DIY Lemonade Stand

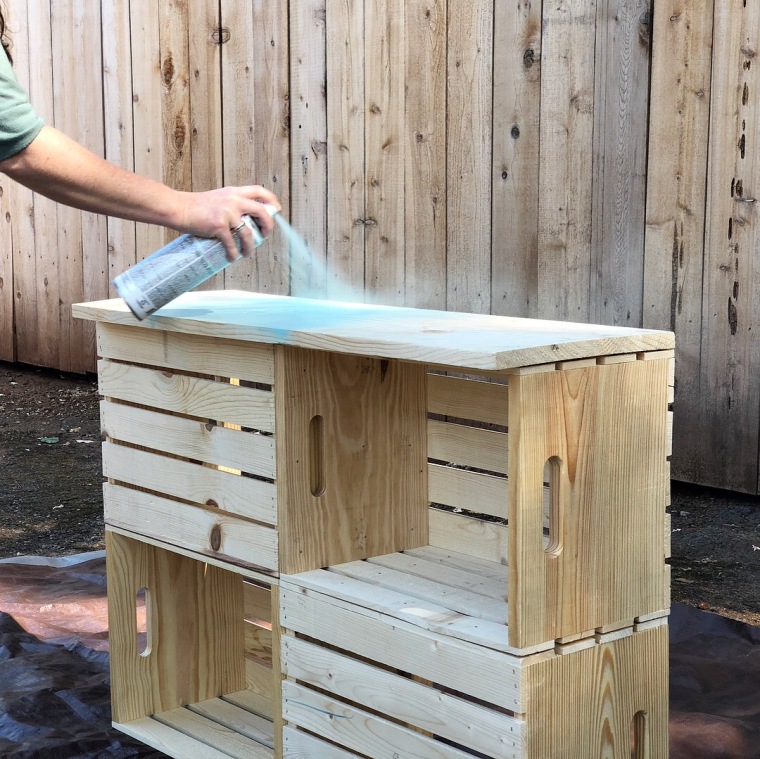
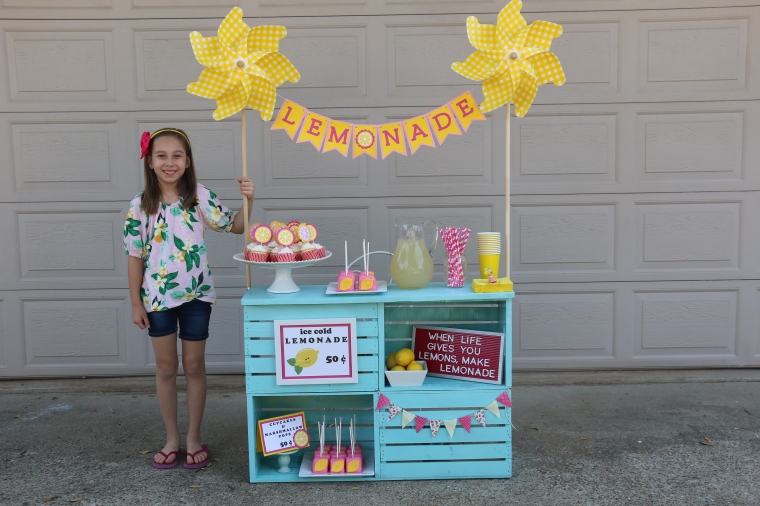
My daughter has been asking to have a lemonade stand since last summer, so it was a must on our 2018 Summer Bucket List.  I saw some cute DIY ideas using wooden crates and thought that we would give it a go.  I found the best deal for wooden crates at our local Michael’s Store.  My husband had a 36″ x 10″ board cut at The Home Depot.  I purchased two different sizes of nails,  1-1/4 inches for the thicker parts and 3/4 inches for the thinner wood slats, and went to work.  You can watch my video tutorial for more details on the building process. #CommissionsEarned

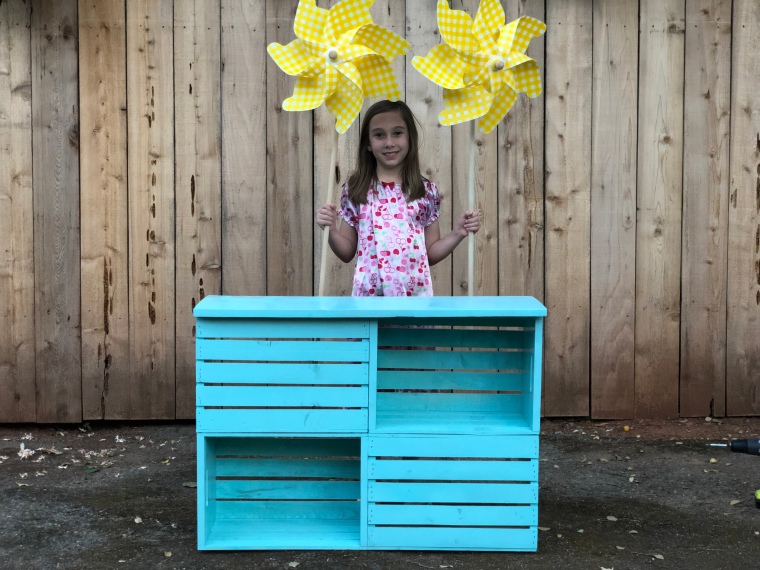
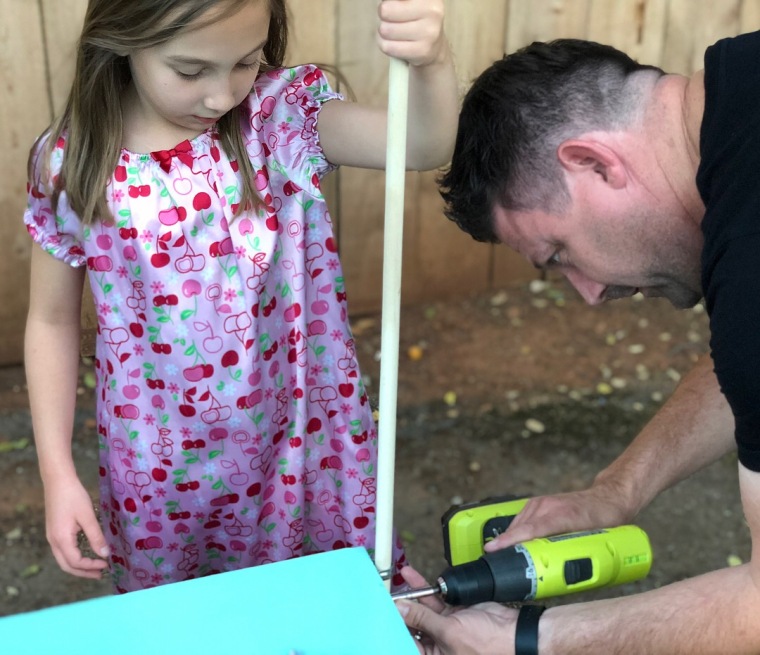
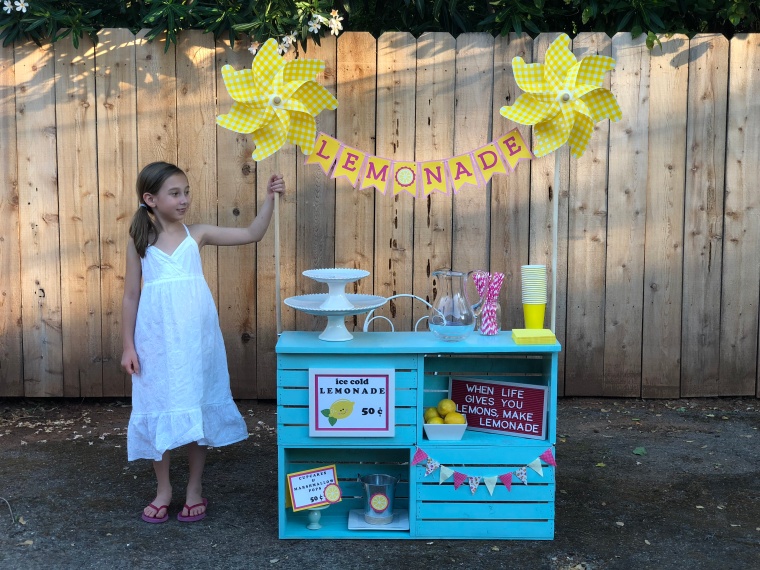
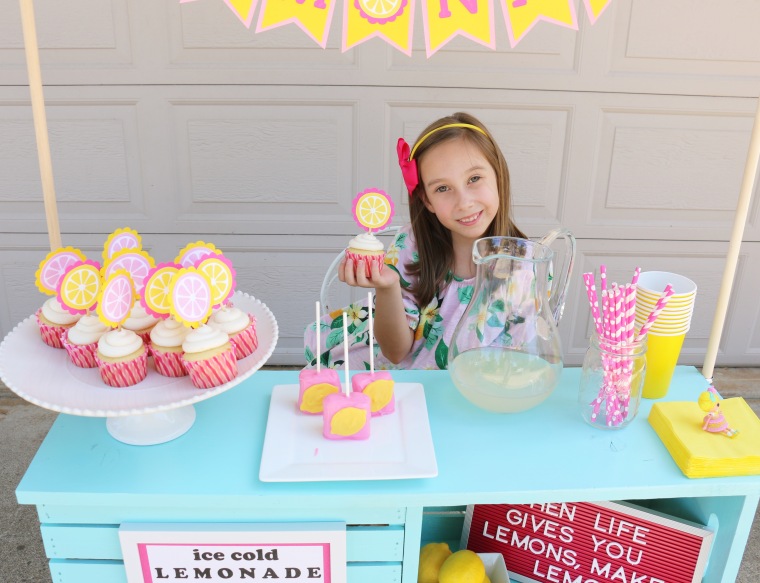
Hobby Lobby recently had a huge clearance on their summer stock, so I was able to get two giant yellow pinwheels for just $4 each.  They made the cutest sides to hang a LEMONADE banner on.  I used my Cricut Expression 2 to cut out the letters for the banner and hung it with twine.  A few material scraps cut into triangles made for a mini pennant banner to hang along one of the crates.  I created an “Ice Cold Lemonade” sign, a price list for some treats that we made, and lemon cupcake toppers that you can print off here  Lemonade Stand Printables PDF

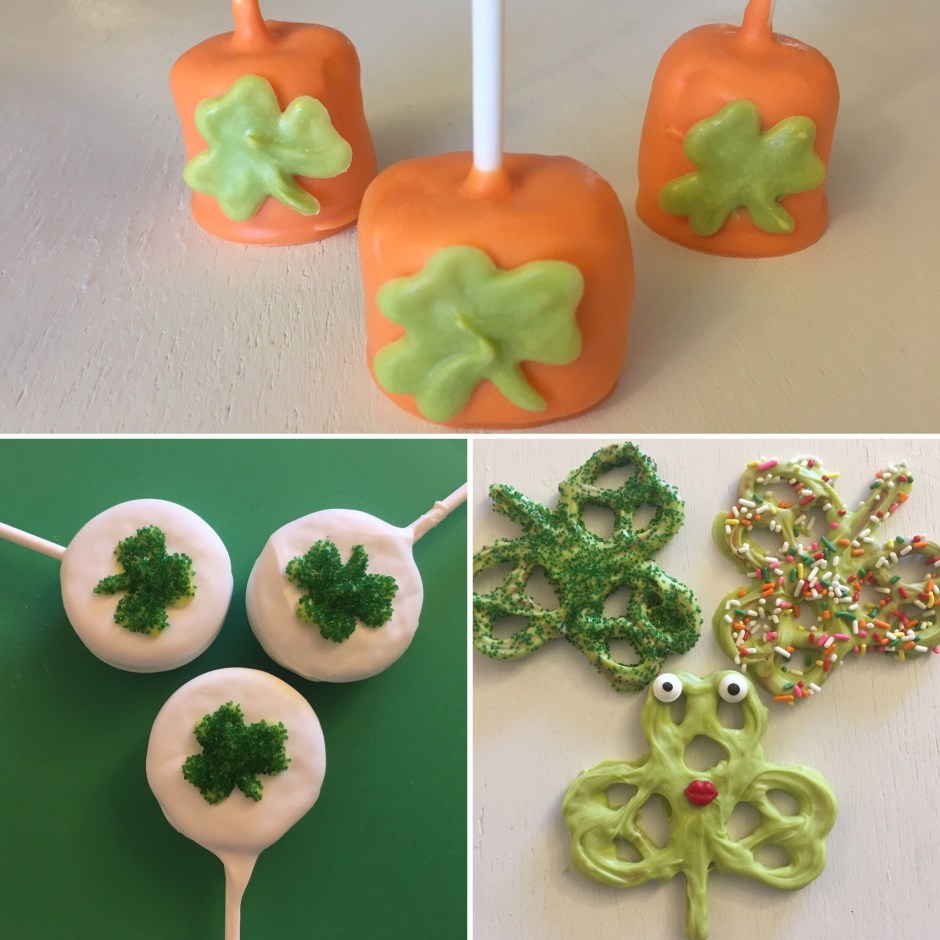
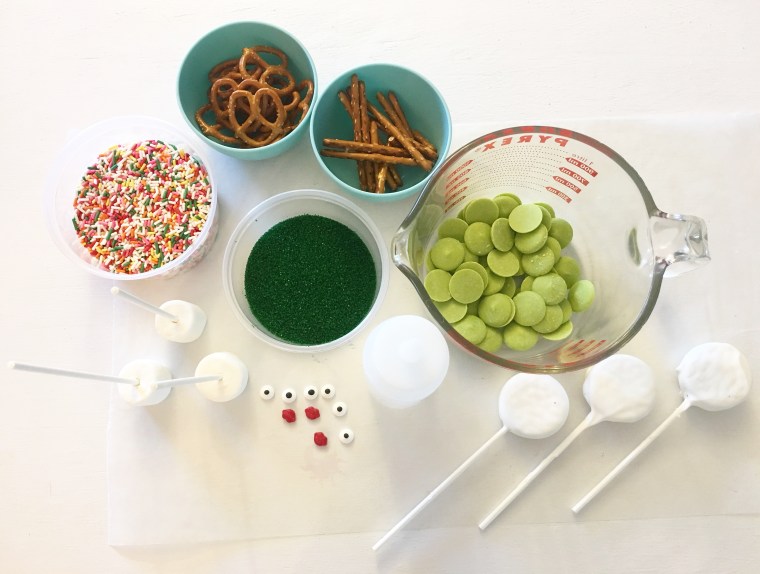
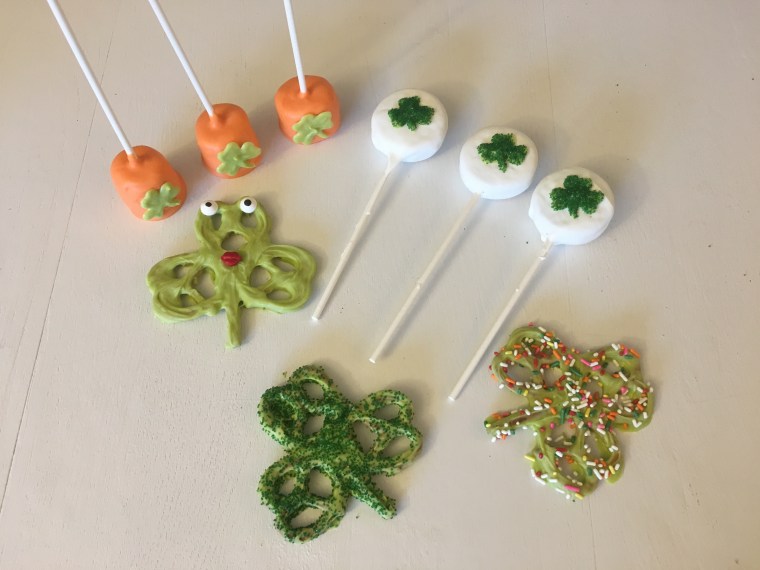
My daughter loves to dance, and every summer her dance studio holds a week long dance camp.  We decided that selling lemonade & treats would be a great way for her to earn the $125 tuition for camp.  On a Friday evening, we made a batch of cupcakes and marshmallow pops.  I have included the lemon template I used for the candy melt lemons.  Lemon Template pdf  (See some of my marshmallow pop videos for instructions on how to create themed mallow pops)

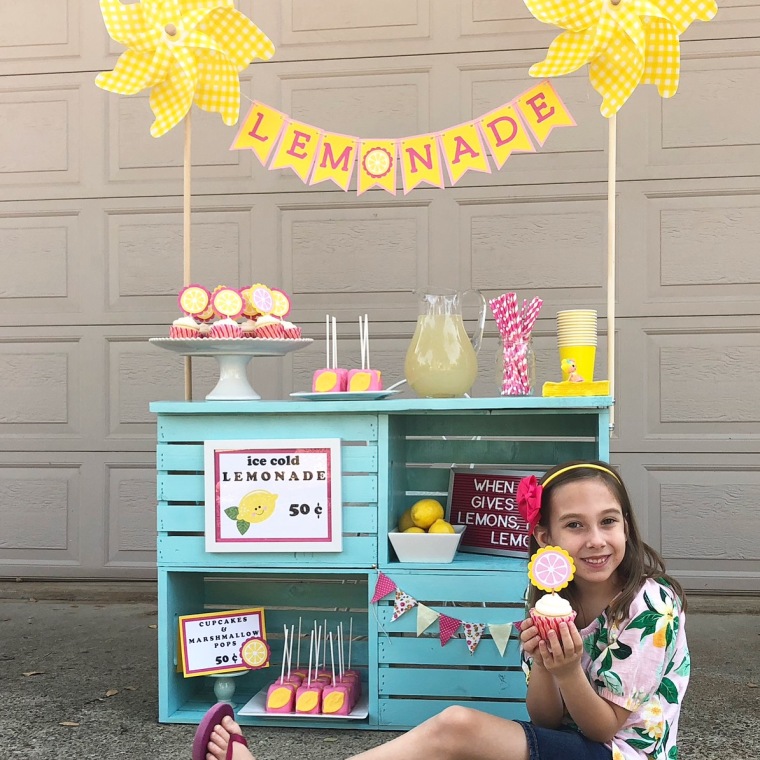
On Saturday and Sunday, my girl held lemonade stands in our driveway, and not only did she have the best time selling lemonade and sweet treats, she earned $129 in two mornings thanks to the generosity and support of our amazing friends and neighbors.  I will never forget the joy on her face when she walked into the dance studio on that Monday morning and paid her entire tuition in full with money she had earned herself.  Lemonade stand success!!!

I am so pleased with the way our DIY Lemonade Stand turned out, and have been thinking of other uses for it.  Of course she can always use it for imaginary play, but I’m sure we will also use it for birthday parties in the future, bake sales, donuts and juice during our garage sale, and of course, many many more lemonade stands.

fullsizeoutput_d081fullsizeoutput_d082IMG_3019IMG_3020fullsizeoutput_d096IMG_3026IMG_3037fullsizeoutput_d0b4IMG_3045CpohFBkzScqu%hG4tm4PggIMG_3044IMG_3047IMG_1231

IMG_30577516772496_IMG_7966IMG_31407516772496_IMG_79637516772496_IMG_7977IMG_3065

DIY Visual Schedule For Kids

School starts next week and we are so not ready!  Summer seems like it has flown by and we are savoring these precious last days of sleeping in, staying in pajamas well into the afternoon, swimming, and staying up late.  This really is the first summer that all of my kids have slept in…and by sleeping in, I mean, not getting up until after 7:30.  I am a night owl, so that extra hour and a half in the morning is glorious for this mama!

The last couple of weeks, I have been taking little steps to prepare for the upcoming school year, cleaning out clothes that are too small and shopping for new clothes and shoes.  But I know that the hardest part for my kids will be the transition from lazy summer mornings to the “get up and go” school morning routine.  So this week, I created this simple and inexpensive visual schedule to help my 7 year old daughter adjust to the new norm.

Watch my tutorial to learn how to create one of your own.  I’m including the template that I used with the morning routine icons and the words that go with each.  The video gives you step by step instructions.  Here’s a list of what you will need…

#CommissionsEarned

IMG_9288fullsizeoutput_eb57fullsizeoutput_eb58

I would love to hear some of your best tips for helping your kids transition from summer to a new school year.

DIY Magnetic Marble Track

At the beginning of this summer, we spent a day at The Tech Museum of Innovation in San Jose, CA.  If you’ve never been there, it is such a fun experience with tons of hands on exhibits.  One of my daughter’s favorites was a wall with plastic magnetic tubes to create a “marble track” and little balls to test it out on.  She spent quite awhile rearranging the tubes to make different tracks and trying them out.  As I watched her, I started thinking about how I could make something similar at home, and this idea was born.

I began saving toilet paper and paper towel rolls and waiting for just the right time to create our DIY Magnetic Marble Track.  This Saturday was the perfect day!  My oldest was away at camp with his youth group and my two younger kids were having a pajama day.  My husband was taking a nap and the kids were getting “bored,” so together we created this super fun “boredom buster!”

Check out my daughter’s “Craft Time With Karis” video tutorial (above) to learn how to make these with your own kids.  It took some trial and error, but we figured out the best way to keep the tracks up and the best balls to use.  Here are a couple of tips:

  • make sure your magnets are strong enough…we tried some at first that would not hold
  • use light weight balls: we found my son’s Nerf Rival Bullet Balls to be the perfect balls for this project.  Small bouncy balls were a close second.  Marbles were too heavy and knocked the tracks right off.  Experimenting with different options is part of the fun!
  • even though we used magnets that were sticky on one side, it is best to hot glue them as well for a stronger hold

IMG_9122IMG_9123IMG_9167IMG_9204

For more “Craft Time With Karis” videos click on the following:

DIY Kids Magnetic Puzzles

Colored (RAINBOW) Rice

Tricky Hopscotch (with a twist)

Valentine Craft: Cookie Cutters & Paint


DIY “My Little Pony” Capes Tutorial

My Little Pony Capes Template

This week I finally made the time to create a tutorial for the My Little Pony Capes that I make for my daughter’s ponies.   While she was in school the other day,  I made 3 new capes and when she came home she was thrilled!  Just a couple of scraps of material, some pretty embellishments, and a little bit of my time has led to hours of imaginary play with ponies the past 2 days.  Definitely time well spent!

To see more ideas for “My Little Pony” Capes, you can read my original post here.  To learn how to make some of these tiny capes for your child’s own My Little Ponies, watch my tutorial above.

fullsizeoutput_de76IMG_7466IMG_7469

3 Simple St. Patrick’s Day Treats

If you are planning on making some St. Patrick’s Day treats, here are 3 simple options for you…  Pretzel Shamrocks, Shamrock Oreo Cookie Pops, and Shamrock Marshmallow Pops.  All of these treats use Wilton’s Candy Melts, which you can find at crafts stores like Michael’s and JoAnn Fabrics.  Watch my tutorial to learn how to make these tasty treats!

SHAMROCK TEMPLATE

IMG_6948fullsizeoutput_dcd9IMG_6936IMG_6940IMG_6946

Click on these links for more St. Patrick’s Day fun…

St. Patrick’s Day Treasure Hunt

Make a Rainbow of Color: Skittles Science Experiment

Rainbow Fruit Kabobs 

How to Make a Real Portal Cake

Portal and Portal 2 are popular video games.  Truthfully, I’ve never played either of them, but according to my son they are the “best video games ever!”  Here’s a bit about the games according to my son Micah…”In Portal, you are a test subject in a huge underground facility called Aperture Science that is supposedly under Michigan.  You go through the tests (which are puzzles), solving them, and they get harder and harder along the way.  At a certain point in the game, you acquire a tool which makes portals that objects and you yourself can pass through.  This tool is official called the Aperture Science Handheld Portal Device, but is more commonly referred to as the Portal Gun.”

Micah’s 11 birthday was March 3rd and he wanted a Portal Themed Birthday Party!  Micah chose to have his party at a Fun Center in our city so that we could play laser tag and ride go carts, so the cake became the main thing that represented the Portal Theme.

In Portal there is a gigantic robot named GLaDOS at the center of the facility.  GLaDOS runs everything and she promises you cake at the end of the test, but it turns out that she’s lying.  She actually puts you on a platform headed towards a fire pit.  In the game, there is a message written on a wall in a secret room, written by a scientist that says, “the cake is a lie!”   Here are a couple of images from the actual game.

This was a super fun cake to create!  You can watch my tutorial to learn how to make one of your own.  This cake is definitely NOT a lie!  I used Pillsbury devil’s food cake mix, Hershey’s chocolate bars for the chocolate shavings on the outside of the cake,  vanilla and chocolate frosting, cherry gumballs, and a white candle.  #CommissionsEarned

img_6722

For more Portal Birthday Party fun, check out my blogpost from the party. You’ll find links to free printables for “repulsion gel” and “propulsion gel” as well as an awesome tutorial on how to make Portal Cookie Pops.

For another fun teen boy birthday party idea check out my latest blogpost:

Retro Video Game Room (ARCADE) for Teens

DIY Tablecloth Curtains

A couple of years ago we rented the cutest little house in an older neighborhood.  The street was lined with big trees, the neighbors were friendly, and the backyard was filled with a variety of fruit trees.  The house itself had a lot of character, including a wall covered in shiplap, a large window with a view of a train trestle, glass doorknobs, and old light fixtures.  The master bedroom, however, needed a bit of help.  Because we were renting, I didn’t want to invest a ton of money into bedroom decor, as we knew we wouldn’t be living there very long.

One afternoon my husband decided to take the kids to see a movie and he left me with a couple of glorious hours home alone.  I had purchased two rectangular tablecloths at Target a couple of days before, so I went right to work on creating some curtains to brighten up my bedroom.  The windows truly were the best feature of that room, so I wanted to highlight them.

I can’t believe how easy it was to sew these simple curtains!  By the time my family came home, I was finished and my bedroom had a completely new look.   Here’s my tutorial on how to make simple curtains out of a rectangular table cloth.

I would love to hear from you.  Leave me a comment and tell me about your favorite DIY project and of course show me a picture if you make some tablecloth curtains of your own!


Valentine Marshmallow Pops

If you are looking for a cute and simple, no bake, Valentine Treat…look no further.  These Valentine Marshmallow Pops are quick and easy to make and they taste delicious!  They are perfect for taking to class parties or passing out to friends.  You can even hole punch a small Valentine card or paper heart on the top and bottom, and weave it through the top of the lollipop stick, for personalized treats.

One bag of Wilton’s candy melts makes about 26 pops and the decorating possibilities are endless.  Let your kids help you make these for a fun family activity and an opportunity for them to express their creativity.

For more helpful tips on making these adorable Valentine Pops, watch my tutorial!    Happy Valentine’s Day!

img_6032img_6035img_6033img_6034img_6038img_6037img_6042img_6056img_6058

Book Page Banner

img_5919

I love books!  In this day in age when so many are reading books on Kindles, Nooks, and iPads, you will find me curled up in a cozy spot in my house with a traditional paper book.  The library just so happens to be one of my very favorite places on the Earth!  I think that is why my eyes are drawn to creative projects made from book pages.

Several years ago I made this pretty little book page banner to hang across my mantle for Valentine’s Day and I have reused it several years in a row because I love it so much!  To make one of your own, you will need a book that you don’t mind cutting up (I bought mine from the Dollar Tree).  You will also need scrapbooking paper in several colors or patterns. I went with a black, red, and off white theme.  Grab a couple of buttons and some twine and you are all set.

I used my Cricut Expression 2 to cut the L O V E letters, but made my own template for the large and small hearts.  The book pages are 6 inches long by 4 inches wide.  This gives you enough length to fold the top over to hang them on the twine and to cut a 1 1/2 inch triangle out of the bottom of each.  For my banner, I stapled the individual book page pieces over the twine and then glue the hearts on after to cover the stapes.  For the LOVE portion, I lined the staples up with one of the words to “hide” it as much as possible.

If you love creating banners for your own home, check out my tutorial on How to Make a Pennant Banner.

If you are looking for some other simple and fun Valentine ideas, here are some links you will enjoy.

Valentine Paper Garlands

Valentine Craft for Kids: Cookie Cutters and Paint

Valentine Words of Affirmation for Kids 

Chocolate Covered Strawberries 

Valentine Craft: Cookie Cutters & Paint

Today I’m introducing a new series on Kerri Creates called “Craft Time with Karis.”  So many of my crafting inspirations have to do with my kids, so I thought it would be fun to bring my daughter in as my little crafting sidekick!  She’s always up for an art project and I love providing creative opportunities for her.

“Craft Time With Karis” debuts with a simple and inexpensive Valentine Craft that we put together with a few things we already had around our house…cookie cutters, paint, and paper bags.  Enjoy this little video tutorial we created, and subscribe to our youtube channel for up and coming “Craft Time With Karis” videos.  #CommissionsEarned img_5838img_5840fullsizeoutput_d7a0

For more Valentine fun check out the following blogposts:

Valentine Felt Heart “LOVE BOMBS”

Valentine Marshmallow Pops

Valentine Paper Garland

Valentine Words of Affirmation for Kids

Valentine Hearts Cake