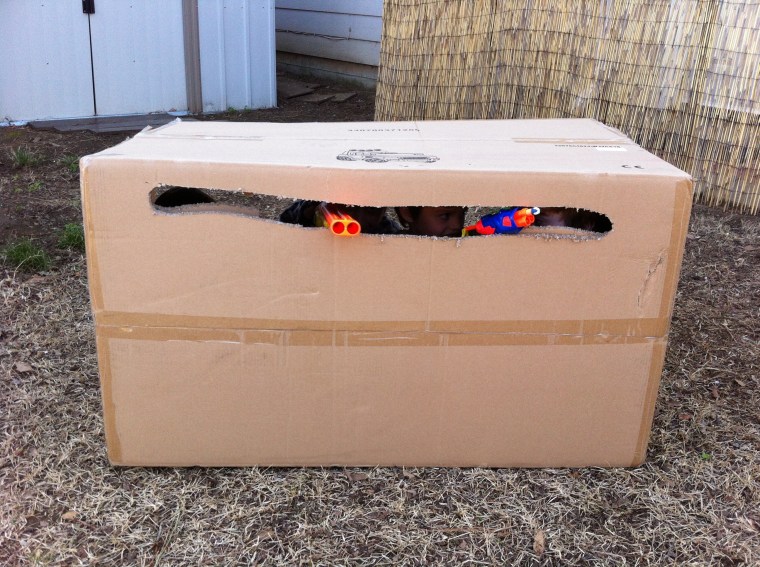
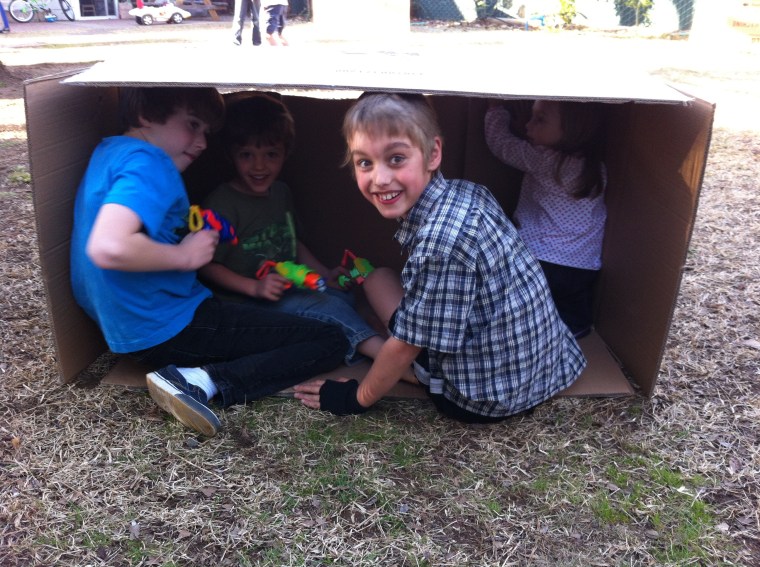
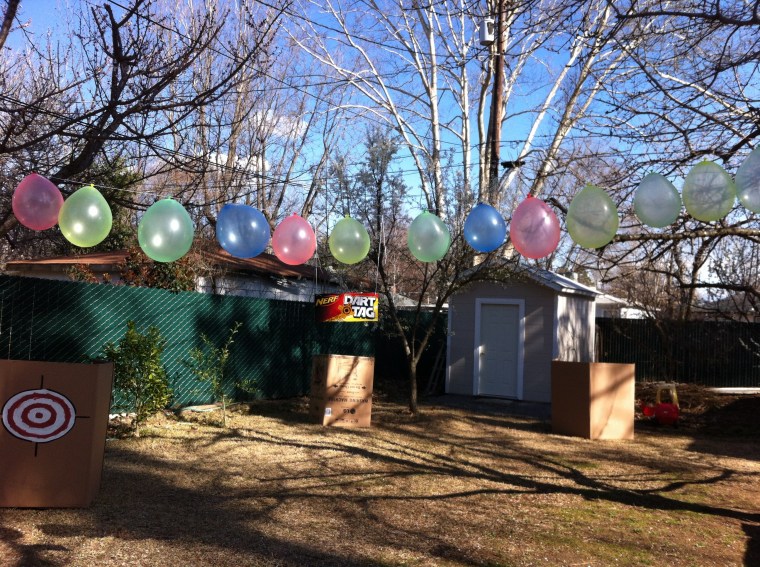
My kids all love to play with Nerf guns! When my son was turning 7, all he wanted was a giant Dart Tag Nerf Gun. This gave me the idea to plan a Nerf Wars Birthday Party for Micah and his friends. I gathered several large cardboard boxes from some local appliance stores and got right to work. I projected several Nerf logos and targets on the sides of the boxes and got the kids to help me paint them. I also made a couple of felt targets to hang on the trees in our backyard so that the dart tag bullets would stick to them. I made a simple pendant banner with the words “NERF WARS” also out of felt and hung it from some trees. I told the kids to bring a nerf gun with them, but I also bought some cheap little guns at Target and a bunch of extra nerf bullets for the most epic Nerf War ever!
The day of the party, my husband staged the backyard with our homemade barriers and hideouts. He also cut lookouts out of some of the extra boxes. We threaded a line of balloons across the width of the yard for target practice and we were ready for the party to begin. The kids came, they played for hours, and even some of the grown ups joined in. Micah was not disappointed! He got his beloved Dart Tag Nerf Gun and he got to battle with his best buddies in his very own backyard. This party is one that he will fondly look back on for years to come.
If you are looking for more Nerf ideas click here for my latest tutorial on how to create really fun spinning targets to use for target practice with Nerf guns.
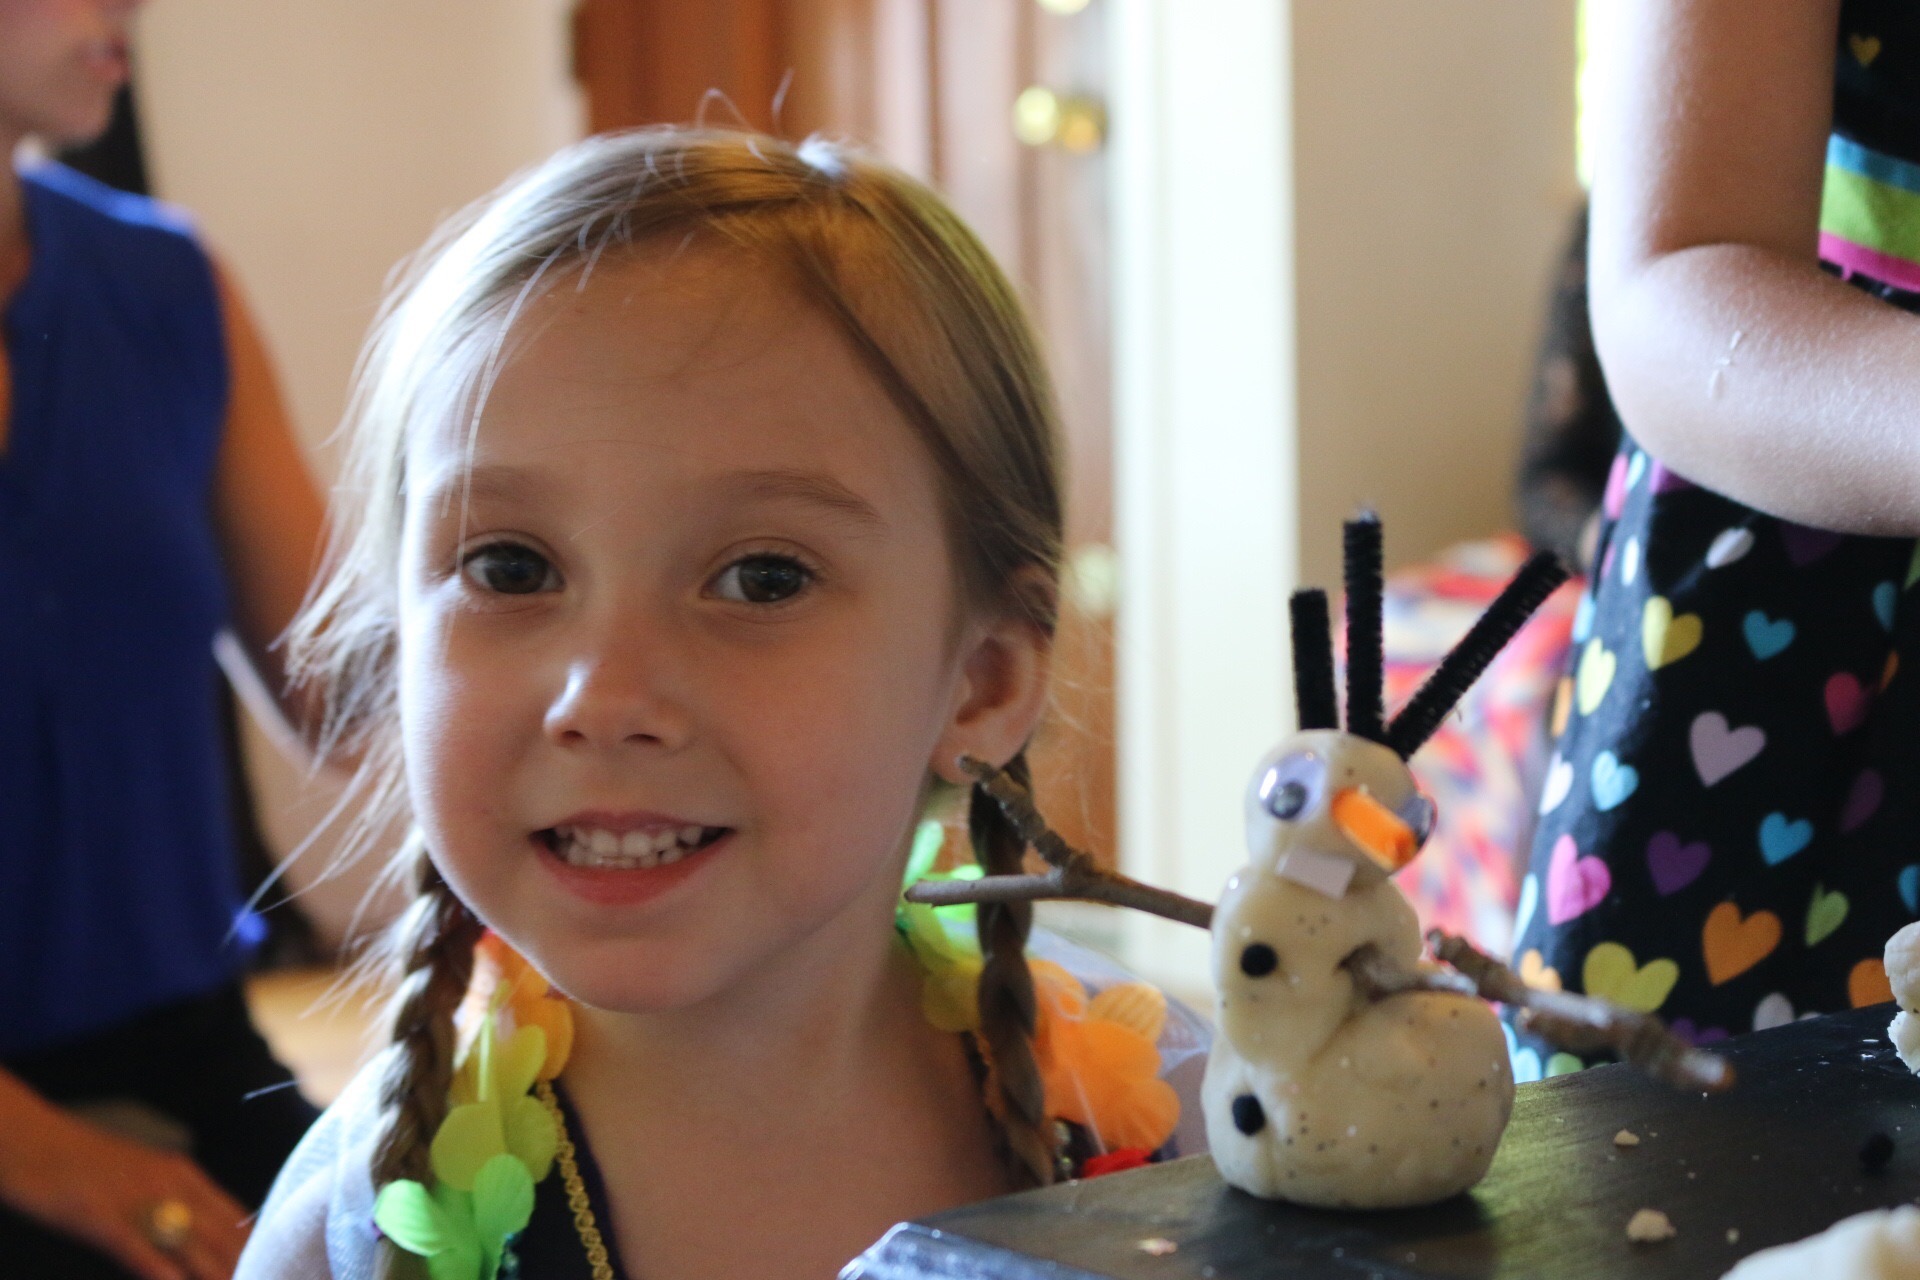
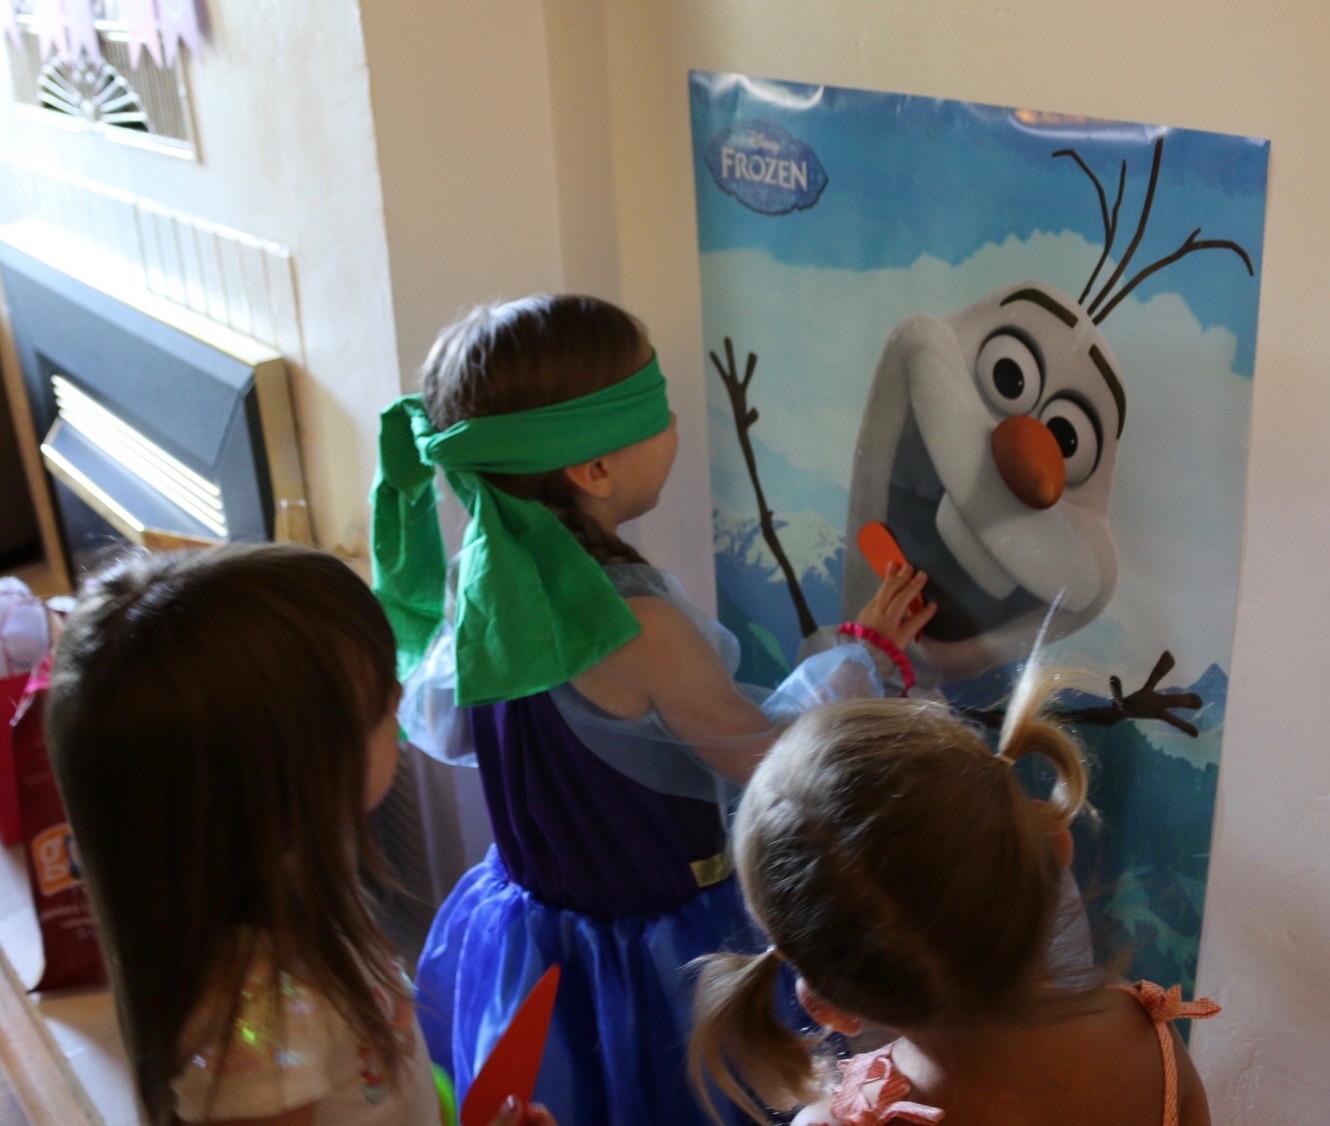
Anna. Elsa. Olaf. My daughter, Karis, turned four a few months after Frozen hit the theaters. Of course, she, along with every other little girl in America, wanted to have a Frozen birthday party. Unfortunately, party decorations and “Frozen everything” had not filled the stores yet. Perfect opportunity to get creative! I was able to order a few things online from a party store, plates, a table cloth, cups, and stickers. I bought two posters, one of Anna & Elsa and another of Olaf, and I lucked out when I found some Frozen chapsticks at TJ Maxx. The rest was up to me. I used my Cricut a ton for this party, cutting letters out of sparkly card stock to make several banners with the phrases, “Let It Go,” “Do You Want to Build a Snowman?” and “Happy Birthday!” I also cut out circles, squares, and snowflakes to add to the decor. My daughter wore an Anna dress that we purchased at Target, and with her long braids, she felt just like Anna on her special day. I had so much fun planning the activities for this party. #CommissionsEarned
Karis and I made several batches of sparkly Frozen play dough. We collected everything needed to build our own snowmen…noses (cut pieces of orange pipe cleaner), hair and eyebrows (cut pieces of black pipe cleaner) , eyes (googly eyes), arms (small sticks gathered from our yard), tooth (white rectangles of poster board), and coal (mini black pom poms). When the girls arrived, I had them all sit around the coffee table. I gave each a paper plate and a hunk of play dough and let them build their own Olaf. This was the cutest activity and the snowmen were adorable. #CommissionsEarned Even my older boys participated and enjoyed themselves. When the party was over, each child got to take their snowman home with them.
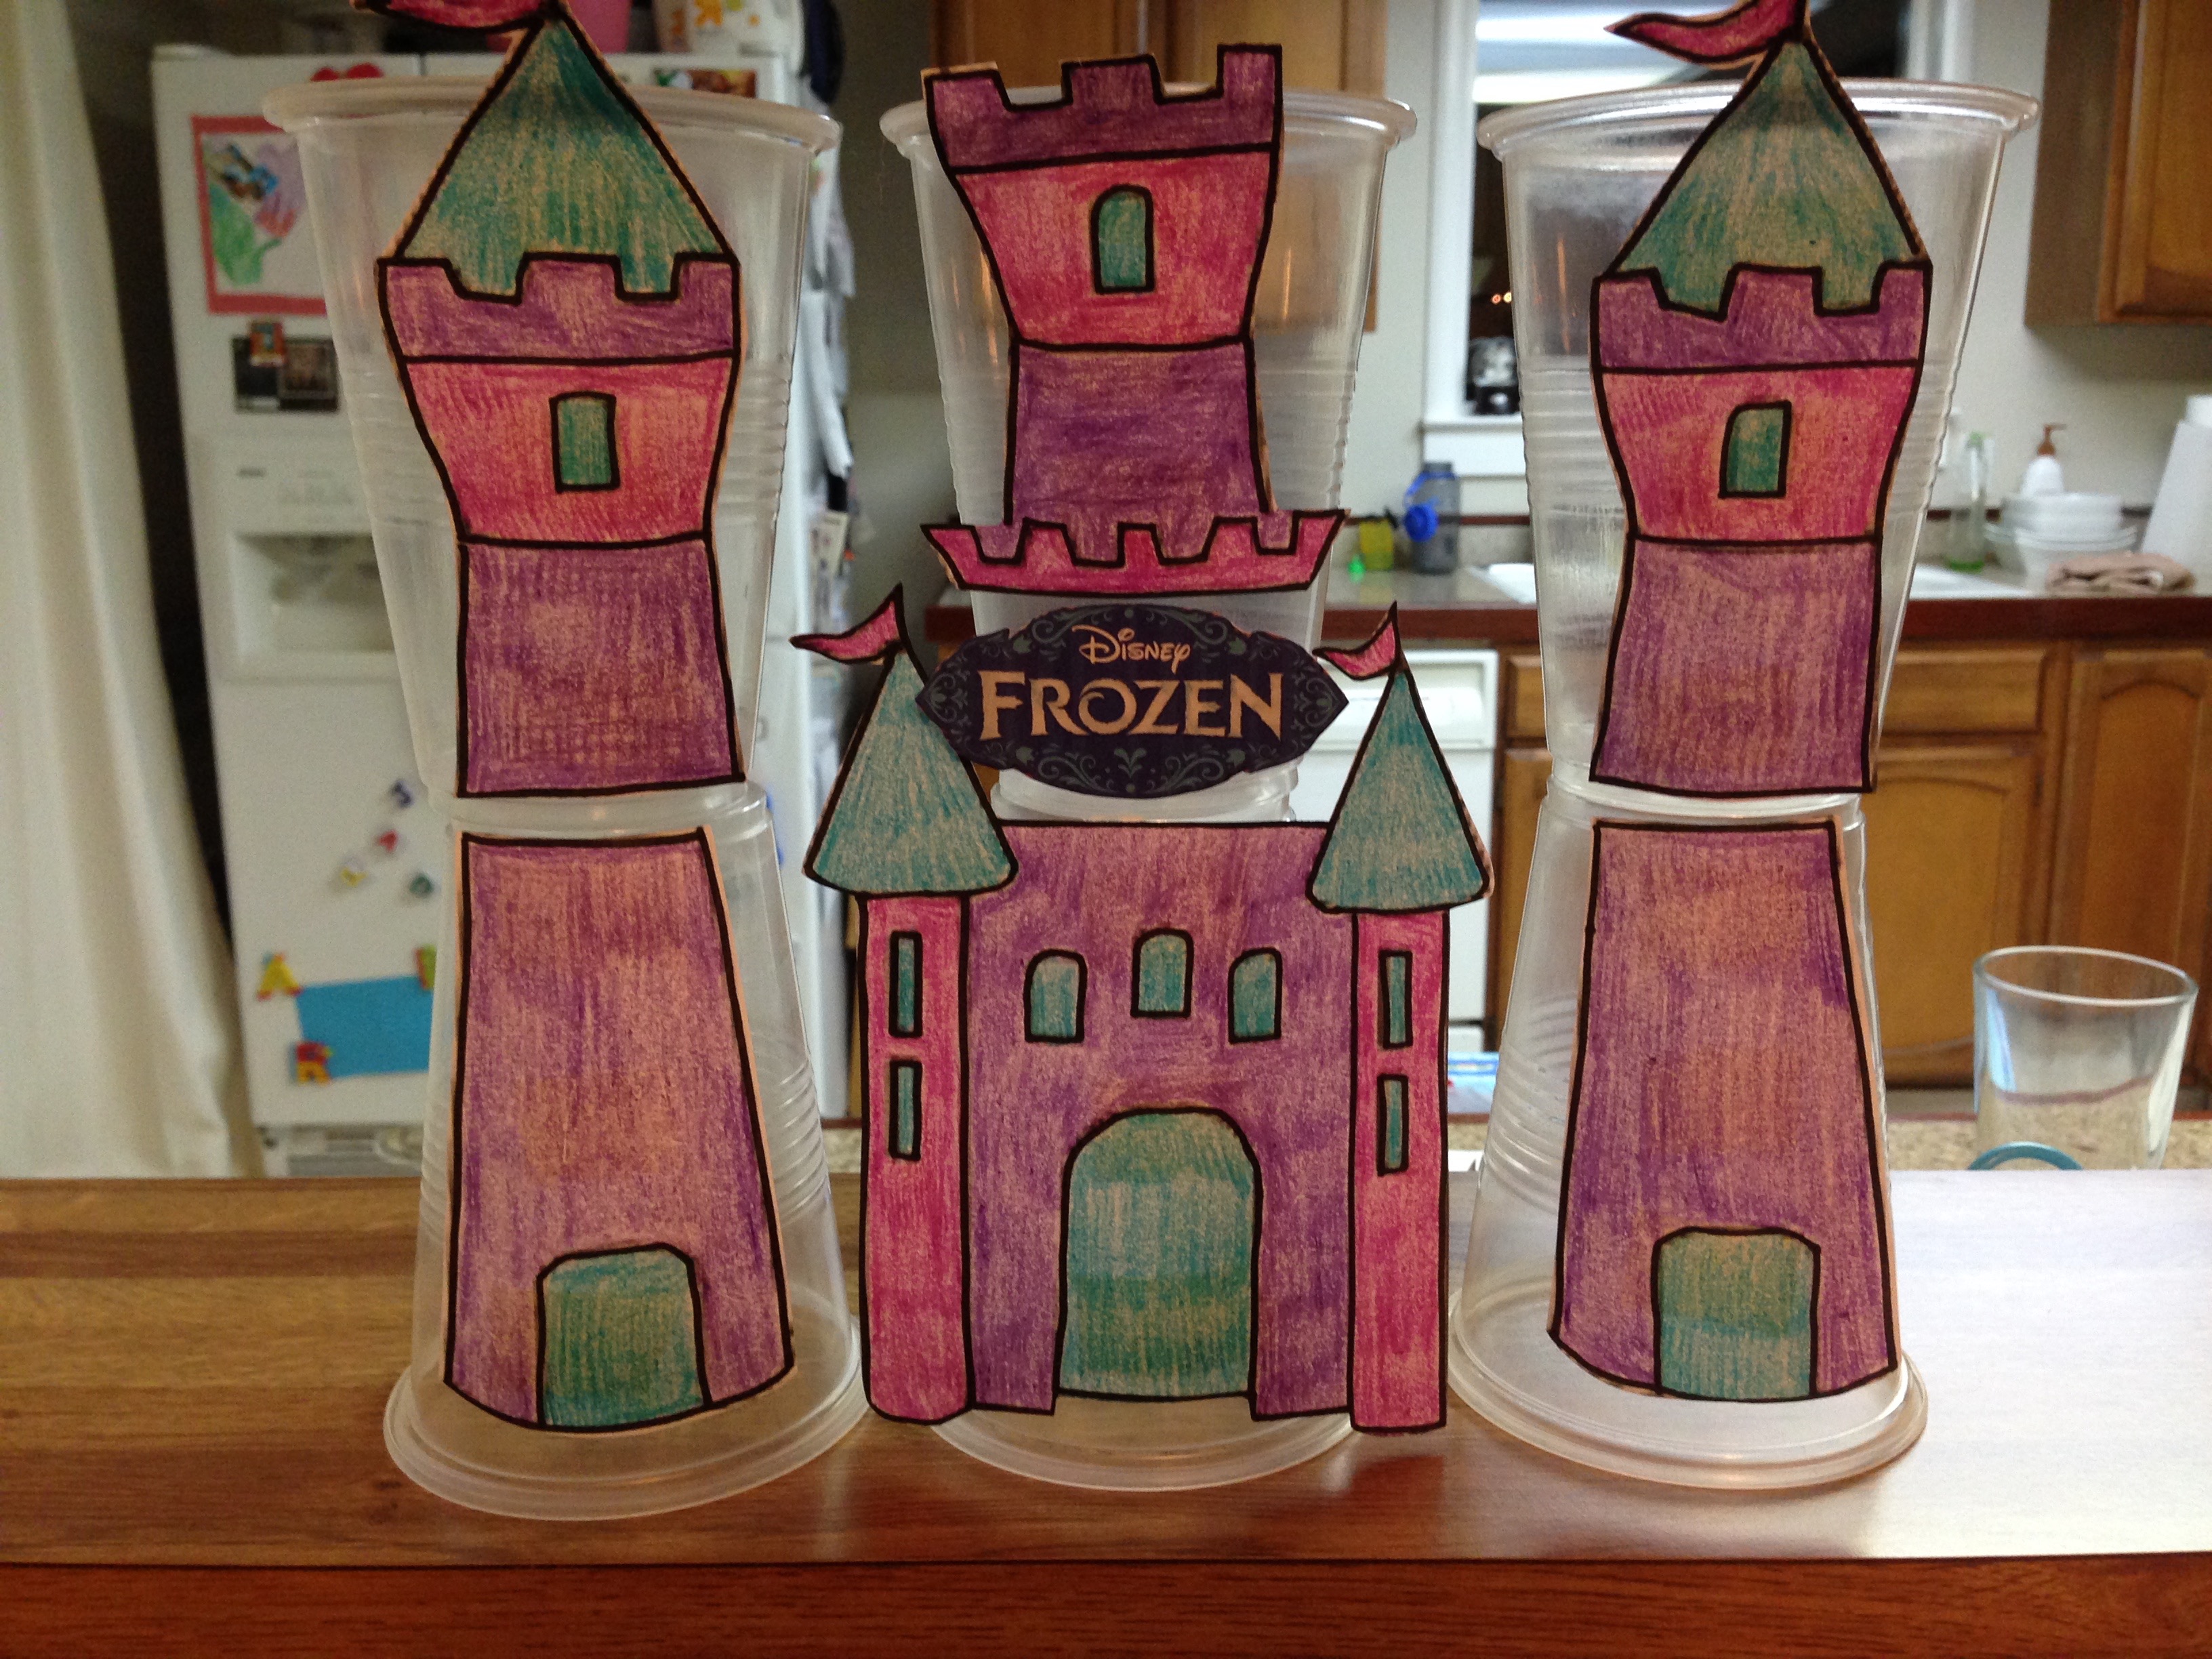
We used the Olaf poster to play “Pin the Nose on Olaf.” I wanted one more game that would be fun for 4 year olds, so I came up with this “Knock the Castle Down” game. I printed a castle coloring page off of the computer, colored it to match the party decor, cut it in 6 pieces and taped it to clear plastic cups. I bought a pack of 3 whiffle balls from the dollar store and set the castle on a children’s size table. The kids lined up and took turns throwing the balls and knocking down the castle. This game ended up being so much fun and my kids played with it many times after the party was over. #CommissionsEarned
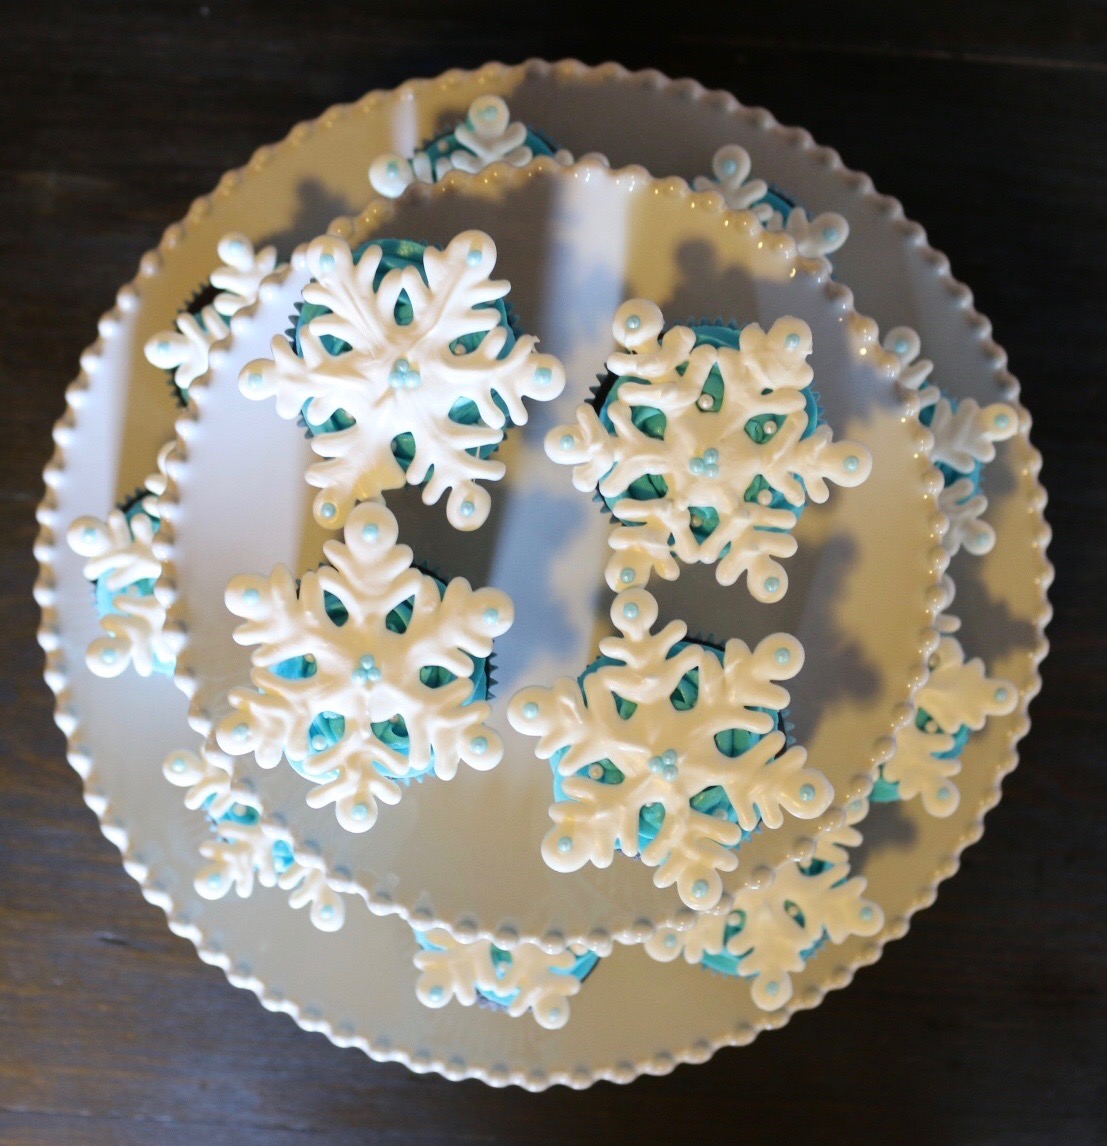
Frozen cupcakes…so many possibilities. I decided on these beautiful snowflake cupcakes. I frosted the cupcakes with vanilla buttercream frosting tinted with Wilton’s food coloring gel in blue. #CommissionsEarned The day before the party, I made the snowflake toppers with Wilton’s candy melts in bright white and Wilton’s Sprinkles in Blue Sugar Pearl. (see tutorial) After placing each snowflake on top of the blue icing, I added a couple of Wilton’s Sprinkles in White Sugar Pearl to add a bit more sparkle.
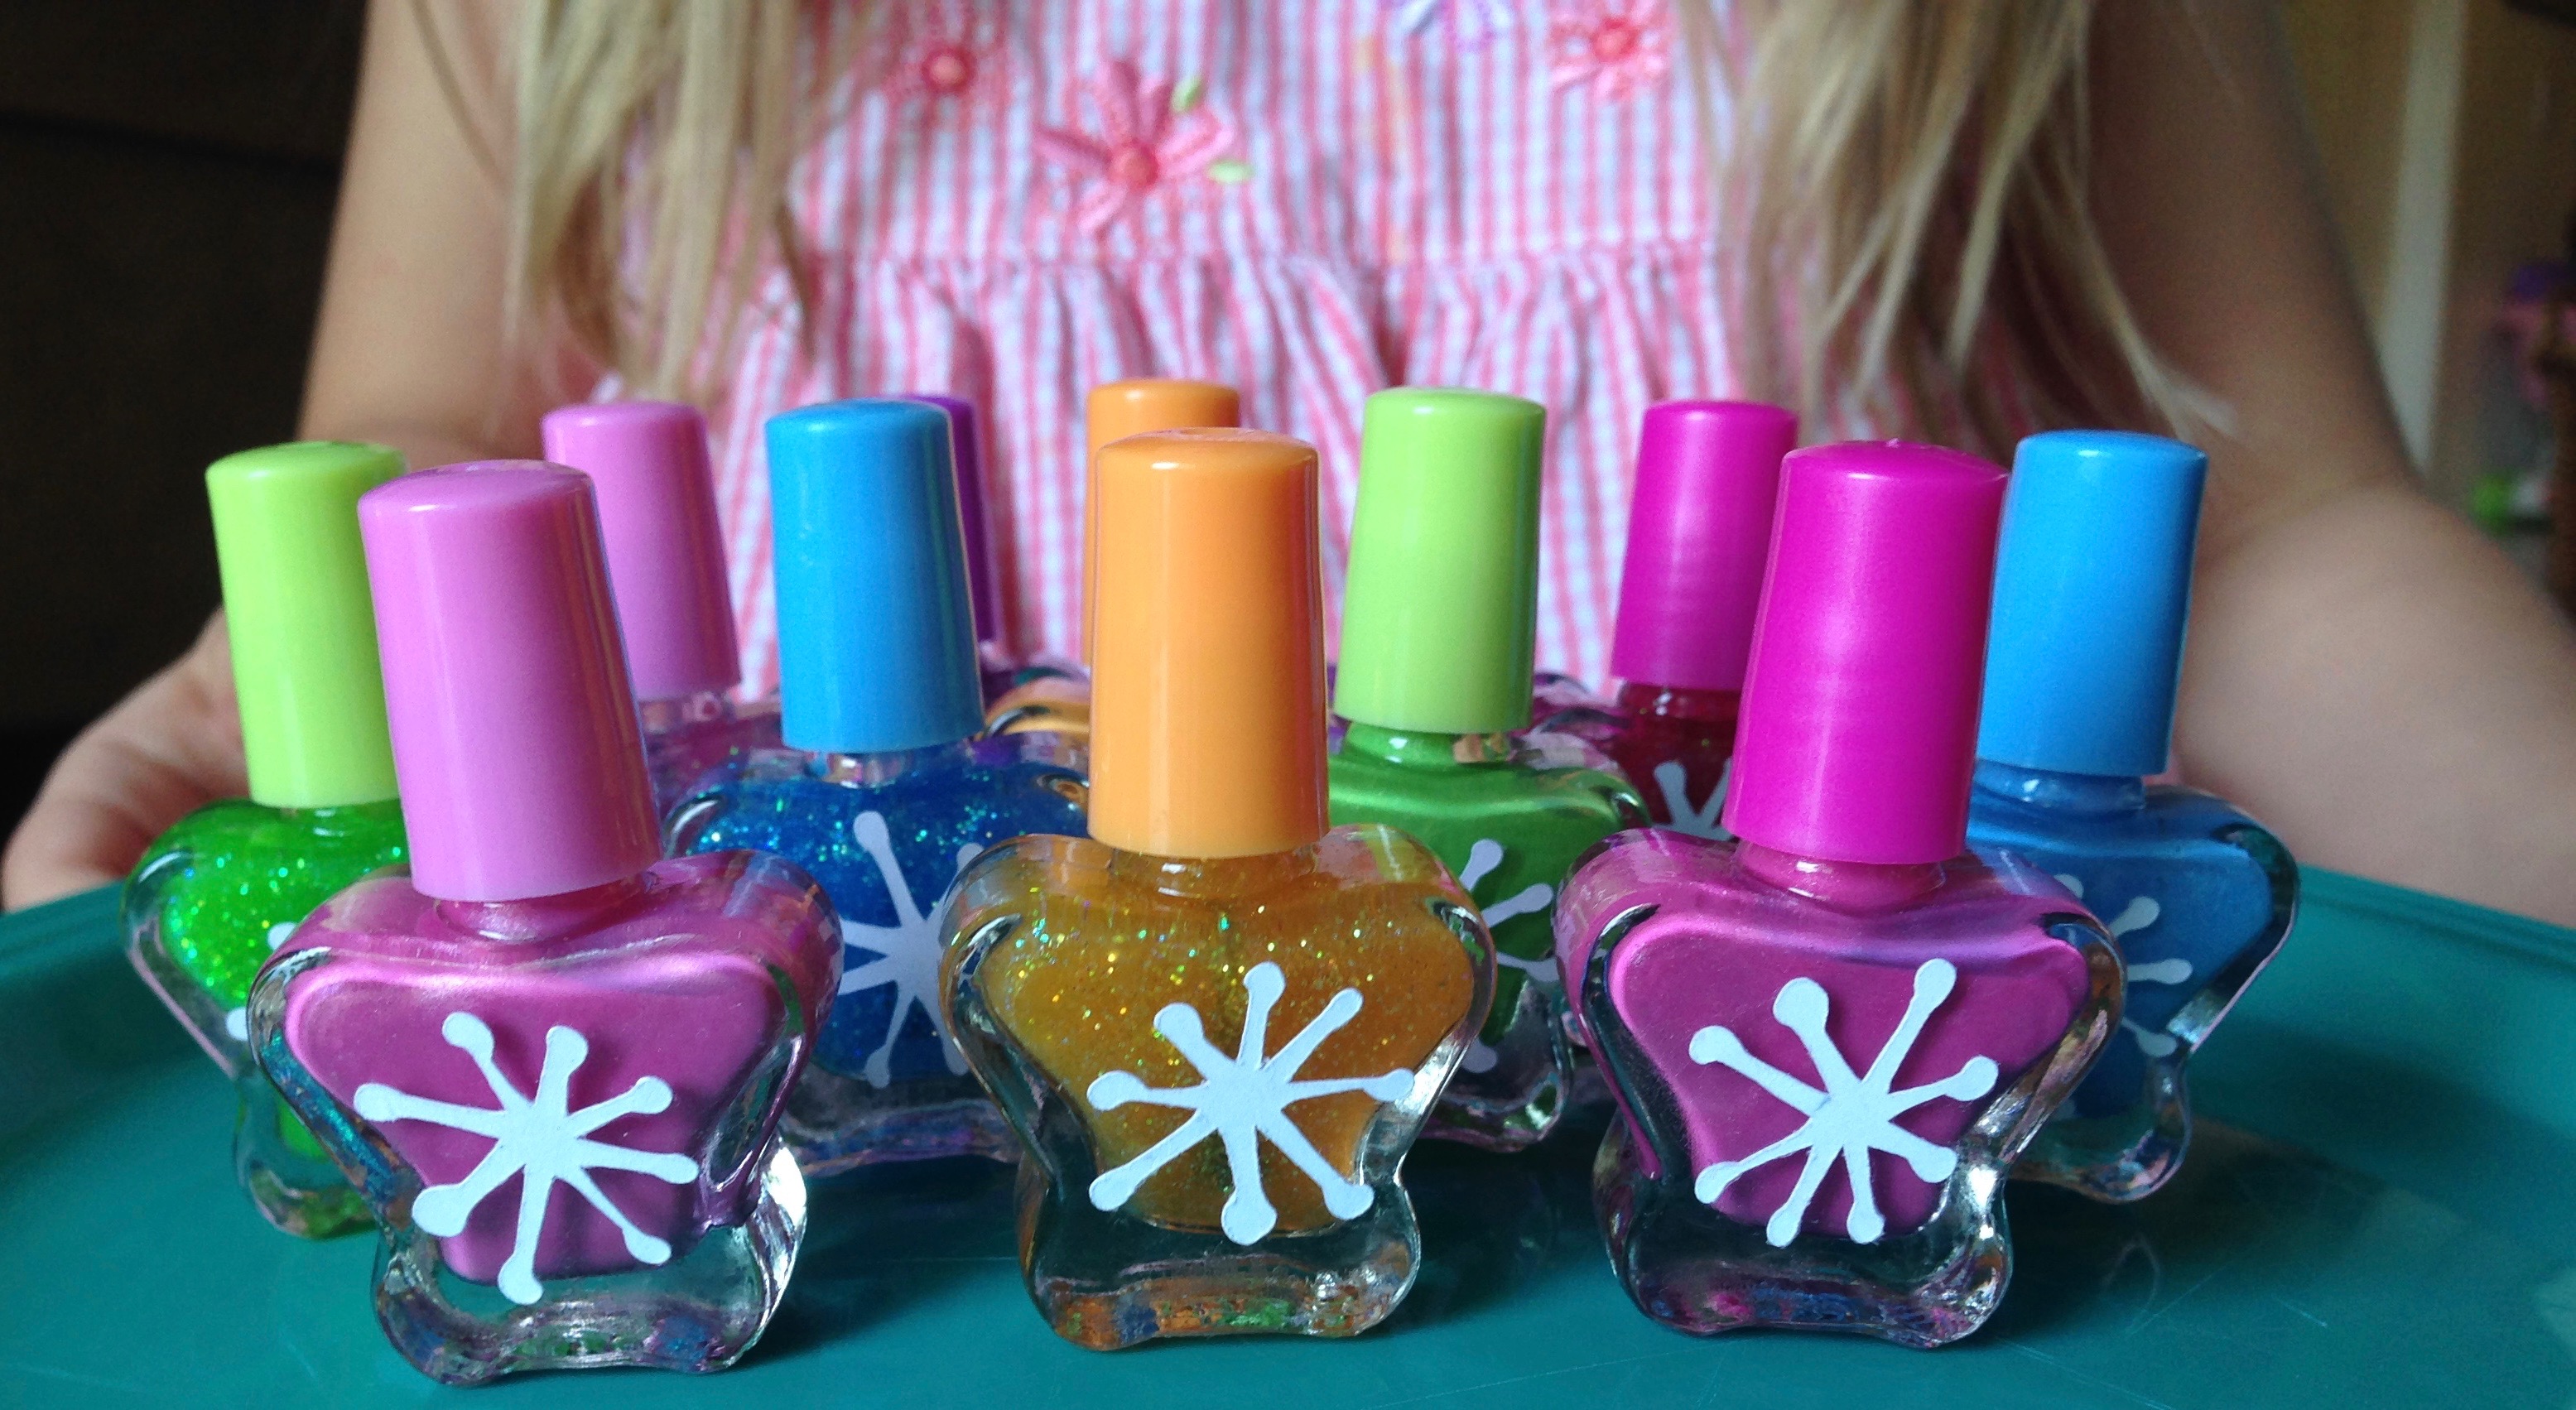
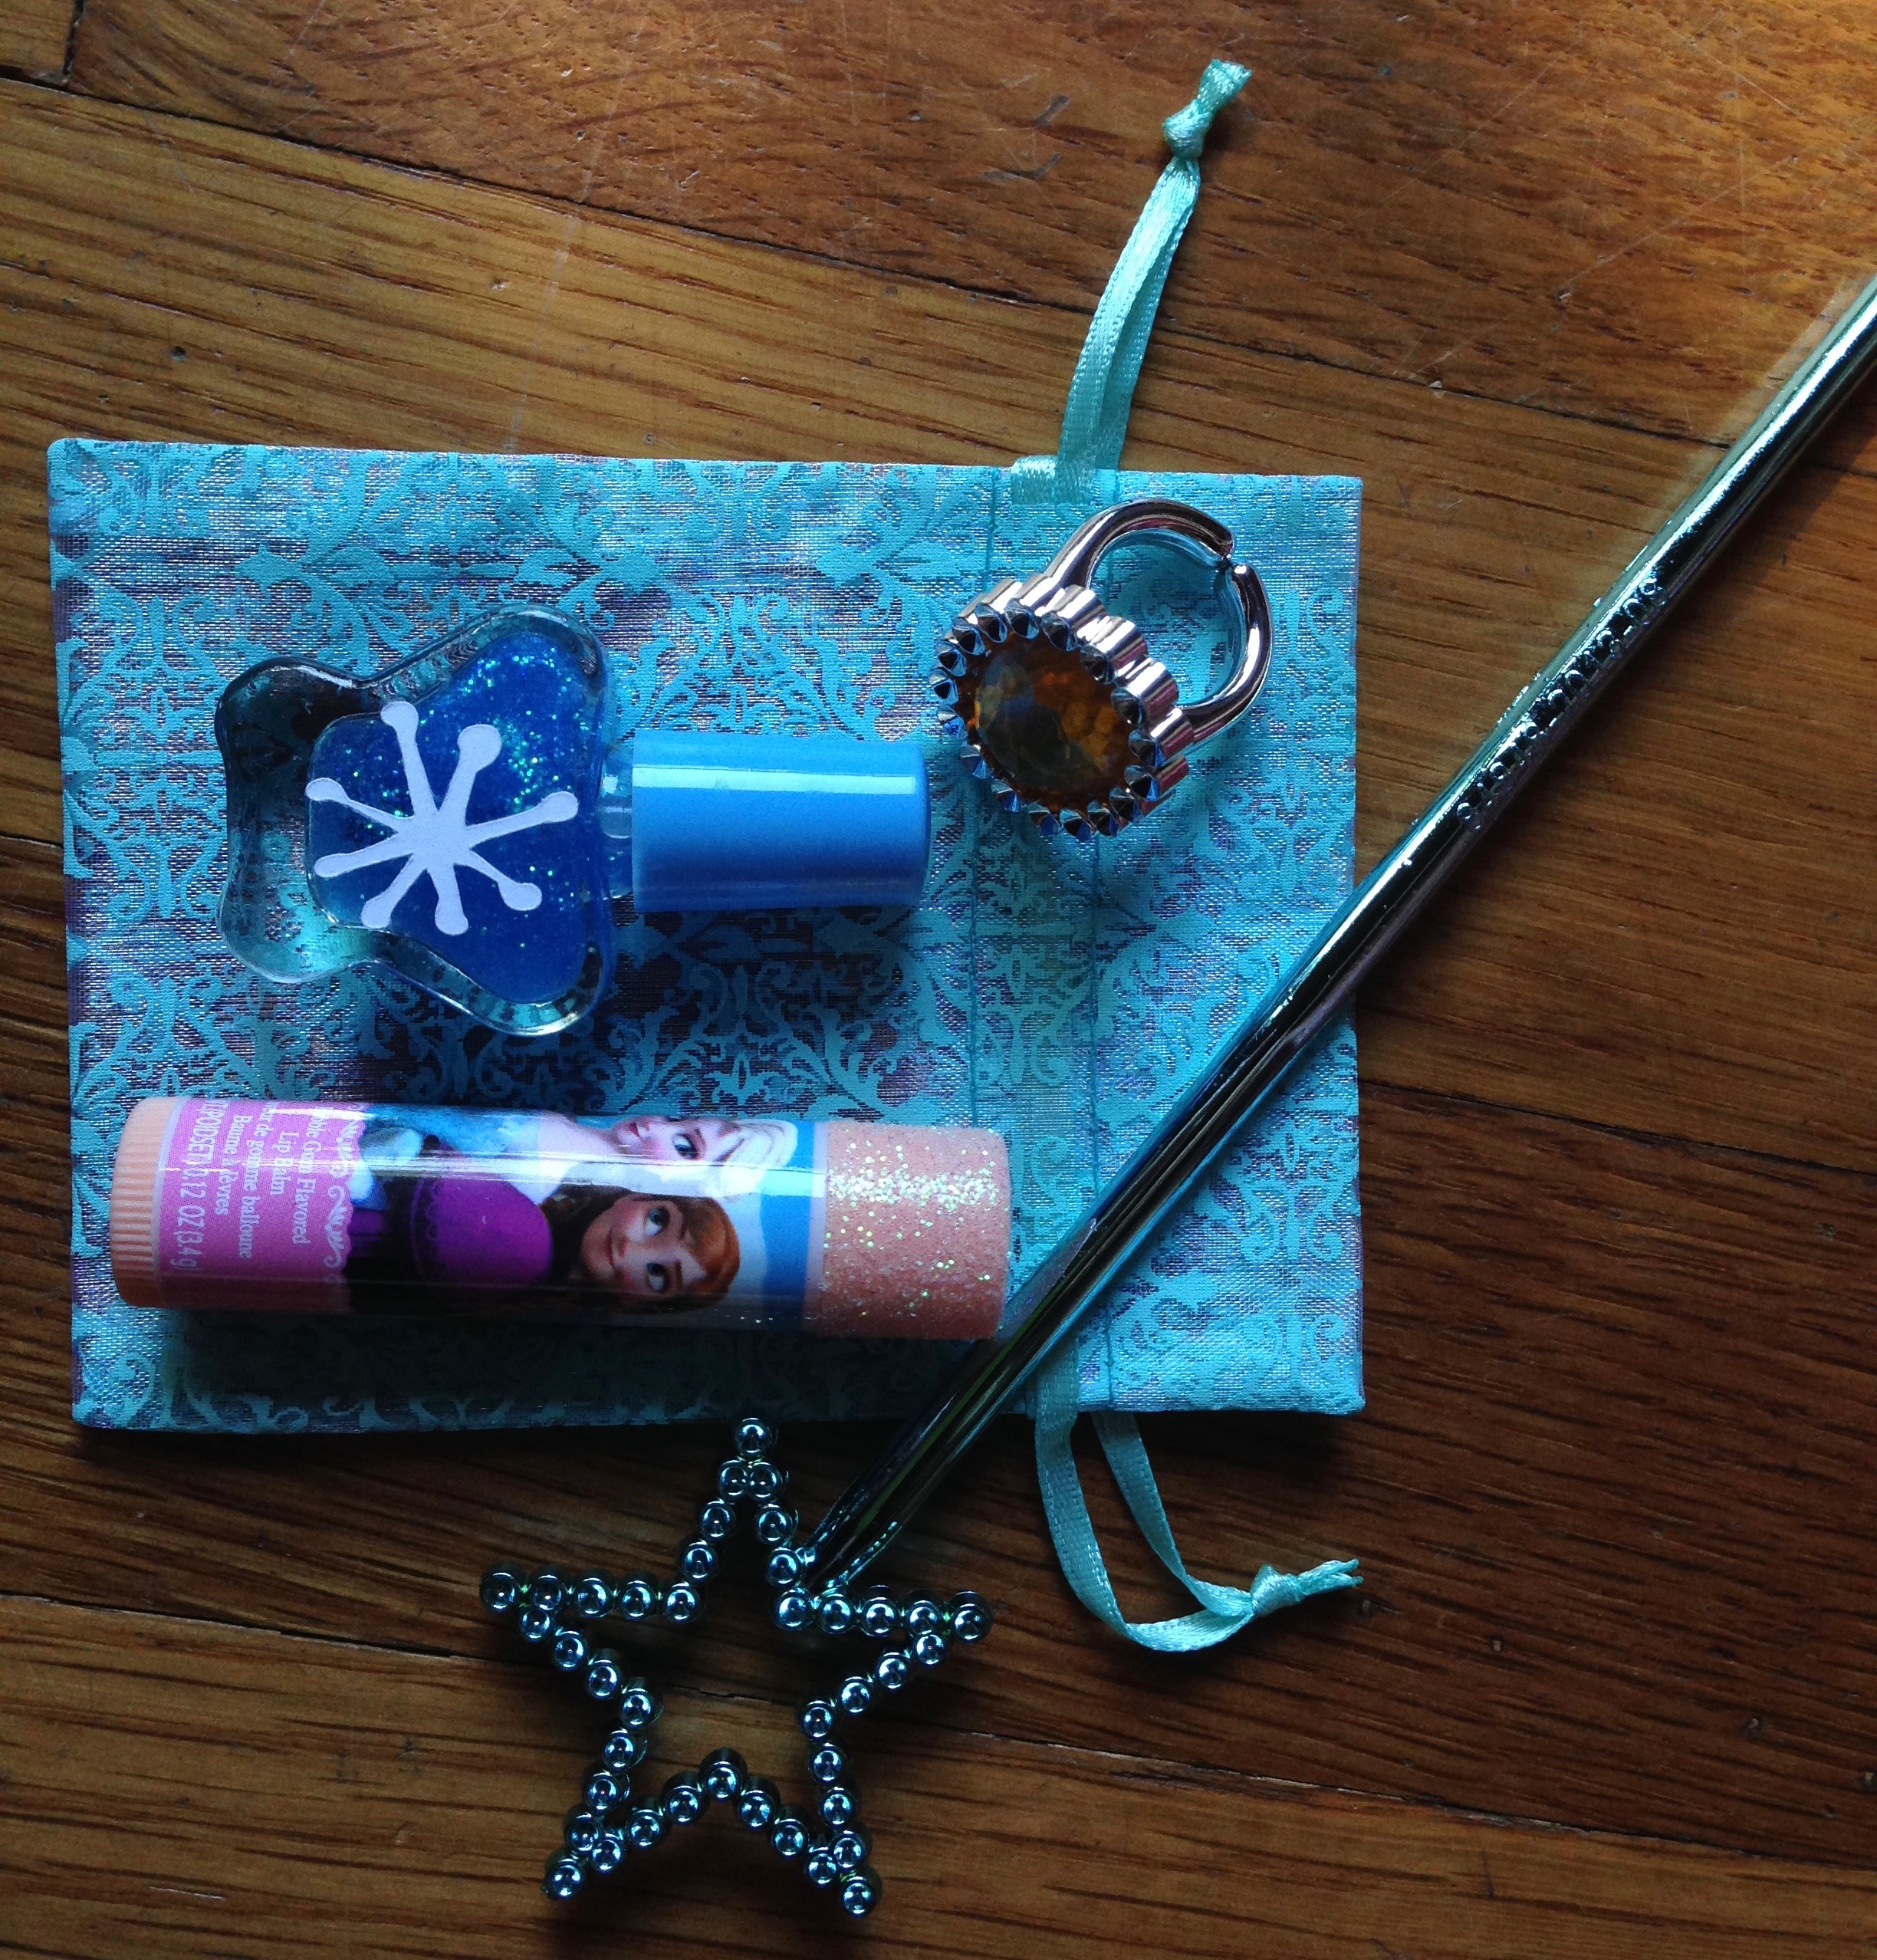
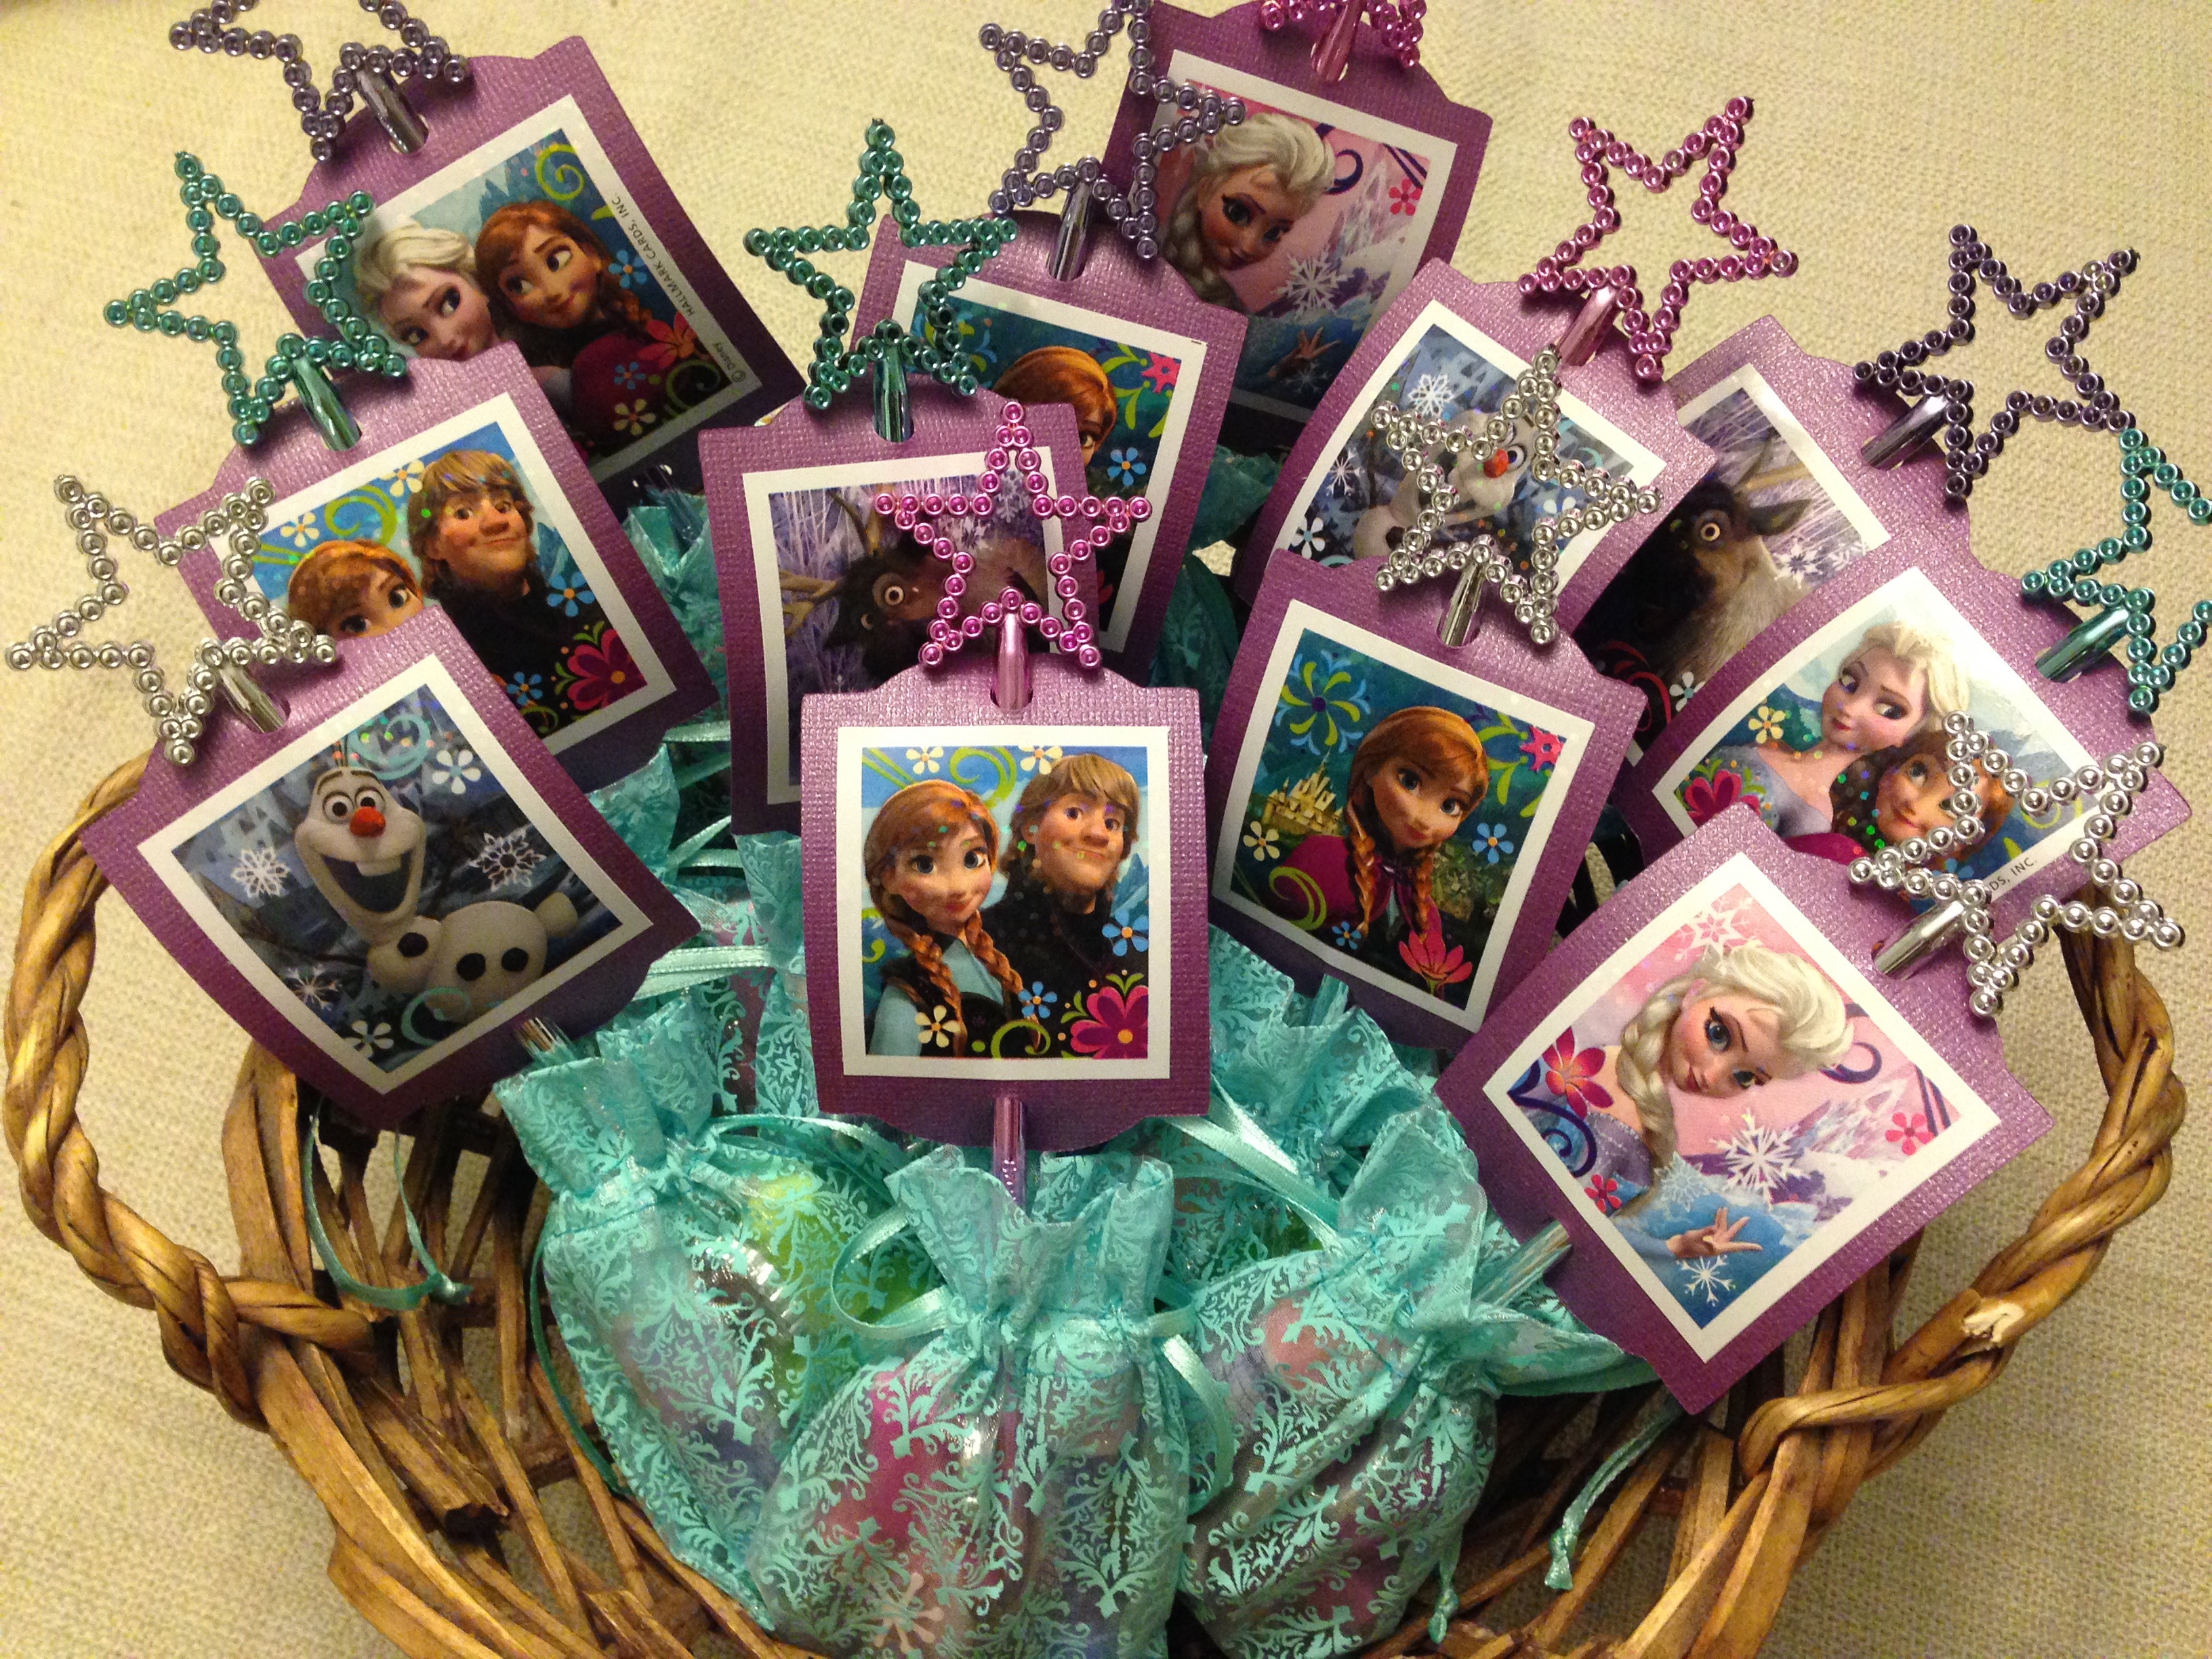
These goodie bags were just perfect to pass out at the end of the party… so girly and fun, filled with sparkly treasures for each little princess. I already had the Frozen chapsticks I purchased early on at TJ Maxx, so I just needed a couple of small items to go with them. I found the little blue bags in the wedding section at Michael’s and the rings and wands in the toy section. These tiny nail polishes became “Frozen” when we added a snowflake (cut from the Cricut) to each one. I made some cute tags using Frozen sticker and threaded them through the wands to complete the look. You can now find a variety of Frozen goodie bag items on Amazon. Karis helped me put the goodie bags together, so she was very proud to hand them out the each of her friends as she said, “goodbye and thank you for coming to my party.”
For more fun birthday party ideas check out some of my other blogposts:
Strawberries and Chocolate…the perfect combination. When my husband asked me to come up with a dessert to pass out to the moms of our church for Mother’s Day, I knew exactly what to make. Chocolate covered strawberries are delicious on their own, but when you add a drizzle of white chocolate across the top they are even better! I have to admit, that I didn’t quite know what I was getting into when I said yes to dipping 500 chocolate covered strawberries for Mother’s Day at the Stirring. I may or may not have stayed up until 2 AM finishing these tasty little treats! Lesson learned, next time, I will ask for help 🙂
Here are a few tips to make the perfect chocolate covered strawberries. First of all, choose berries with pretty stems. They look much more appetizing. Use white cupcake holders to place your dipped berries on so they each have their own holder. Rinse your strawberries and dry them on paper towels. Do not skip this step! It’s essential to dry each strawberry completely before dipping or the chocolate will not set correctly.
Once your berries are dry you are ready to dip. Melt your chocolate. I used Wilton’s candy melts in dark cocoa for the dipping and in bright white for the drizzles. Dip each strawberry and place on a individual cupcake holder to set. Once your dark chocolate has hardened, you can melt the white. I used a spoon to drizzle the white chocolate over each berry. In no time at all, you can have a platter of delicious chocolate covered strawberries to serve at your next party, or to just enjoy with your family.
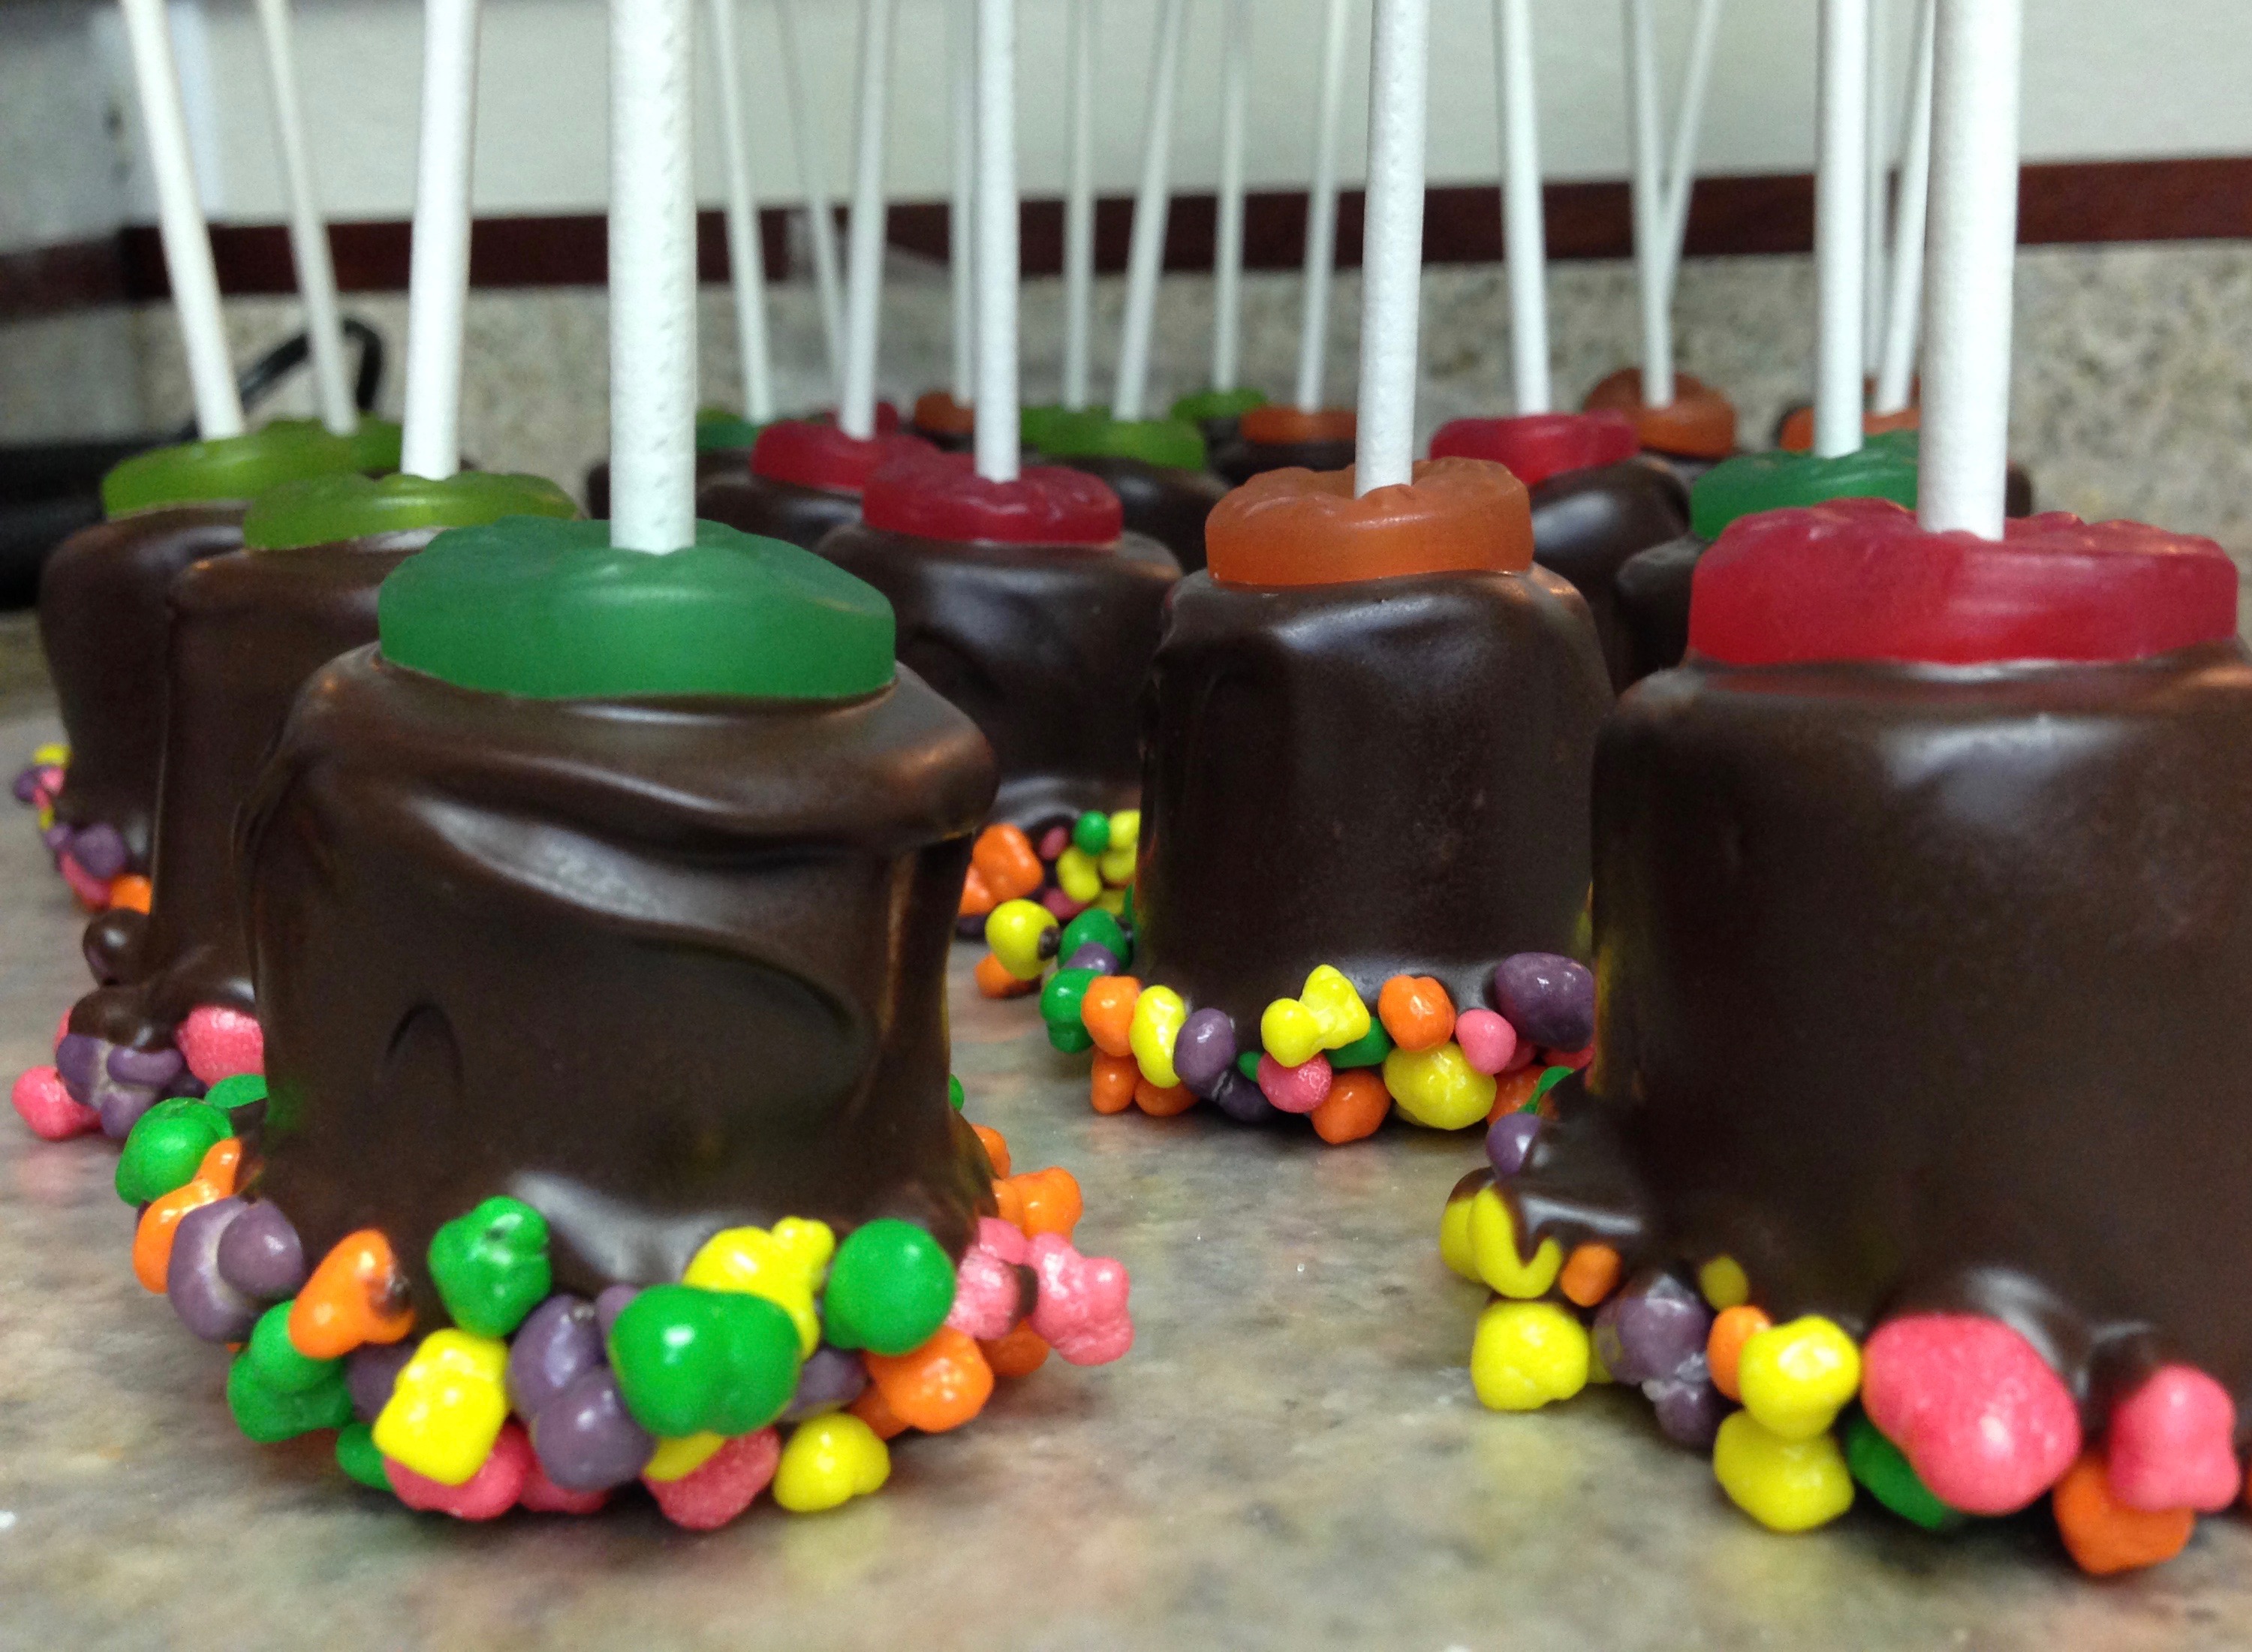
It sounds like a an interesting combination, marshmallows, chocolate, gummy lifesavers, and nerds, but my kids request these just about every year for their birthdays. I have found these marshmallow pops to be the perfect treat to bring to my kids classrooms on their birthdays. One bag of marshmallows makes about 50 pops, and after making them a few times, I can whip out a batch in about an hour. They are always a huge hit and my kids are thrilled to pass them out to all of their friends. They are easy enough to create, that you can involve your children in the process, which makes it all the more fun!
For 50 pops you will need one bag of Kraft Jet-Puffed marshmallows, 50 lollipop sticks, 2 bags of Wilton’s chocolate candy melts (I have used both dark cocoa and light cocoa), 2 packages of LifeSavers Gummies, 3 (movie candy sized) boxes of rainbow Nerds candy, and wax paper. Check back soon for my video tutorial on how to make these tasty little treats and be sure to make a few extra to keep at home. Take my word for it, you may end up liking them just as much as your kids do!
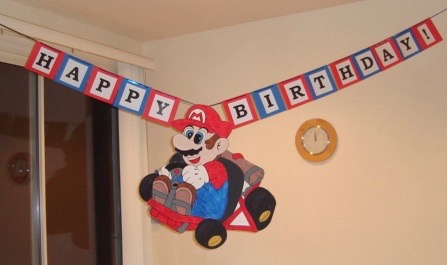
Mario Kart has been a favorite game for our whole family. For my oldest son’s 7th birthday, he wanted a Mario Kart party. My husband worked hard on this party, making it a very memorable one for Jacob. He set up a Mario Kart Wii gaming center in our garage so that Jacob and his friends could race on huge screens.
The cake and decorations were my department. I made a simple happy birthday banner out of blue and red card stock and letters printed off of the computer. I drew Mario in his cart on a piece of poster board and colored it with markers. You could also project an image onto your poster board if you don’t want to draw it free hand.
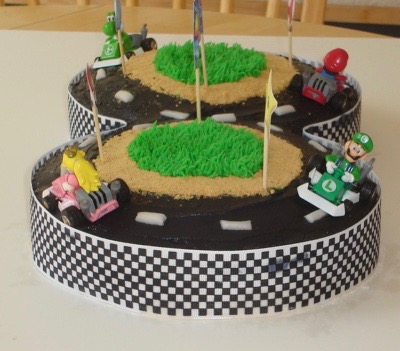
For the cake, I baked two 8 inch cakes and placed them side by side on a piece of white foam core board. This provided a sturdy foundation for decorating and displaying a figure 8 racetrack. The best way to color your frosting black, without using too much food coloring, is to use dark chocolate icing and add a small amount of black food coloring until you have reached your desired color. I used Wilton’s gel icing color in black. The lines in the road are cut rectangles of white Air Heads candy. You could get a similar look using white frosting or fondant. The “sand” lining the race track is made of graham cracker crumbs, which can be found in the baking section of any grocery store. Next, I tinted white frosting green, using Wilton’s gel icing color in leaf green. The grass look was very easy to achieve by using Wilton’s #233 multi-opening decorating tip. The Mario Kart banner, mushroom, star, cloud, and turtle shell are just pictures printed off the internet and glued to toothpicks. A thick black and white checkered strip of ribbon wrapped around the cake gave the edges a clean look. The finishing touch was placing the Mario Kart mini figures (purchased online) around the figure 8 race track. This cake was almost too cute to eat!
Are you looking for a cute and simple Christmas gift to give to your children’s teachers? Look no further. For about $5 each, you can create these delicious caramel apple bundles. I bought my caramel sauce at Trader Joes, hand picked the largest, most colorful red and green apples I could find, made my own gift tags from tan card stock, and purchased a package of bells and long clear bags at Michael’s. I stacked the apples carefully on top of the caramel sauce and tied them off with a piece of twine. And there you have it…a quick, easy, and inexpensive, but very festive Christmas gift for your children’s teachers. You can also add mini ornaments and ribbon if you want to invest a bit more money into these festive gifts. #CommissionsEarned
For more fun Christmas ideas check out the following blogposts:
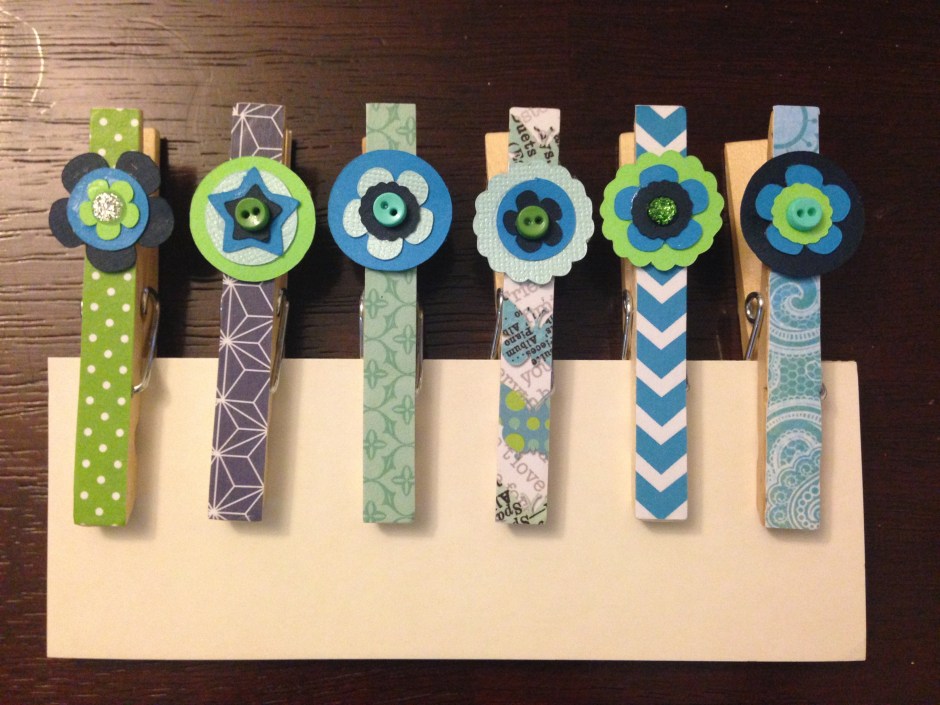
Teacher gifts can get expensive, especially when you have 3 children and each has several teachers and classroom aides. Last school year I decided to make my own teacher gifts. I designed these embellished clothes pins and gave each teacher about 10 of them. I packaged them in festive mason jars with straw lids. I loved them so much that I had to make a few for myself as well.
I used my Cricut machine to cut card stock in several shapes for the paper embellishments. I bought patterned scrapbook paper to line the clothes pins with. This was the most tedious part. I had to trace the shape of the clothes pin on the back of the scrapbook paper and cut them out using my small paper cutter. I then used Mod Podge to glue the paper to the clothespin. After they were dry, I used an exacto knife to trim the excess off of the edges. Then I painted a coat of Mod Podge over the surface of the paper to seal them in. I bought a package of tiny buttons and a sheet of glittery rhinestone stickers at Michael’s to use in the center of the embellishments. Tacky glue worked perfectly to hold all of the tiny pieces together to form each decorated clothespin.
These gifts can be used in the classroom or in the home and will certainly add a pop of color to whatever they are holding in place.
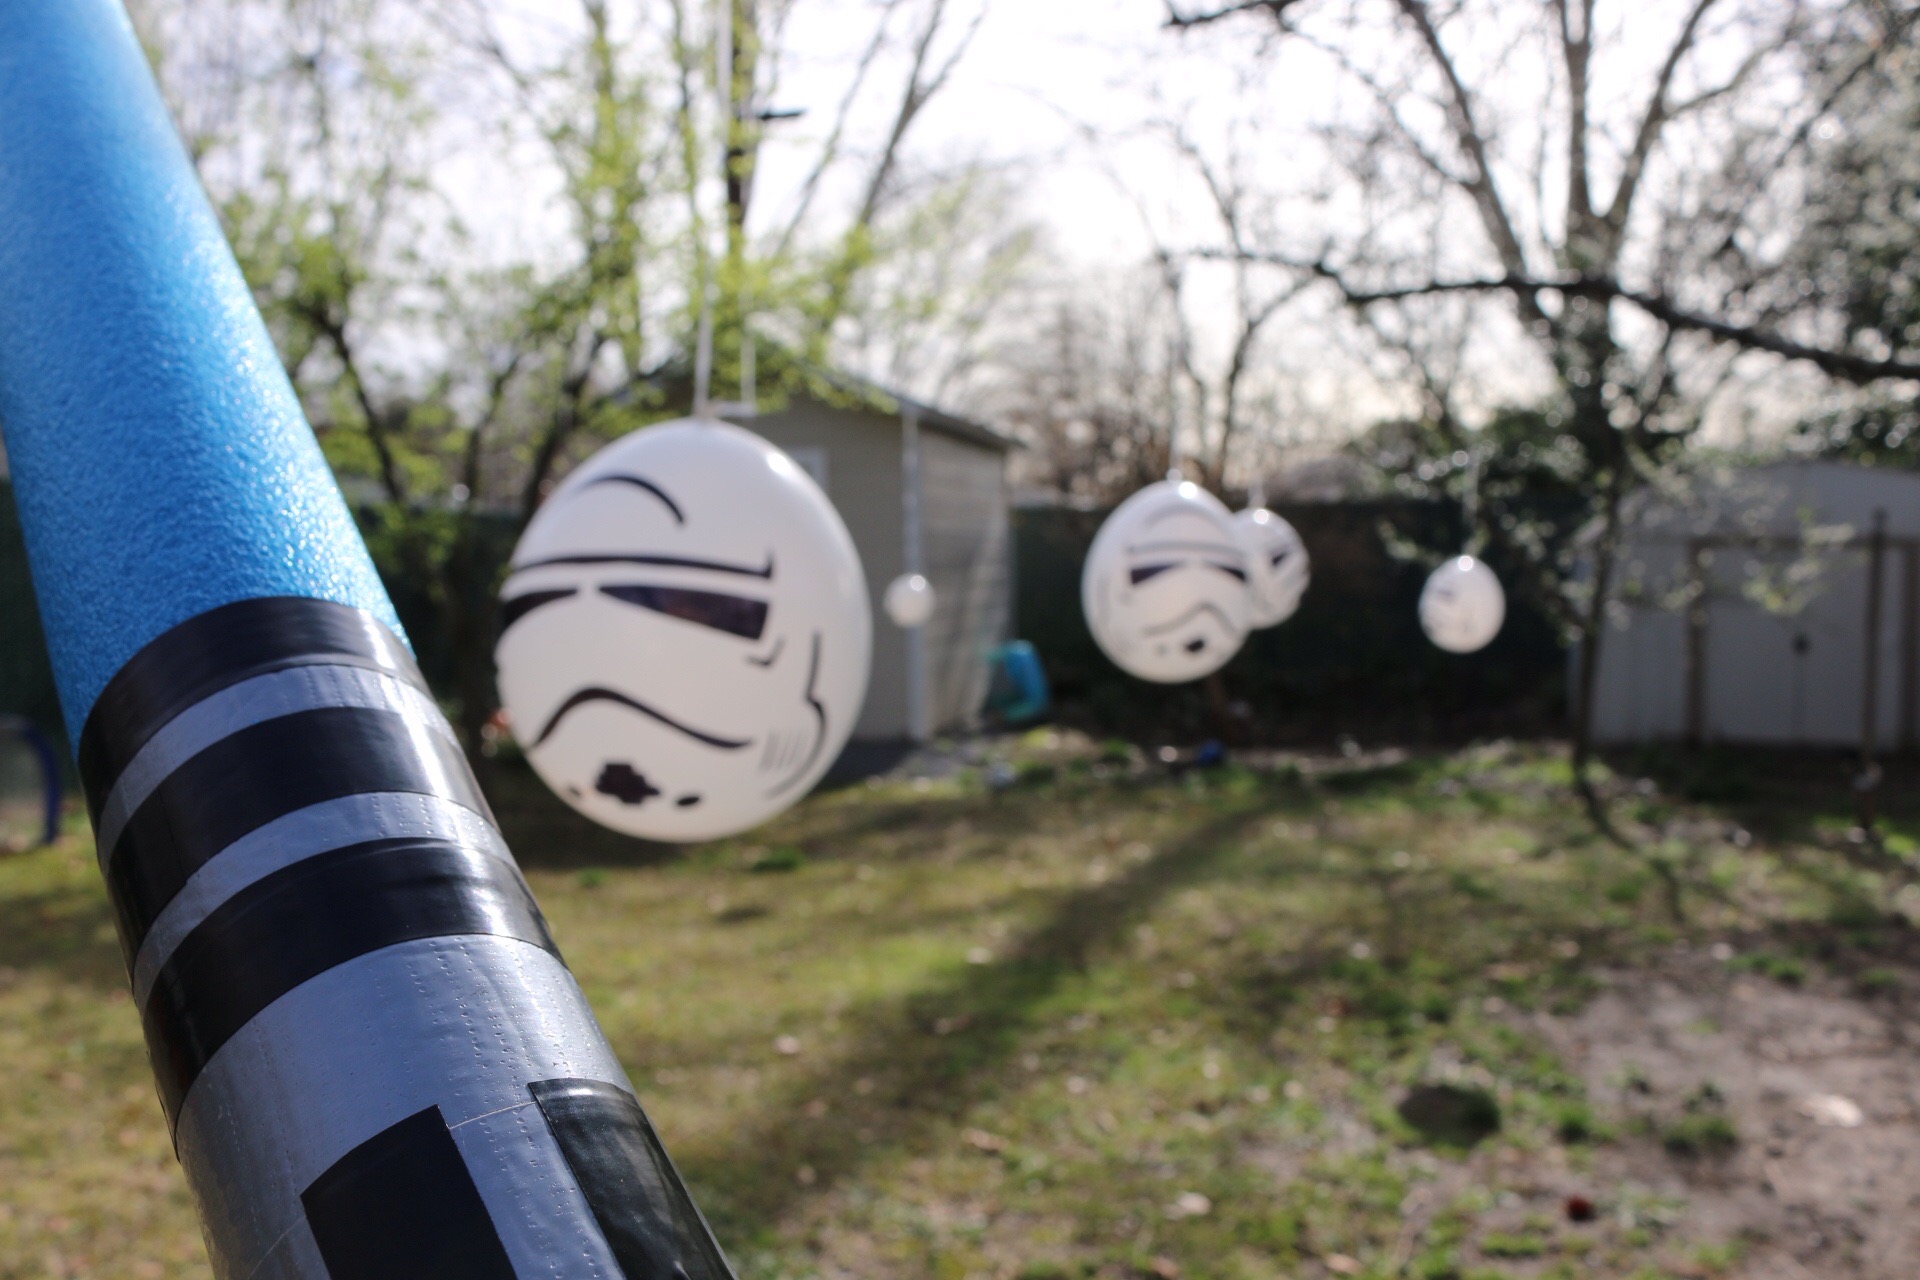
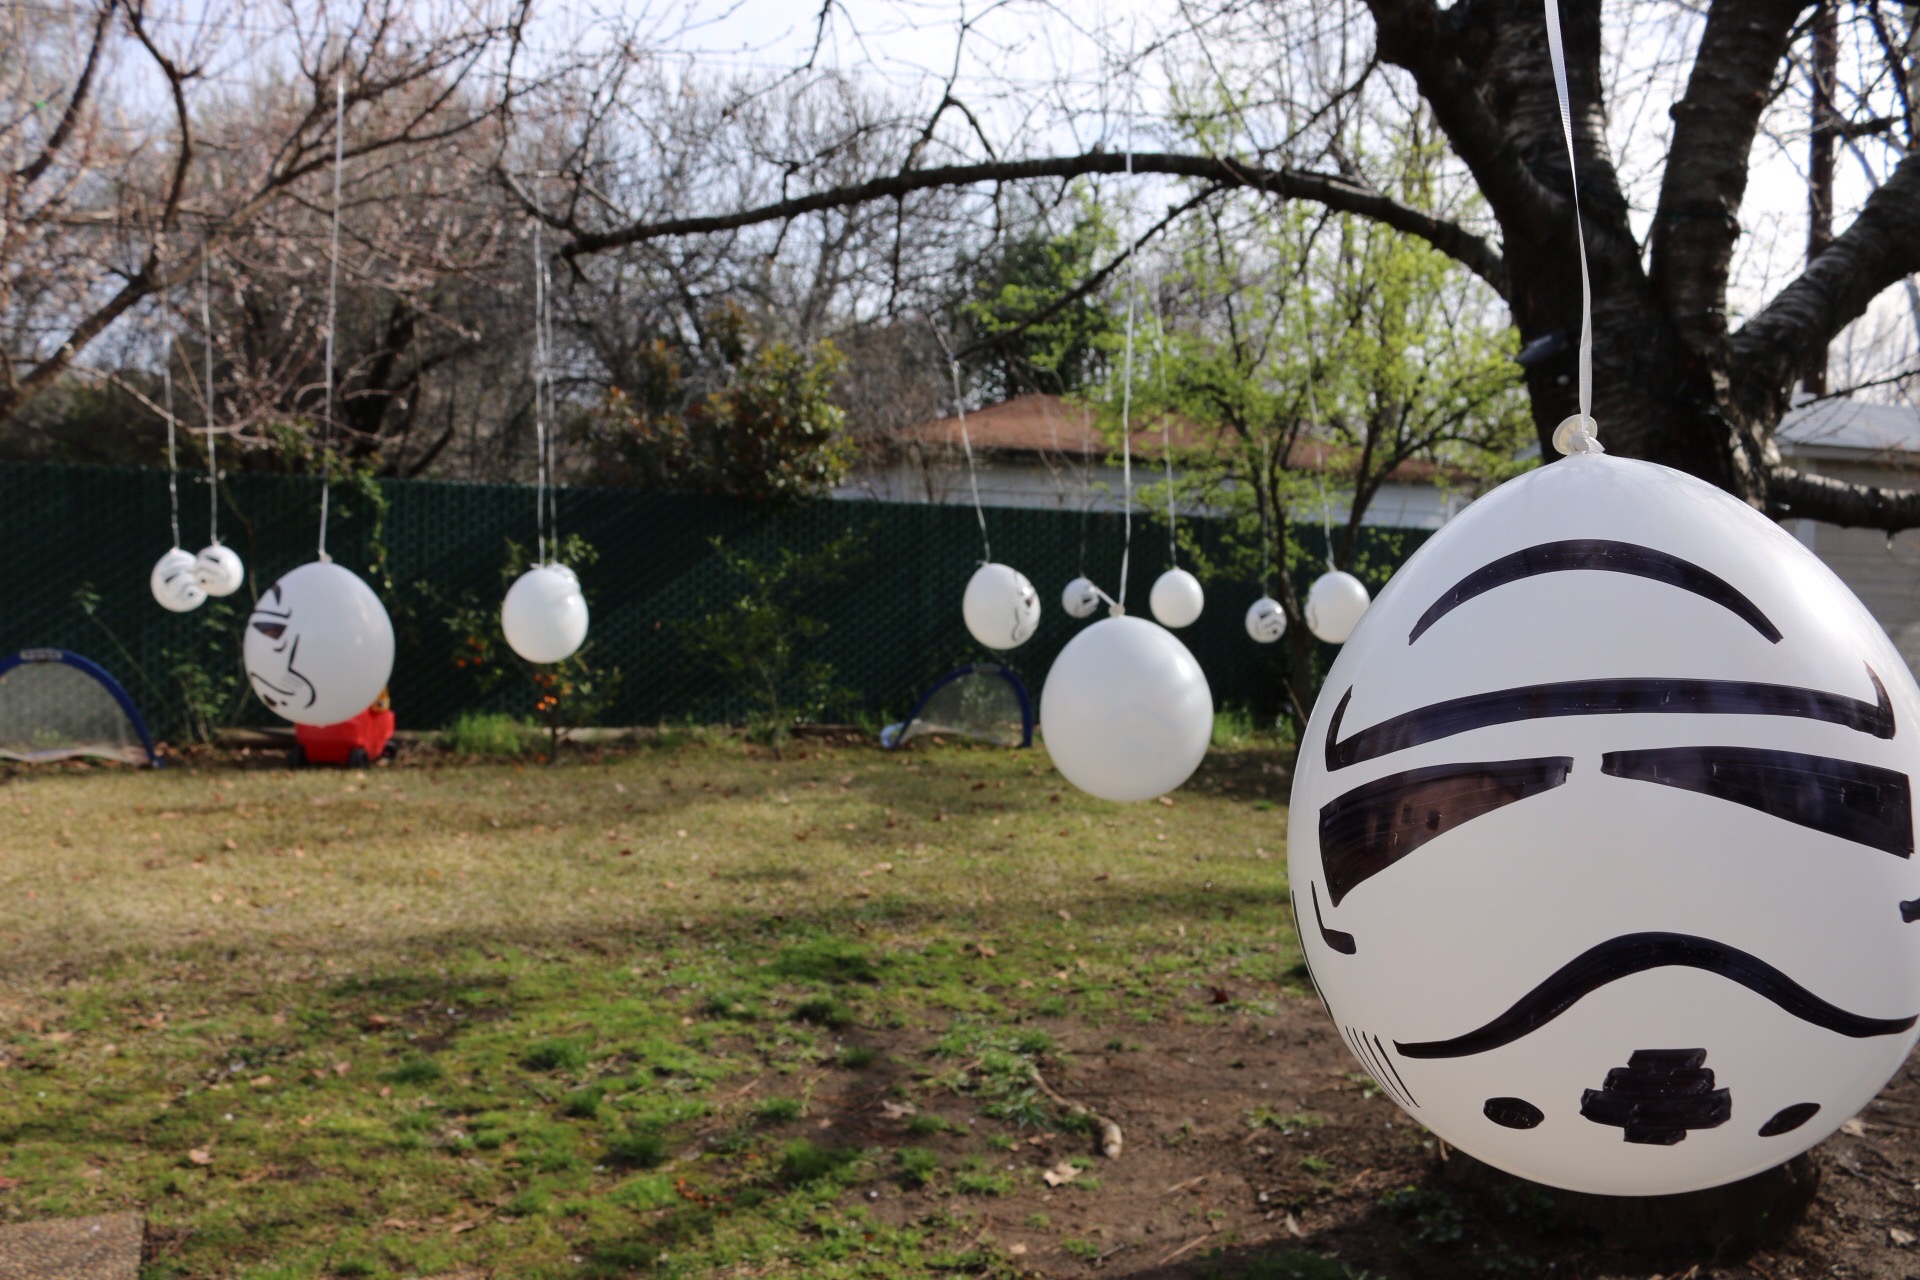
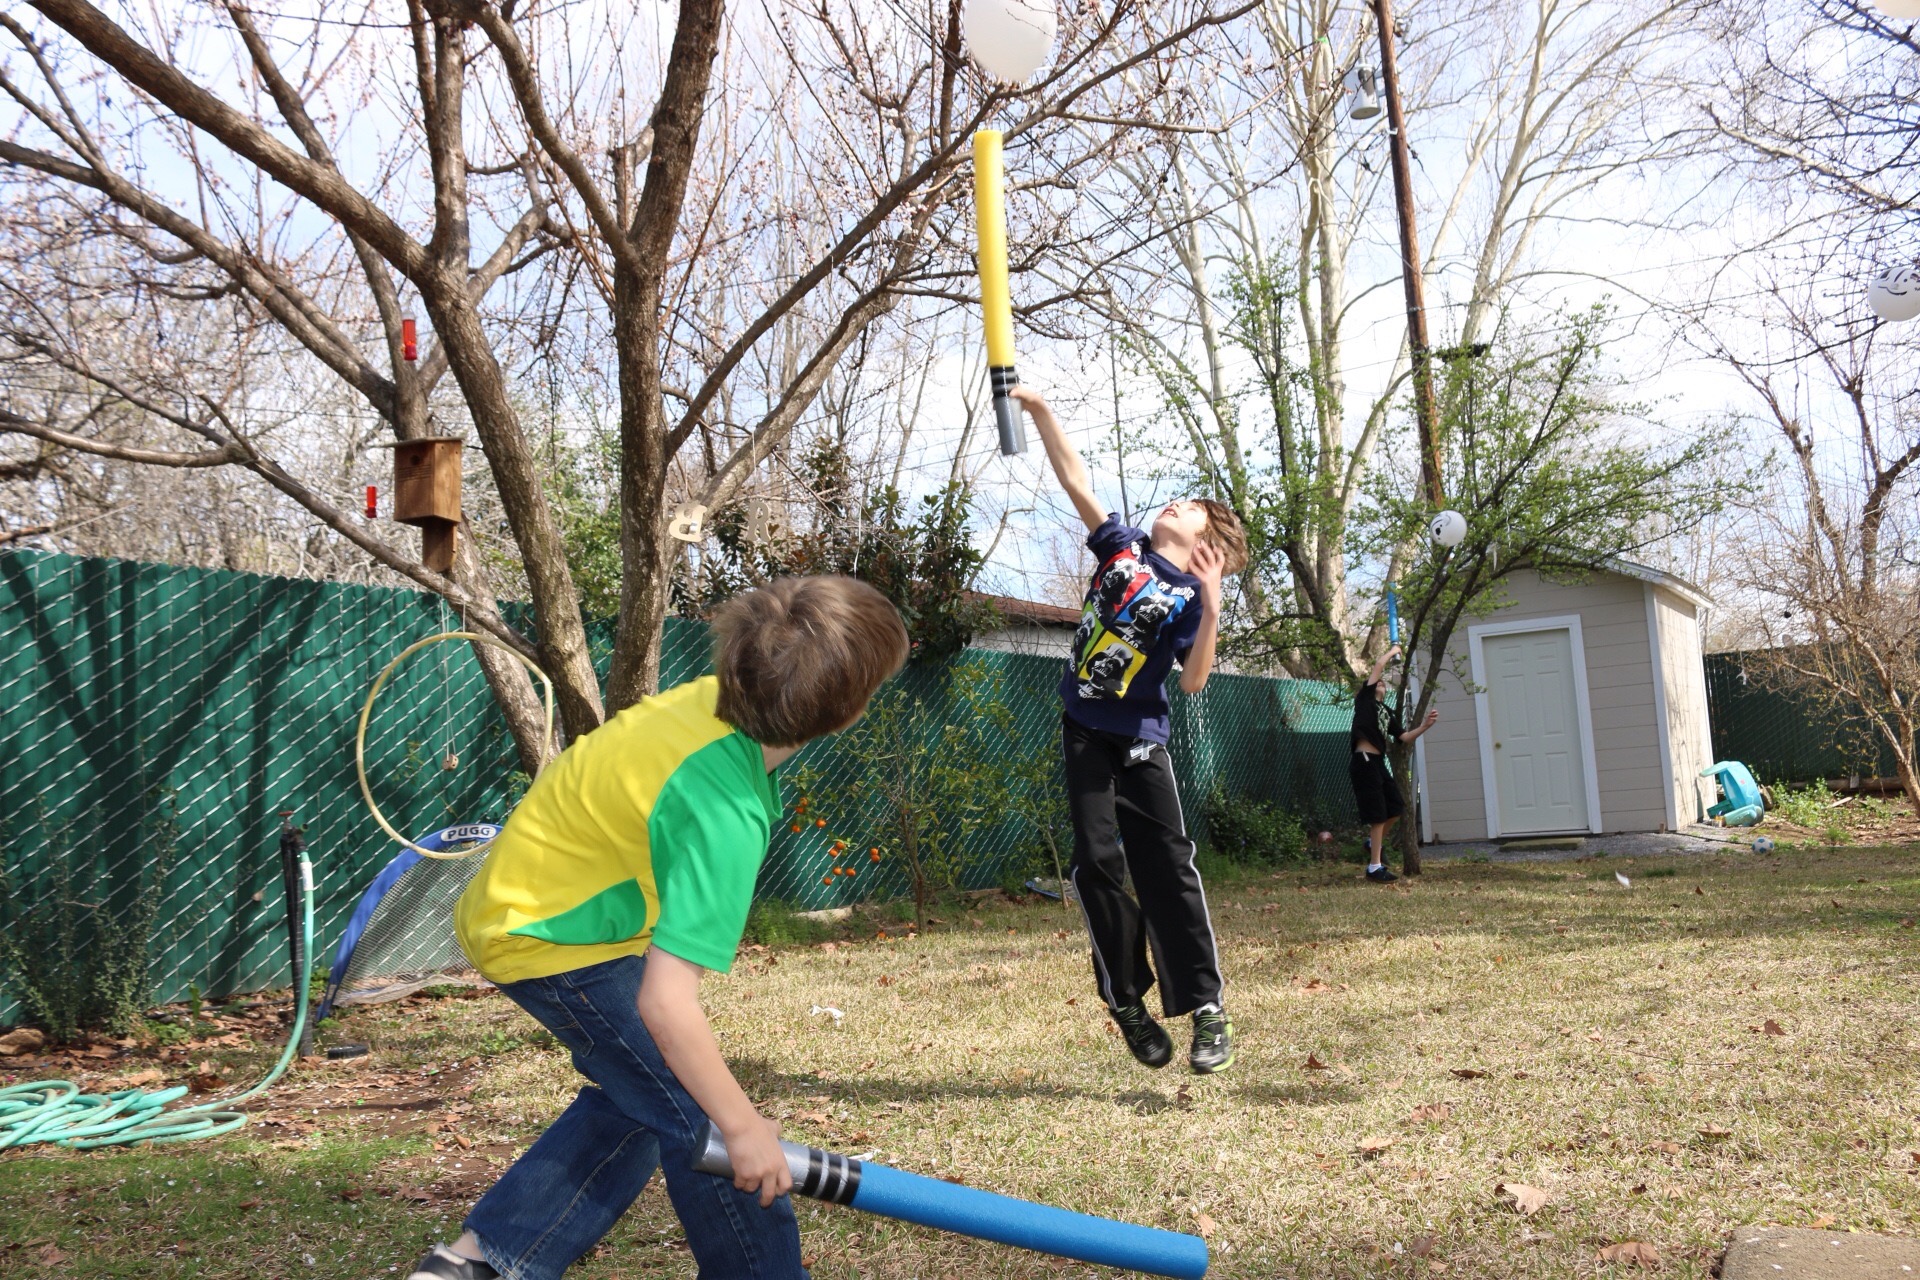
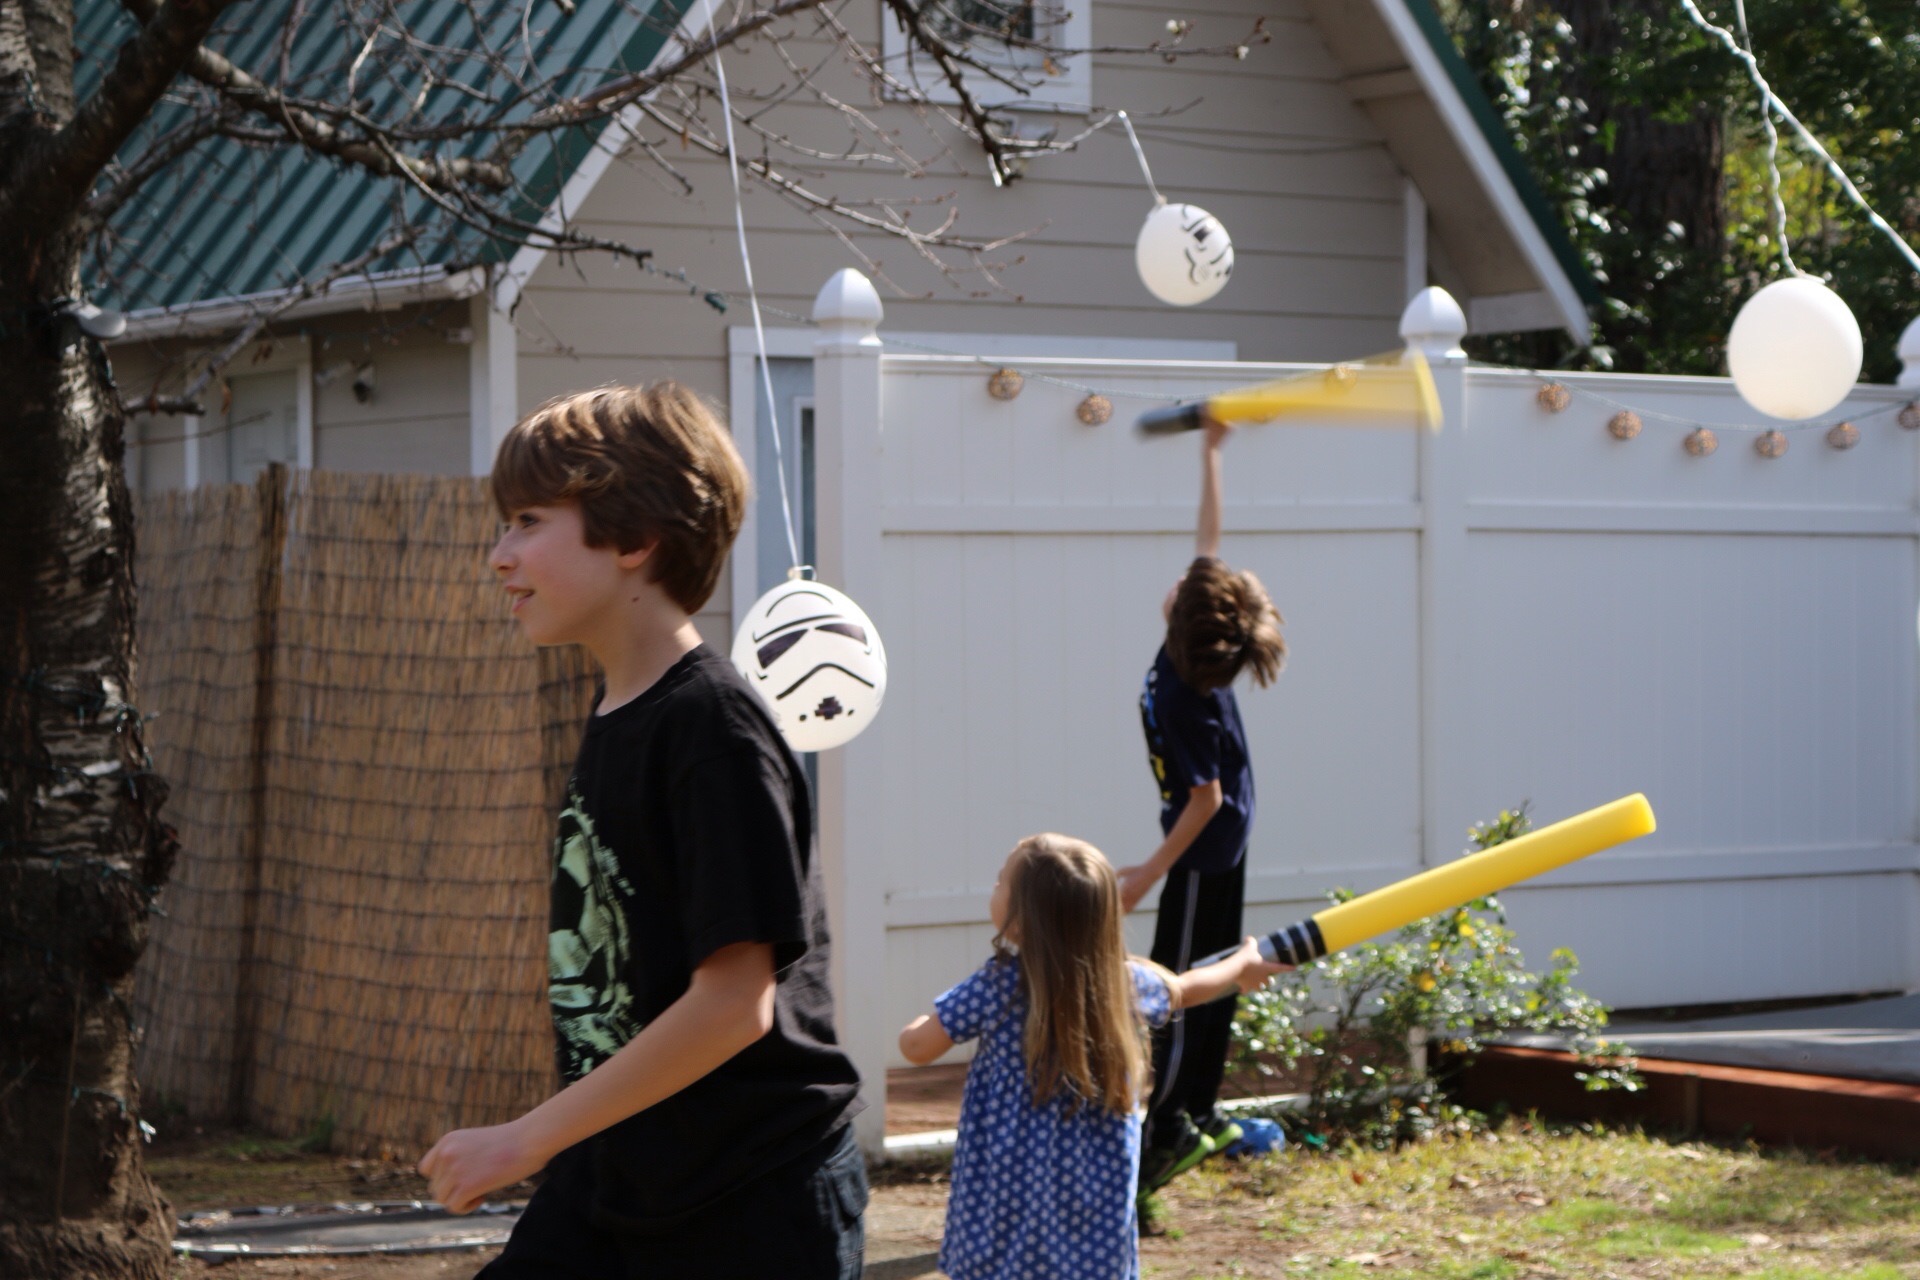
Star Wars… one of the most popular ongoing themes for birthday parties! When my son Micah turned 8, he wanted a Star Wars party. March is a tricky month. You never know if it will be rain or shine. Fortunately, it was a beautiful sunny day, which made this epic Stormtrooper battle possible. When each child arrived, they were given a homemade light saber made from a pool noodle cut in half, decorated with silver and black duct tape. Their mission…go out to the backyard and defeat the Stormtroopers (which in reality were white balloons hanging from string with storm trouper faces drawn on them with sharpie). The boys (and little sister) were way into this battle and it was so fun to watch them running around our yard swatting at all of the bad guys!
I made a hanging centerpiece out of a large white kitchen trash bag by filling it with air, tying it off and drawing a Stormtrooper face on it. This year I went simple on the cupcakes by purchasing some Yoda and Darth Vader toppers at Michael’s.
We ended the party with a viewing of the very first Star Wars movie, which my son had never seen. The boys each got to take a light saber noodle home with them and the left over sabers stayed at our house. Funny thing is, I expected my kids to get tired of them after a week or so, but these noodle sabers were used for many months post party. One of my boys’ favorite outdoor activities became light saber battles while jumping on the trampoline…perfect as party favors or just to use in everyday play!
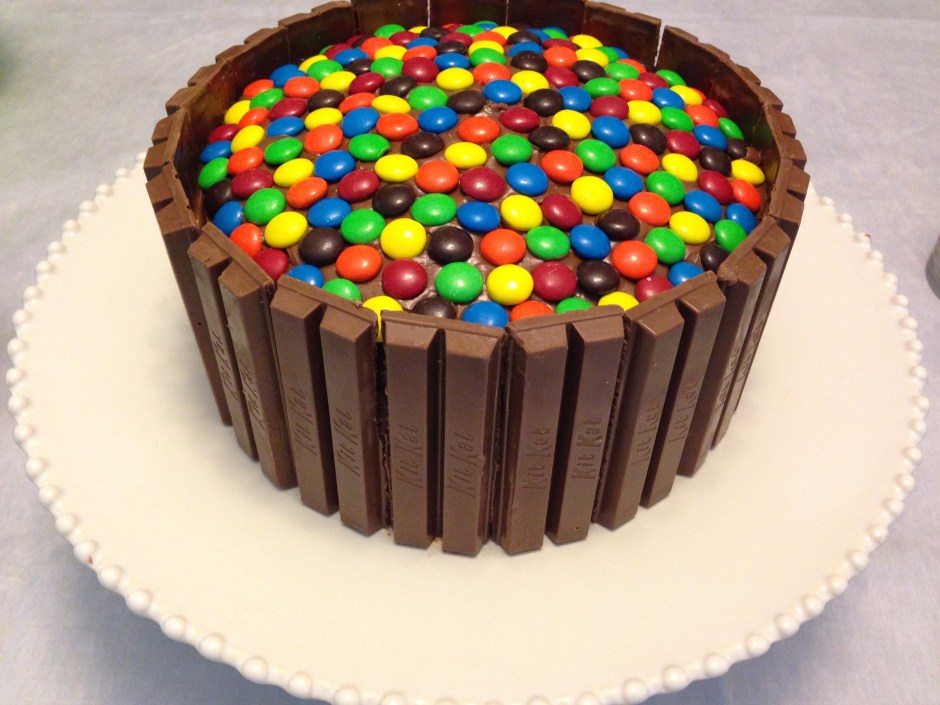
For my son’s 12th birthday, I made this delicious kit kat and M&M cake. It was so simple and turned out just as I hoped it would. I baked the cake in two 8 inch round pans. I spread chocolate frosting in between the layers and all along the outside. After the cake was fully frosted it was time to decorate. I started with the center M&M and began to make circles around it, being careful to not place the same color of candy right next to another. I kept making M&M circles until the entire surface of the cake was covered. Then I broke the kit kats in half, so that each piece had two adjoining sticks. I pressed the double kit kat pieces all around the outside of the cake using the frosting to keep them in place. A 12 candle completed the look of this amazingly sweet and tasty cake. My son was very pleased and I think his friends were too! #CommissionsEarned
If you are looking for a versatile white cake stand that you can use for any occasion, this is a great one that is reasonably priced. #CommissionsEarned
These Thanksgiving silhouettes made out of Wilton’s candy melts are the perfect edible toppers for your Thanksgiving cake and cupcakes. Simply print out silhouettes of pilgrims, indians, turkeys, and the Mayflower. Lay wax paper over your silhouettes. Melt your chocolates, place the melted candy in a Wilton’s squeeze bottle, and you are ready to create these delicious toppers. Watch my tutorial to learn how to create these festive toppers for your Thanksgiving feast and find more creative Thanksgiving ideas on my blogposts Thanksgiving (Turkey Handprint) Kids Table and Thanksgiving Turkey Place Cards . #CommissionsEarned


 If you are looking for more Nerf ideas click here for my latest tutorial on how to create really fun spinning targets to use for target practice with Nerf guns.


 These Thanksgiving silhouettes made out of

