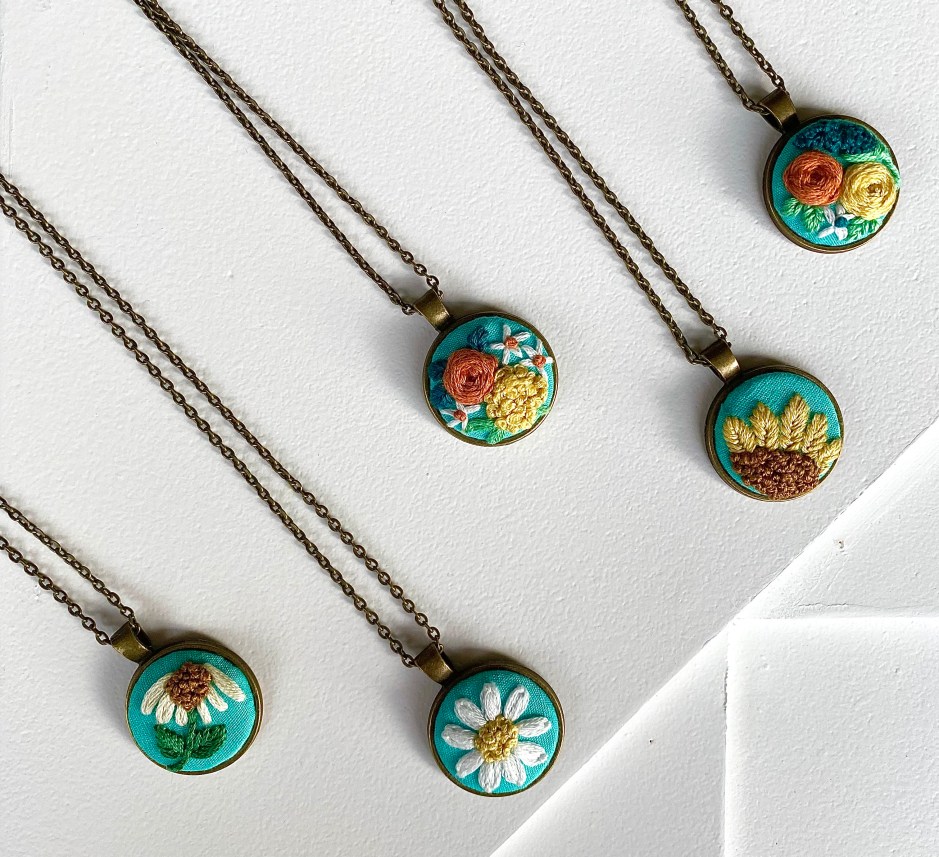

If you’ve been following my blog, then you know that embroidery has become one of my passions. I love learning new stitches and creating beautiful things, and these vintage style necklaces have become some of my favorites. They may look complicated, but they are actually easier than you would expect.
You can find countless tutorials on youtube on how to do various embroidery stitches, but one of my goals for 2024 is to create my own channel to teach people how to do embroidery. Stay tuned for more information about that. If you are wanting to learn how to make similar necklaces or keychains, here is what you will need.
cardboard for bezel inserts (I cut mine on my Cricut Maker 3, but you can use scissors and an empty cereal box)
#commissionsearned
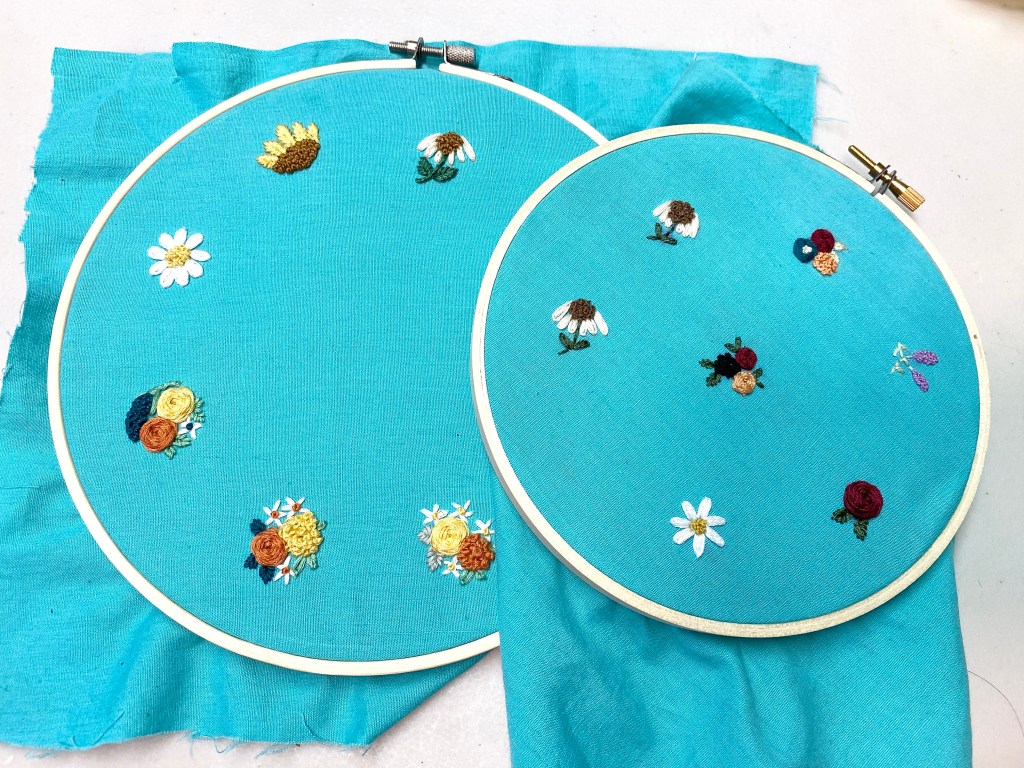
Space out your embroidery so that you can easily cut around each one. I like to use a water soluble fabric marker to draw little circles in the same size as the bezel so that each one fits inside of the circle. I also use the fabric marker to trace around the fabric before I cut it. Leave enough of an edge to fit around the cardboard circle insert.
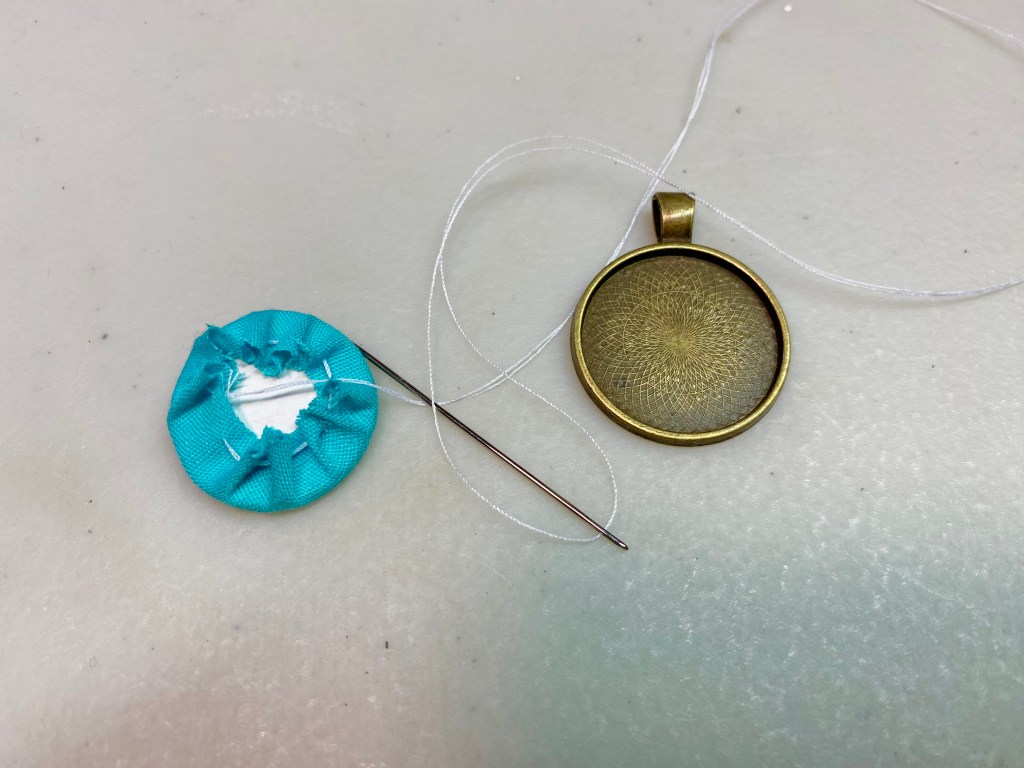
Optional tip: I like to cut a small circle of felt (the same size as the cardboard insert) to place in between the fabric and the cardboard circle to make the fabric and embroidery puff up a bit.

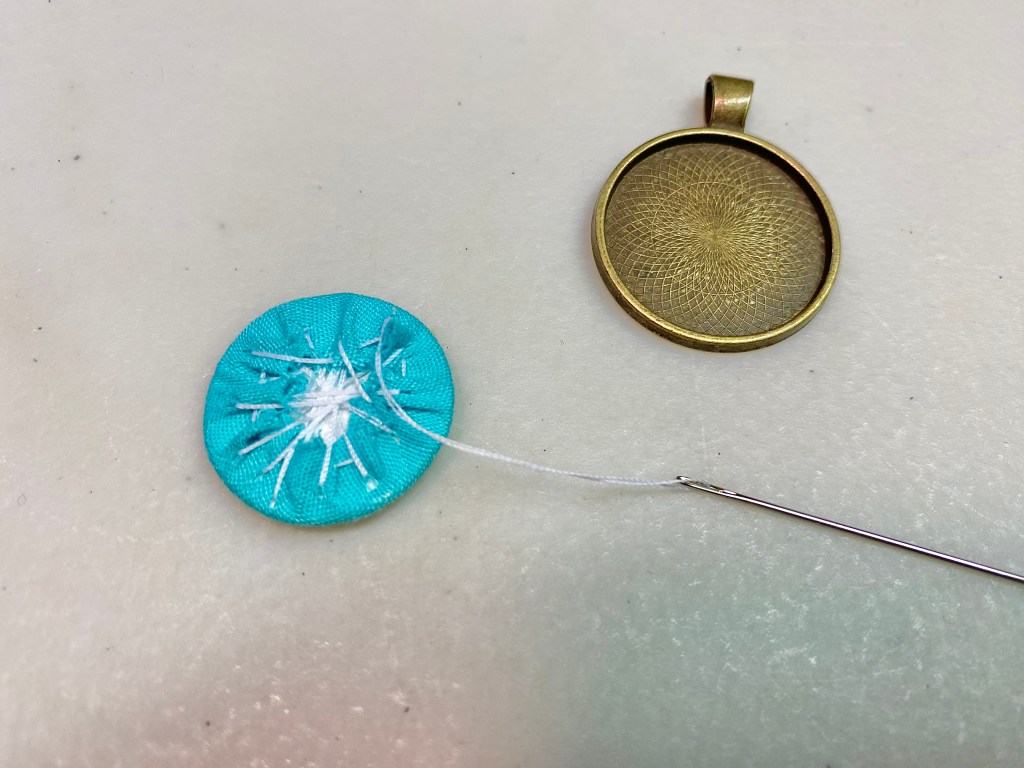
Cut a small circle out of cardboard to fit inside of the bezel. Some bezels come with glass or metal inserts so you don’t have to make your own. Use a running stitch around the excess fabric and cinch it to tighten around the back. Then use the rest of the thread in a criss cross pattern to tighten the folds in place so that the fabric lays as flat as possible against the cardboard.


Use a generous glob of E6000 crystal clear glue inside of the bezel. You should have a thin layer around the inside of the metal, but not so much that it will squeeze out over the edge when you press the embroidery on it. Place the fabric/embroidery inside of the bezel and hold in place with 2-3 clothes pins. Let them dry for 24 hours and then remove the clothes pins and gently fluff up any indents with your fingers. Add a chain and your necklaces are ready to wear. If you are making keychains, then attach the keychain holders instead of adding a necklace chain.
I’ve included a picture of my most recent craft fair so that you can see how I display my necklaces and keychains. I used my Cricut Maker 3 to create the necklace holders out of card stock. #commissionsearned I do currently have a small collection of St. Patrick’d Day embroidered necklaces in my Etsy Shop if you are looking to purchase one.

My favorite thing about making these necklaces and keychains is that each one is unique and there are so many variations you can create. Embroidery is a lost art, but it is making a come back. If you are interested in learning more about embroidery, follow along with me on my blog. I have a lot of fun projects and tutorials planned for the new year!
For more embroidered necklaces, check out my blogpost St. Patrick’s Day Necklaces.