We are currently soaking up any sunny day we get in the midst of this very rainy season. Sidewalk chalk has always been a favorite backyard activity for my kids and I recently introduced my daughter to hopscotch. We started with your traditional, schoolyard, 10 space hopscotch, but my girl wanted to make a bigger one. Over time, we developed a super fun “Tricky Hopscotch with a Twist” that we would like to share with you.
Check out my daughter’s second “Craft Time with Karis” video where she shares her ideas on how to create a “Tricky Tricky Hopscotch.” Karis adds silly spaces in the middle of the basic numbered squares. In some, she acts like a cat, or a dog, in others she will dance or dab. The best part about this, is that kids use their imaginations and creativity to come up with their own unique hopscotch. This one simple activity combines art, writing numbers, counting, imaginary play, and exercise.
Leave Karis a comment and let her know if you made a “Tricky Tricky Hopscotch” of your own and what creative spaces you added to yours!
This past Monday was the first day of Spring, and boy am I ready for some sunshine! This weekend, in anticipation of the arrival of the new season, I made this simple “Book Page Banner” and I absolutely love the way it turned out! Book Page Banners are great, because they are so inexpensive to make and you can modify them to fit any occasion.
For this Bunny Rabbit and Carrot Banner you will need…
pages out of an old book (I got mine from the dollar store)
bunny & carrot template (google bunny silhouette & carrot silhouette to find ones you like and size them to fit your book pages)
white, orange, and green card stock
scissors
ruler
pencil
paper cutter
glue stick
scotch tape
twine
Watch my tutorial above to make your own Spring Book Page Banner.
We are a bit “Trolls Obsessed” in our house! The CD currently plays on repeat in my car and my daughter likes to sing the songs at the top of her lungs… which might embarrass her big brothers a bit! Let’s just be thankful that the soundtrack is seriously one of the best kid movie soundtracks ever!
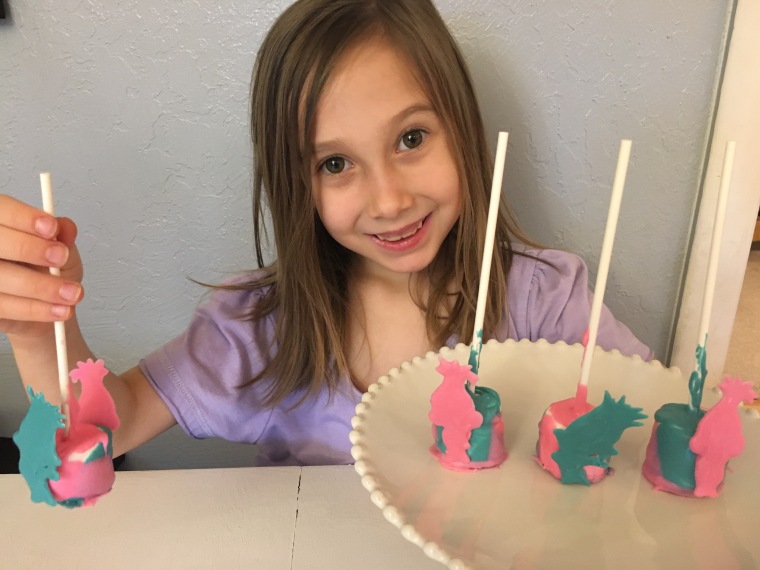
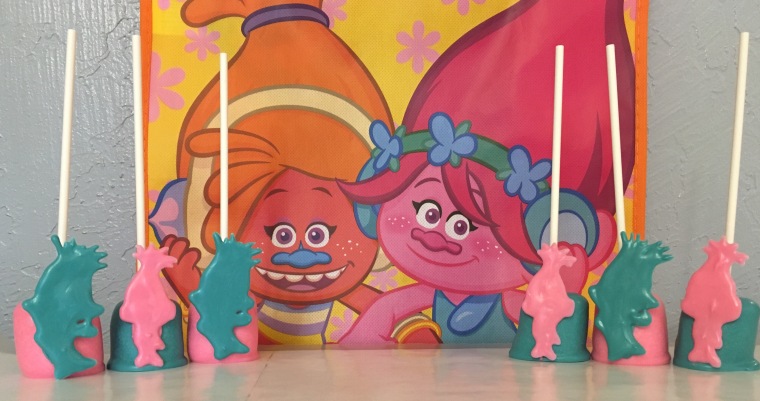
I’ve been wanting to have a special mommy/daughter Trolls day for quite some time, so this week, we made it happen. I rented the movie from Redbox, planned a couple of Trolls crafts, and together, my daughter and I, made these super fun Poppy & Branch Marshmallow Pops. My sweet girl had so much fun…and so did her mama!
Watch our tutorial, above, to learn how to make these Marshmallow Pops for your own little Trolls fans. I’ve included the template that I used so you can print it off to make the candy Poppy & Branch silhouettes.
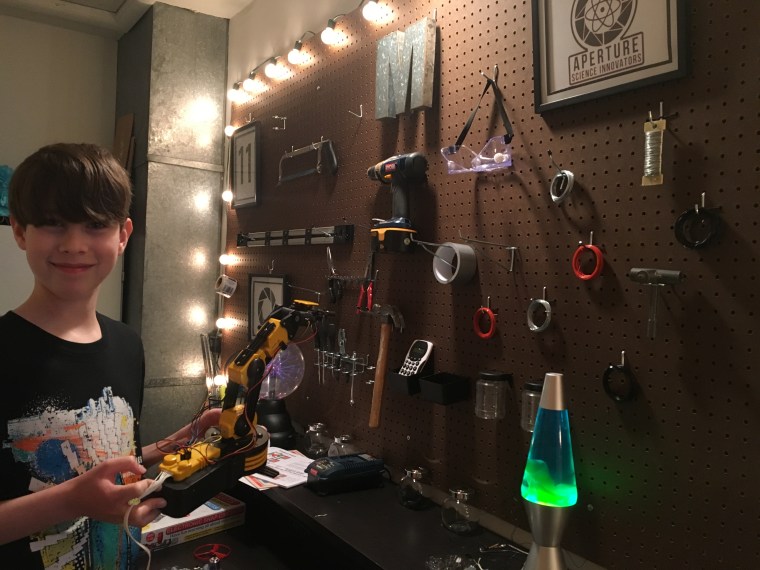
My son Micah is that kid who is always trying to figure out “how things work.” He absorbs information like no one I know and often amuses us with the most off the wall, interesting facts that he “read somewhere in a book.” He also loves science and technology. We always say that he’s going to be a famous inventor someday!
For the last couple of years, Micah would often say, “Mom, I wish I had a workshop of my very own! I wish I had a place that I could just go and build stuff.” Whenever he said this, I was left feeling like I didn’t even know where to begin, so I’d look up a project on Pinterest or try to get him engaged in a creative activity. I never really thought it would be possible to make his dream a reality.
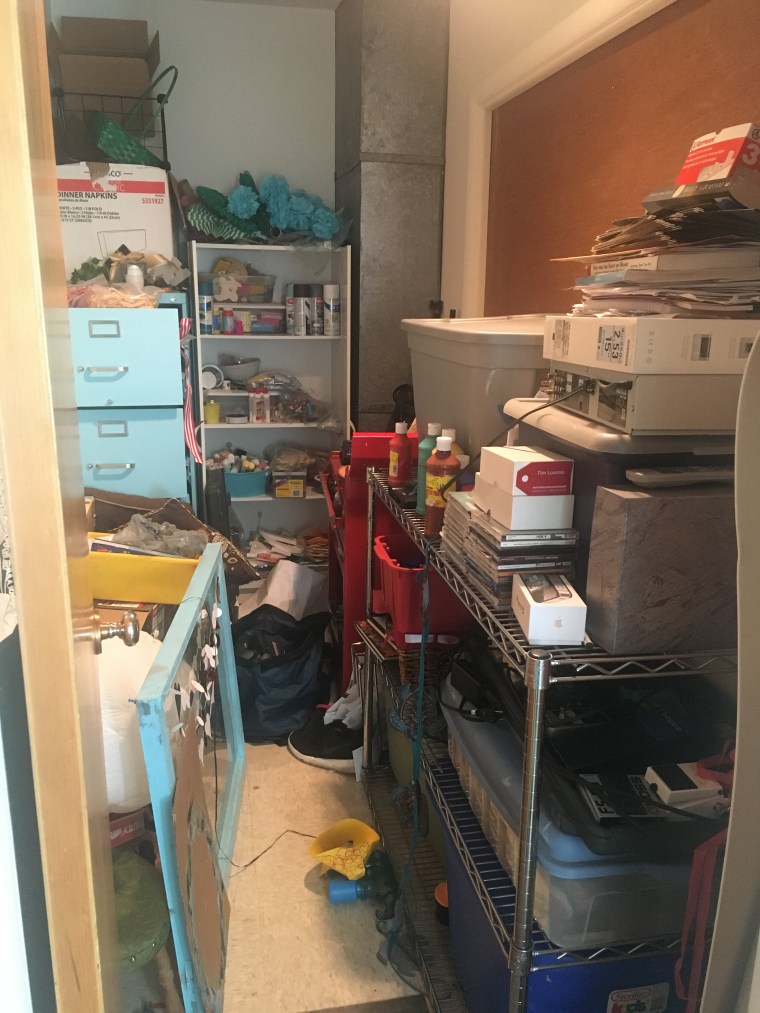
Recently, I started talking to Micah about what he wanted for his 11th birthday. He didn’t have a specific gift in mind. Then inspiration struck! I started dreaming about how we could make a special workshop just for Micah in our house. We have this random, small utility room between our living room and garage that had basically become a storage space for all kinds of random things. I realized that this could become a perfect tinkering space for Micah.
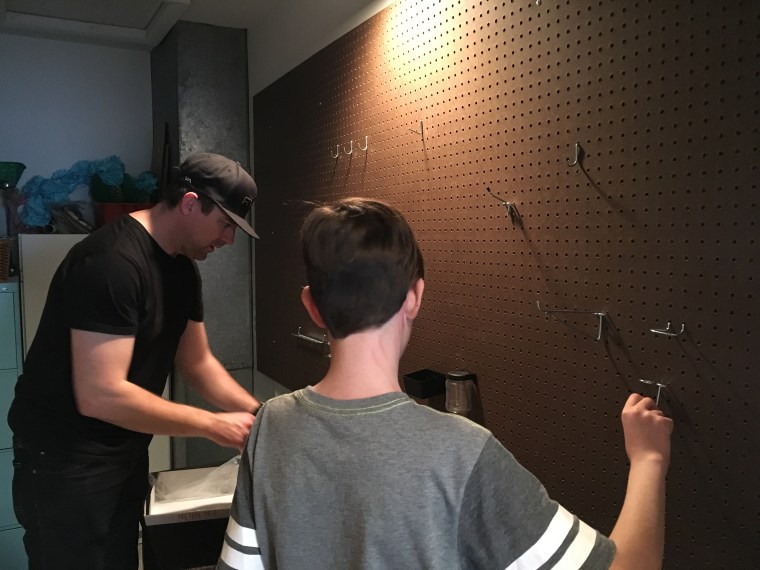
I knew that I wanted to start with large pegboard on one wall, so we took a trip to Lowe’s to see what we could find. In a matter of days, Micah’s workshop came together, and I was very pleased that we were able to keep the cost down to under $60 by using a bunch of thing we already had in our garage and in our house.
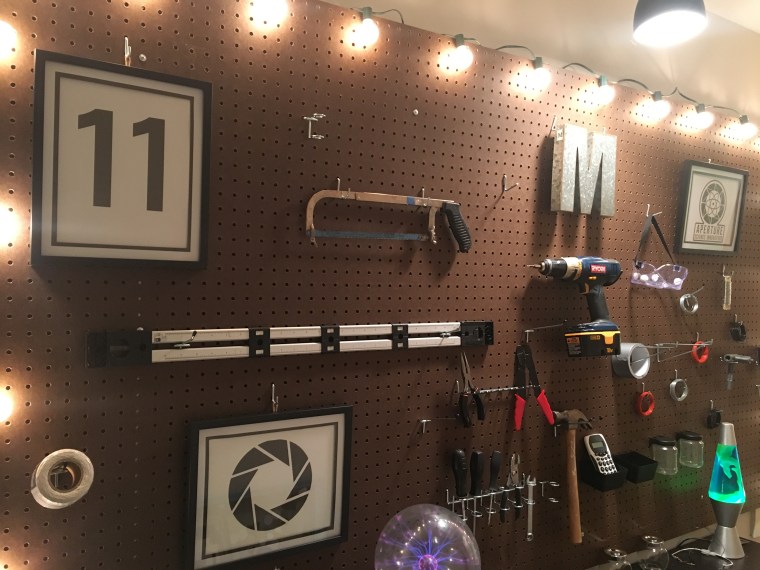
I put together this little video (below) of “The Making of Micah’s Tinkering Workshop” which includes a cost breakdown and a few fun moments with Micah too! Micah is thoroughly enjoying his “place to go build stuff.” The first day it was finished, he spent over 4 hours in there working on building a robotic arm that was given to him by a friend.
BEFORE
AFTER
We would love to hear from you! If you know of any cool building projects for kids or ideas of what Micah could do in his workshop, leave us a comment and let us know!
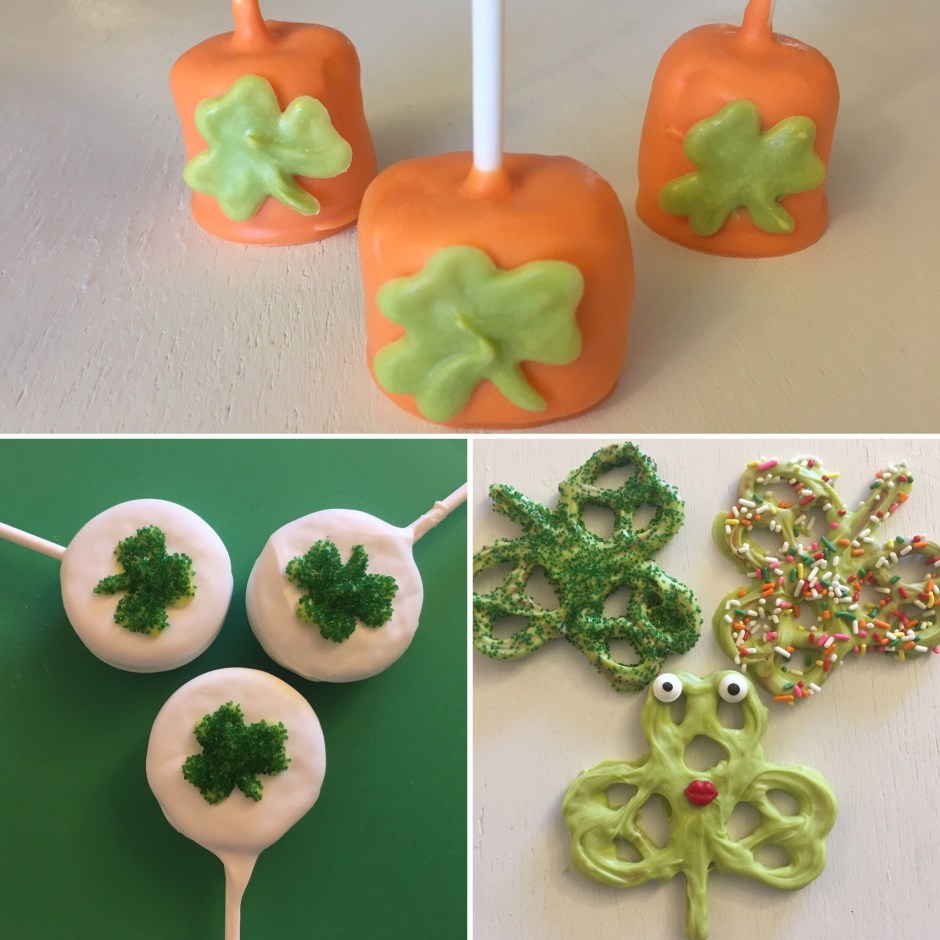
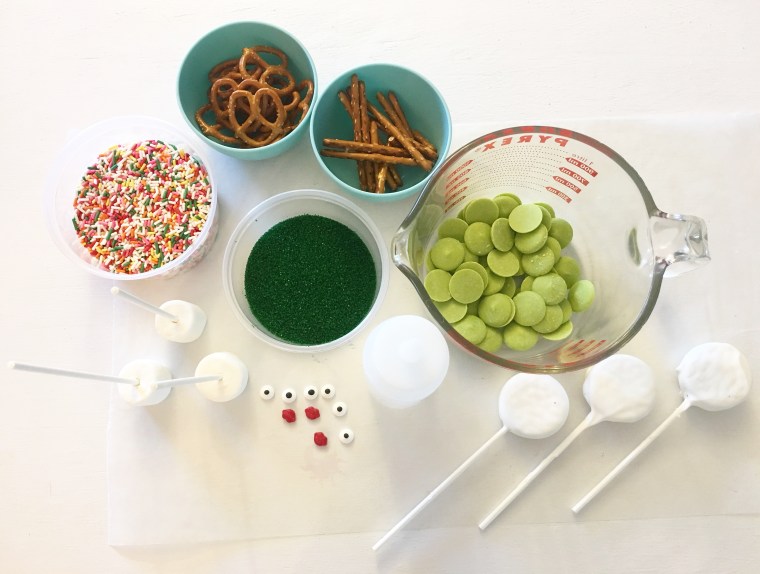
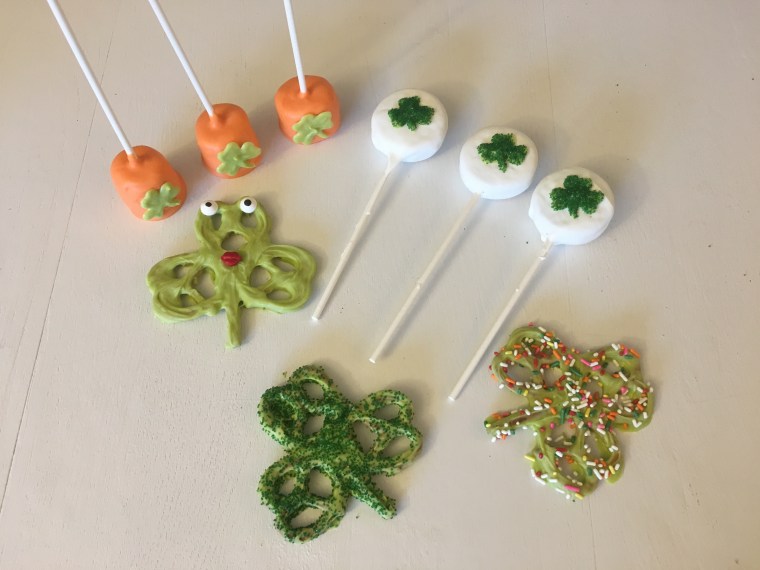
If you are planning on making some St. Patrick’s Day treats, here are 3 simple options for you… Pretzel Shamrocks, Shamrock Oreo Cookie Pops, and Shamrock Marshmallow Pops. All of these treats use Wilton’s Candy Melts, which you can find at crafts stores like Michael’s and JoAnn Fabrics. Watch my tutorial to learn how to make these tasty treats!
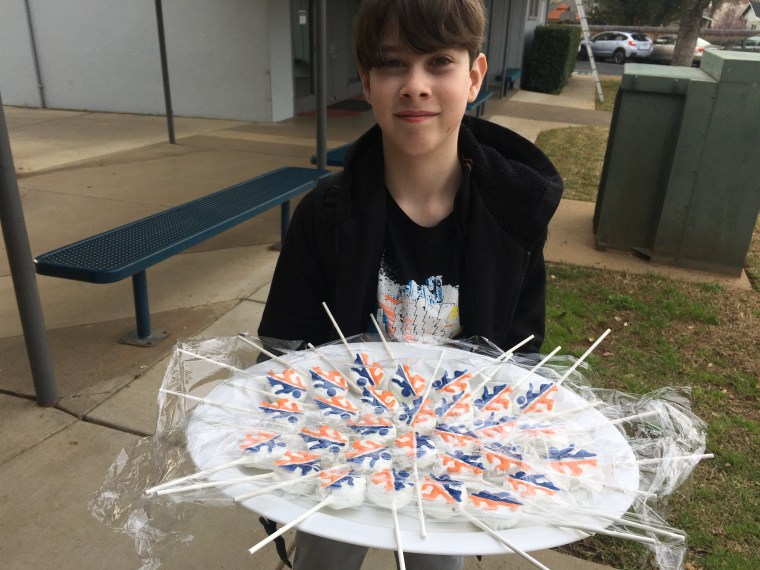
My son, Micah, is a huge fan of the video games Portal and Portal 2. So for his 11th birthday, he decided to have a Portal themed party. I wanted to send a special treat for Micah to bring to school on his big day, so I went to work making these super tasty Portal Cookie Pops. He was so thrilled to bring them to share with all of his friends! You can watch my tutorial above if you want to make some of your own Portal Cookie Pops!
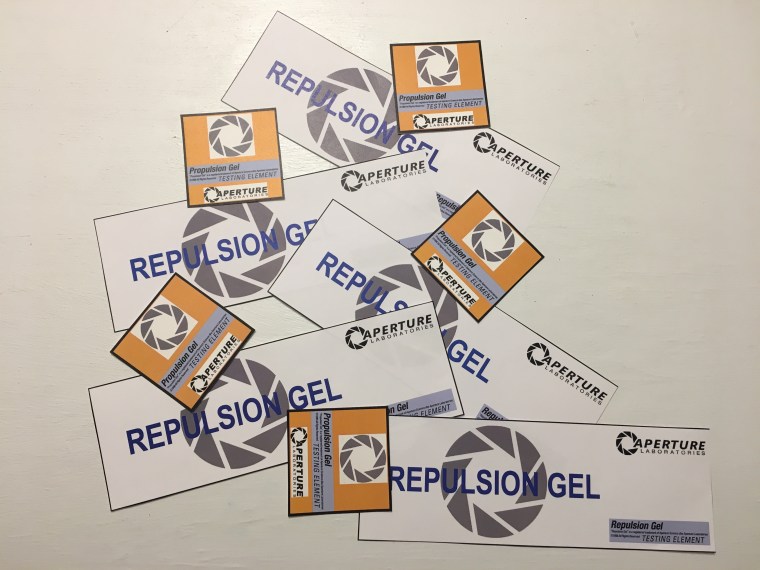
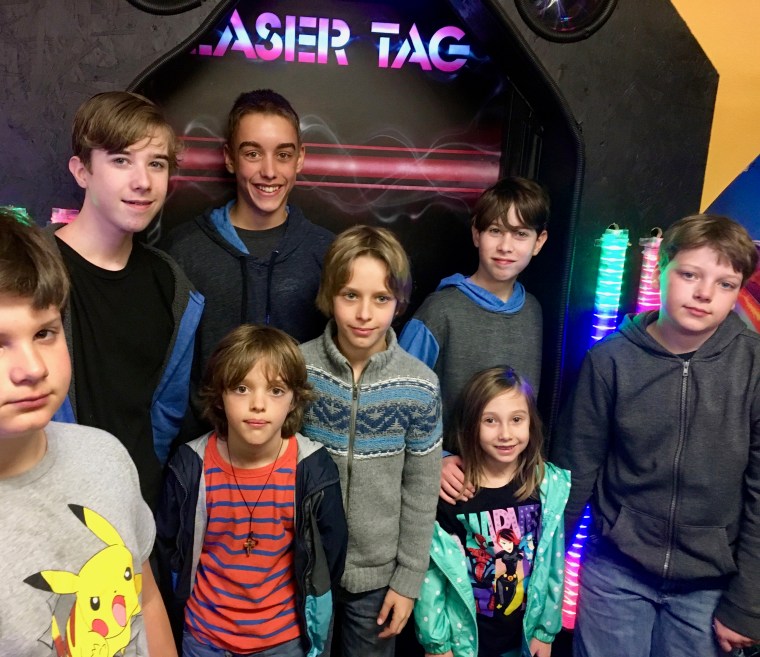
The party itself didn’t require a whole lot of preparation because Micah wanted to have it at a local “fun center” so that he and his buddies could play laser tag and ride go carts. I did want to add a couple of fun elements though, so I created these labels to make “Propulsion Gel” and “Repulsion Gel” to give to each of the kids.
According to theportalwiki.com , “Propulsion Gel is a bright orange substance that greatly reduces the friction of objects moving across the surface to which it is applied. Propulsion Gel also increases velocity, as objects covered in Propulsion Gel also have their friction reduced, causing them to slide around and be moved more easily. Repulsion Gel is a light blue substance that repels objects, and any player or object that hits a surface coated with Replusion Gel will bounce off.”
We used orange slime that we found in the dollar section at Target for the Propulsion Gel and blue Gatorades for the Repulsion Gel. It’s close to Easter, so we could only find orange slime in “carrot” containers. We transferred the slime into 4 0z extra small ziplock square containers with lids. These were the perfect size! I bought a 12 pack of 12 oz Gatorades, which were just the right amount for Micah’s party. #CommissionsEarned
Here are the printable templates I created for the Propulsion Gel and Repulsion Gel.
In Portal, there is also a specific cake that is talked about throughout the game. We definitely had to make a Real Portal Cake for Micah’s 11th birthday! Click here for my recent blogpost on How to Make a Real Portal Cake.
I would definitely have to say that Micah’s Portal Birthday Party was a huge success!
Portal and Portal 2 are popular video games. Truthfully, I’ve never played either of them, but according to my son they are the “best video games ever!” Here’s a bit about the games according to my son Micah…”In Portal, you are a test subject in a huge underground facility called Aperture Science that is supposedly under Michigan. You go through the tests (which are puzzles), solving them, and they get harder and harder along the way. At a certain point in the game, you acquire a tool which makes portals that objects and you yourself can pass through. This tool is official called the Aperture Science Handheld Portal Device, but is more commonly referred to as the Portal Gun.”
Micah’s 11 birthday was March 3rd and he wanted a Portal Themed Birthday Party! Micah chose to have his party at a Fun Center in our city so that we could play laser tag and ride go carts, so the cake became the main thing that represented the Portal Theme.
In Portal there is a gigantic robot named GLaDOS at the center of the facility. GLaDOS runs everything and she promises you cake at the end of the test, but it turns out that she’s lying. She actually puts you on a platform headed towards a fire pit. In the game, there is a message written on a wall in a secret room, written by a scientist that says, “the cake is a lie!” Here are a couple of images from the actual game.
This was a super fun cake to create! You can watch my tutorial to learn how to make one of your own. This cake is definitely NOT a lie! I used Pillsbury devil’s food cake mix, Hershey’s chocolate bars for the chocolate shavings on the outside of the cake, vanilla and chocolate frosting, cherry gumballs, and a white candle. #CommissionsEarned
For more Portal Birthday Party fun, check out my blogpost from the party. You’ll find links to free printables for “repulsion gel” and “propulsion gel” as well as an awesome tutorial on how to make Portal Cookie Pops.
For another fun teen boy birthday party idea check out my latest blogpost:
What is St. Patrick’s Day really all about? Is it about leprechauns, shamrocks, rainbows, and pots of gold? Who was St. Patrick anyway? Every year, on March 17th we celebrate St. Patrick’s Day, but as I began thinking about some fun things I could do with my kids this year, I realized that I didn’t know anything about St. Patrick. So I did a little reading, and what I discovered gave me a whole new perspective on this Irish holiday.
Patrick (Patricius) was a teenage boy living in Britain when he was kidnapped and put on a slave ship headed for Ireland. He spent 6 years as a slave and it was in those years that he encountered God and received Jesus Christ as his Savior. One day he had a dream that he was going back to his own country and he heard a voice say, “see your ship is ready.” Patrick escaped and returned home. Sometime later, he had another dream that he was to return to Ireland as a missionary.
St. Patrick was a man of God who brought the gospel of Jesus Christ to a very Pagan country. In 432 A.D. he built the first Christian church in Ireland. Over the course of 29 years, St. Patrick planted 300 churches and baptized over 120,000 Irishmen.
According to legend, he used the three leaf clover to explain the trinity. He used the one plant with three leaves as an analogy for the Father, Son, and Holy Spirit.
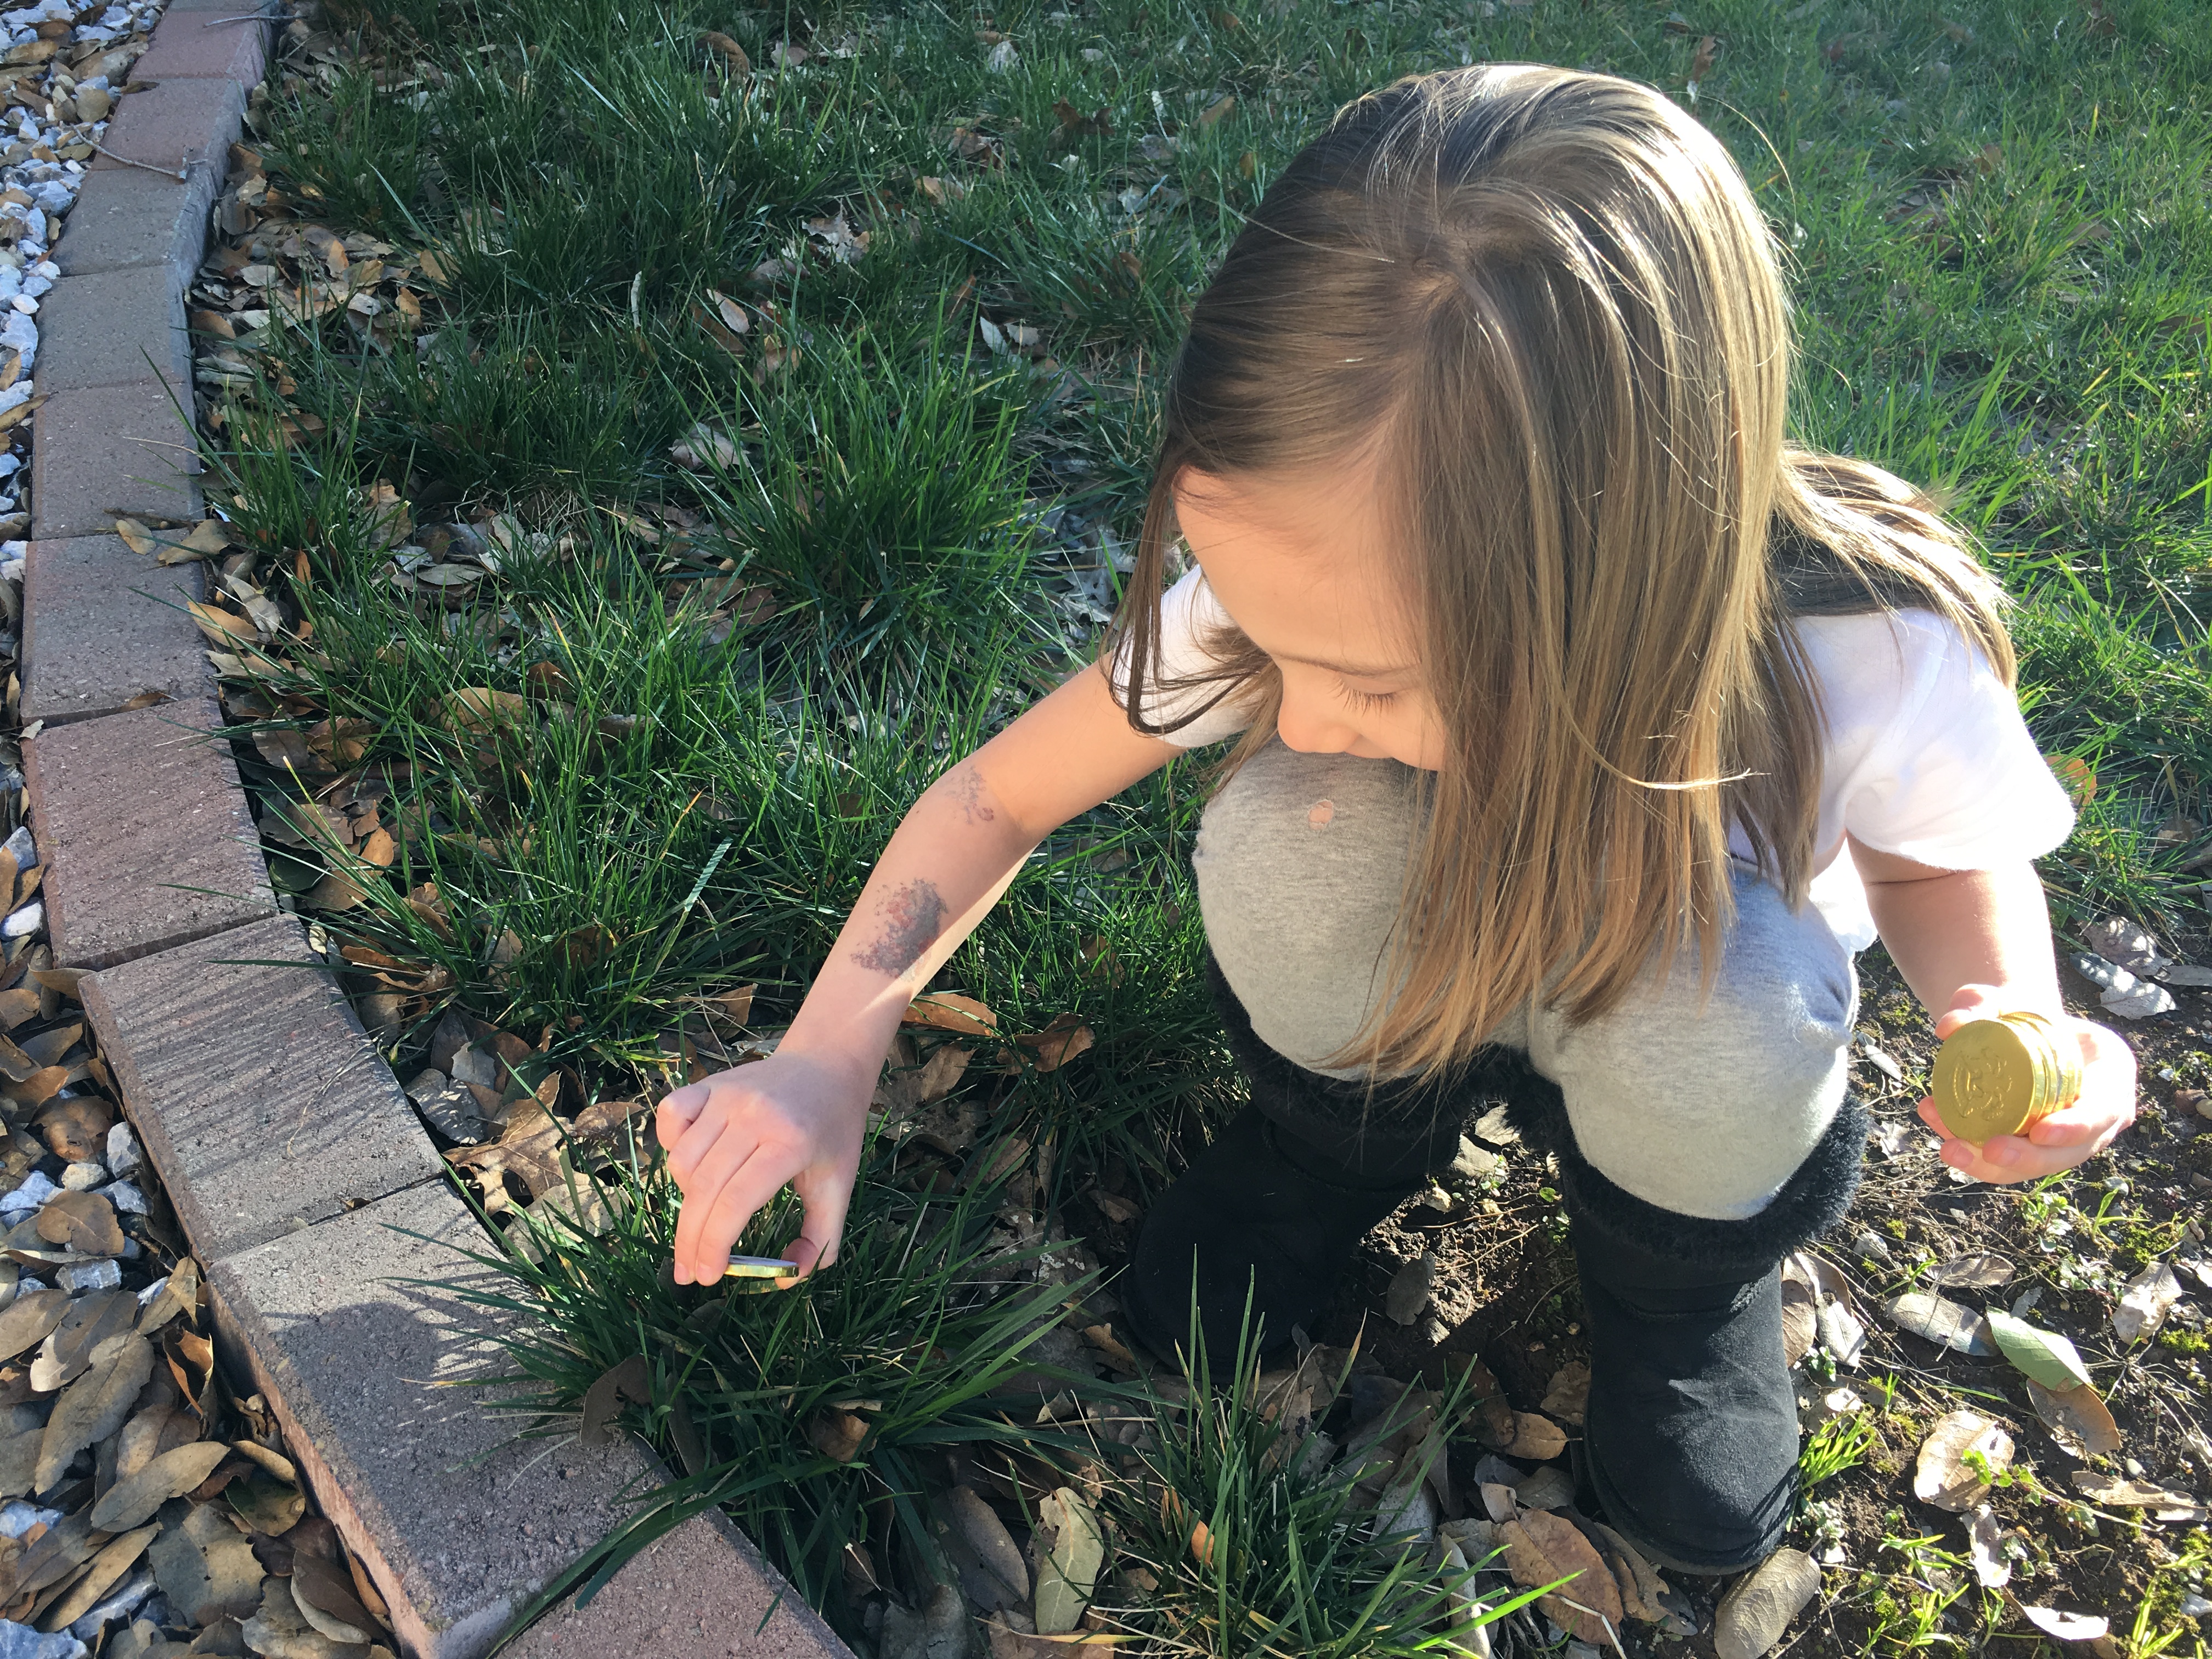
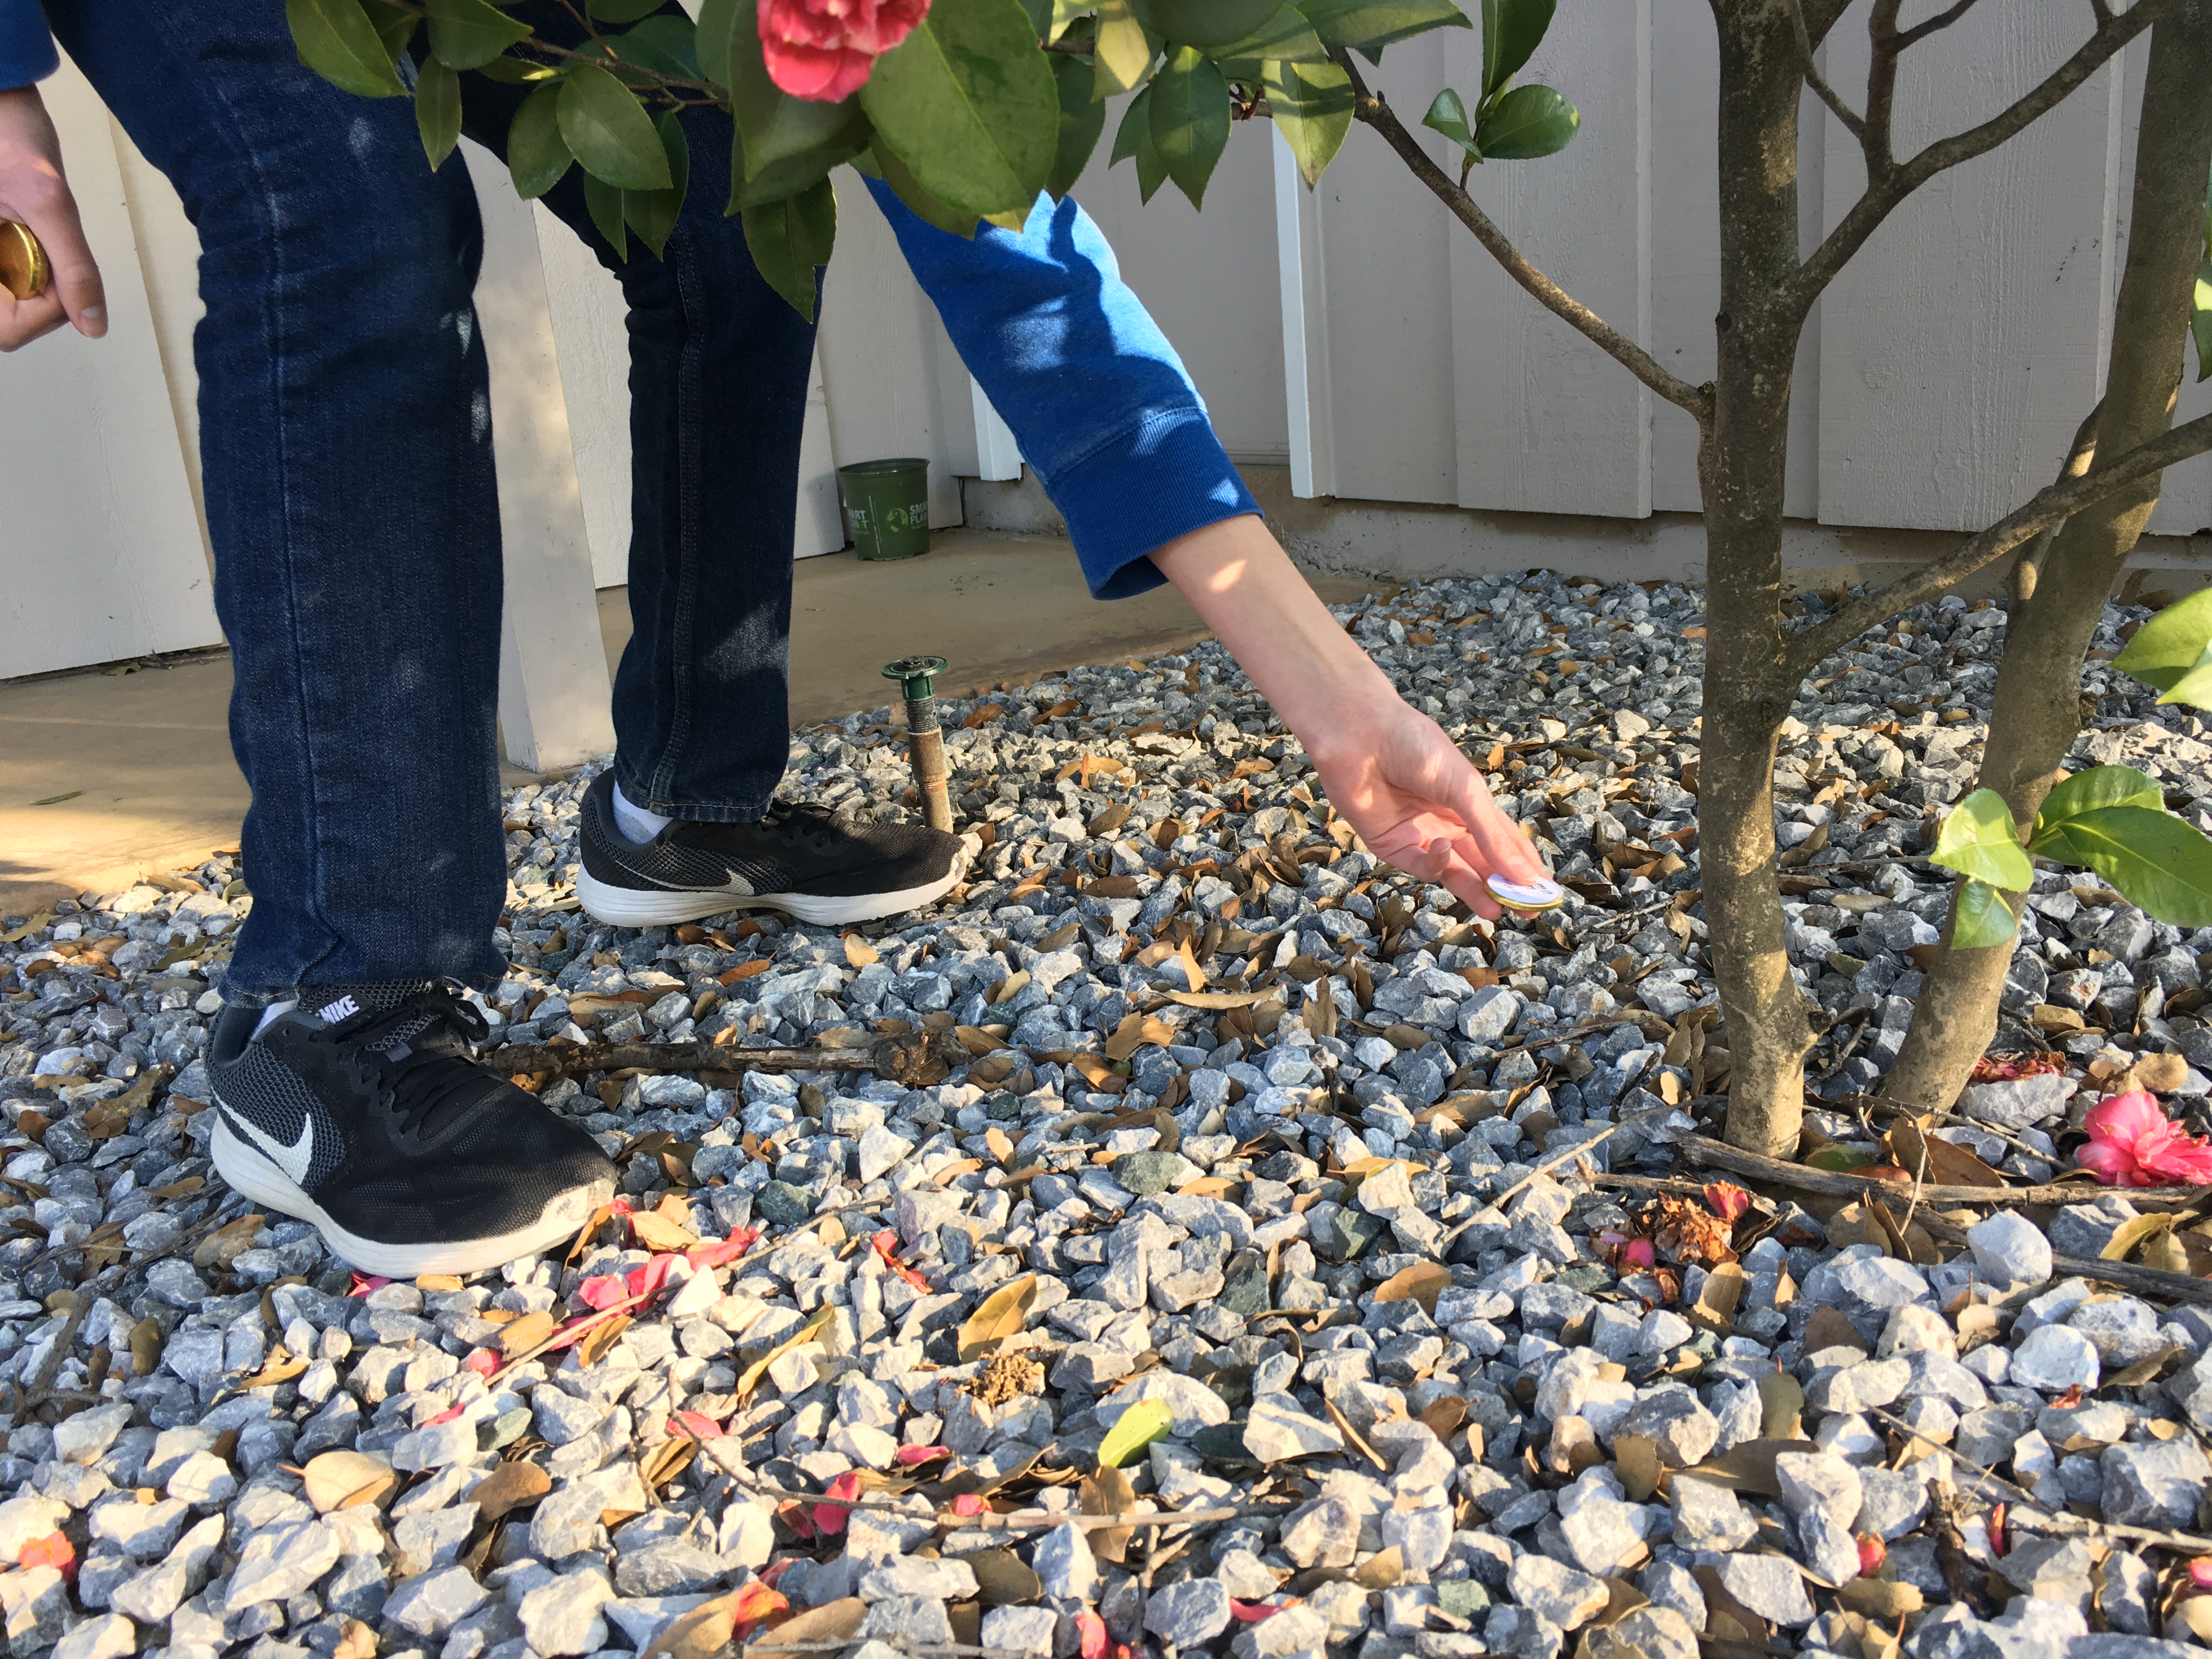
With all of this in mind, I had an idea for a St. Patrick’s Day Treasure Hunt for children that would highlight the God who St. Patrick lived for. I’m all about good old fashioned holiday fun! We always wear green on St. Patrick’s Day so we don’t get pinched 🙂 and for the last couple of years, we have celebrated by making these Rainbow Fruit Kabobs. But I love an opportunity to teach my children about their identity in Christ. I love to create fun experiences for them to learn Biblical truths. So I think we have started a new St. Patrick’s day tradition in our house!
Here’s How the Treasure Hunt Works:
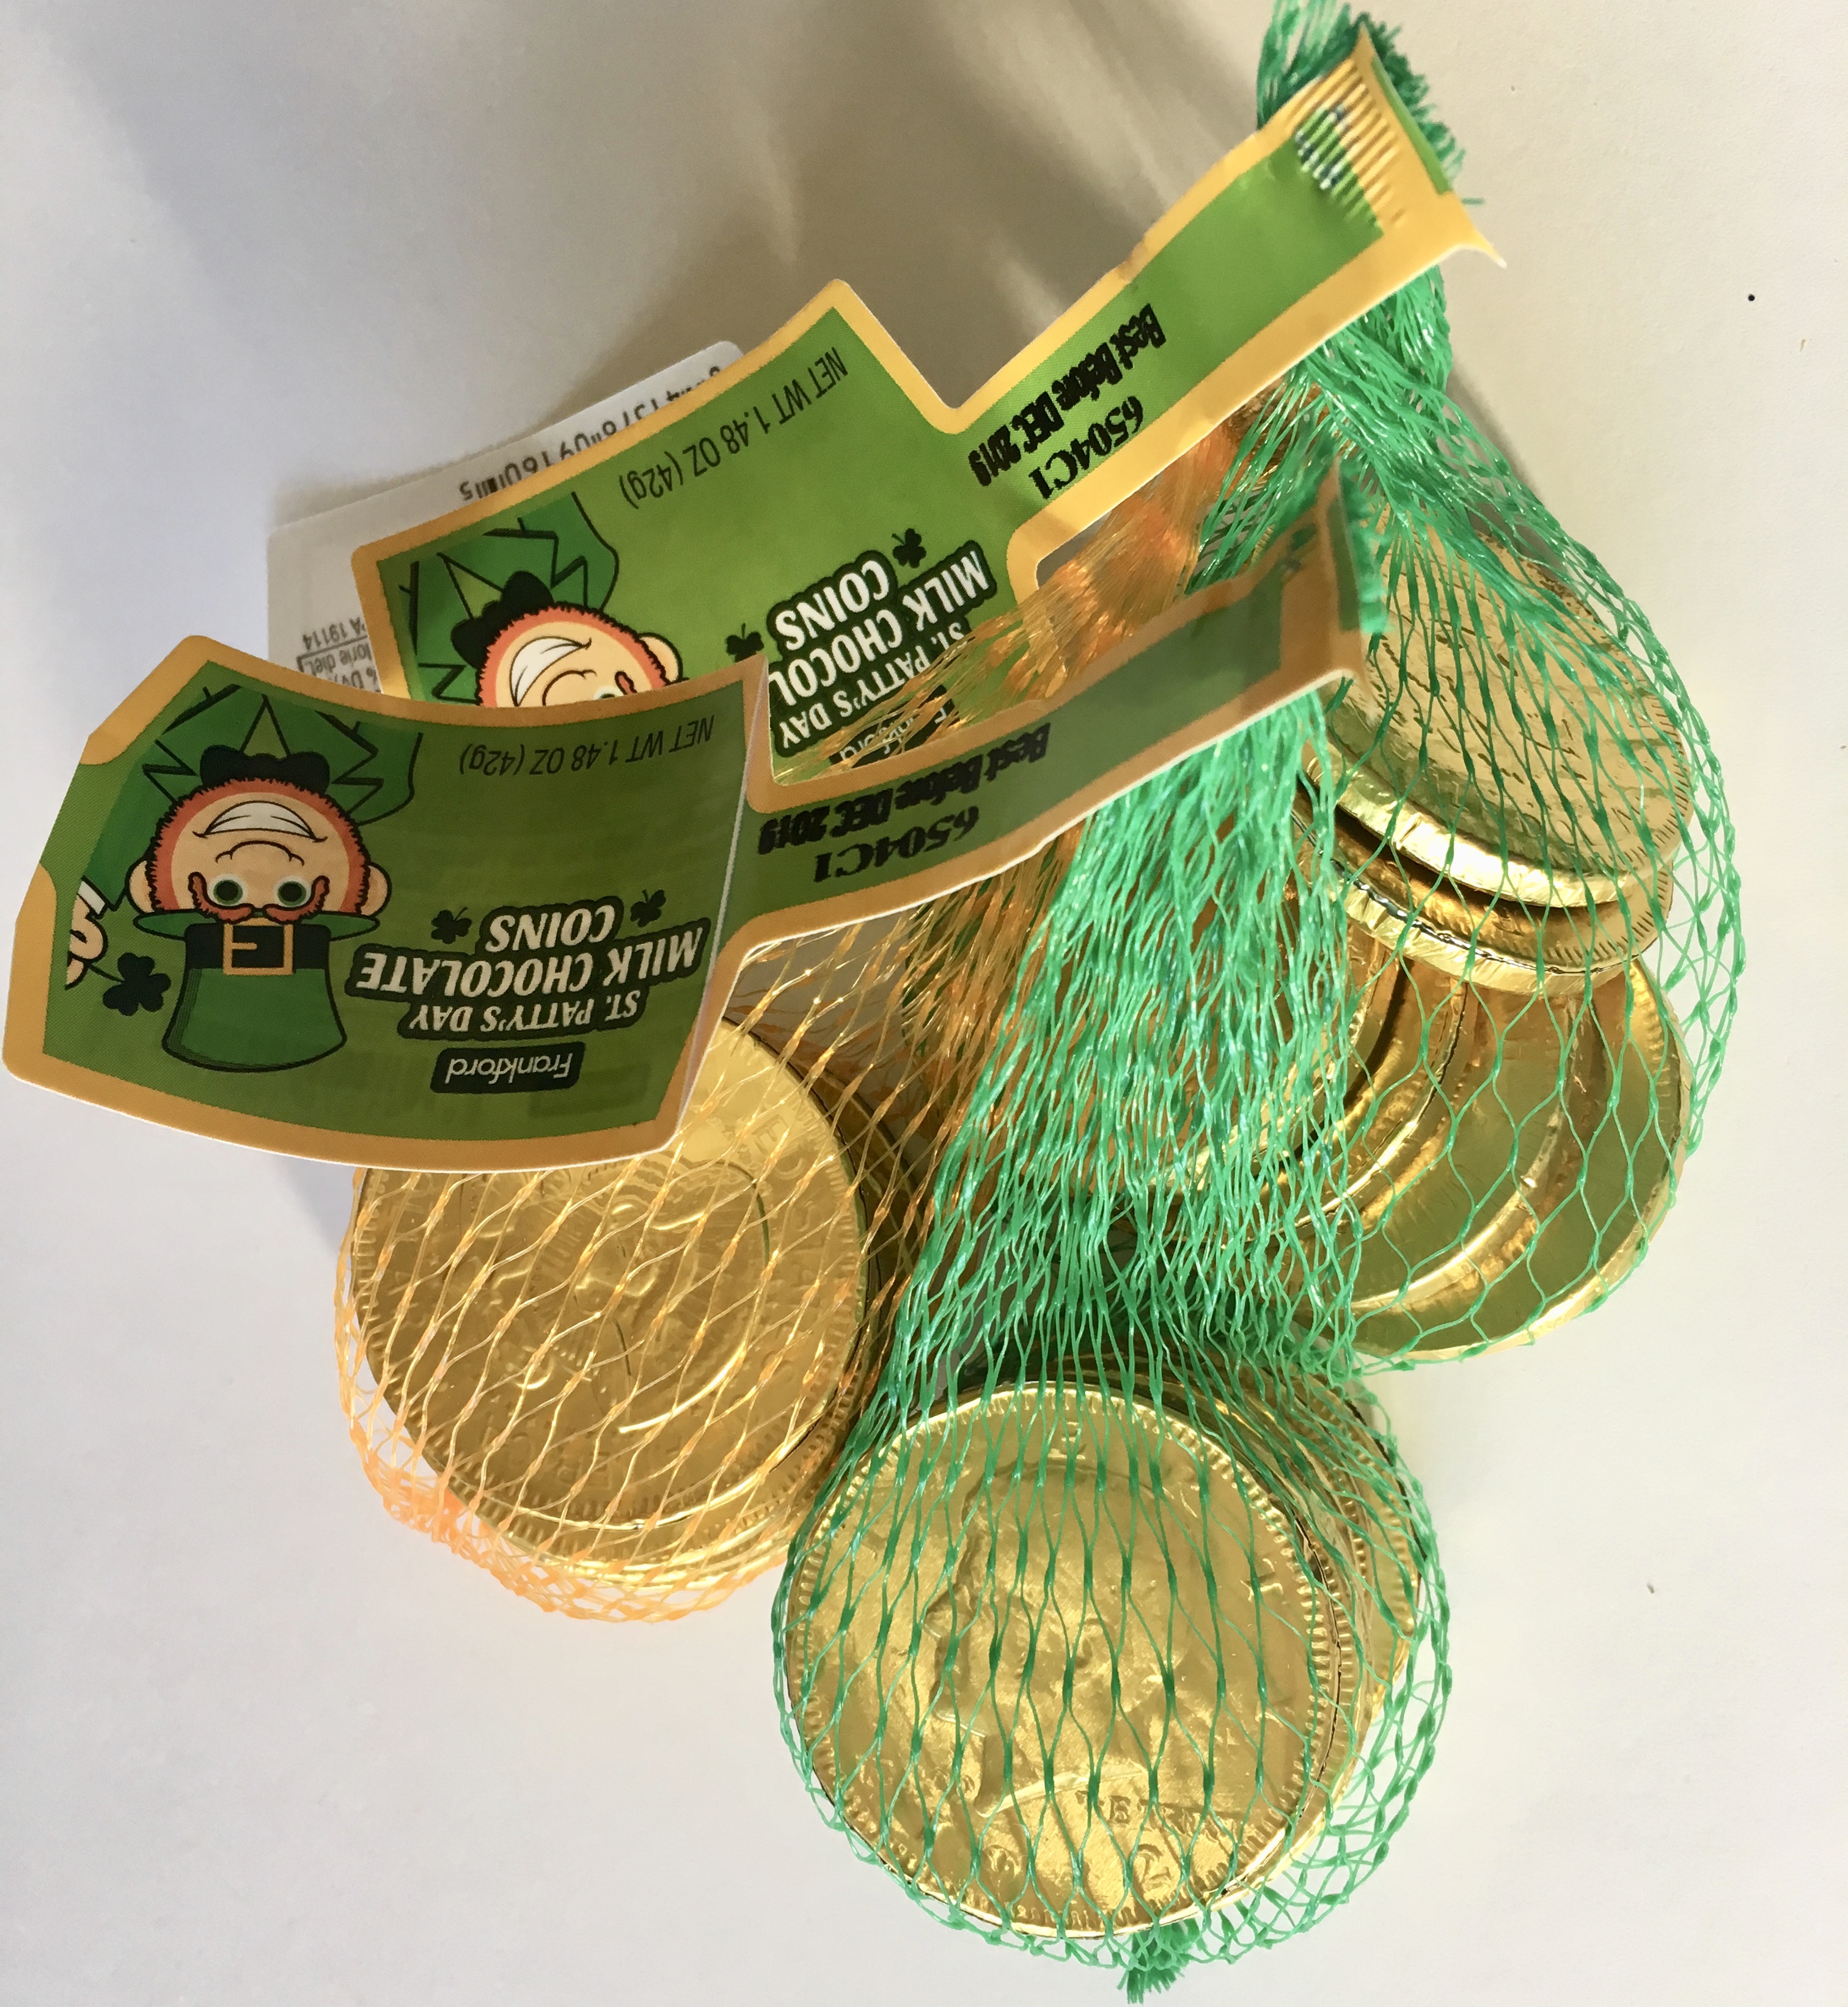
Print out the free templates I have included (at the end of this post) for the Gold Coins and the Bible Verse Cards. Cut out the circles and use a glue stick to attach them to the chocolate coins. I found my coins in the dollar section at Target, but you can purchase them online as well. Cut out the Scripture Cards and have them ready. Hide your gold coins out in your yard (or inside if it’s a rainy day). Gather your kids and tell them that you are sending them on a treasure hunt. Have them each collect the same number of gold coins. Bring them inside, sit down together at the table and lay out the scripture cards. Now your kids can match up their coins with the cards that have the same scripture references. Have your kids take turns reading the verses that they found. This fun experience will give kids the opportunity to discover the treasure of who they are in Christ. As you wrap up your time together indulge in a little chocolatey goodness! #CommisssionsEarned
Here are some pictures and a video of our family enjoying our St. Patrick’s Day Treasure Hunt.


 AFTER
AFTER