Planning birthday parties for my kids is one of my absolute favorite things about being a mom. I love brainstorming ideas with them, scrolling Pinterest for decorations, games, food, and party tips, and ultimately, bringing their visions to life in a way that makes them feel loved, known, and celebrated. I usually start months ahead of time and I thoroughly enjoy the process from start to finish.
But I realize that not everyone thrives in the same way, and what is life giving to me, may not be life giving to the next person. That is one of the reasons I love blogging. I get messages from moms, thanking me for putting party ideas together so that all they have to do is purchase similar items, download my free printables, and set up their child’s party without all of the legwork. It brings me so much joy to know that I am making life easier for those who do not enjoy the creative process of party planning in the same way that I do.
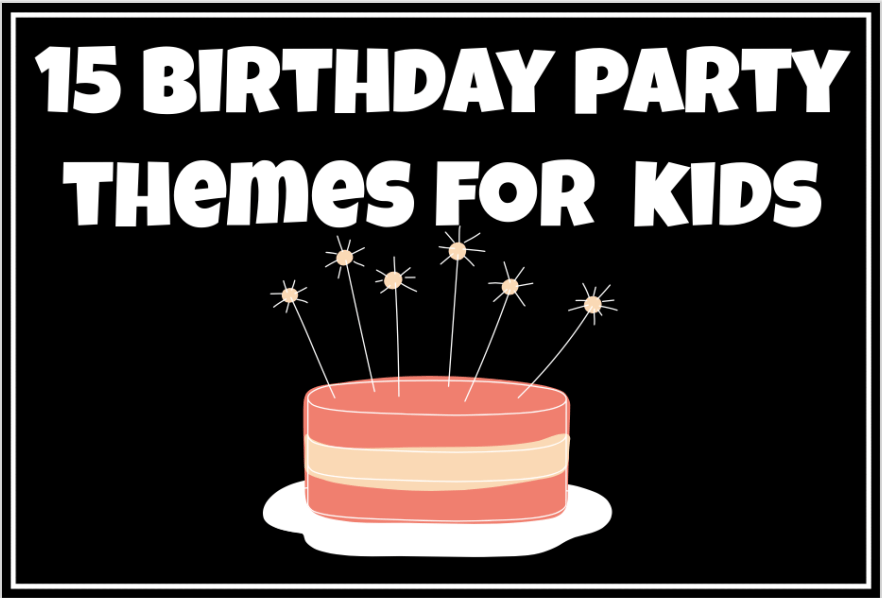
Over the years, I have posted at least 15 different party themes, and I thought it was time to do a blogpost compiling all of these ideas into one for parents who are not sure what theme to go with and would like to browse through all of the parties I have put together over the years. Here is a list of all of the parties on my blog so that you can have quick links to get to each of them to see if any spark interest in your child. Happy party planning!
I hope that this post provided some fun inspiration for your upcoming events. Leave a comment to let me know what your next party theme is going to be!
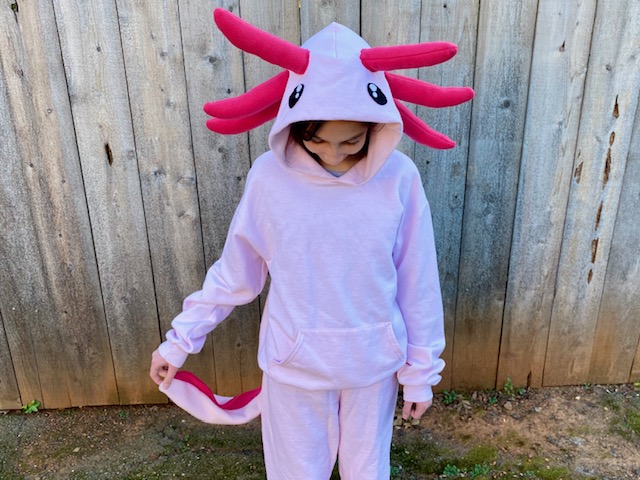
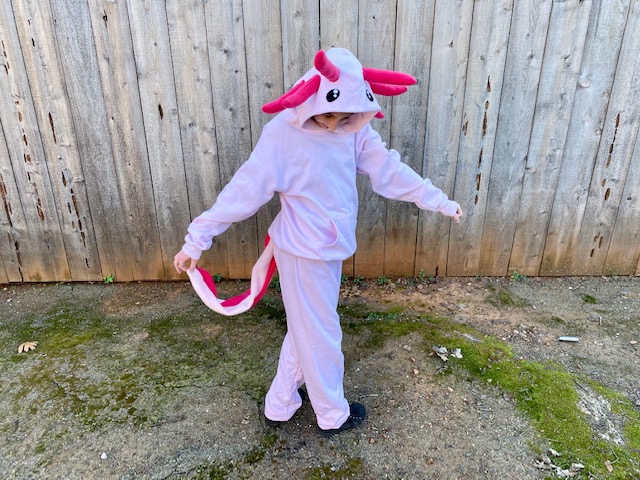
Axolotls are the most adorable little creatures. These endangered amphibians are in the salamander family and have gained popularity recently due to being added to Minecraft. My daughter has been a fan of axolotls for the last several years, and she even has a big pink stuffed animal axolotl that her brother got her for her 11th birthday.
My daughter tends to pick the most obscure costumes that cannot be found anywhere in stores. Last Halloween she asked me to make her Appa from Avatar The Last Airbender. For “dress like your favorite book character” (Spirit Day) at school, she chose to be Kinkajou, the pink and yellow dragon from Wings of Fire, and this year, for Halloween, she wanted to be an axolotl.
I began to brainstorm about how to make her dream a reality, and started out by purchasing a pair of pink joggers and a matching hoodie to use as the base. I have found that felt is an inexpensive and easy material to use for creating costumes, and I already had some dark pink felt left over from the dragon wings I recently made, so I used it for the external gills and to add some details to the tail. #CommissionsEarned
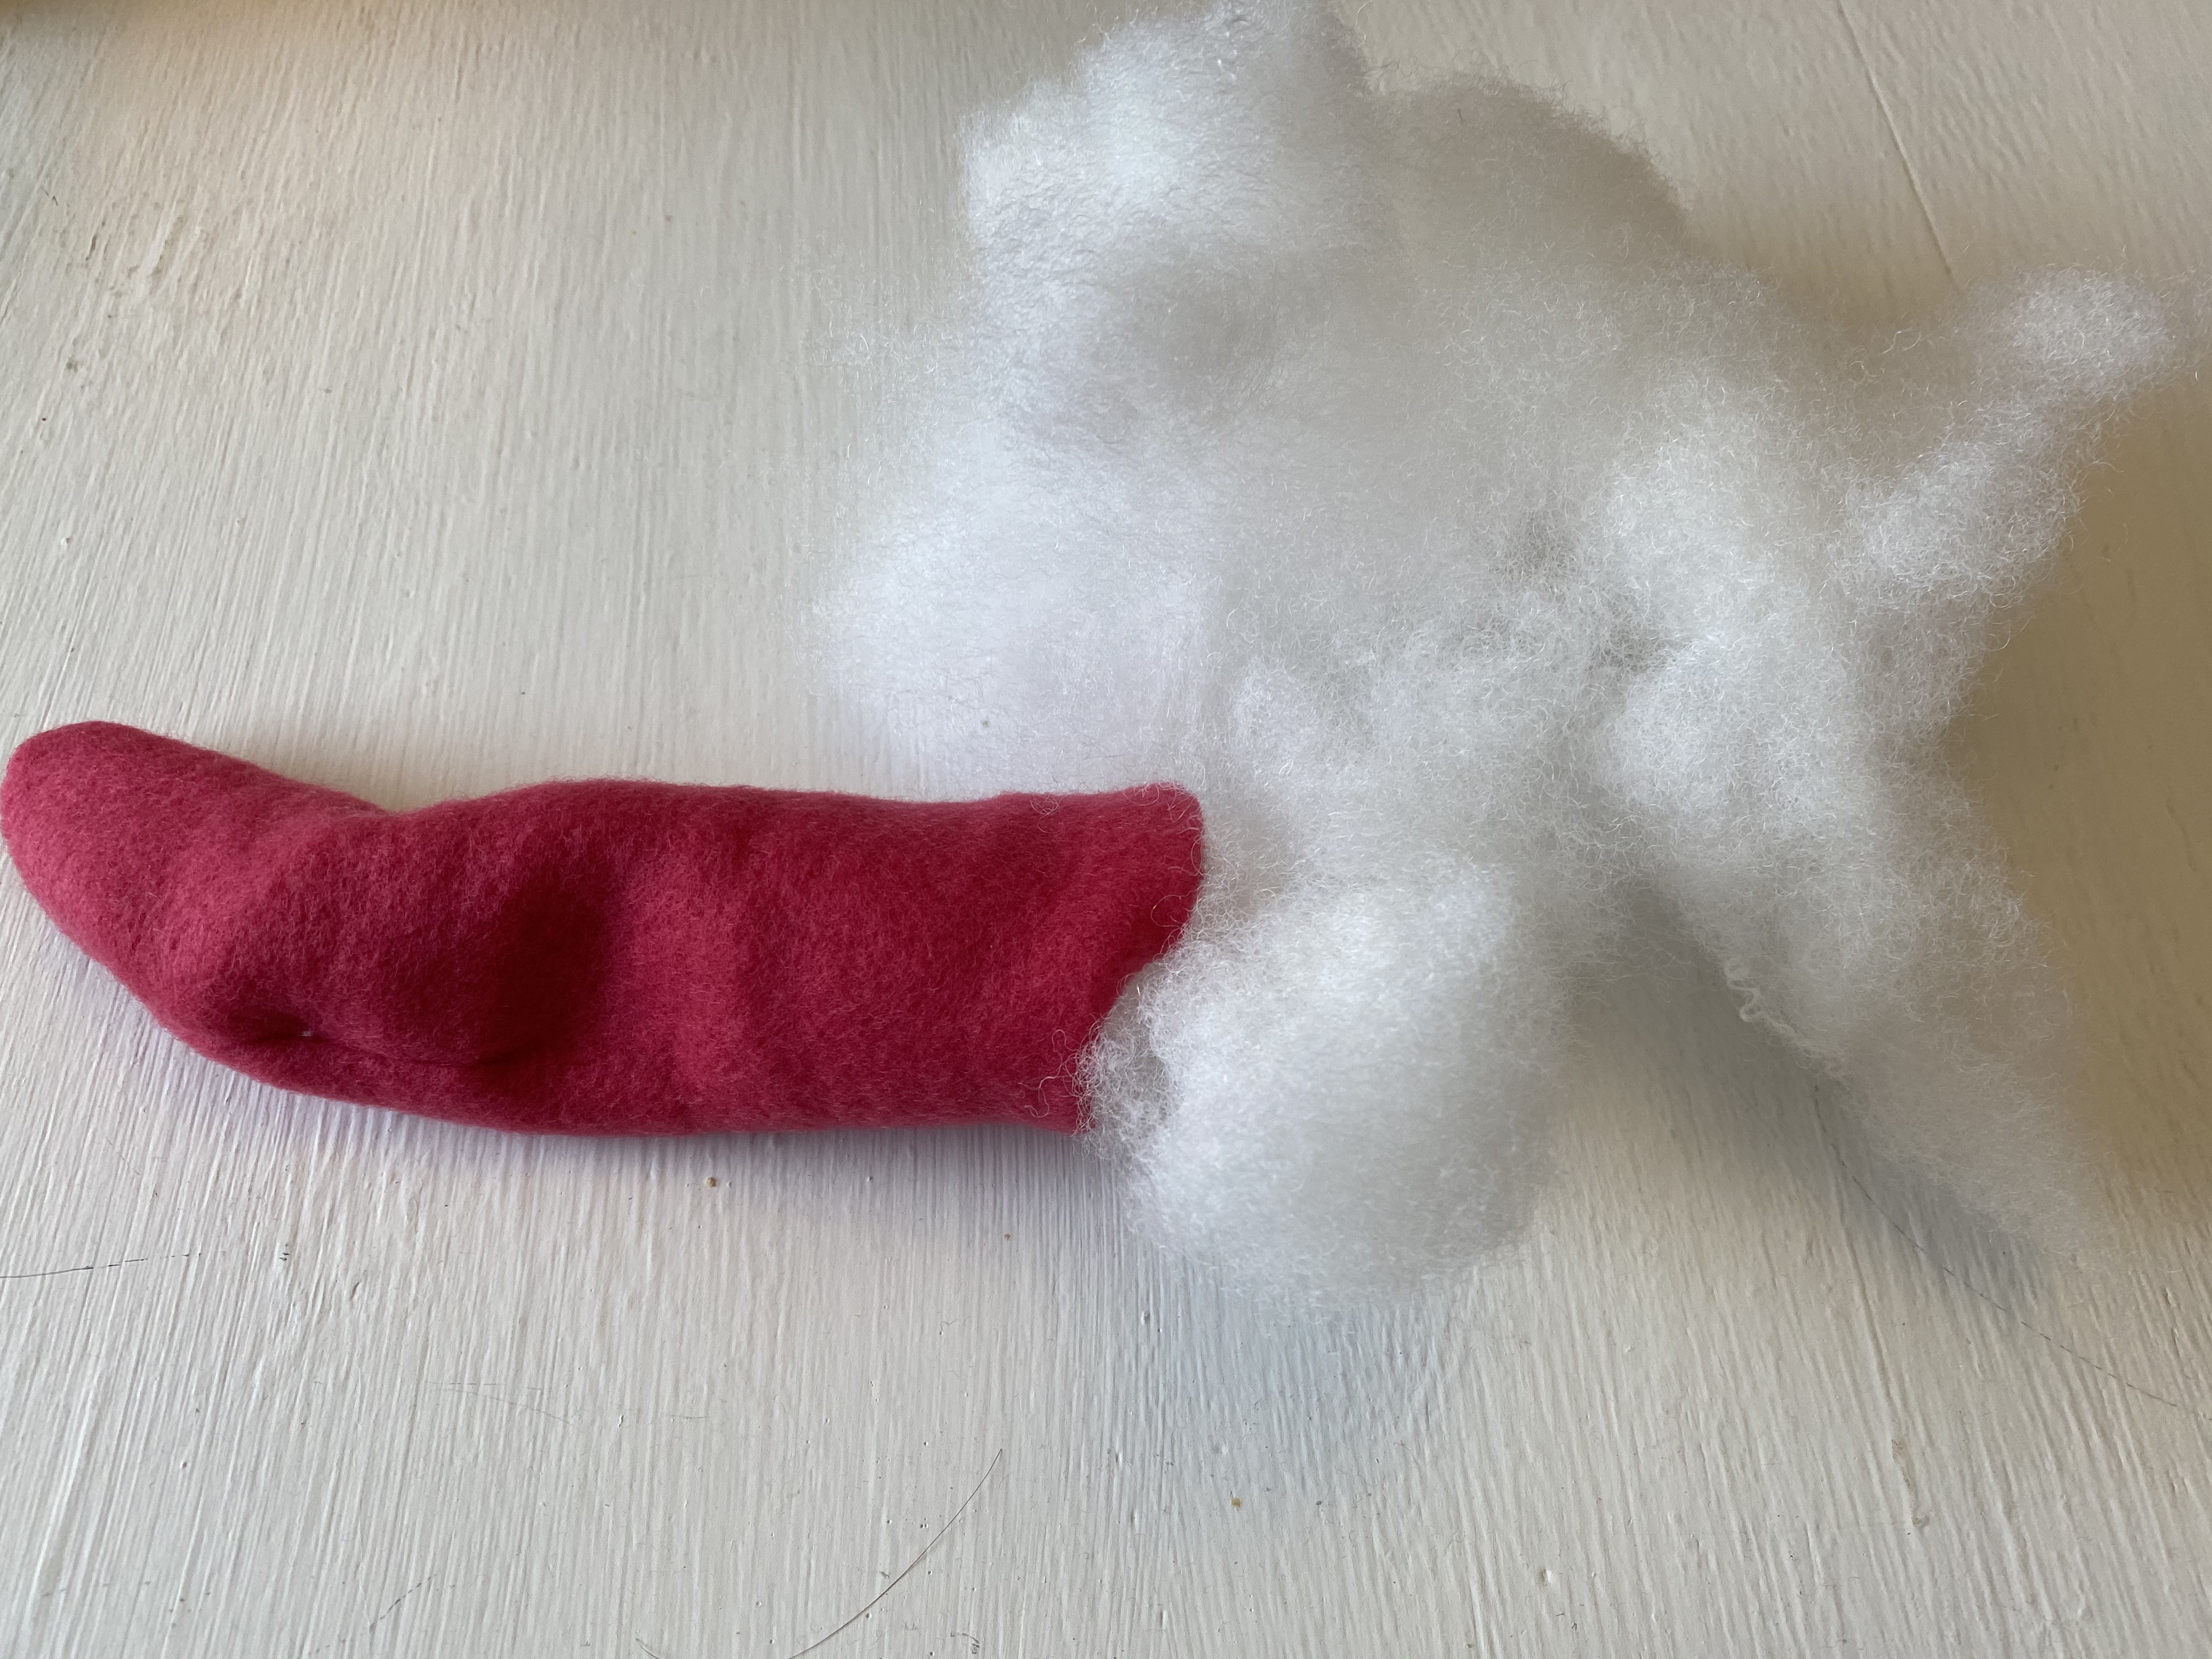
I used a piece of poster board to make a template for the gills that measured 2 inches wide and 6.5 inches long. Fold the material and cut around three sides, leaving the fold uncut. Repeat so you have 6 dark pink gills. Sew around the cut edges, turn right side out, and fill with batting. Have your child try on the hoodie to determine the placement of the eyes and gills. I made my gills 3/4 inches apart. Pin the gills in place and then one by one, hand stitch them to the hood. You may have to adjust the batting to get them to stand up. (tip: overfill the gills with batting so that you have enough to move down to the base once they are sewn to the hood)
Cut two oval shaped eyes out of black felt and some white highlights to make the eyes even cuter. Clear Gel Tacky Glue worked great for attaching the highlights to the eyes and for securing the eyes to the hoodie. Axolotl’s eyes are wide set, so be sure to leave a good amount of space between the eyes. I put a piece of poster board inside of the hood to catch any glue that may have leaked through.
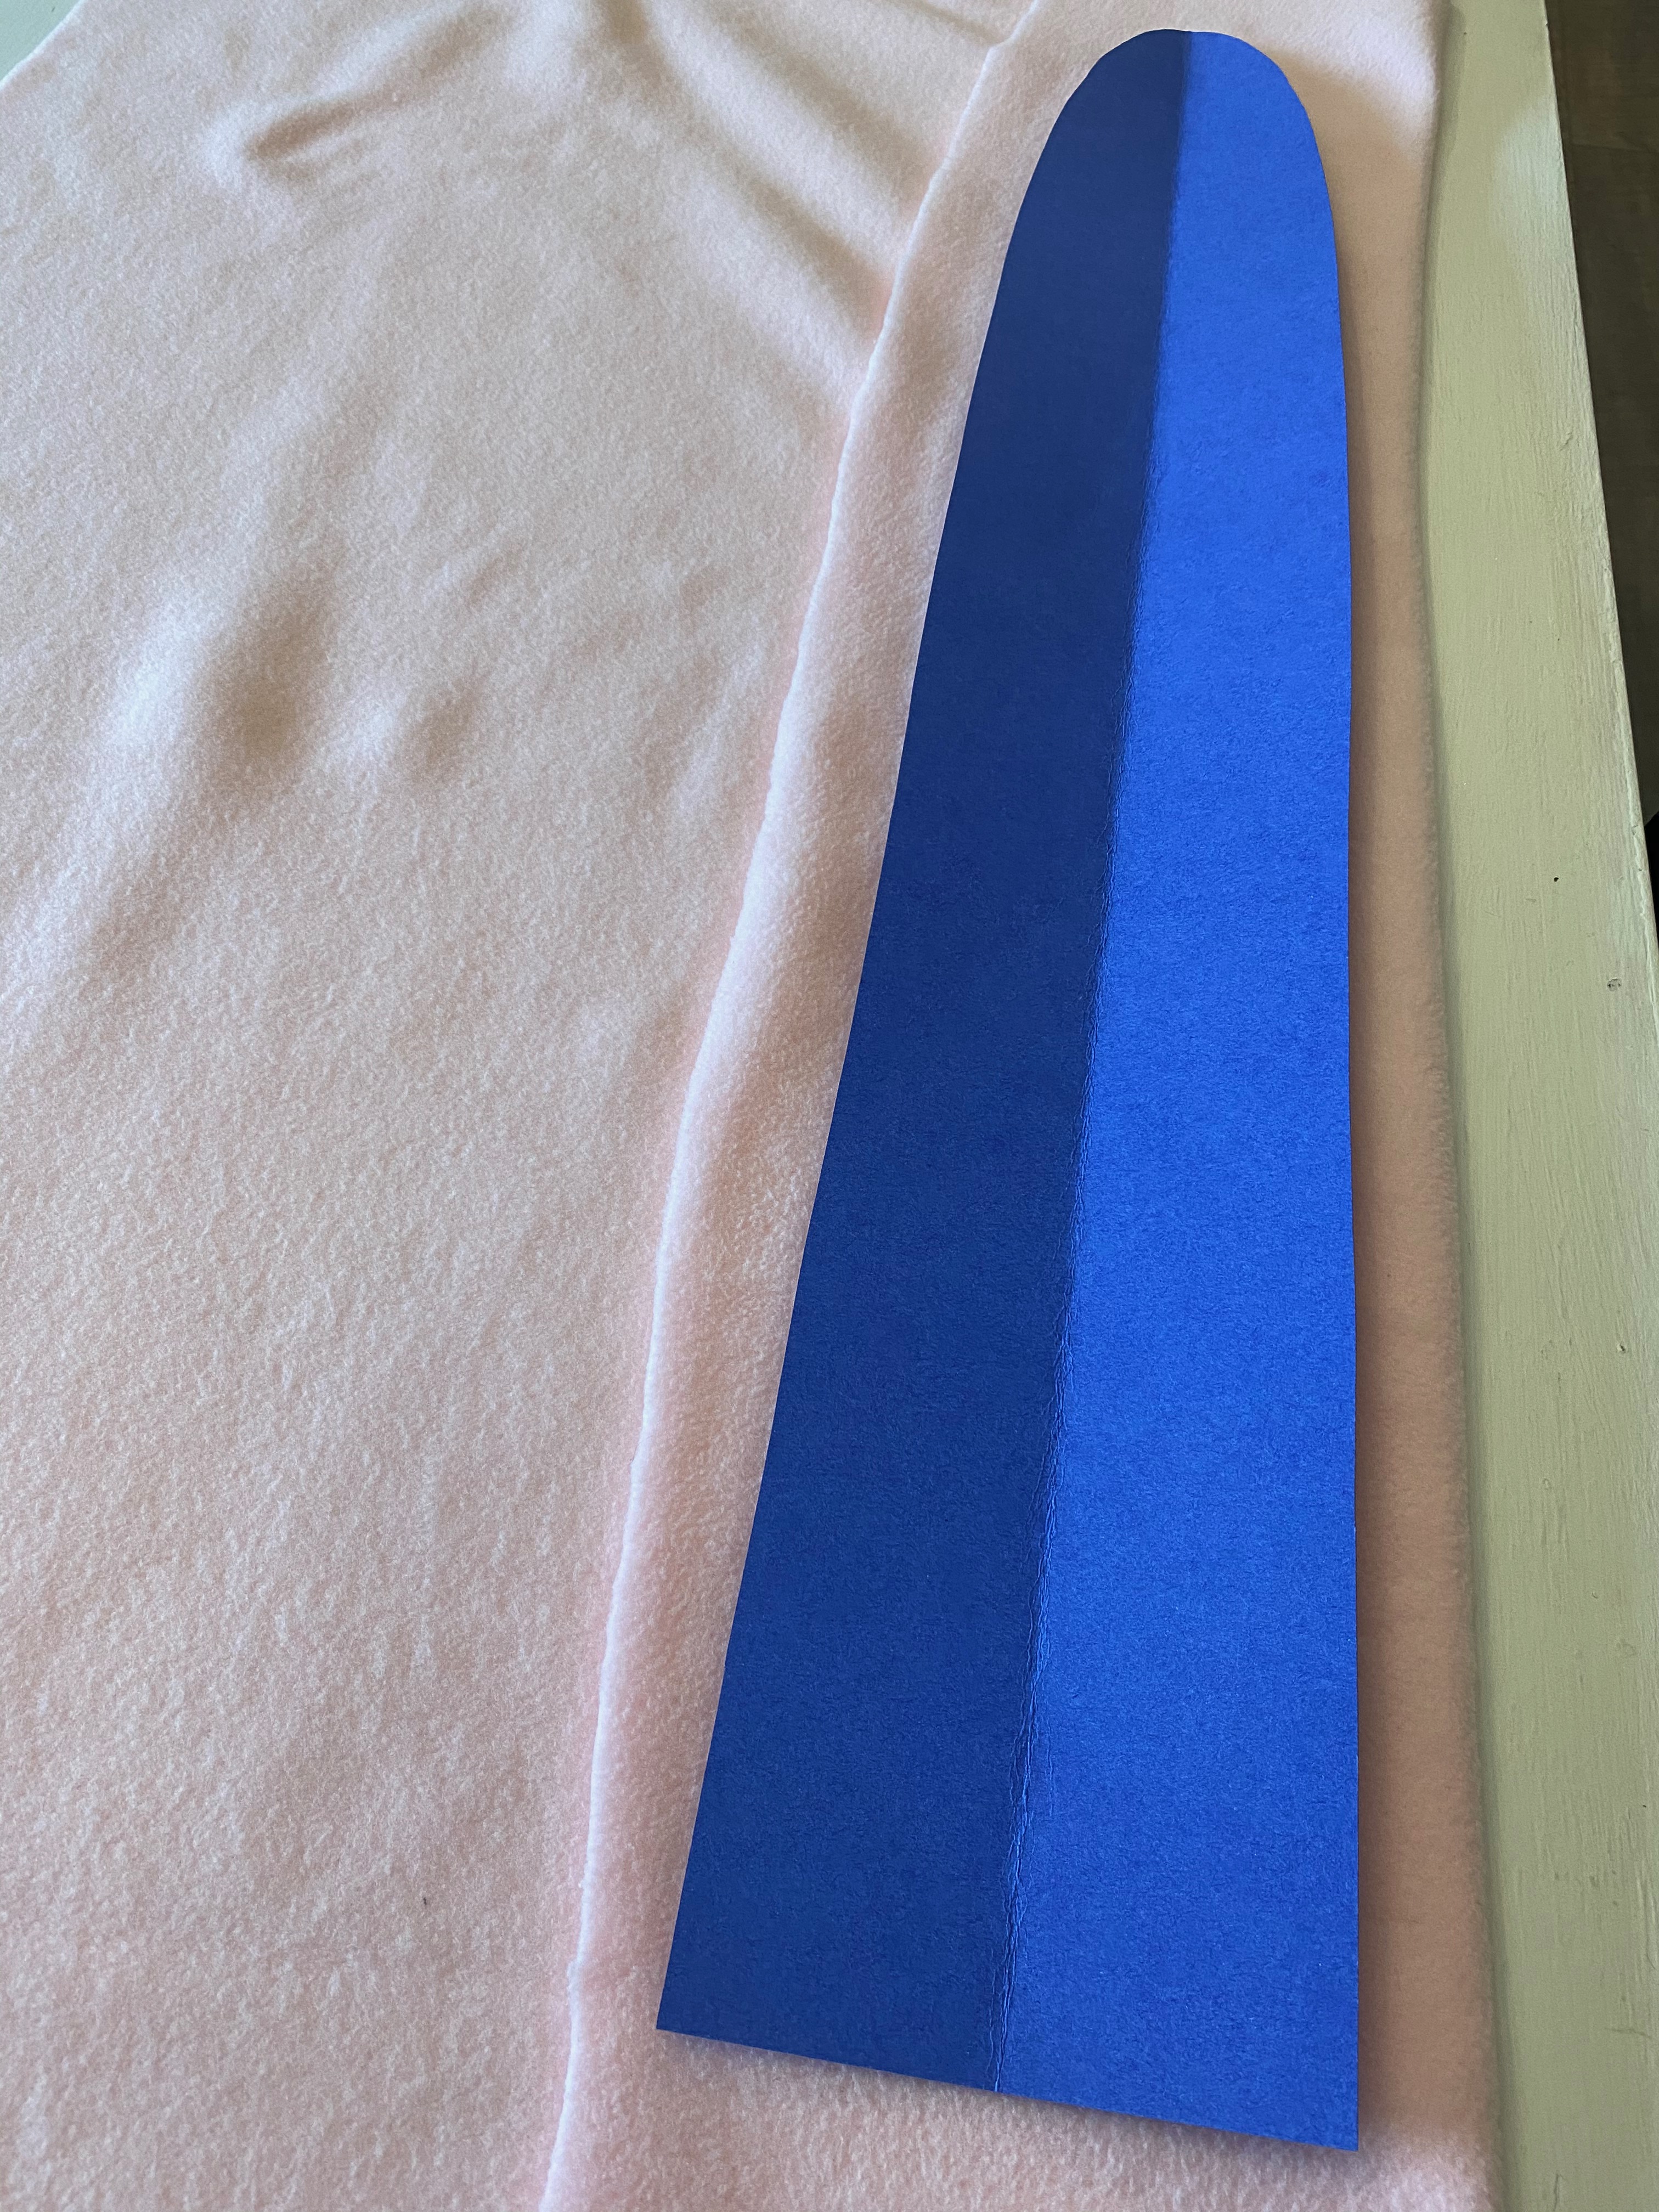
For the tail, I made another template that measured 4.5″ wide by 27.5″ long. I cut two pieces out of light pink felt. Then I cut some dark pink accents. Sew the accent pieces together to make them thicker. Place both accents in between the two light pink tail pieces and sew together. Now turn right side out and your tail is complete.
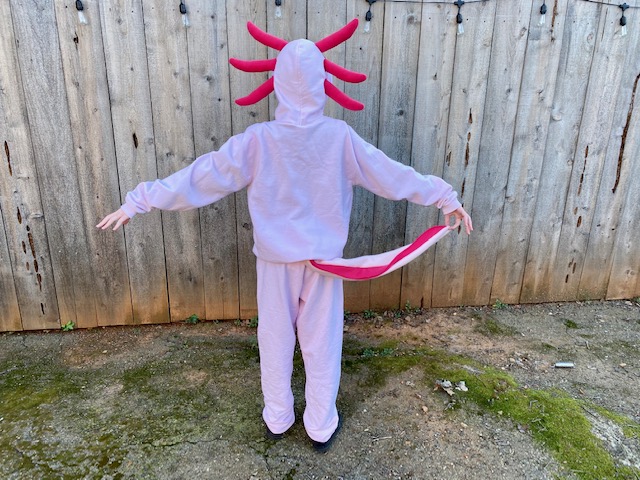
My daughter wanted to be able to wear the pink joggers again, so we safety pinned the tail to the back of the pants.
I was pretty pleased with the way the whole axolotl costume came together. It was super comfy and I love that it is something that she can wear again even when it’s not Halloween.
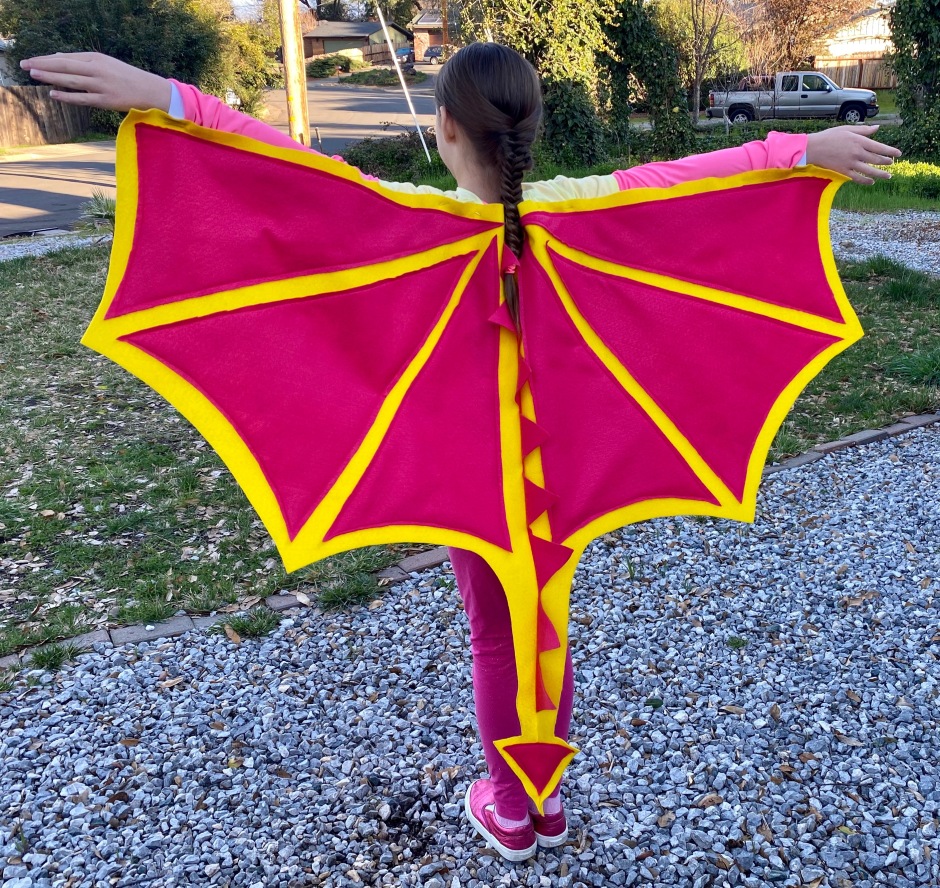
My 11 year old daughter LOVES the Wings of Fire book series. She even chose Wings of Fire as the theme for her most recent birthday party and we had so much fun planning dragon themed food, activities, and decorations. She also got the opportunity to dress up like her favorite book character at school during Spirit Week, and of course, she asked me to make her a Kinkajou (from Wings of Fire) costume.
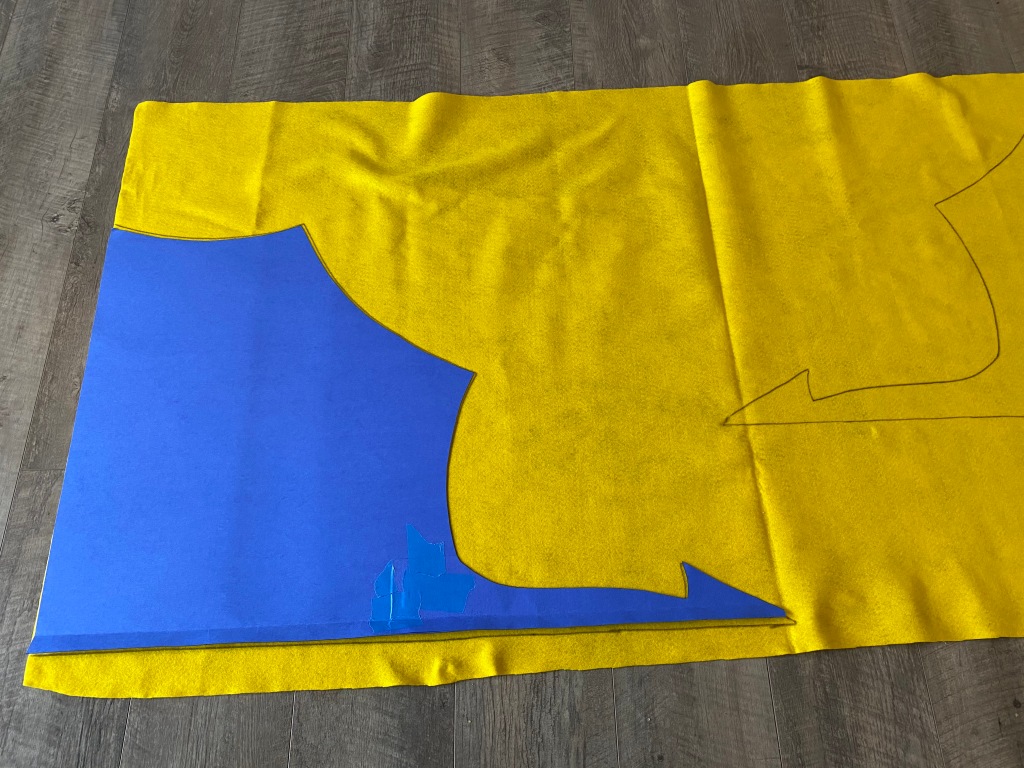
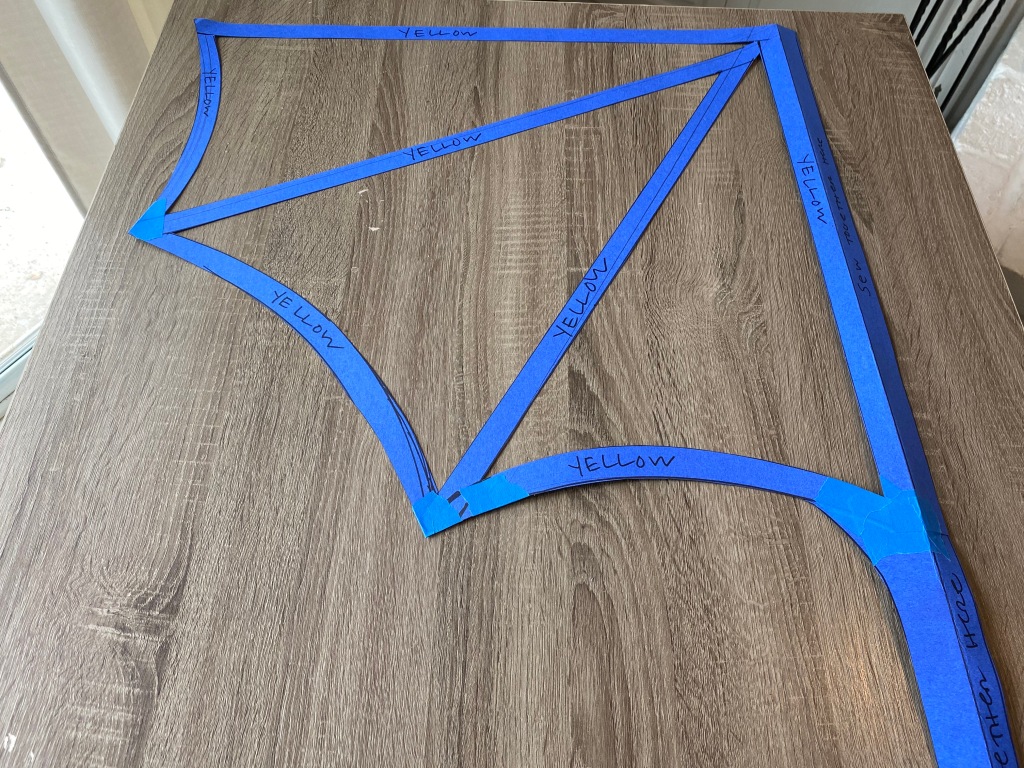
If I’m being honest, I’m not great with a sewing machine, but I can get by, so I set out to make a pair of dragon wings out of pink and yellow felt for my girl. I used a couple of pieces of poster board for the template and tailored it to fit my daughter, who is about 4 ft 10 inches tall. If you are making your own set of dragon wings for your favorite Wings of Fire fan, you’ll also want to purchase some dark pink thread to match the felt, as well as some elastic to attach to the arm portion of the costume. #CommissionsEarned
I have included a detailed pic of my template with the measurements I used to create the wings.
Start by tracing your wings onto the yellow felt. I traced one side up and then turned it over to trace the other side.
Cut out your left and right wings.
Now modify your template to include the pink panels. My triangles left a 1 inch border around and a 2 inch border along the middle to account for the fold that you will sew together to create the middle with the spikes and tail.
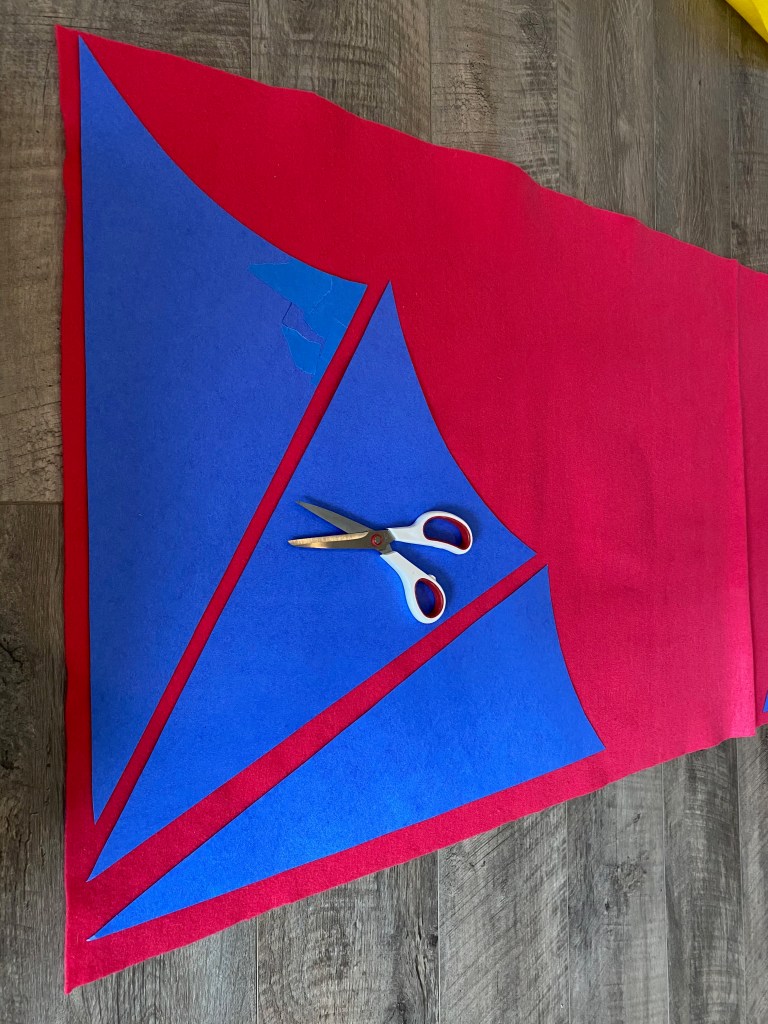
Use your triangles as templates to cut your pink pieces.
Trace and cut a second set of pink panels for the other wing.
Cut your spikes out of the pink felt and set aside for later.
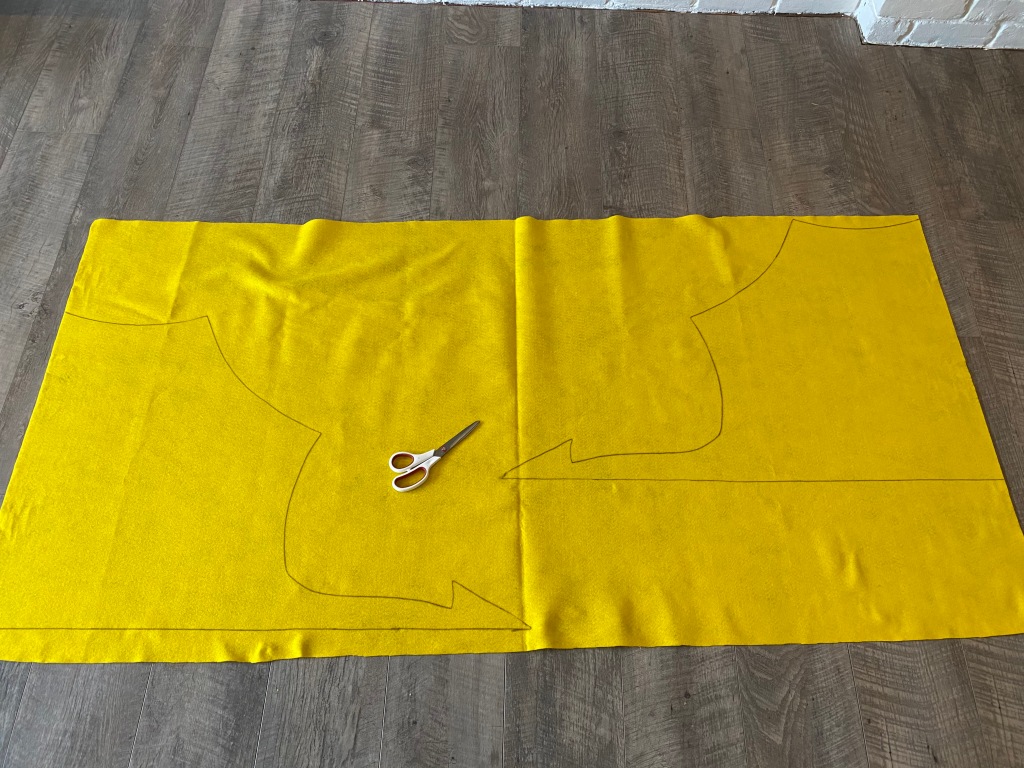
Once all of your pieces are cut out, you can assemble your wings. Simply lay the pink pieces over the yellow and pin them in place.
Using your matching pink thread, sew the pink triangular panels to the yellow wings, one wing at a time.
Pin your spikes, folding the wings over each other so that the spikes are in the middle.
Sew a straight stitch all the way along, connecting your two wings with the spikes inside.
Add a little pink triangle to the end of the tail for the finishing touch.
Sew some elastic loops to the ends of your wings that will fit around your child’s wrists. You can also add some elastic to the shoulder area. We chose to safety pin the wings along my daughter’s shoulders and neck to a yellow t-shirt, which worked really well.
My attempt at adding some sparkly pink eye shadow around my daughter’s eyes, made her look more like she had pink eye than dragon eyes, haha, but all in all, she was thrilled to show up to school for Spirit Day as Kinkajou, the pink and yellow dragon from her favorite book series.
For more Wings of Fire fun, check out my daughter’s 11th birthday party post:
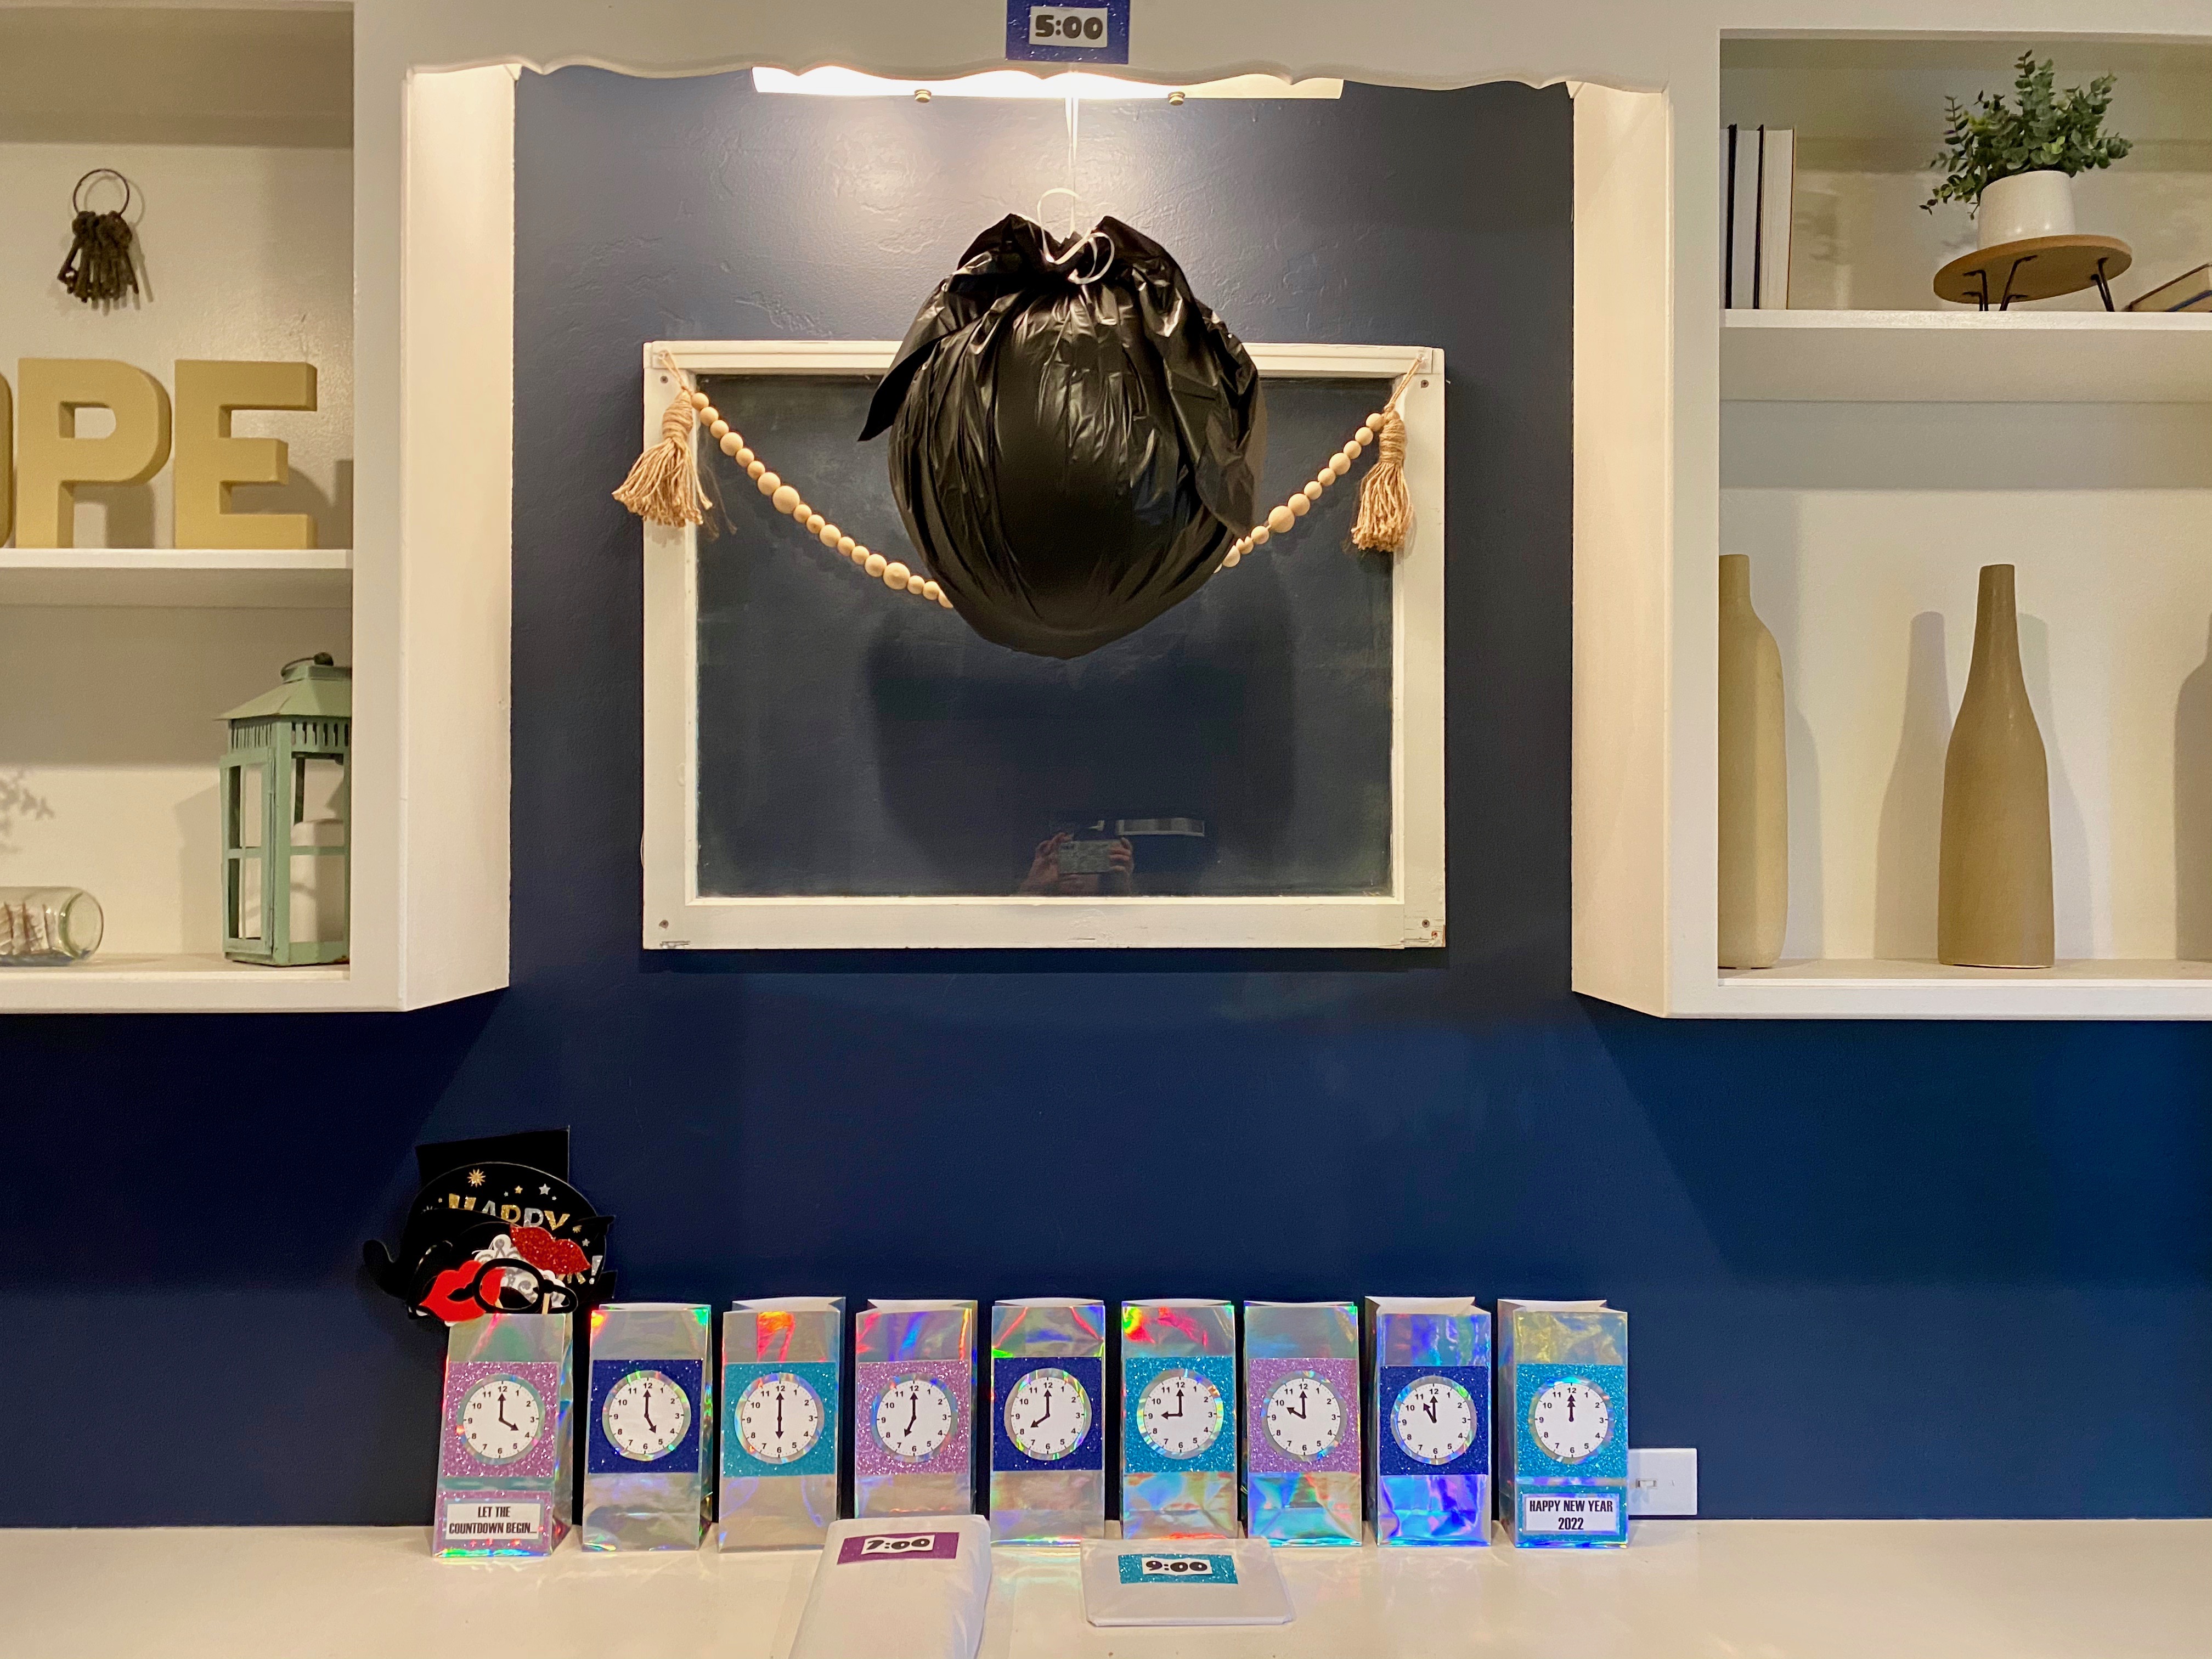
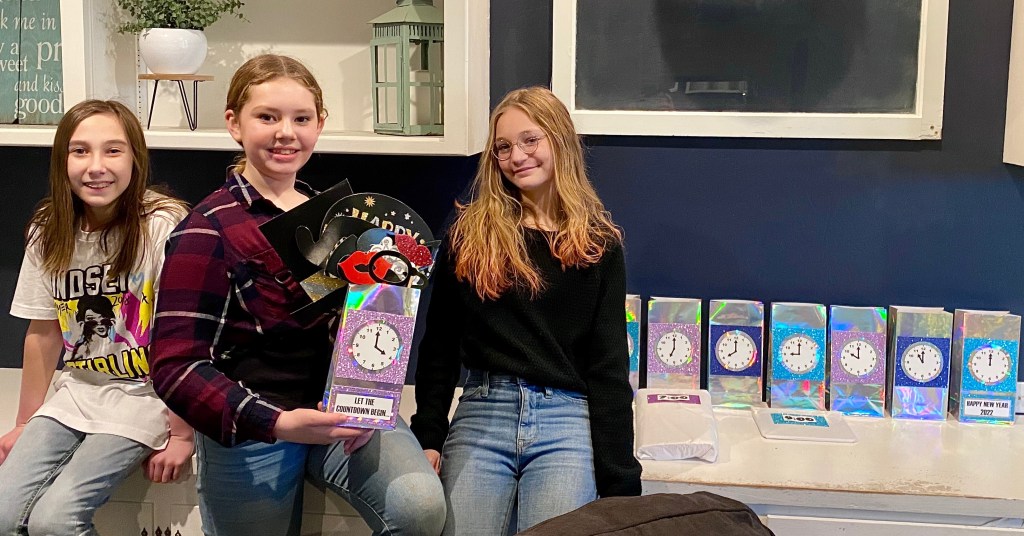
“Countdown Bags” are one of my favorite ways to ring in a new year. I started doing this when my 3 kids were little, and over the years, I have adapted this tradition in a variety of ways. This year my husband had to work until 9pm and my teenage boys made plans to play Airsoft with friends, so it was just going to be my girl and I counting down for most of the evening. I wanted to make it really fun for her, so I let her invite a couple of friends over and got to work creating a memorable tween friendly event.
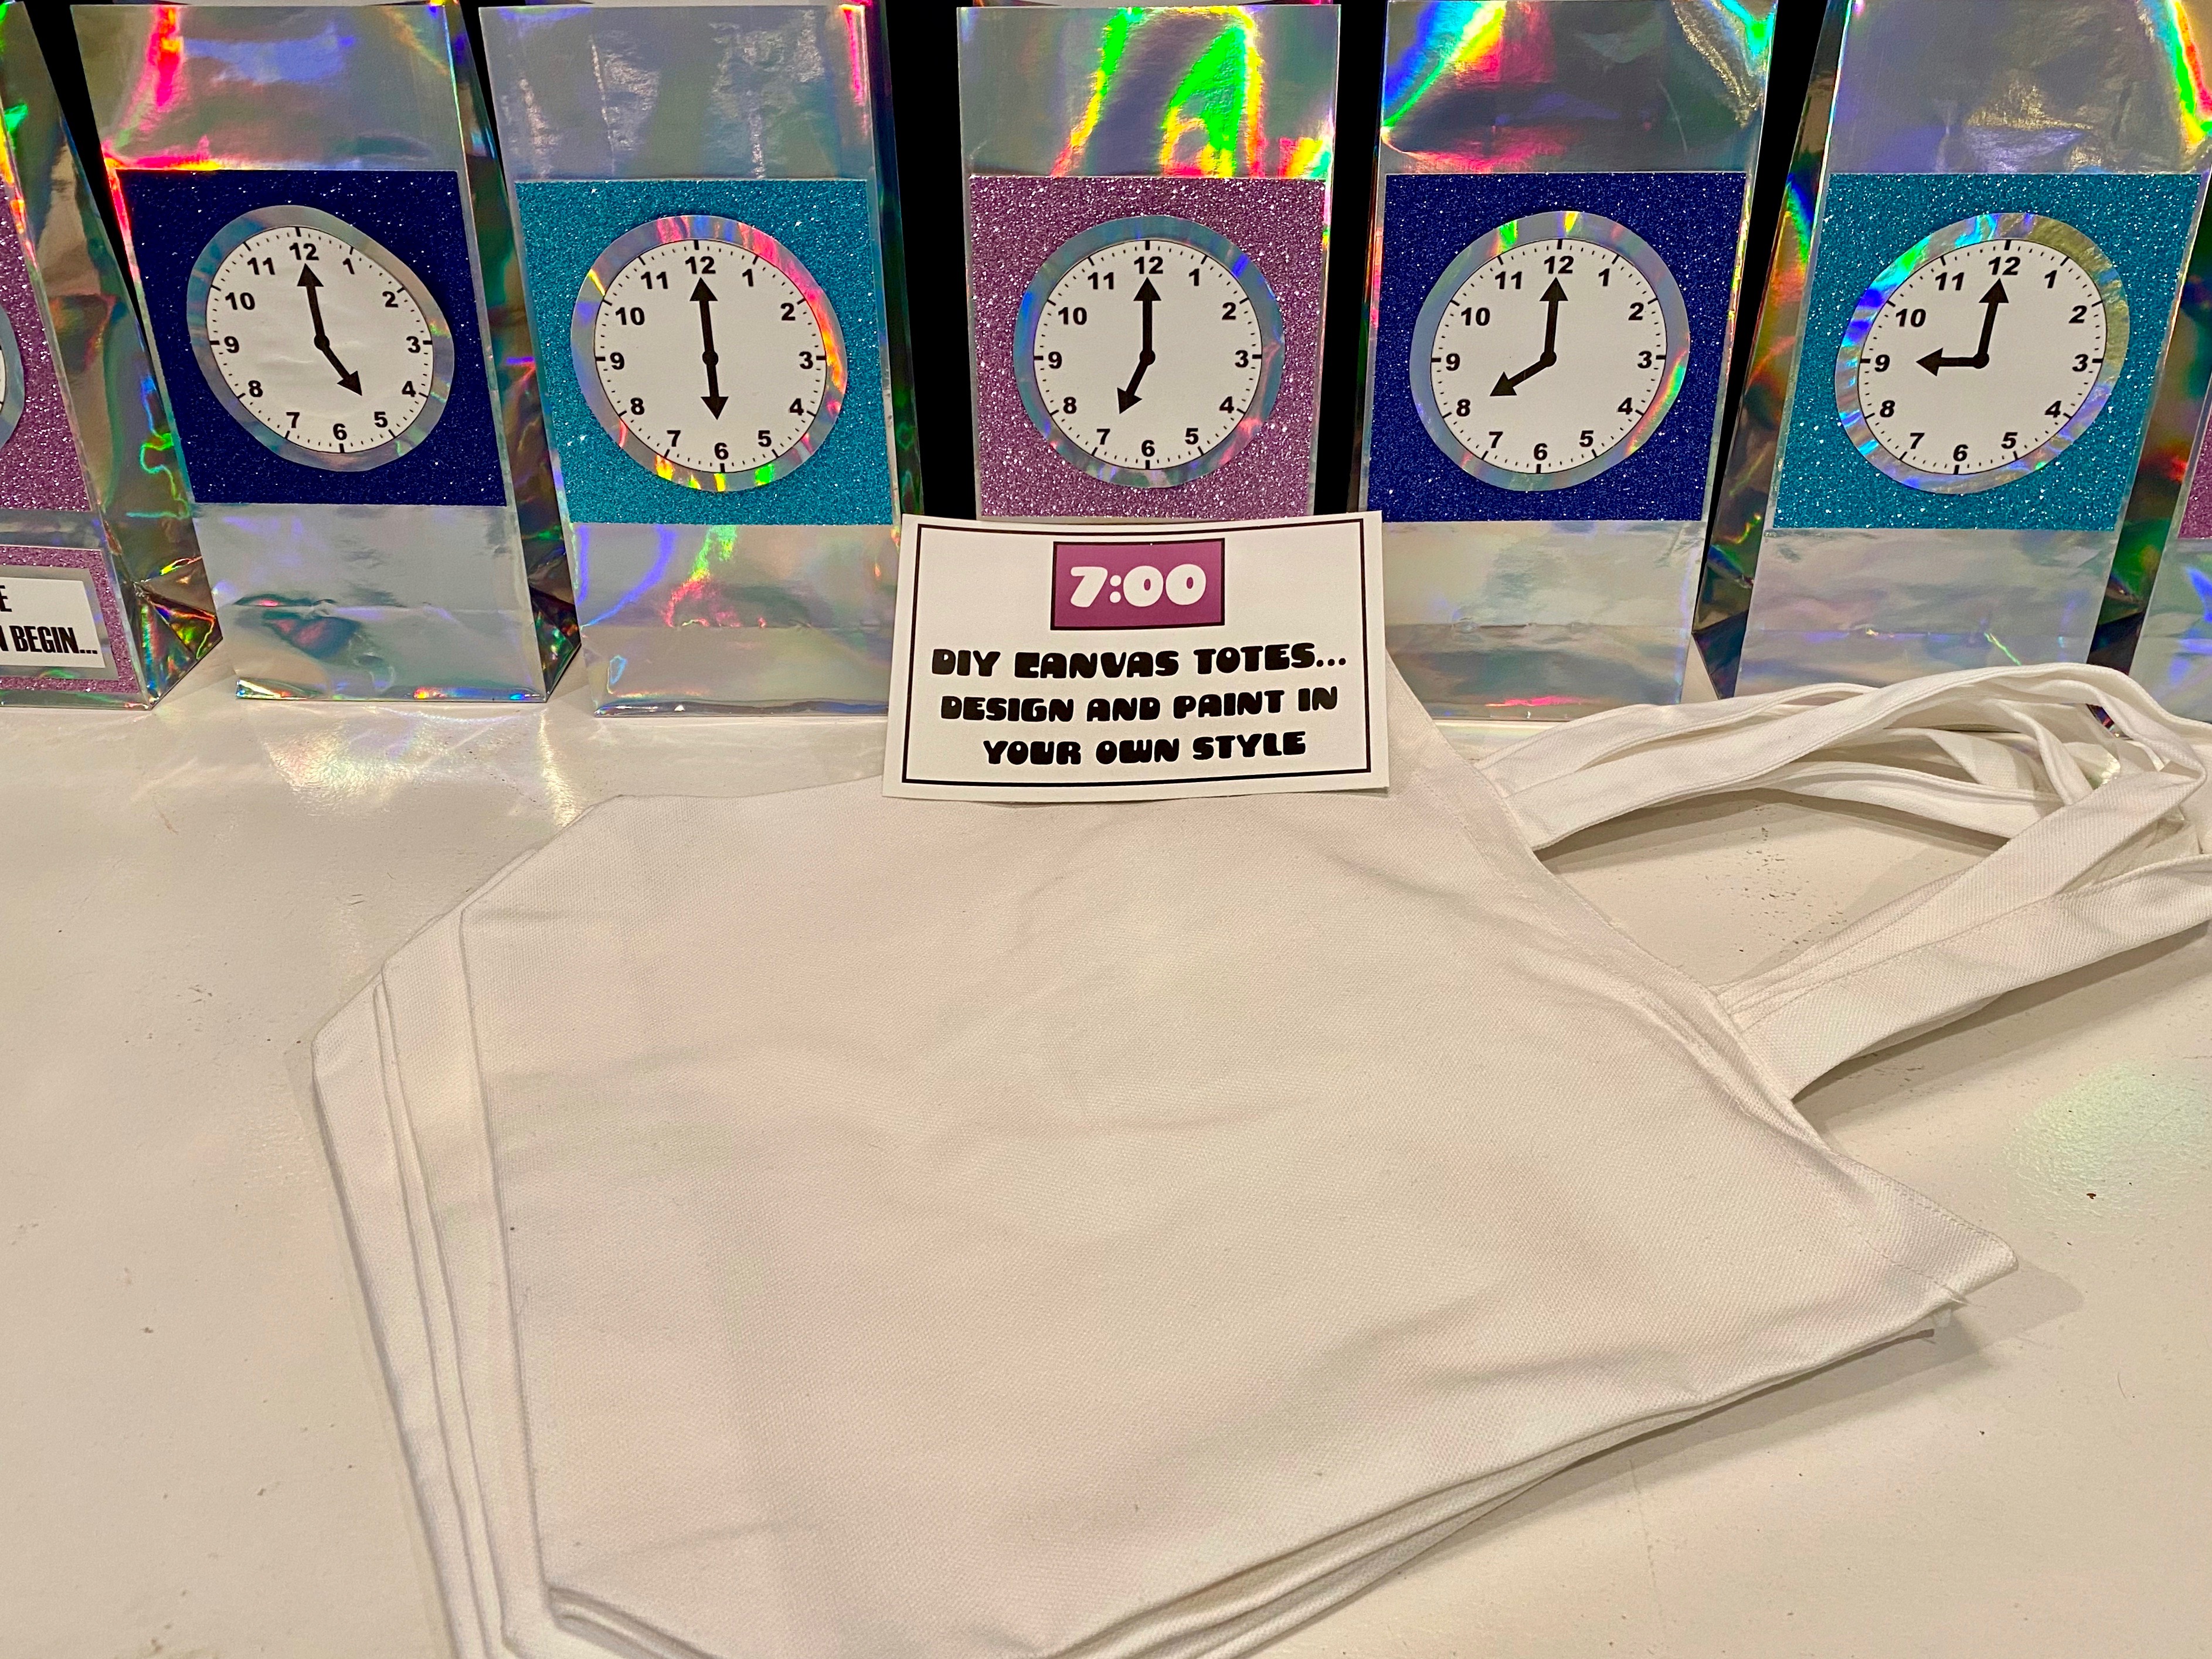
I am learning that 11 year old girls love to be silly and have fun with planned activities, but also like to have a good amount of unstructured time when they get together, so I planned the night to incorporate both. I purchased a pack of shimmery silver lunch sized bags and filled them with a variety of fun things that they could do on the hour, every hour, from 4:00 pm – midnight. I bought some glittery card stock in a couple of different colors and I created clocks to glue on the front of each bag. #CommissionsEarned
I filled the bags ahead of time, and since some of the items were too large to fit in the bags, I wrapped them and included times to correlate with the bags that they went with.
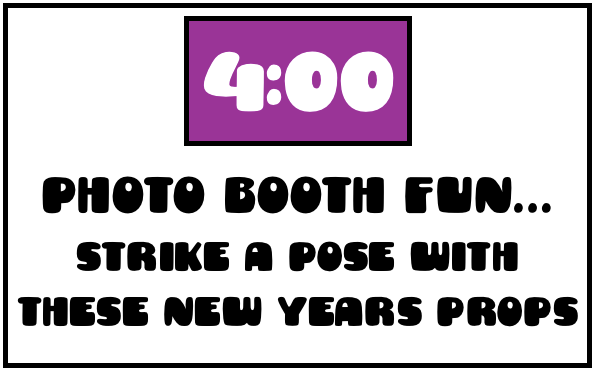
The girls arrived at 4:00 and we kicked off the night with “photo booth fun!” I already had a large piece of black material that I had used for a variety of party backdrops. I also kept some props and decorations from our 2020 New Year’s Eve celebration, so I reused them and added a string of white Christmas lights as a border. The girls took a few fun shots and then went off to giggle and chat about all the things. #CommissionsEarned
At 5:00 they opened the next bag. This one had them wondering, because there was a huge ball hanging over the countdown bags, wrapped in black plastic. They had guessed that it might be a disco ball and were shocked to find that it was really light. They opened it to find a beach ball with questions written all over it in sharpie. This game turned out to be so much fun and they came back to playing it several times throughout the night.
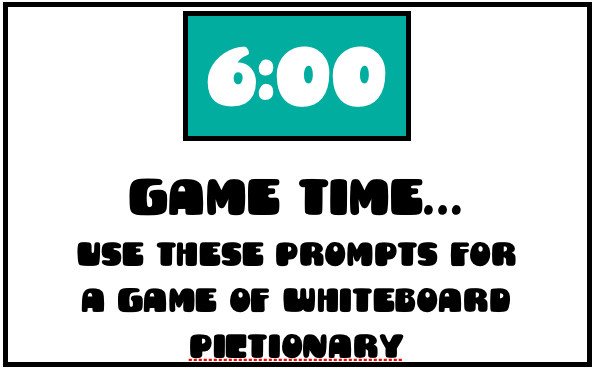
Somewhere between 5:00-6:00 the girls ate dinner, which was just a super easy Papa Murphy’s take and bake pizza and some fruit. Then at 6:00 they opened the next bag. I planned ahead for a game of “Whiteboard Pictionary” by printing off a list of fun and easy prompts. I folded each one and put them all in a mason jar and include a whiteboard marker in the bag. This is another game that didn’t take the entire hour, so it left a good amount of downtime for whatever the girls wanted to do.
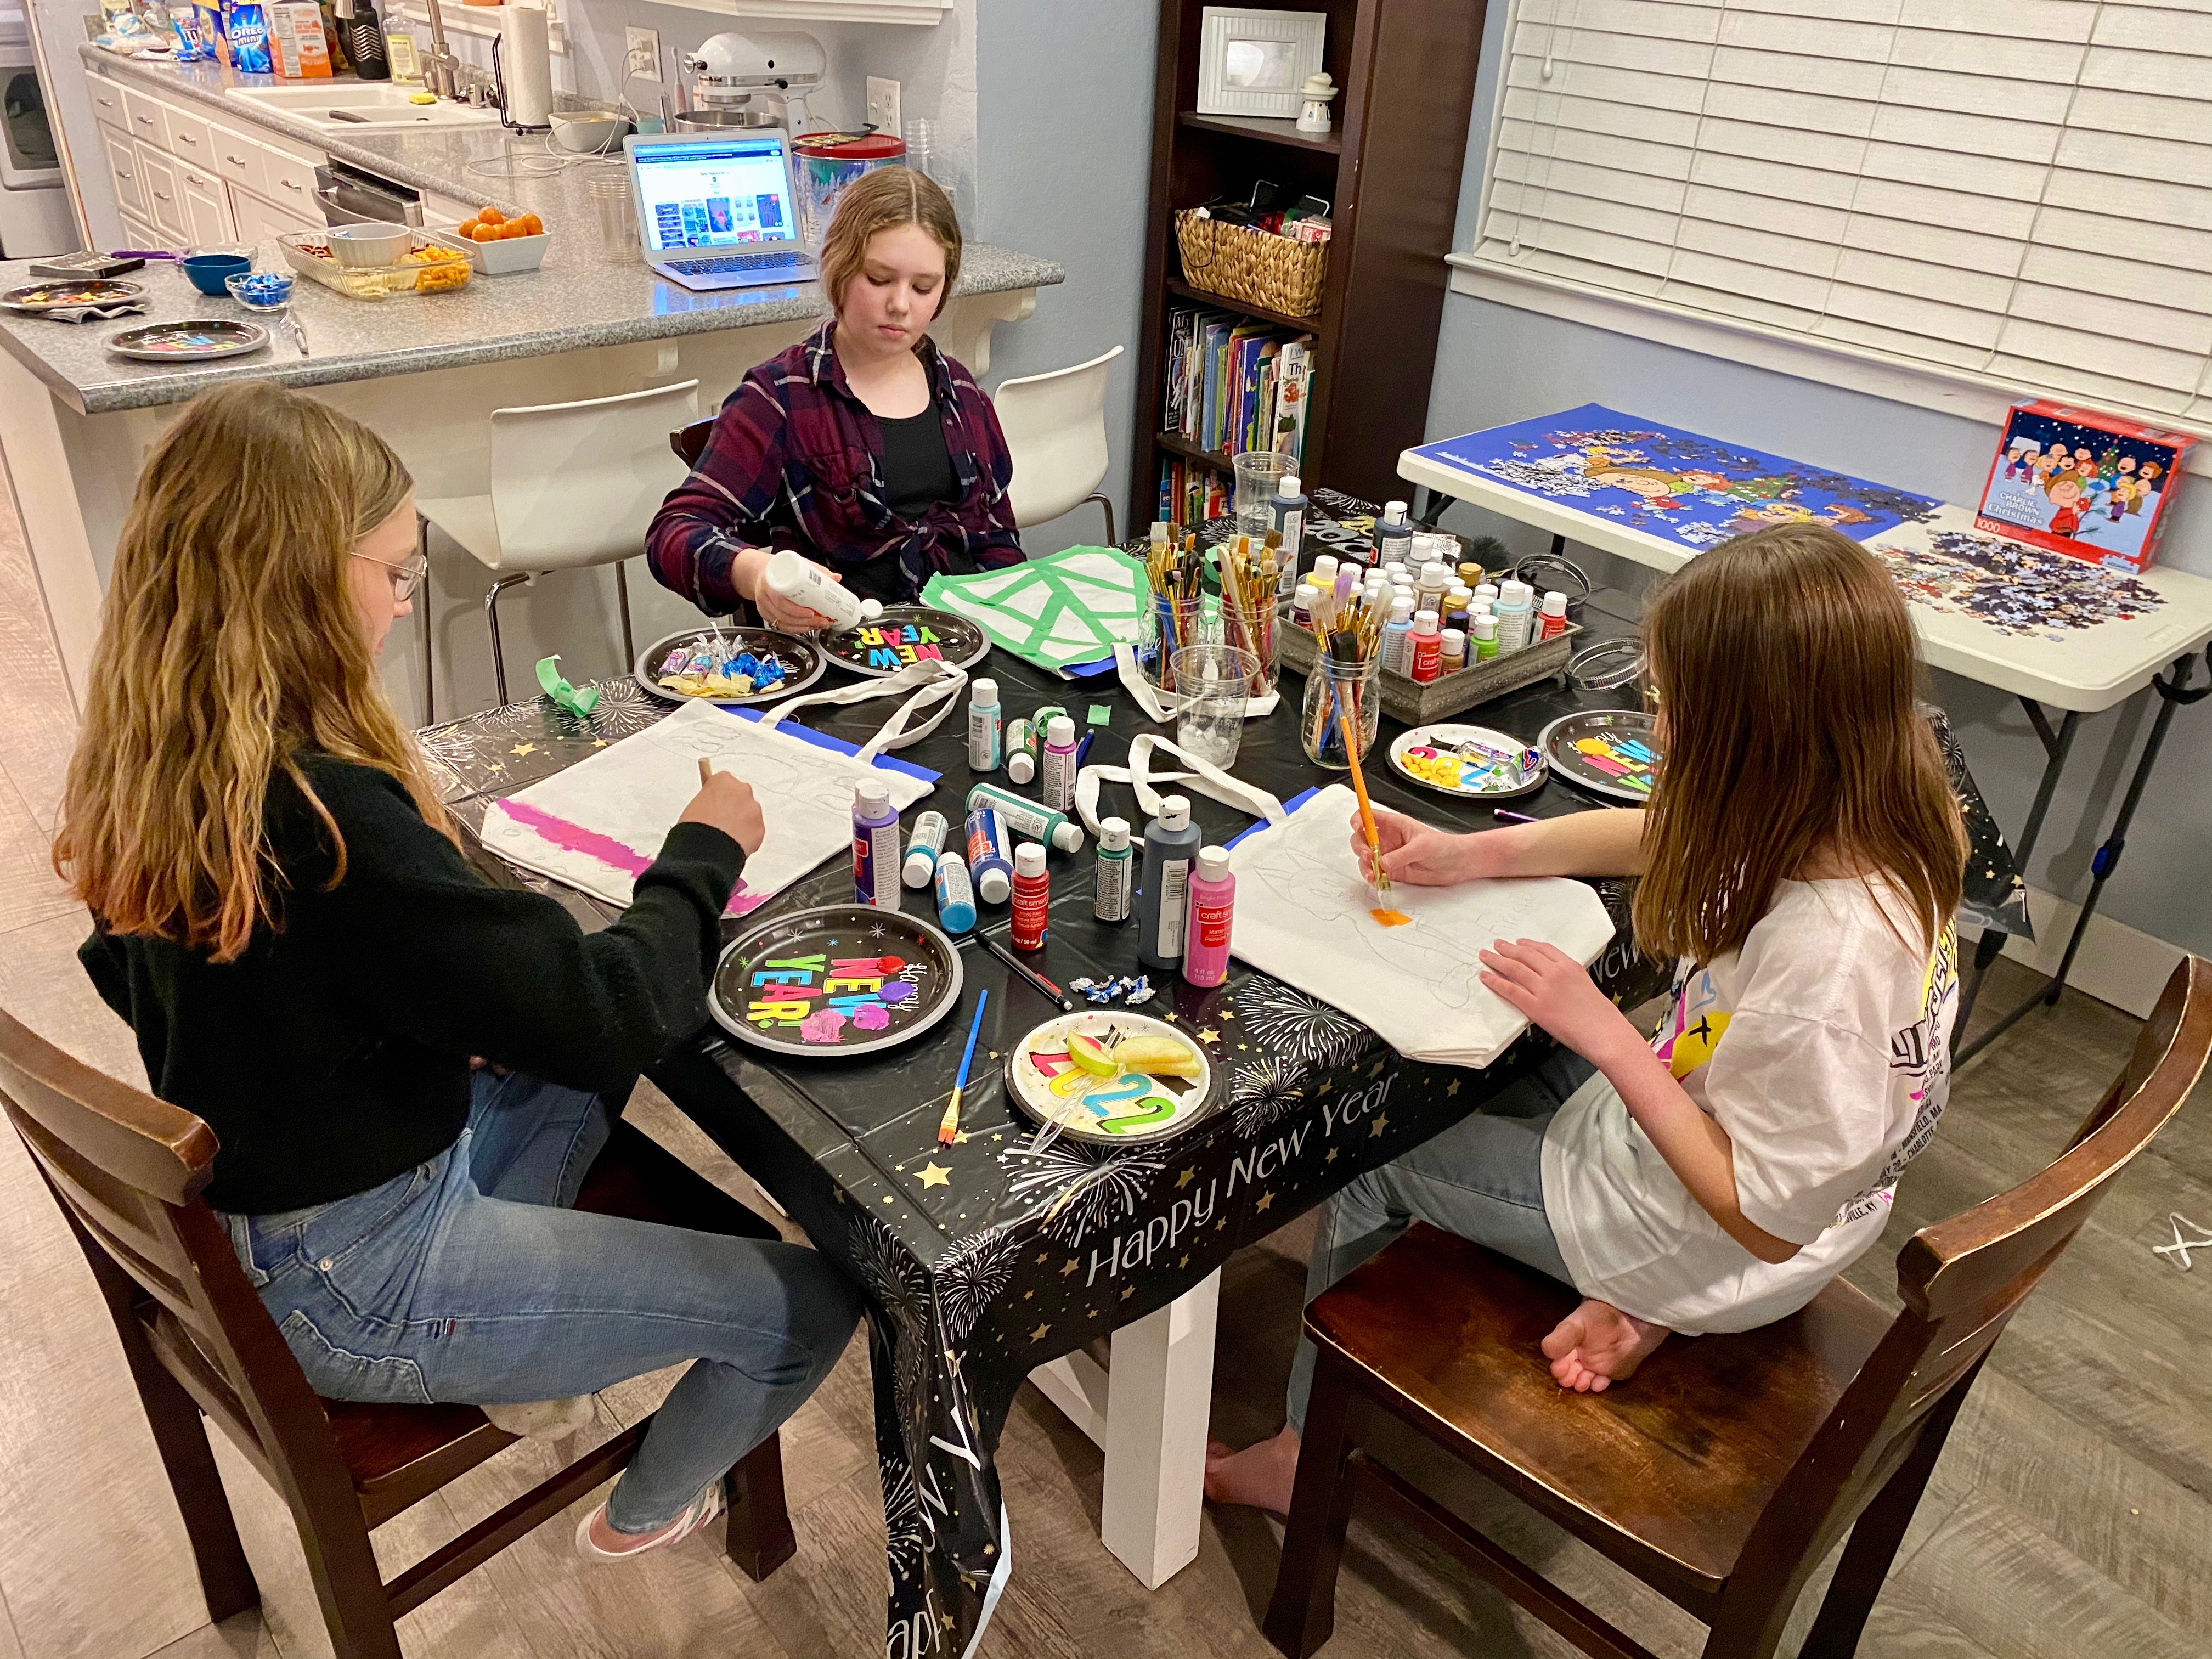
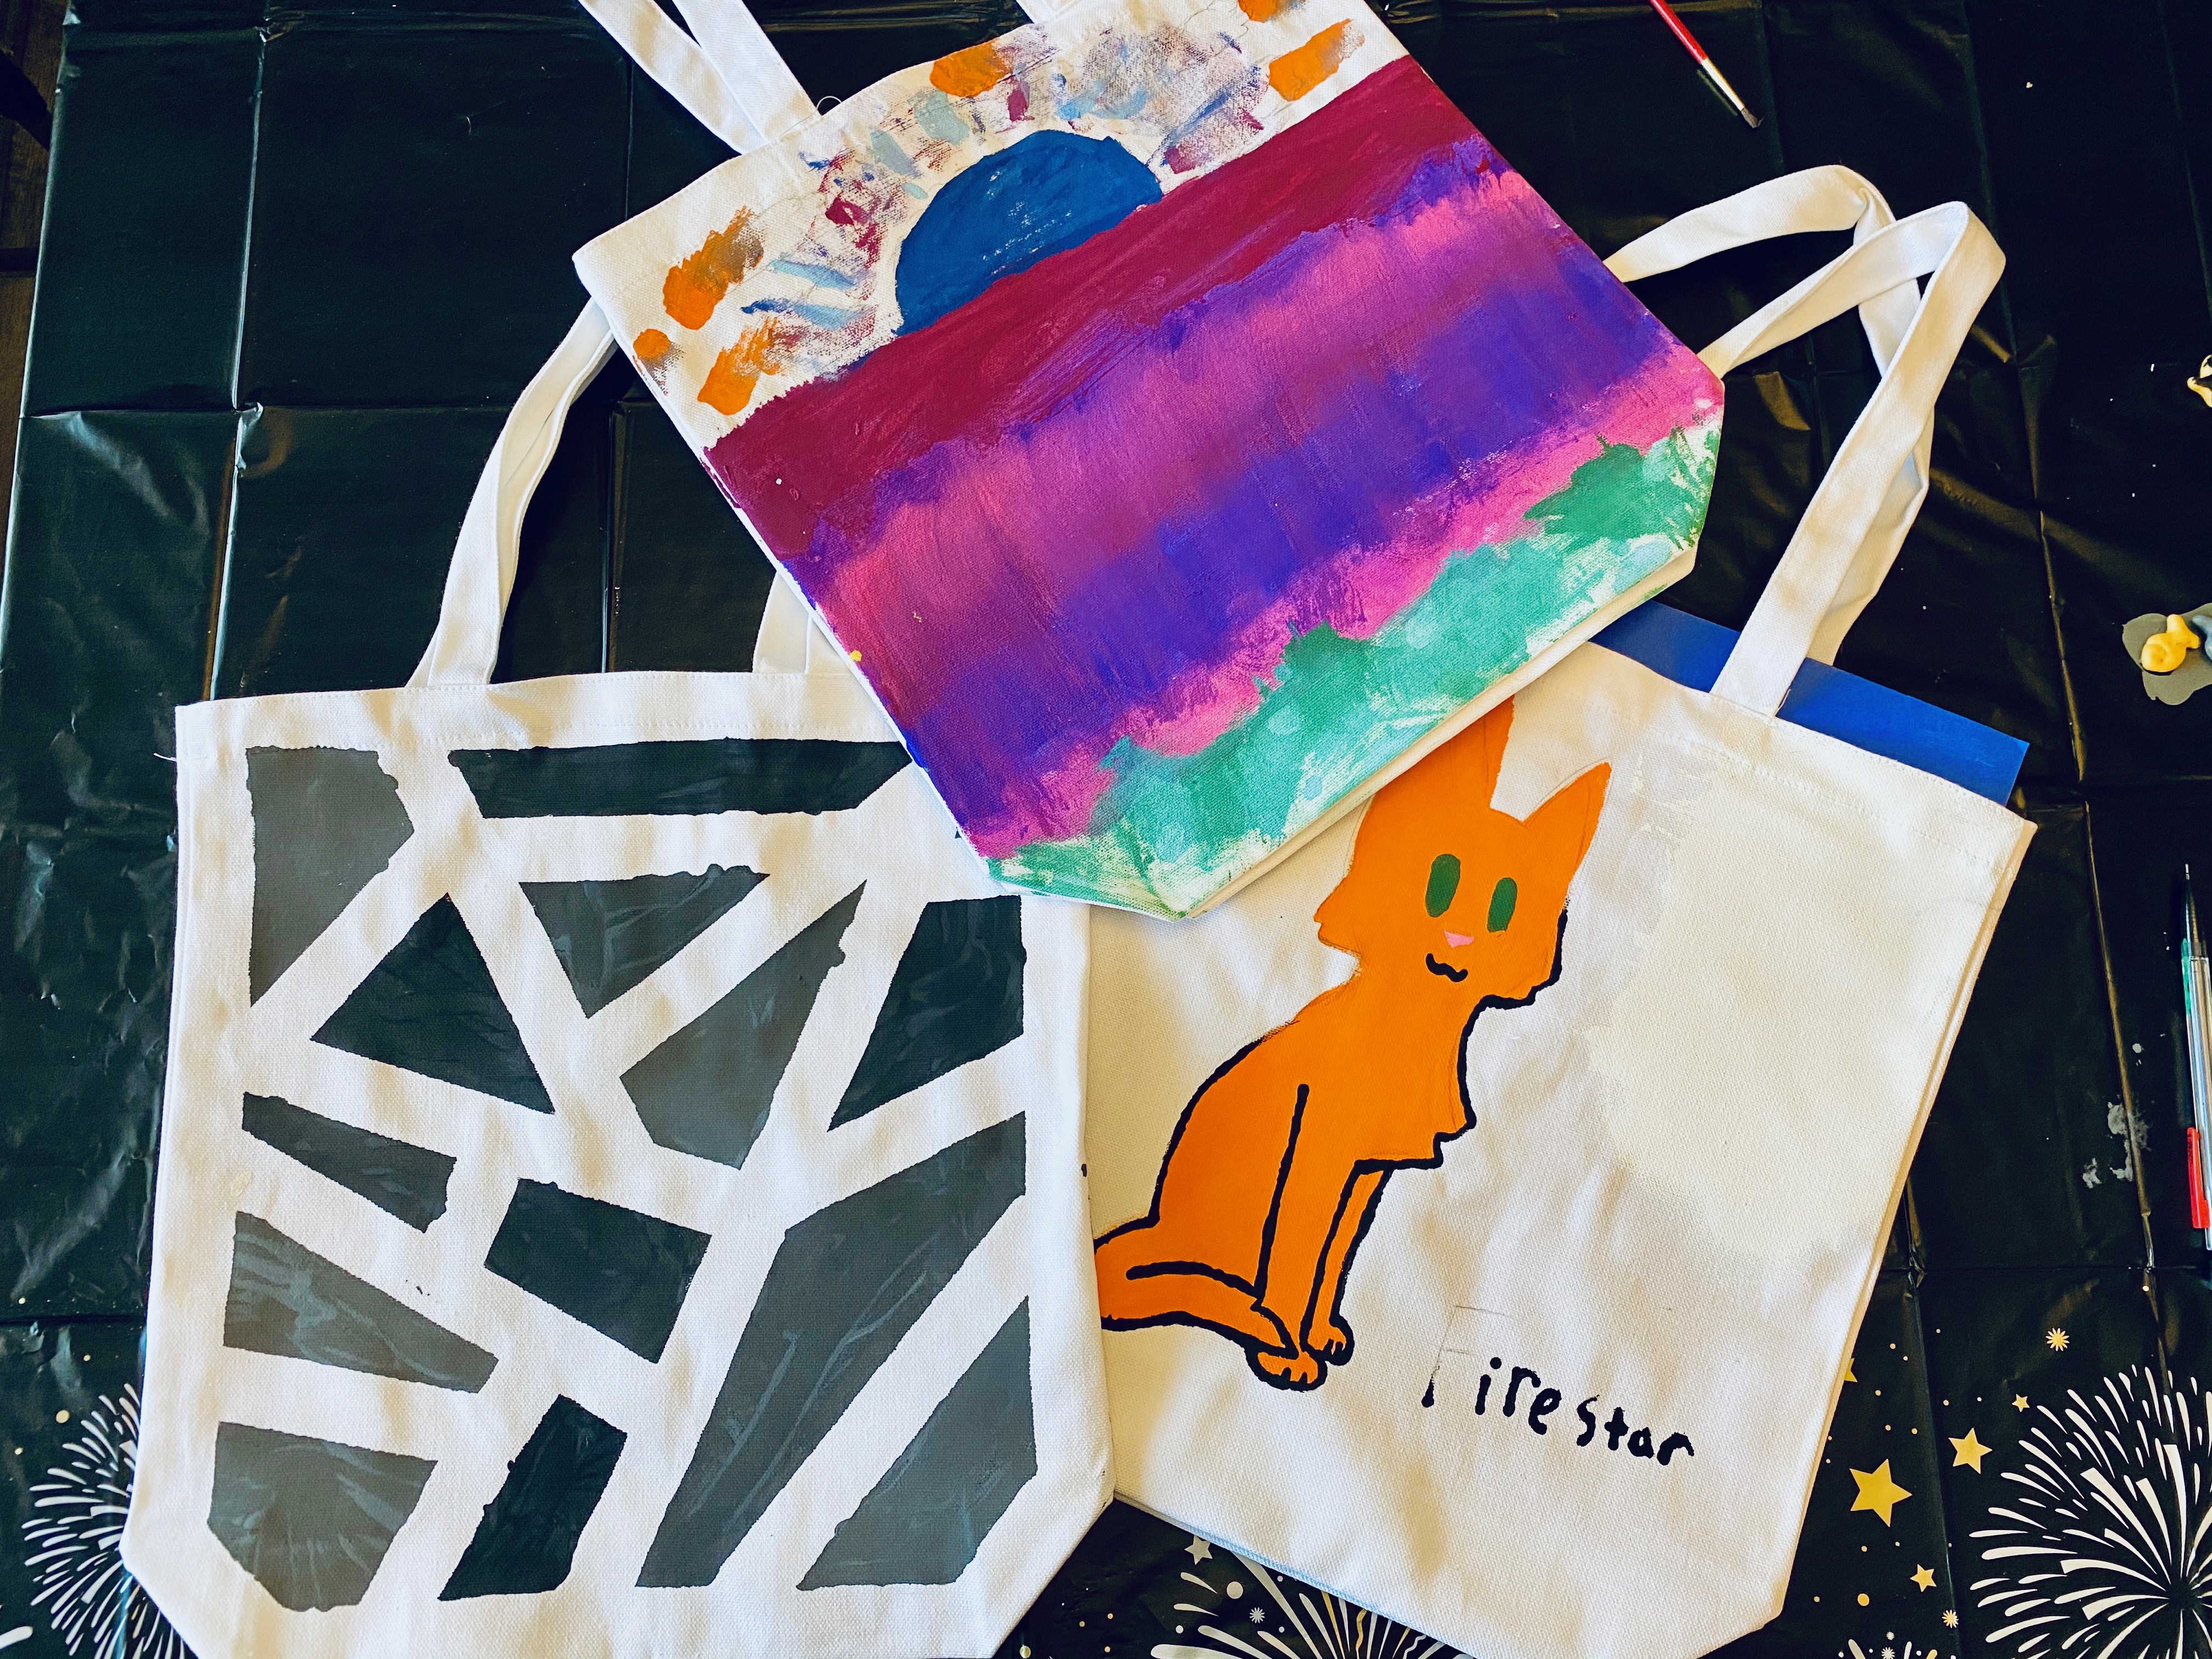
7:00 was probably my favorite because I am such a crafty girl at heart. I purchased 3 plain canvas tote bags and I already had a variety of paintbrushes and acrylic paints from previous projects. I found some fun “create your own tote bag” inspiration on Pinterest and grabbed a roll of painters tape so the girls could try some of the geometric tote bag ideas. I would have to say, that they turned out pretty cute! #CommissionsEarned
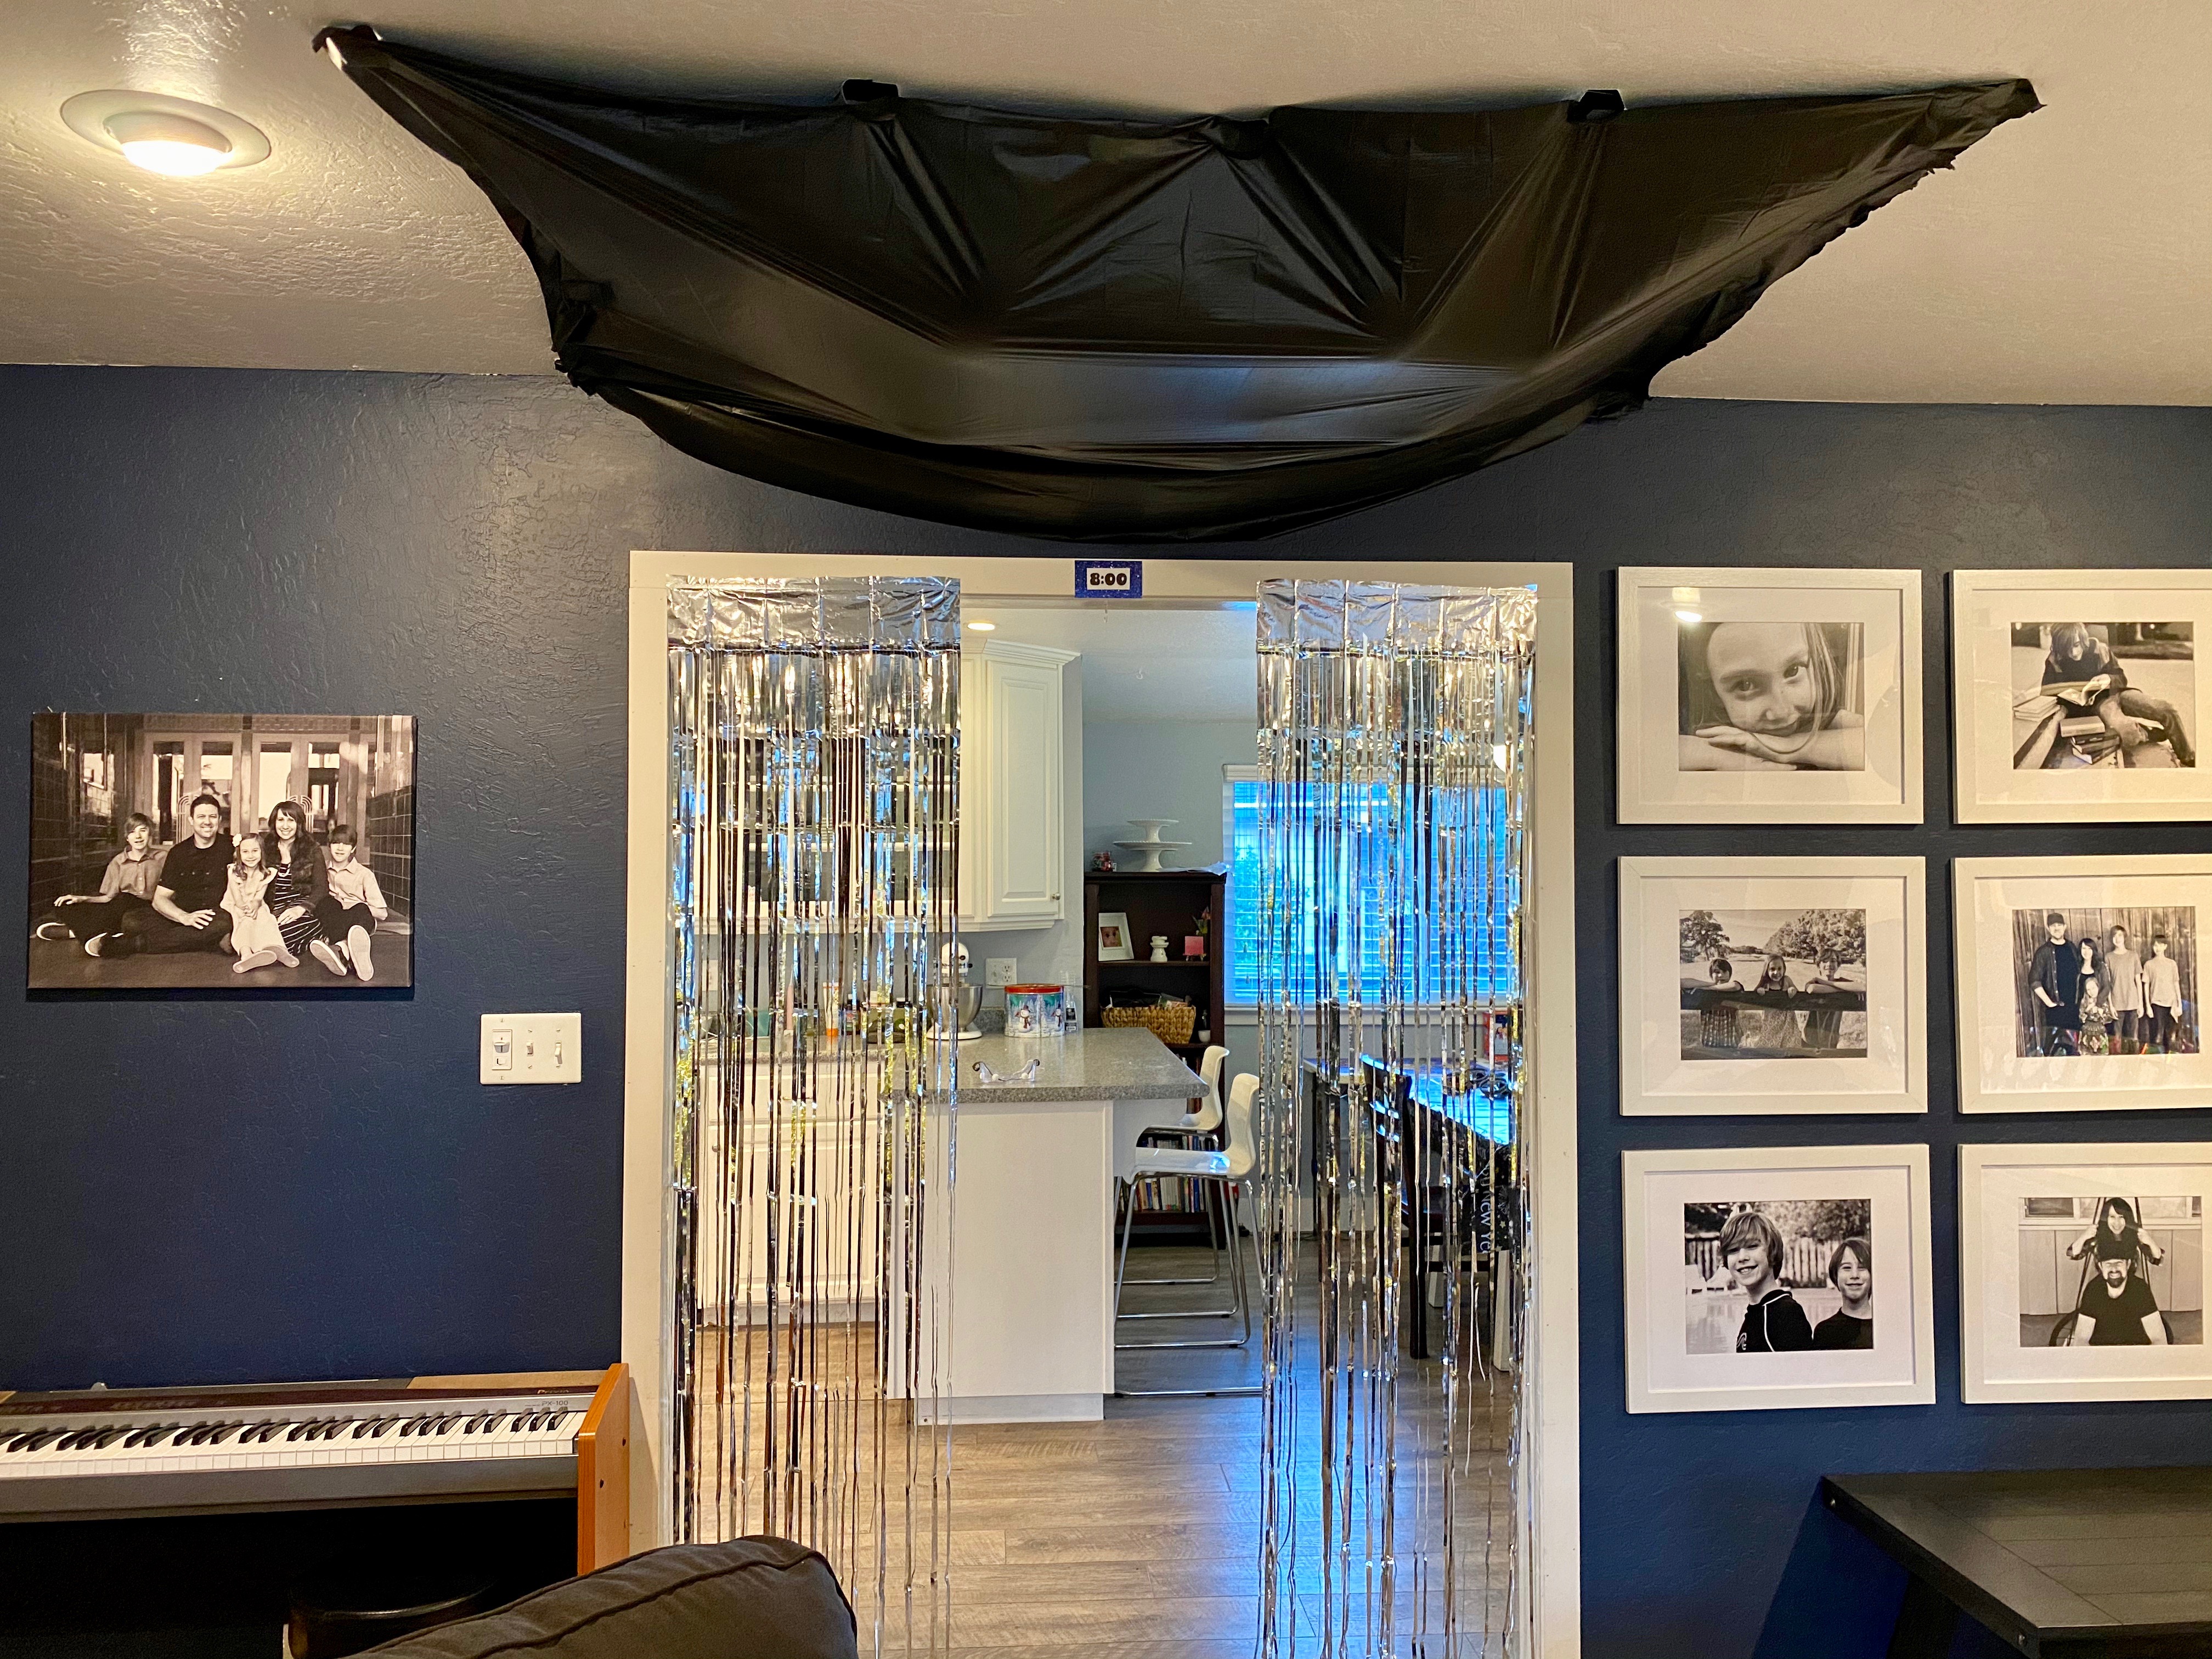
The girls were so curious to find out what 8:00 was all about because they noticed at the beginning of the night that there was a large mass of “something” taped to the ceiling under a black plastic table cloth. They finally got to rip into the plastic and a bunch of balloons cascaded down on them. The object of the balloon game is to pop the balloons one at a time and do whatever activity is found on the piece of paper hidden inside. Some of the tasks I included were: leapfrog across the room, dance an Irish jig, make a 3 person pyramid, and run outside and yell Happy New Year 5 times as loud as you can.
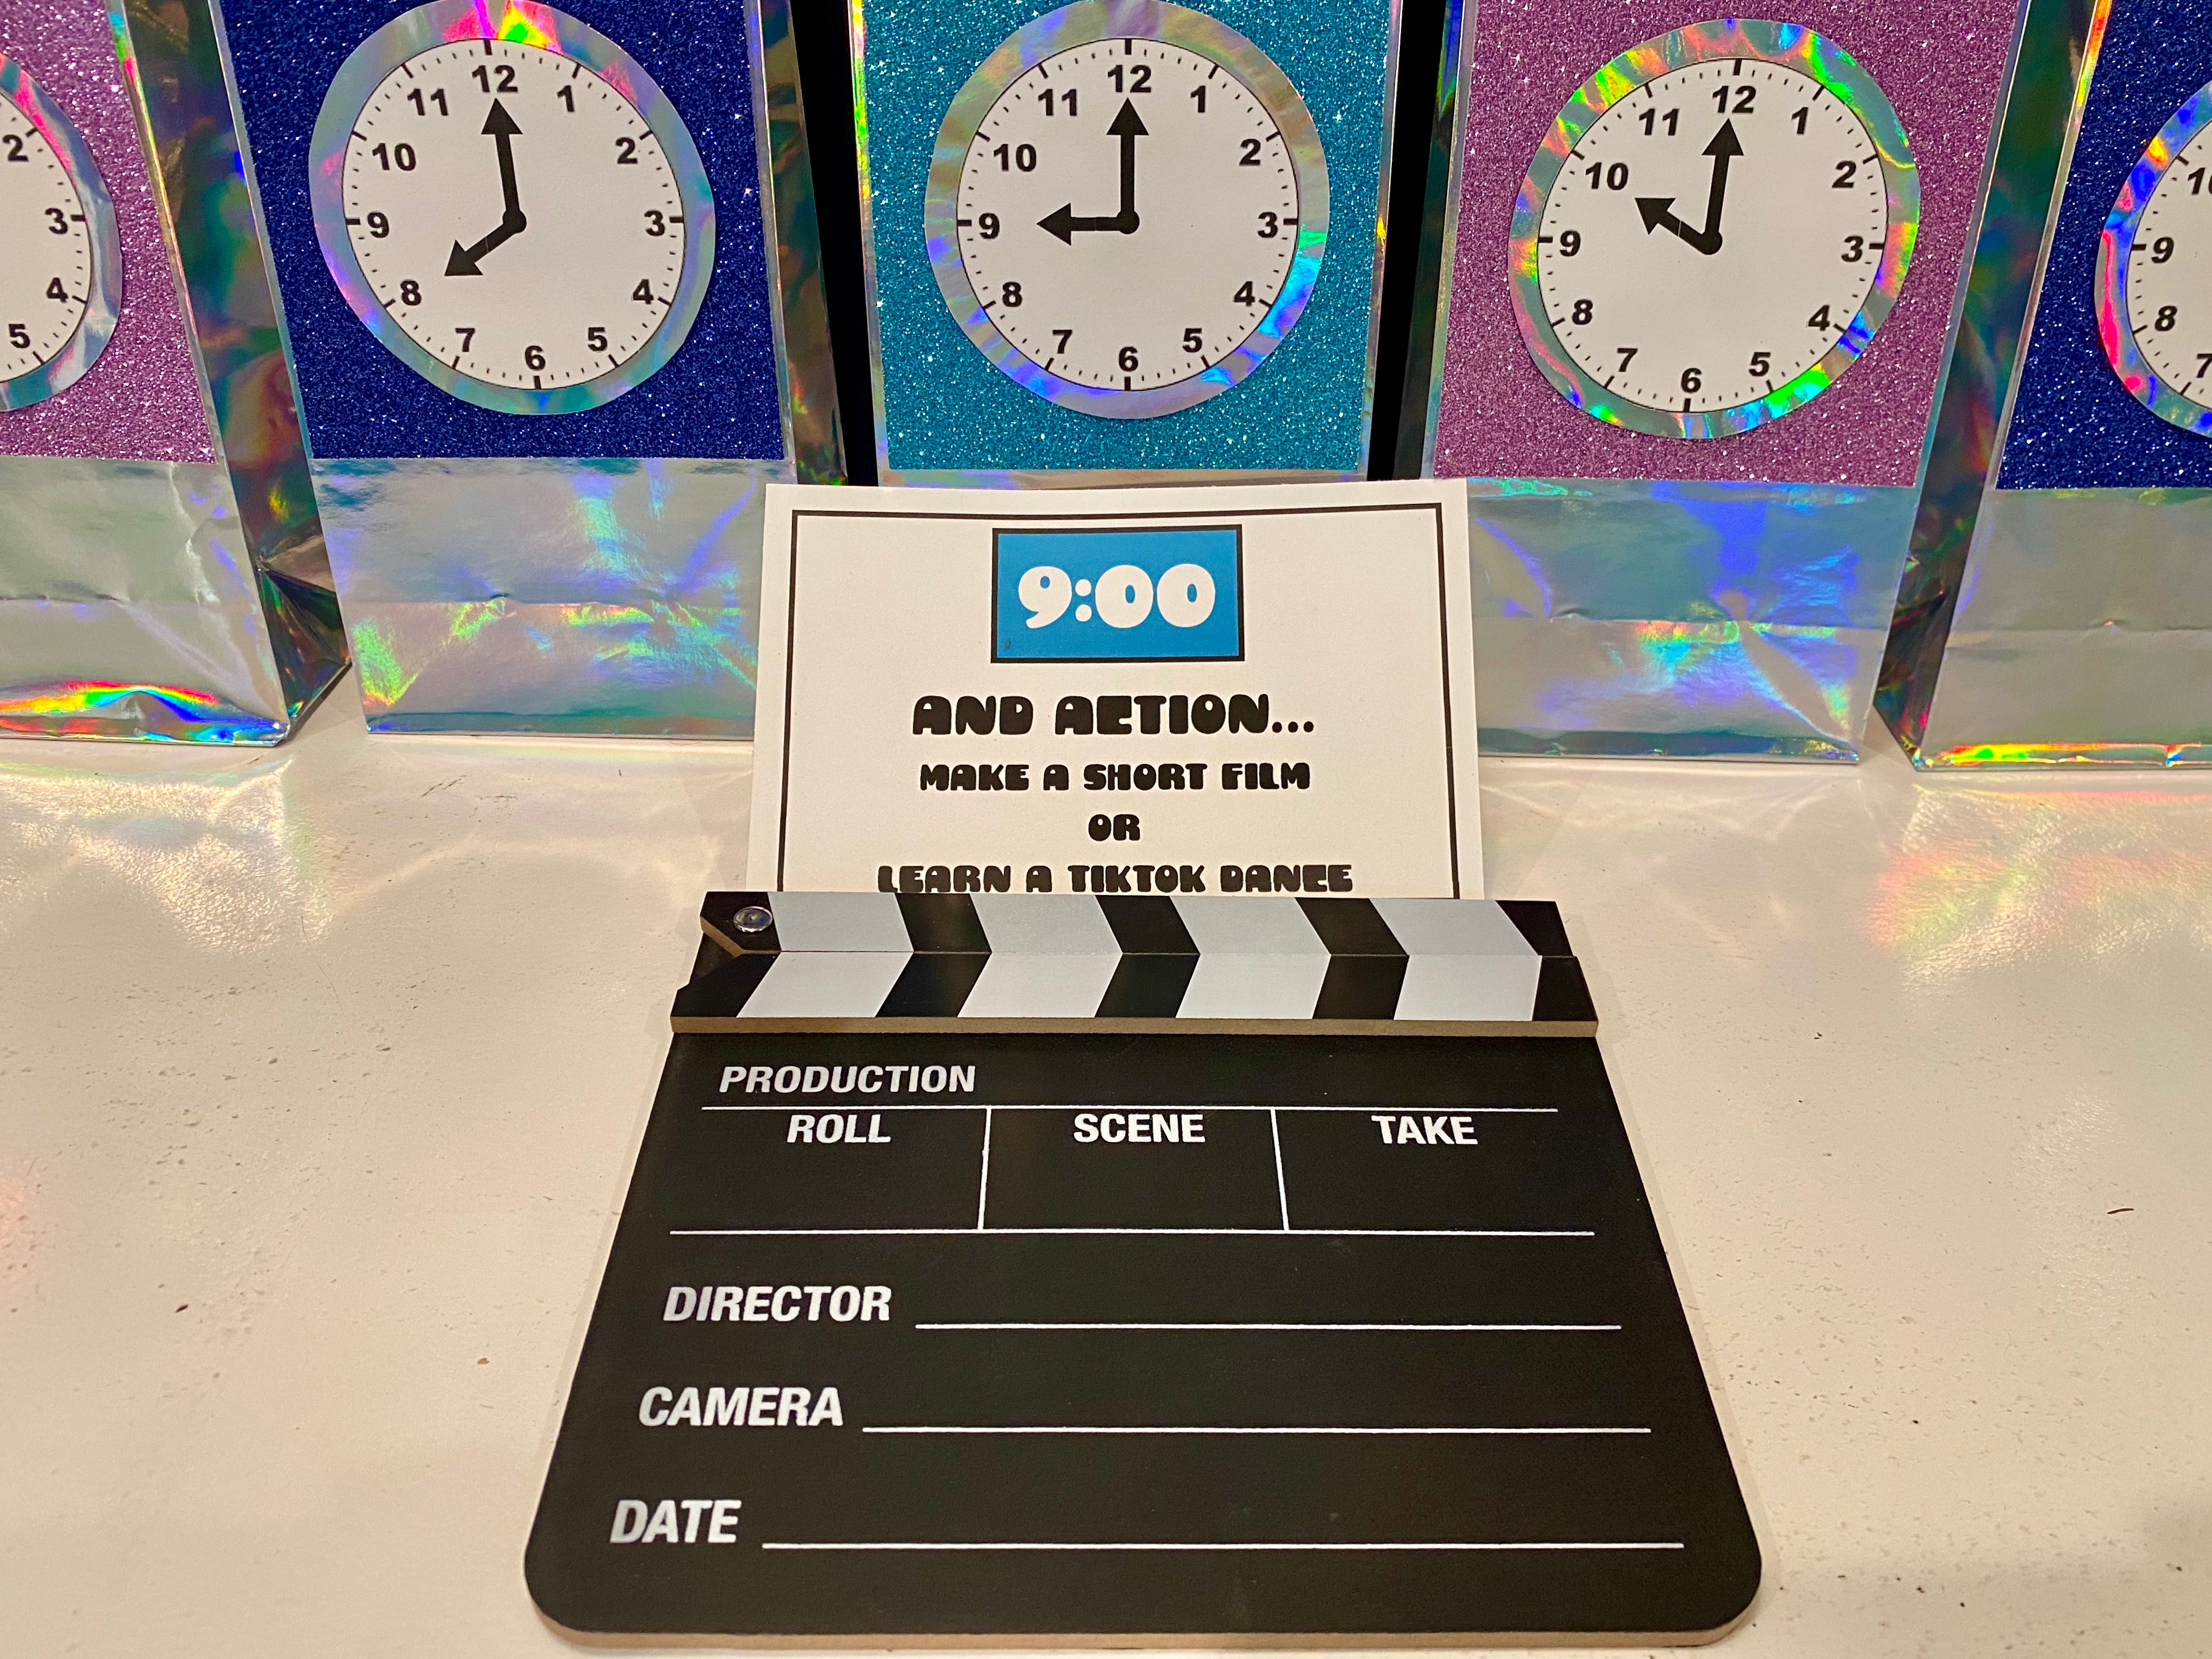
At 9:00 the girls opened an extra little package in front of the countdown bag that was too large to fit inside. It was a small wooden movie clapboard and I included a couple of chalk pens as well. They had already been doing TikTok dances throughout the night, but this hour was dedicated time to do just that. #CommissionsEarned
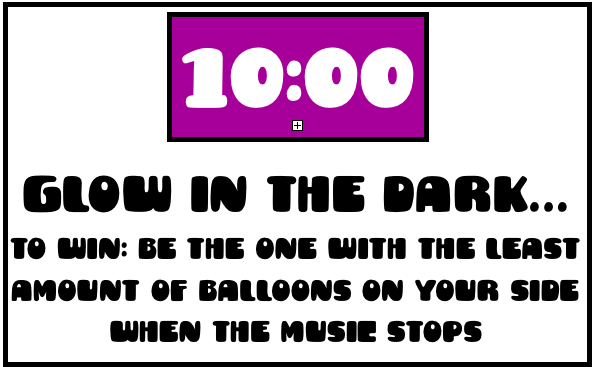
By 10:00 these girls were showing no signs of slowing down, so I planned to tire them out with glow in the dark balloon games. I taped off three sections in the middle of my living room with some of the painters tape so each girl had her own zone. Then I brought out 15 balloons I had blown up earlier in the day with glow sticks inside. You can also purchase glow balloons on Amazon. We put all of the balloons in the middle and turned the lights out. I played music on my phone while the girls tried to keep all of the balloons out of their section. When the music stopped they had to freeze. I would also switch the light on and the winner was the one with the least amount of balloons in their zone. After each game, they rotated spots. I think they played about 7 rounds with lots of squeals and giggles before taking a snack break of rice crispy treats and s’mores dip. #CommissionsEarned
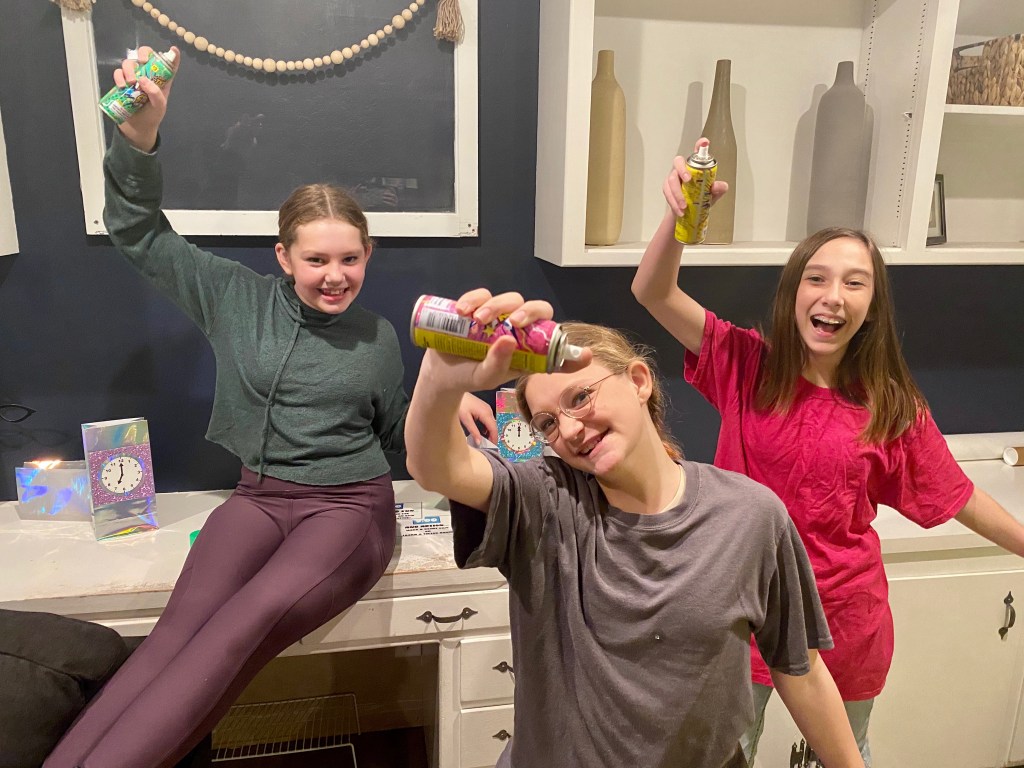
I wanted to do something exciting at the 11:00 hour, so I bought 3 cans of silly string and sent the girls outside for an EPIC SILLY STRING BATTLE!!! This may have only taken a few minutes, but it was hilarious to watch and was so much fun! #CommissionsEarned
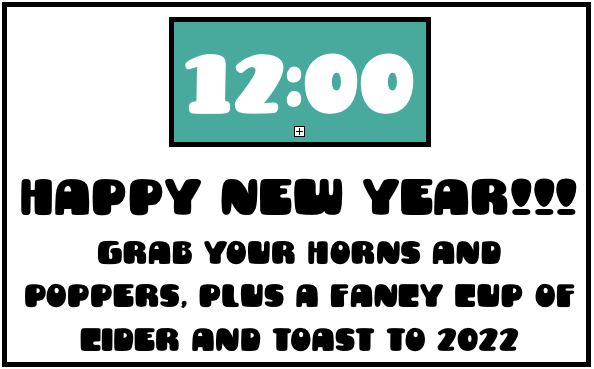
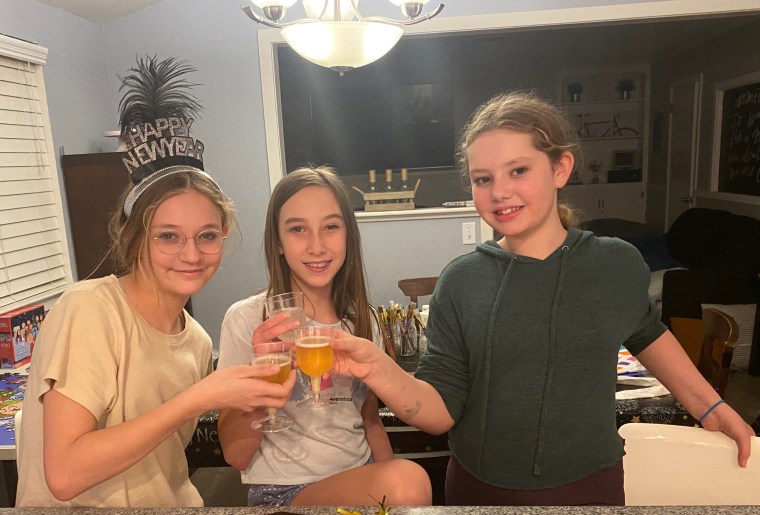
Our 12:00 HAPPY NEW YEAR bag was filled with poppers and horns, so I let the girls open this one at 11:45. We also busted out the Martinelli’s Sparkling Apple Cider and some “fancy glasses!” and got ready to ring in the New Year. We ran outside at 20 seconds to midnight with poppers and horns ready to go, counted down to 2022, yelled HAPPY NEW YEAR for all of neighborhood to hear, popped our poppers, and then came back inside to toast to a new year. #CommissionsEarned
For another fun New Year’s Eve idea check out my previous blogpost:
Christmas came and went, and while I had great intentions to add some new holiday posts to my blog, I was too busy enjoying all of the fun activities to get to the blogging part. I guess these little Hot Cocoa Mug Marshmallow Pops can be tucked away on a Pinterest board for next Christmas 🙂
The past couple of years, our church has done a drive-thru Christmas Caroling event. My friend asked me to make cookies to pass out, but festive mallow pops are more fun than baking cookies for me, so I set out to make some really cute and Christmassy pops. These little guys were a bit trickier to make than I expected, but I think they turned out pretty cute.
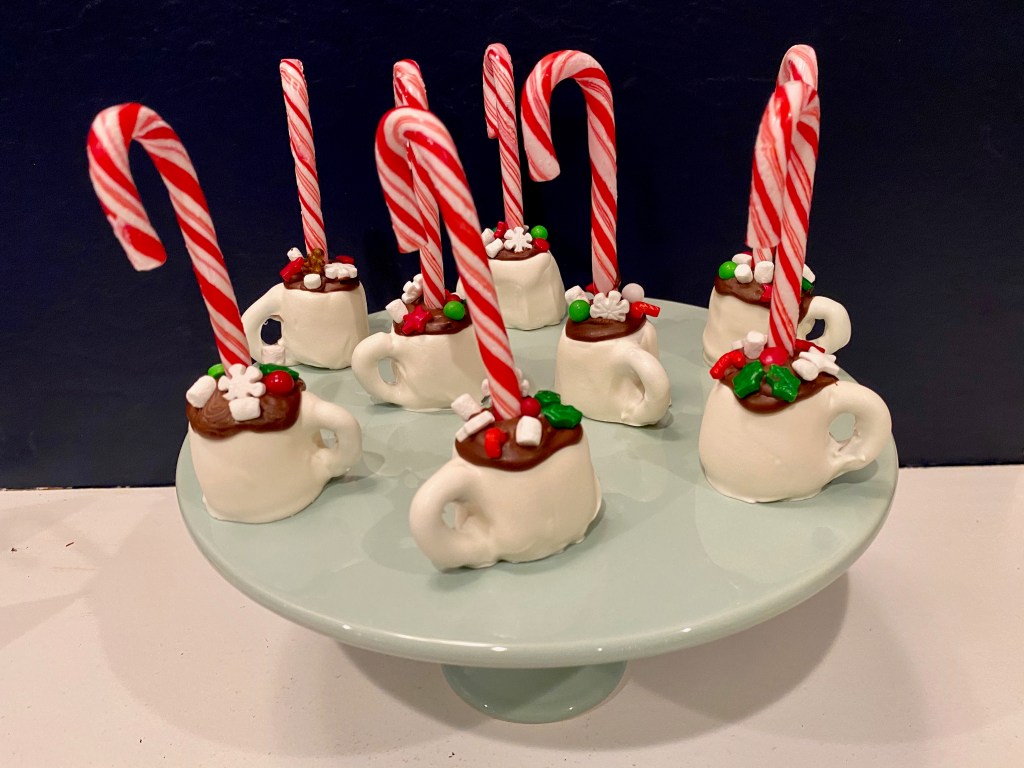
Here’s what you will need to make your own Hot Cocoa Pops: peppermint candy canes (the ones I used were in between the typical big and small size), Jet Puffed Marshmallows, pretzels (broken up to create handles), candy melts in milk chocolate and bright white, Kraft Mallow Bits, various holiday sprinkles, parchment paper, and a Wilton’s squeeze bottle. #CommissionsEarned
STEP 1: LAY EVERYTHING OUT ON PARCHMENT PAPER SO YOU HAVE AN EASY WORKSPACE
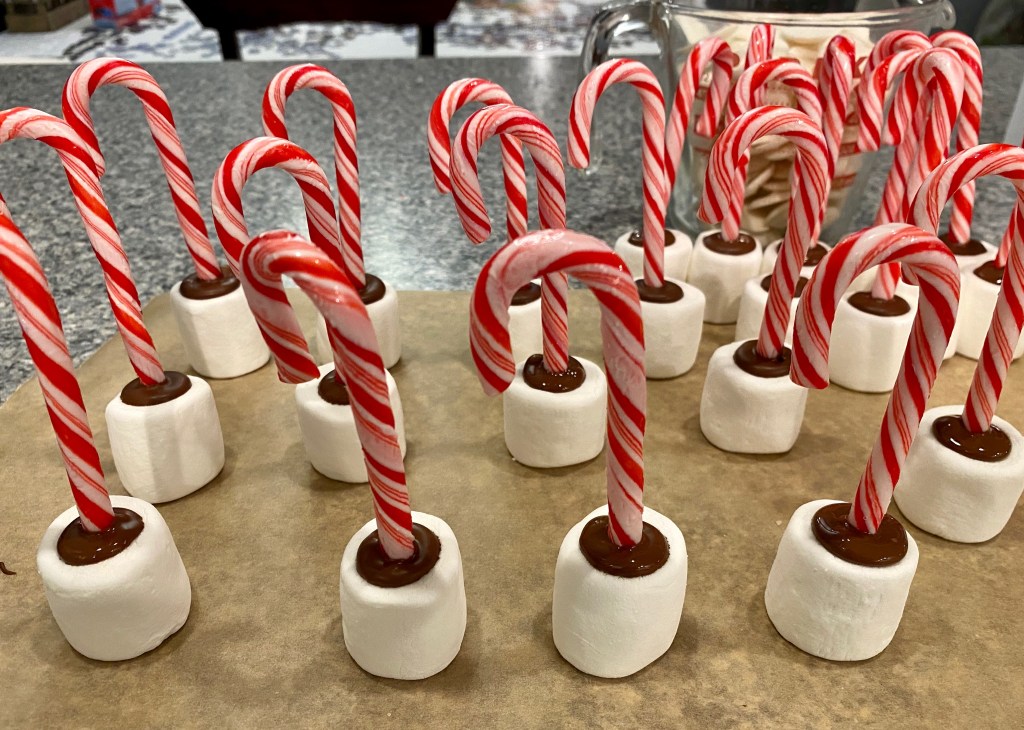
STEP 2: MELT A SMALL AMOUNT OF THE CHOCOLATE CANDY MELTS. DIP A CANDY CANE IN THE CHOCOLATE AND PUSH INTO THE CENTER OF THE MARSHMALLOW. REPEAT
STEP 3: MELT A SMALL AMOUNT OF THE WHITE CANDY MELTS. DIP THE ENDS OF THE BROKEN PRETZEL IN THE WHITE MELTED CANDY AND SECURE TO THE SIDE OF THE MARSHMALLOW. REPEAT.
STEP 4: MELT THE REMAINDER OF THE WHITE CANDY MELTS. DIP EACH MARSHMALLOW, MAKING SURE TO COAT ALL THE WAY UP TO THE TOP OF THE MARSHMALLOW AND COVERING THE PRETZEL HANDLE. YOU MAY NEED TO WIPE OFF SOME OF THE DRIPS FROM THE BOTTOM BEFORE PLACING ON THE PARCHMENT PAPER TO DRY.
STEP 5: MELT THE REMAINDER OF THE MILK CHOCOLATE CANDY MELTS AND TRANSFER TO A SQUEEZE BOTTLE. WORKING QUICKLY, BEFORE THE CANDY MELTS SOLIDIFY, DRIZZLE MILK CHOCOLATE ALONG THE TOP OF EACH POP AND ADD A FEW FESTIVE SPRINKLES AND MALLOW BITS. THIS IS WHERE THE TRICKY PART COMES IN BECAUSE IT’S DIFFICULT TO ADD THE TOPPINGS AFTER THE CHOCOLATE HAS SET, SO YOU HAVE TO WORK FAST.
STEP 6: ENJOY!!!
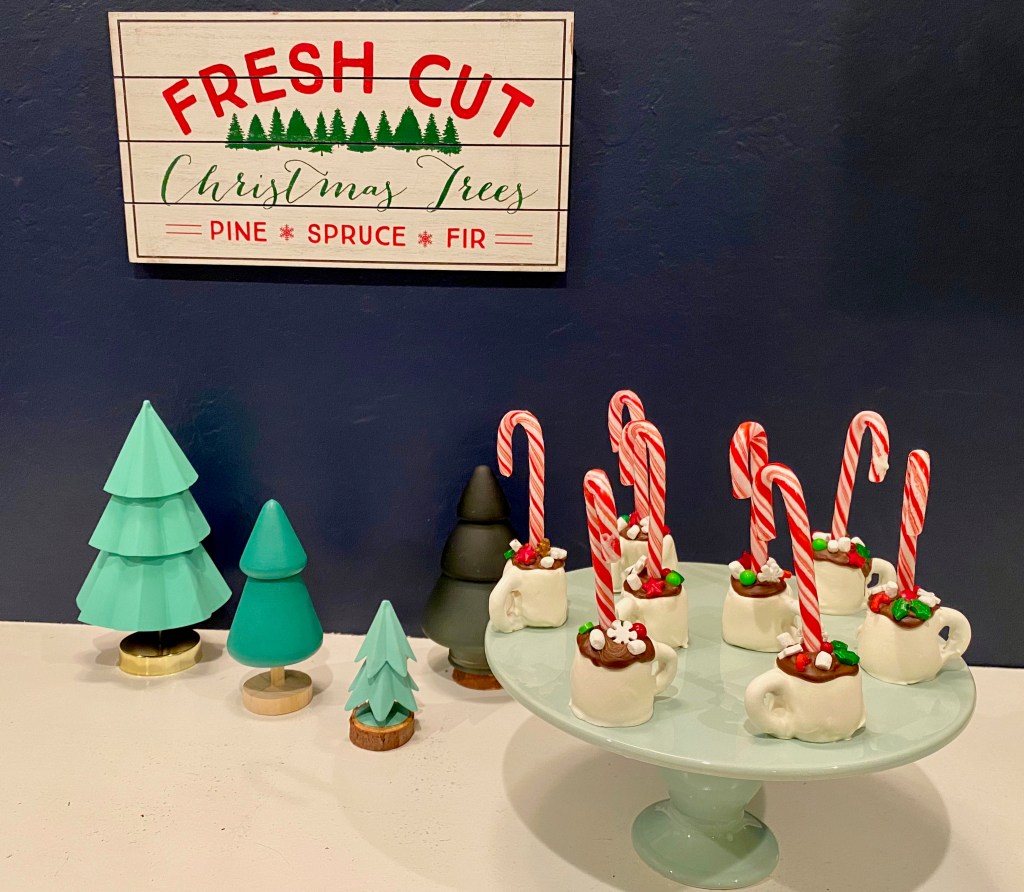
These little Christmassy Pops are perfect for your holiday party or for adding to your plate of Christmas treats. I used a pretty cake platter in mint green next to my display of mini Christmas trees for some photos and then sent them off to be handed out at the Drive-Thru caroling event. #CommissionsEarned
For more fun Christmas Ideas check out the following blogposts: