Hot Cocoa Mug (Christmas) Marshmallow Pops

Christmas came and went, and while I had great intentions to add some new holiday posts to my blog, I was too busy enjoying all of the fun activities to get to the blogging part. I guess these little Hot Cocoa Mug Marshmallow Pops can be tucked away on a Pinterest board for next Christmas 🙂

The past couple of years, our church has done a drive-thru Christmas Caroling event. My friend asked me to make cookies to pass out, but festive mallow pops are more fun than baking cookies for me, so I set out to make some really cute and Christmassy pops. These little guys were a bit trickier to make than I expected, but I think they turned out pretty cute.

Here’s what you will need to make your own Hot Cocoa Pops: peppermint candy canes (the ones I used were in between the typical big and small size), Jet Puffed Marshmallows, pretzels (broken up to create handles), candy melts in milk chocolate and bright white, Kraft Mallow Bits, various holiday sprinkles, parchment paper, and a Wilton’s squeeze bottle. #CommissionsEarned

STEP 1: LAY EVERYTHING OUT ON PARCHMENT PAPER SO YOU HAVE AN EASY WORKSPACE

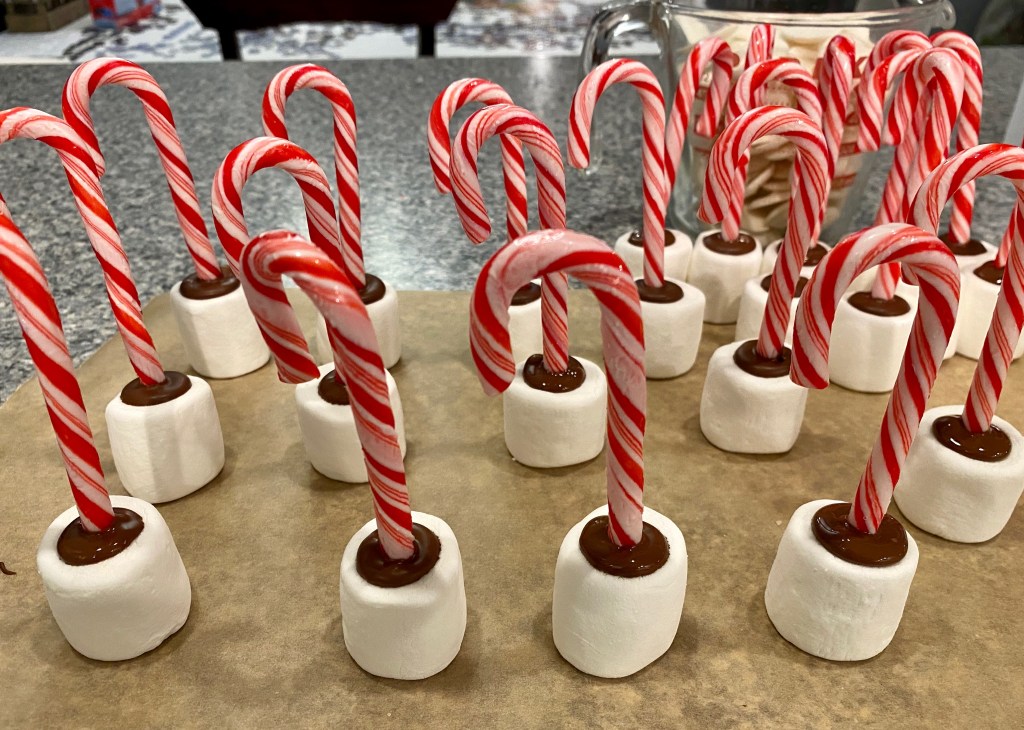
STEP 2: MELT A SMALL AMOUNT OF THE CHOCOLATE CANDY MELTS. DIP A CANDY CANE IN THE CHOCOLATE AND PUSH INTO THE CENTER OF THE MARSHMALLOW. REPEAT

STEP 3: MELT A SMALL AMOUNT OF THE WHITE CANDY MELTS. DIP THE ENDS OF THE BROKEN PRETZEL IN THE WHITE MELTED CANDY AND SECURE TO THE SIDE OF THE MARSHMALLOW. REPEAT.

STEP 4: MELT THE REMAINDER OF THE WHITE CANDY MELTS. DIP EACH MARSHMALLOW, MAKING SURE TO COAT ALL THE WAY UP TO THE TOP OF THE MARSHMALLOW AND COVERING THE PRETZEL HANDLE. YOU MAY NEED TO WIPE OFF SOME OF THE DRIPS FROM THE BOTTOM BEFORE PLACING ON THE PARCHMENT PAPER TO DRY.

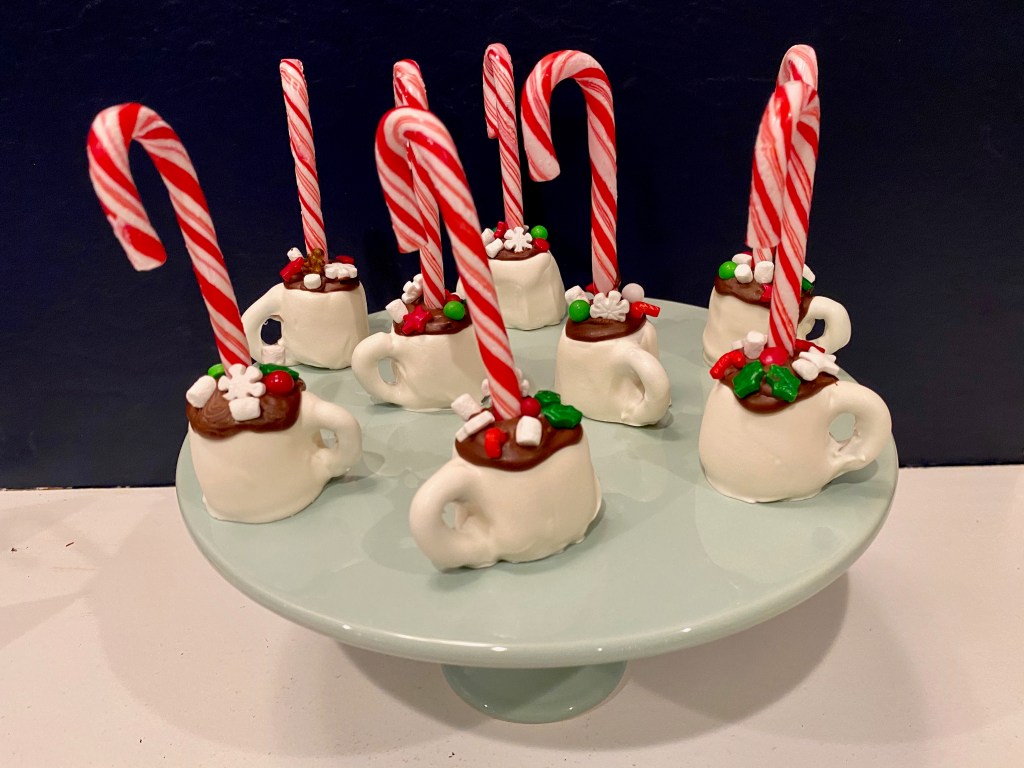
STEP 5: MELT THE REMAINDER OF THE MILK CHOCOLATE CANDY MELTS AND TRANSFER TO A SQUEEZE BOTTLE. WORKING QUICKLY, BEFORE THE CANDY MELTS SOLIDIFY, DRIZZLE MILK CHOCOLATE ALONG THE TOP OF EACH POP AND ADD A FEW FESTIVE SPRINKLES AND MALLOW BITS. THIS IS WHERE THE TRICKY PART COMES IN BECAUSE IT’S DIFFICULT TO ADD THE TOPPINGS AFTER THE CHOCOLATE HAS SET, SO YOU HAVE TO WORK FAST.

STEP 6: ENJOY!!!

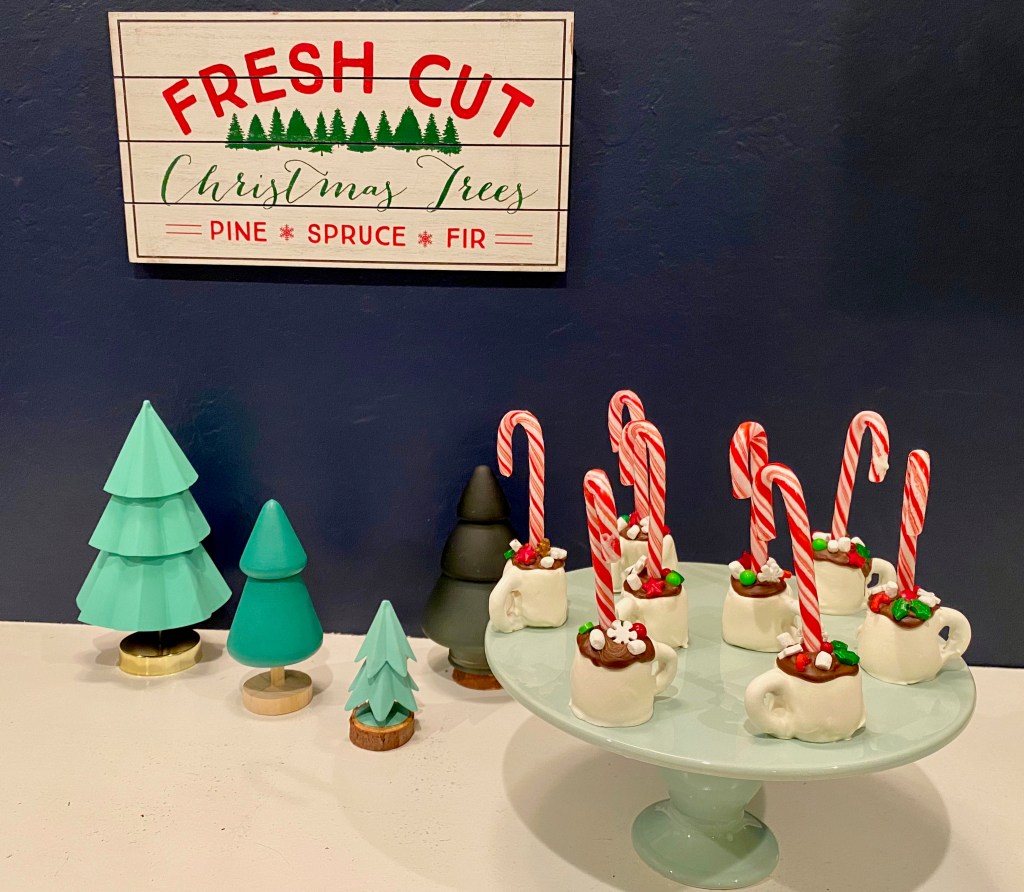
These little Christmassy Pops are perfect for your holiday party or for adding to your plate of Christmas treats. I used a pretty cake platter in mint green next to my display of mini Christmas trees for some photos and then sent them off to be handed out at the Drive-Thru caroling event. #CommissionsEarned

For more fun Christmas Ideas check out the following blogposts:

Polar Express & Graham Cracker Trains

Turn Dad Into A Snowman

Advent

Graham Cracker Gingerbread Houses

Glittery Christmas Tree Silhouettes

DIY Rustic Christmas Tree Banner

Advertisement

DIY Rustic Christmas Tree Banner

Each year, I try to incorporate some type of Christmas craft into our Advent activities. When my kids were younger, we would often take nature walks and collect all sorts of natural treasures. My kids are older now, and nature walks are a distant memory, but this remains one of my favorite DIY Christmas crafts that we made together.

This simple and inexpensive Christmas Tree Banner will add a rustic touch to your holiday decor and kids will have so much fun collecting sticks and twigs to use for their creations. You will need to pre-cut white or off white card stock in rectangles or pendants and purchase some wooden stars, gold paint, twine, and glue. Before your nature walk, take a few minutes to paint your wooden stars with the gold paint. #CommissionsEarned

Bundle up, grab a bag, and go on a stick hunt. Look for sticks in a variety of lengths, but try to find ones in a similar width around. Once you get home, hand each child a piece of the pre-cut banner and let them sort through the sticks, breaking pieces off to for their Christmas Tree, and working their way from bottom to top, while leaving a bit of room for a star.

Glue the sticks in place, including a vertical twig for the trunk and add one of your gold stars to the top of each twig tree. Once all of your banner pieces have dried and you have hole punched the top, thread your twine through and find the perfect place to hang your rustic Christmas Tree Banner.

For more fun Christmas ideas check out the following blogposts:

Advent

The Polar Express & Graham Cracker Trains

Turn Dad into A Snowman

Glittery Christmas Silhouettes

Graham Cracker Gingerbread Houses

Thanksgiving (Turkey Handprint) Kids Table

Thanksgiving is just around the corner and I have been reflecting on the progression of our Thanksgivings over the years. This used to be the one holiday that my entire side of the family came together. We spent several days at my mom’s house baking, taking walks through the almond orchards in her town, playing games, bike riding, watching movies, and preparing for the big feast on Thanksgiving Day. When my mom passed away, 6 years ago, everything about this beloved holiday changed. We started getting together with my family the weekend after Thanksgiving for a non traditional meal, which has still made for some really fun memories, but some years, we have found ourselves at home on Thanksgiving Day, just the 5 of us.

I love to create memories that my kids will look back on with joy when they have families of their own, so on those quiet Thanksgivings we started a new tradition. I purchased a roll of brown craft paper and used it as our table cloth. I grabbed a large bowl from the kitchen to use as a template to trace circles for each member of our family and put a bucket of markers in the middle of the table. At some point in the day, before our big feast, we all sit down and make “turkey handprints” in the circles and then write the things we are thankful for. The circles then become our dinner place settings. #CommissionsEarned

On Thanksgiving, like many families, we take some time to share what we are thankful for. This interactive table setting, provides plenty of content for a wonderful conversation about gratitude and gives each member of the family a chance to put their creativity on display.

You can even add to this activity by including some fun holiday stickers for the kids, as well as a beautiful thankful sticker to place along the center of your table. #CommissionsEarned

For more fun Thanksgiving ideas, check out these blogposts:

Thanksgiving Turkey Place Cards

Thanksgiving Cakes and Cupcakes

Fall Leaf Cupcakes

Thankful Tree

Breakfast Turkey

Valentine Marshmallow Pops

If you are looking for a cute and simple, no bake, Valentine Treat…look no further.  These Valentine Marshmallow Pops are quick and easy to make and they taste delicious!  They are perfect for taking to class parties or passing out to friends.  You can even hole punch a small Valentine card or paper heart on the top and bottom, and weave it through the top of the lollipop stick, for personalized treats.

One bag of Wilton’s candy melts makes about 26 pops and the decorating possibilities are endless.  Let your kids help you make these for a fun family activity and an opportunity for them to express their creativity.

For more helpful tips on making these adorable Valentine Pops, watch my tutorial!    Happy Valentine’s Day!

img_6032img_6035img_6033img_6034img_6038img_6037img_6042img_6056img_6058

Book Page Banner

img_5919

I love books!  In this day in age when so many are reading books on Kindles, Nooks, and iPads, you will find me curled up in a cozy spot in my house with a traditional paper book.  The library just so happens to be one of my very favorite places on the Earth!  I think that is why my eyes are drawn to creative projects made from book pages.

Several years ago I made this pretty little book page banner to hang across my mantle for Valentine’s Day and I have reused it several years in a row because I love it so much!  To make one of your own, you will need a book that you don’t mind cutting up (I bought mine from the Dollar Tree).  You will also need scrapbooking paper in several colors or patterns. I went with a black, red, and off white theme.  Grab a couple of buttons and some twine and you are all set.

I used my Cricut Expression 2 to cut the L O V E letters, but made my own template for the large and small hearts.  The book pages are 6 inches long by 4 inches wide.  This gives you enough length to fold the top over to hang them on the twine and to cut a 1 1/2 inch triangle out of the bottom of each.  For my banner, I stapled the individual book page pieces over the twine and then glue the hearts on after to cover the stapes.  For the LOVE portion, I lined the staples up with one of the words to “hide” it as much as possible.

If you love creating banners for your own home, check out my tutorial on How to Make a Pennant Banner.

If you are looking for some other simple and fun Valentine ideas, here are some links you will enjoy.

Valentine Paper Garlands

Valentine Craft for Kids: Cookie Cutters and Paint

Valentine Words of Affirmation for Kids 

Chocolate Covered Strawberries 

Valentine Craft: Cookie Cutters & Paint

Today I’m introducing a new series on Kerri Creates called “Craft Time with Karis.”  So many of my crafting inspirations have to do with my kids, so I thought it would be fun to bring my daughter in as my little crafting sidekick!  She’s always up for an art project and I love providing creative opportunities for her.

“Craft Time With Karis” debuts with a simple and inexpensive Valentine Craft that we put together with a few things we already had around our house…cookie cutters, paint, and paper bags.  Enjoy this little video tutorial we created, and subscribe to our youtube channel for up and coming “Craft Time With Karis” videos.  #CommissionsEarned img_5838img_5840fullsizeoutput_d7a0

For more Valentine fun check out the following blogposts:

Valentine Marshmallow Pops

Valentine Paper Garland

Valentine Words of Affirmation for Kids

Valentine Hearts Cake

Valentine Words of Affirmation for Kids

Valentine’s Day is the perfect opportunity to be intentional about expressing our love in creative ways to our children.  So why save it all for one day?  Take the beginning of February and create an “affirmation heart chain” for each of your children.  Hang it on their bedroom doors and write a word or phrase affirming something uniquely wonderful about who they are on one heart, each day, leading up to Valentine’s Day.

I will never forget the first time we did this with our kids.  It made getting up each morning a little more pleasant.  You could see the joy on their faces as they read the words written just for them.  I would even catch them reading down the list several times a day.

To make this a bit easier for me to stick to (as we all know how busy life gets), I like to print out a list of 14 words or phrases of affirmation for each of my kids before February 1st.  I cut them up and put them in baggies.  Then I just glue one on each of their hearts before I go to bed every night.

fullsizeoutput_d78ffullsizeoutput_d790fullsizeoutput_d791

New Year’s Eve

New Year’s Eve is always a much anticipated night for our family.  It is, of course, the one night a year that my little night owls are given permission to stay up until midnight!  We started the tradition of celebrating a “family friendly” New Year’s Eve a couple of years ago.  Some years we have joined together with other families.  This year it was just the 5 of us at home for the evening.

fullsizeoutput_d589
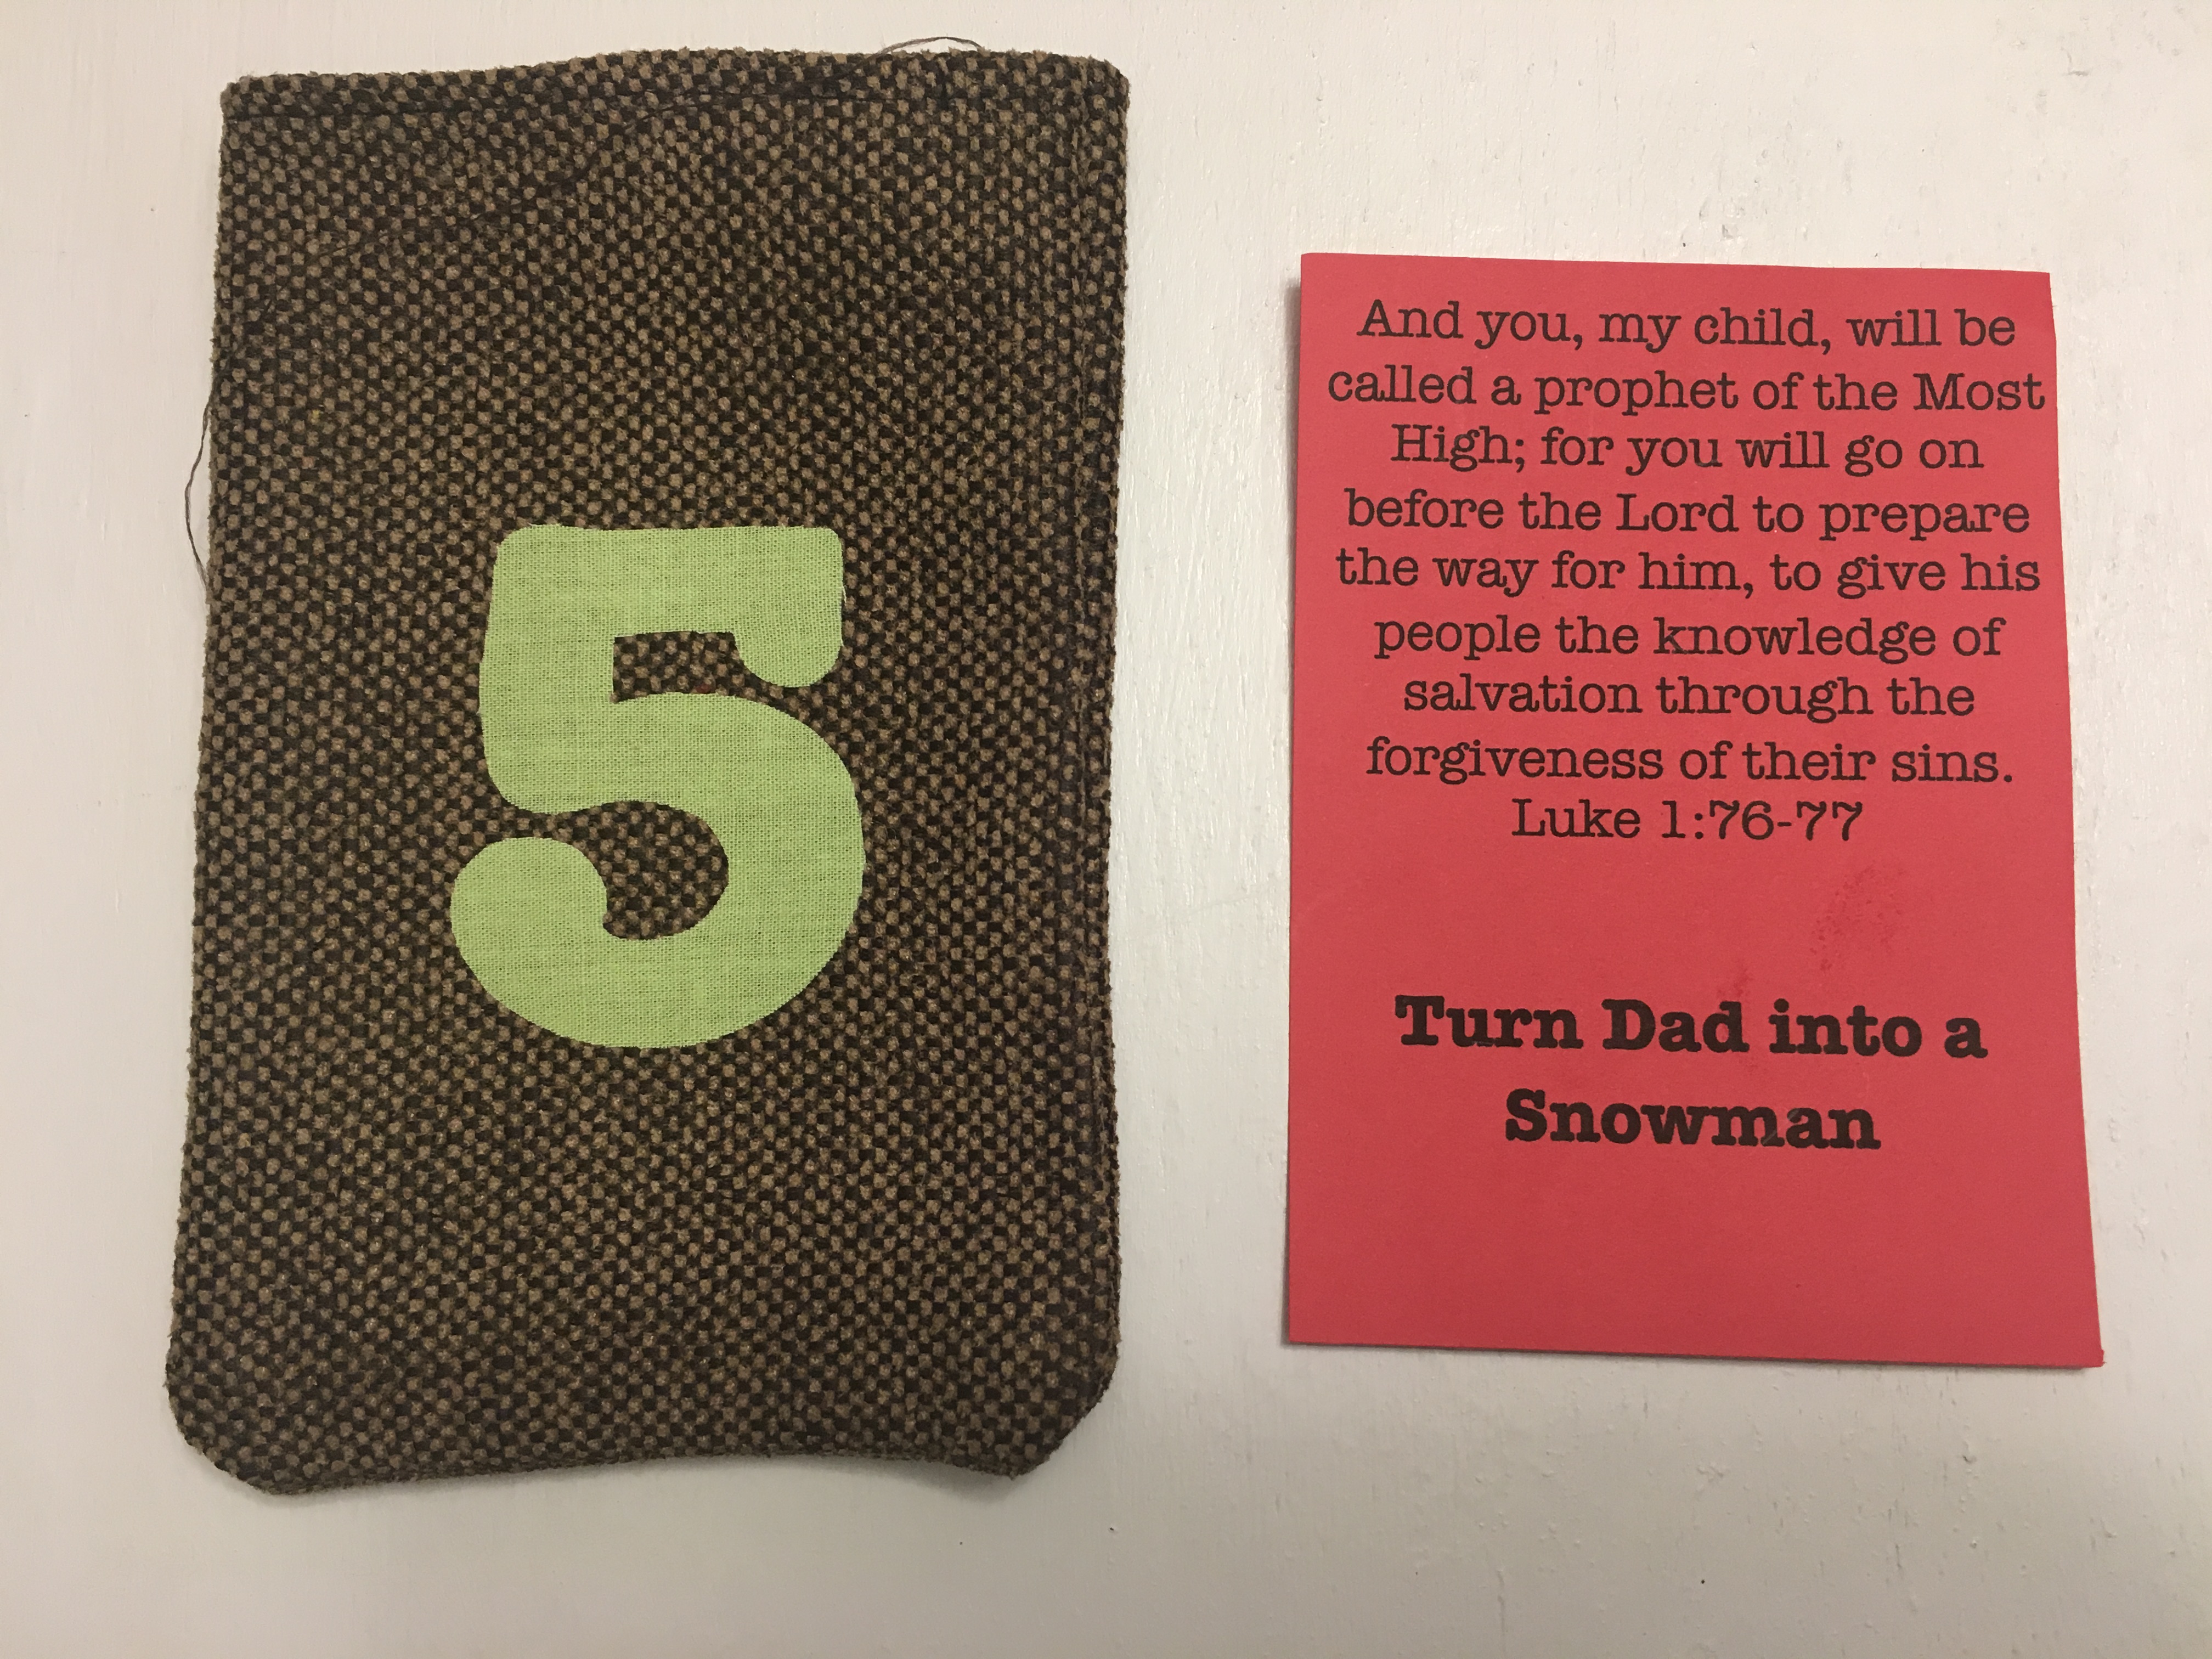
I kept things inexpensive by hitting up our local Dollar Tree for supplies, and then I went to work.  I already had paper bags, card stock, and glue sticks, so our “On the Hour Bags” didn’t cost a dime!  My plan was to start our evening festivities at 6:00, so I made a bag for each hour from 6:00 pm – Midnight.  I googled “free printable clock templates” and then added the clock hands to each one before printing them out onto white card stock.  I traced around a bowl to get perfect circles on the shiny blue and sparkly card stock behind the clocks.  A few finishing touches later, and the bags were done.

What was in each bag?  Each bag contained something that had to do with the activity for that hour.

6:00 pm: Time Capsule Printouts & A Mason Jar     We started a new tradition this year, and it was a huge hit!  I looked up some ideas for the time capsule template on Pinterest, and then created my own for our family.  We began our evening by sitting at the table together and filling in our favorites, reflections from 2016, & resolutions for 2017.  Then we read them to each other, rolled them up and placed them in a mason jar.  Our plan is to open them up on New Year’s Eve 2017, read them together, and then create a new time capsule.  I’m pretty sure this will continue to be a treasured tradition.

fullsizeoutput_d58dimg_5389
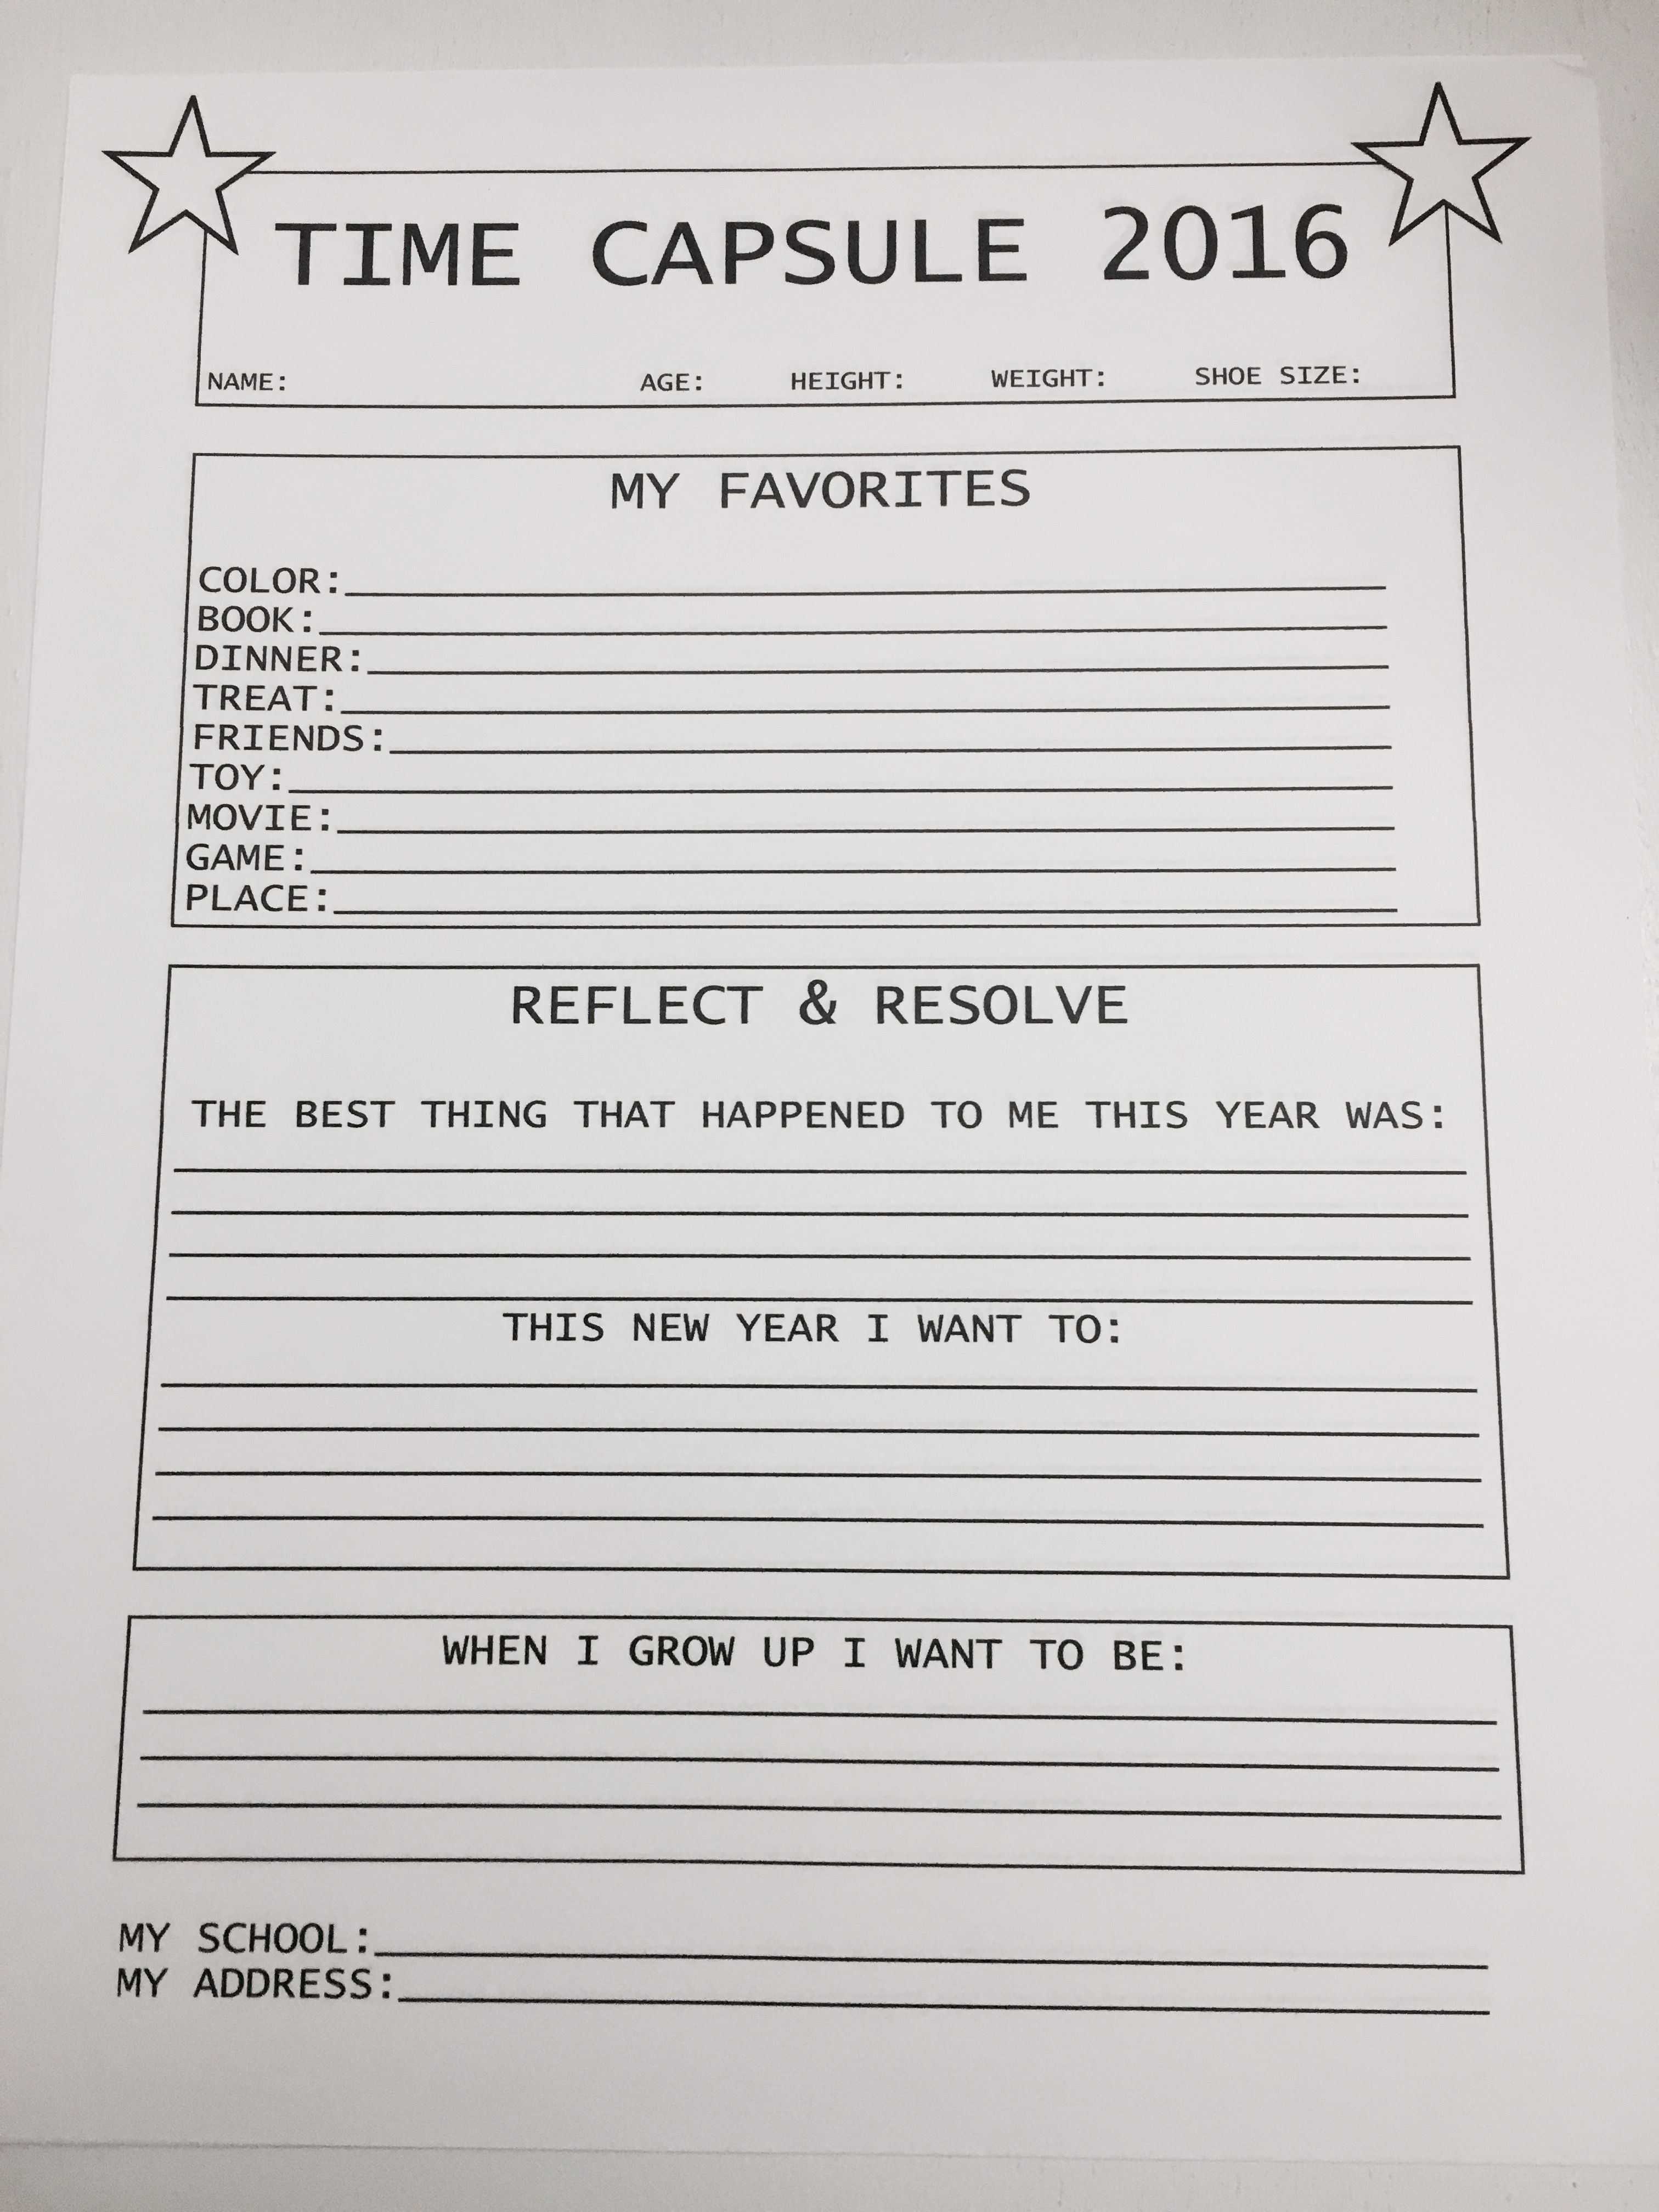
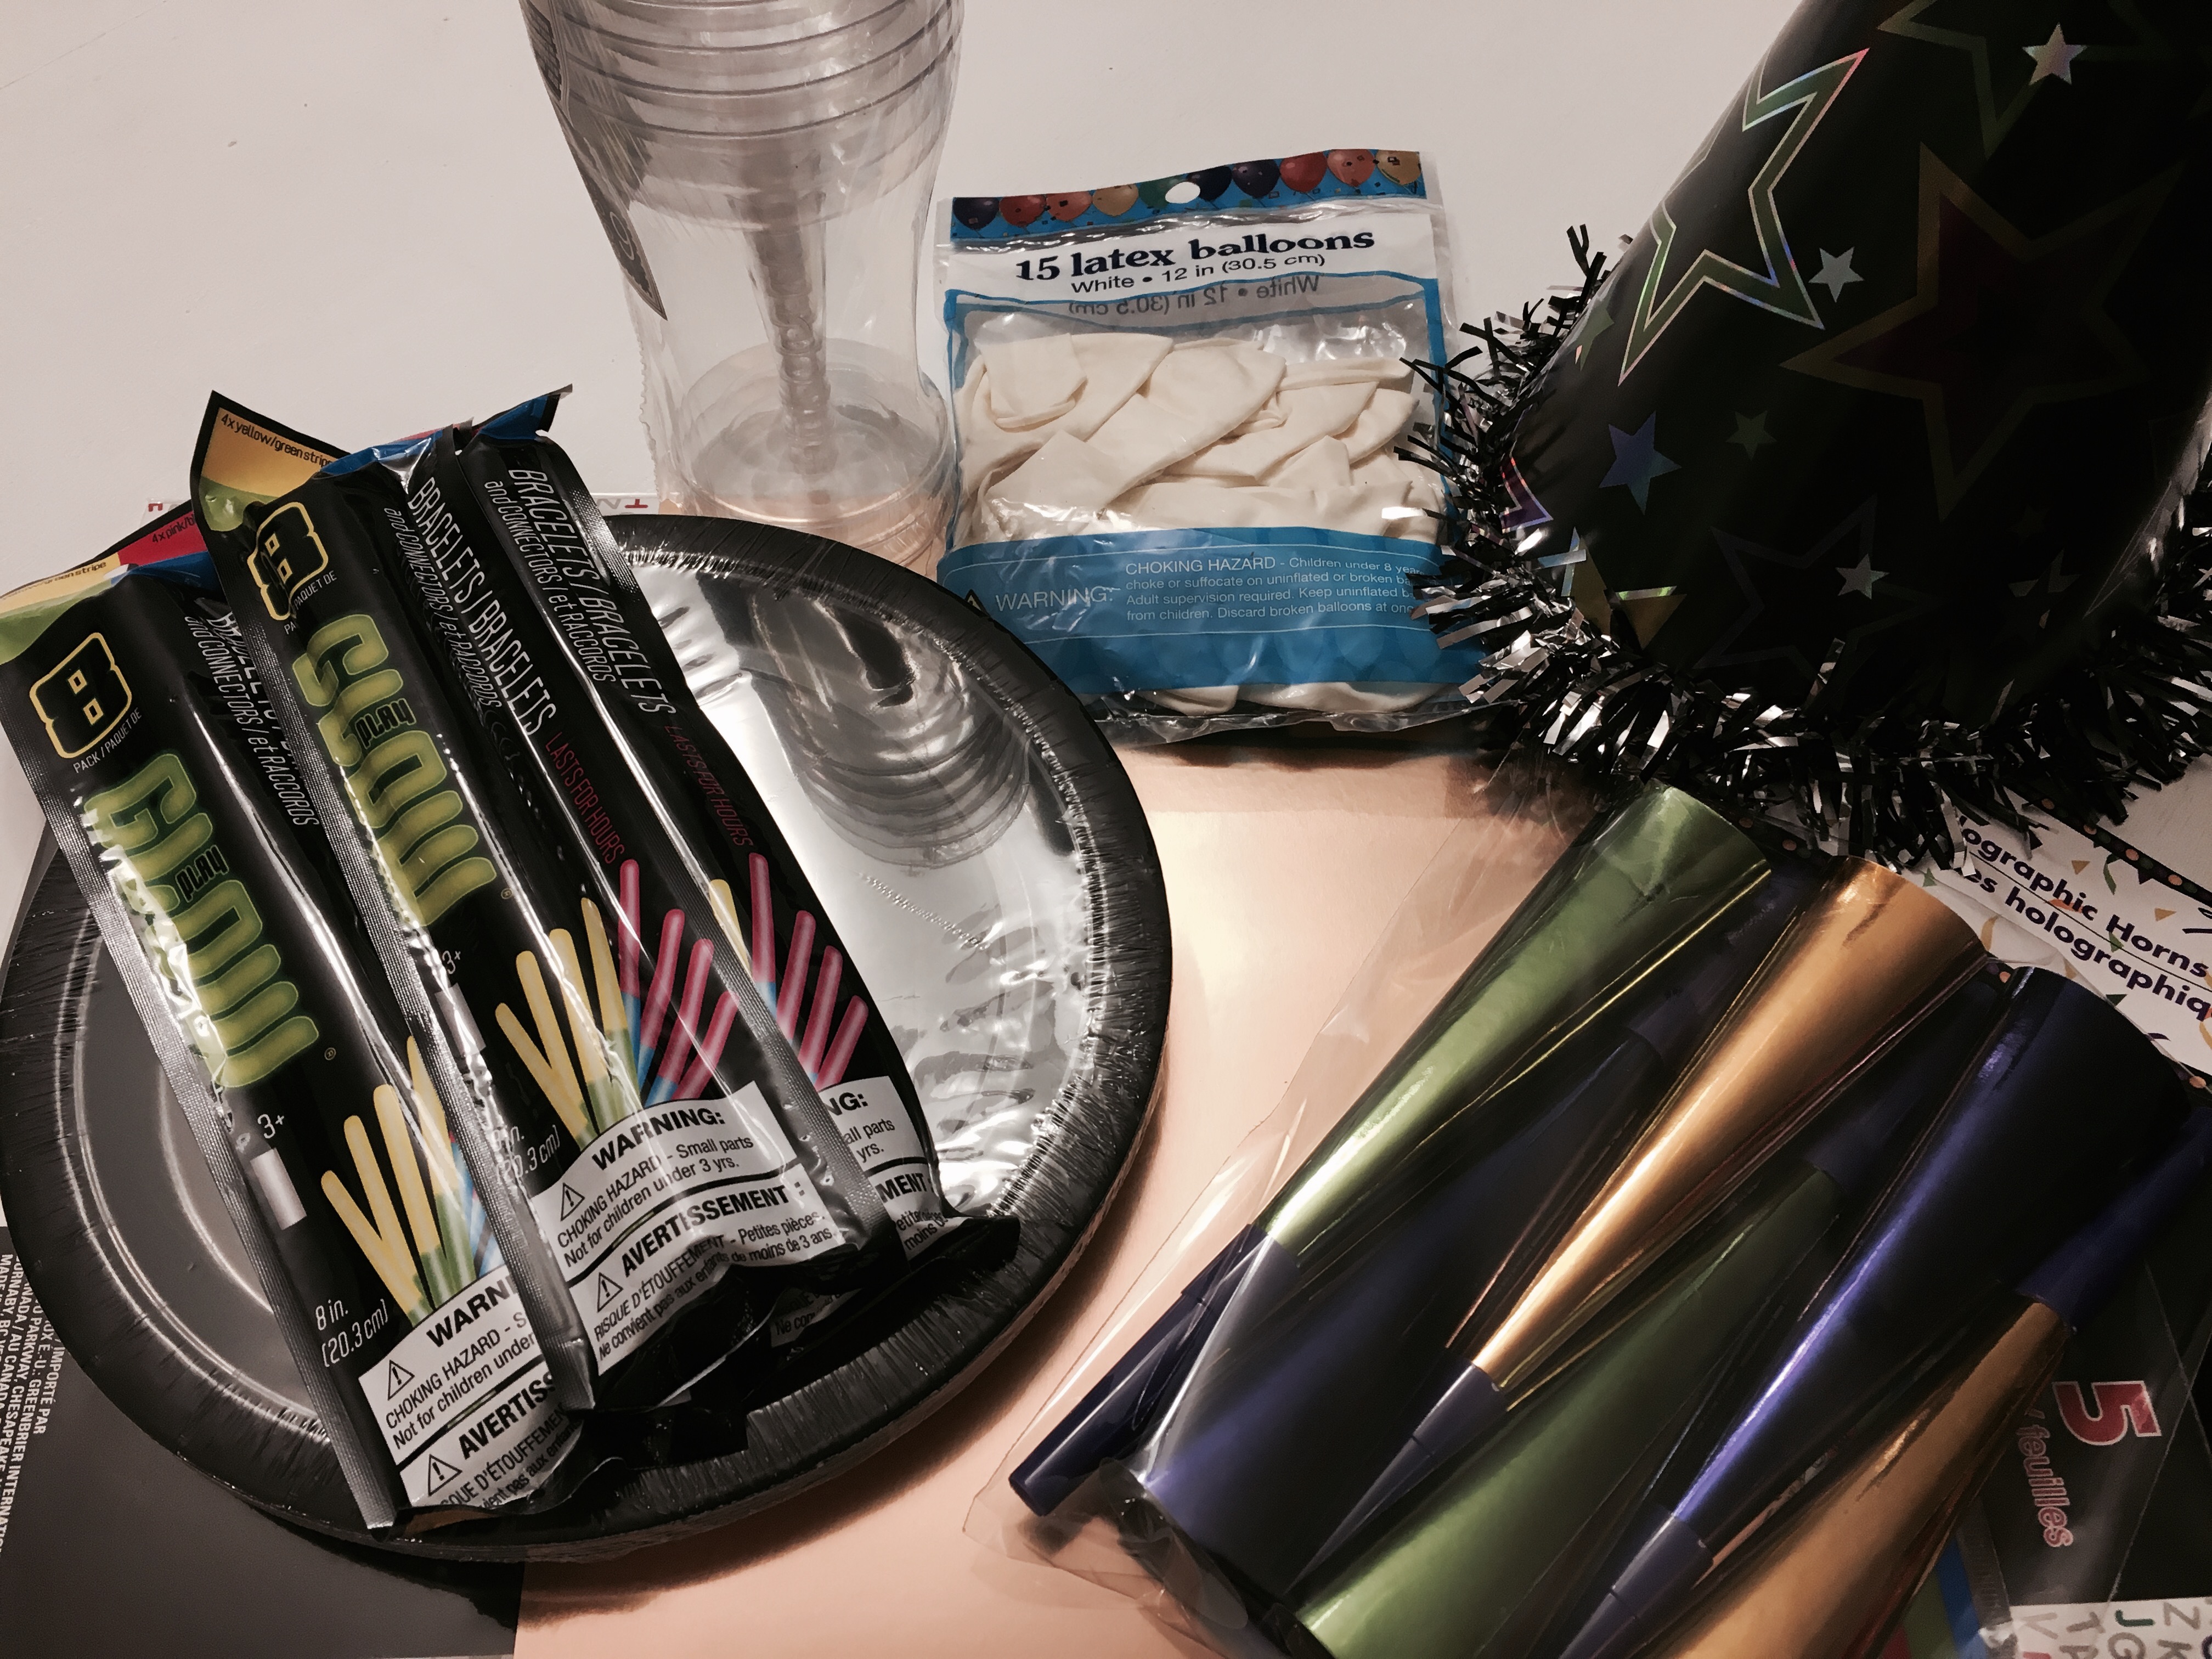
7:00 pm: Glow Sticks & Balloons     This was SO….MUCH….FUN!  We put glow sticks in balloons and then had an epic living room battle.  Boys vs. Girls with Dad as the DJ.  We turned off all the lights and made a line of glow sticks dividing the floor in half, girls on one side, boys on the other, with 6 glowing balloons on each side.  When Dad played the music, we would try to get all the balloons onto the opposing side.  When the music stopped the team with the least balloon on their side was the winner.  The girls started off strong, but after 5 rounds, the boys were the ultimate winners!  I’m telling you…I haven’t laughed that hard in a long time!     

img_53948:00 pm: Popcorn & A Red Box Movie     Popcorn and movie nights are a family favorite for us, and my kids really wanted to see the movie Storks!  Perfect for one of our New Year’s Eve activities!

img_54039:00 pm: Gummy Worms with a “Dessert Break” note attached     We took an intermission from the movie to get dessert.  This year, I made a delicious ice cream pie with a clock face.  I used gluten free Joe Joe’s cookies from Trader Joes to make an “oreo” crust, filled it in with vanilla bean ice cream, and poured homemade chocolate fudge frosting over the top.  While it was setting in the freezer, I made a clock on wax paper out of melted white chocolate and placed it on top of the frozen pie.  We also included gummy worms for the “non ice cream eater” in our family.

fullsizeoutput_d5bc10:00 pm: M&M’s, Marshmallows, and Straws     Game Time: I found this idea under “minute to win it” games on Pinterest.  I set the table with two paper plates for each player.  One plate contained M&M’s and marshmallows.  The other was empty.  Each player was given a straw (cut to about 3/4 size).  At my “GO” the players had to suck up the candies and mallows to make them stick to their straw and transfer them from one plate to the next.  The first player to get all of theirs transferred had to call out “Happy New Year!”  Micah for the win!

img_5413
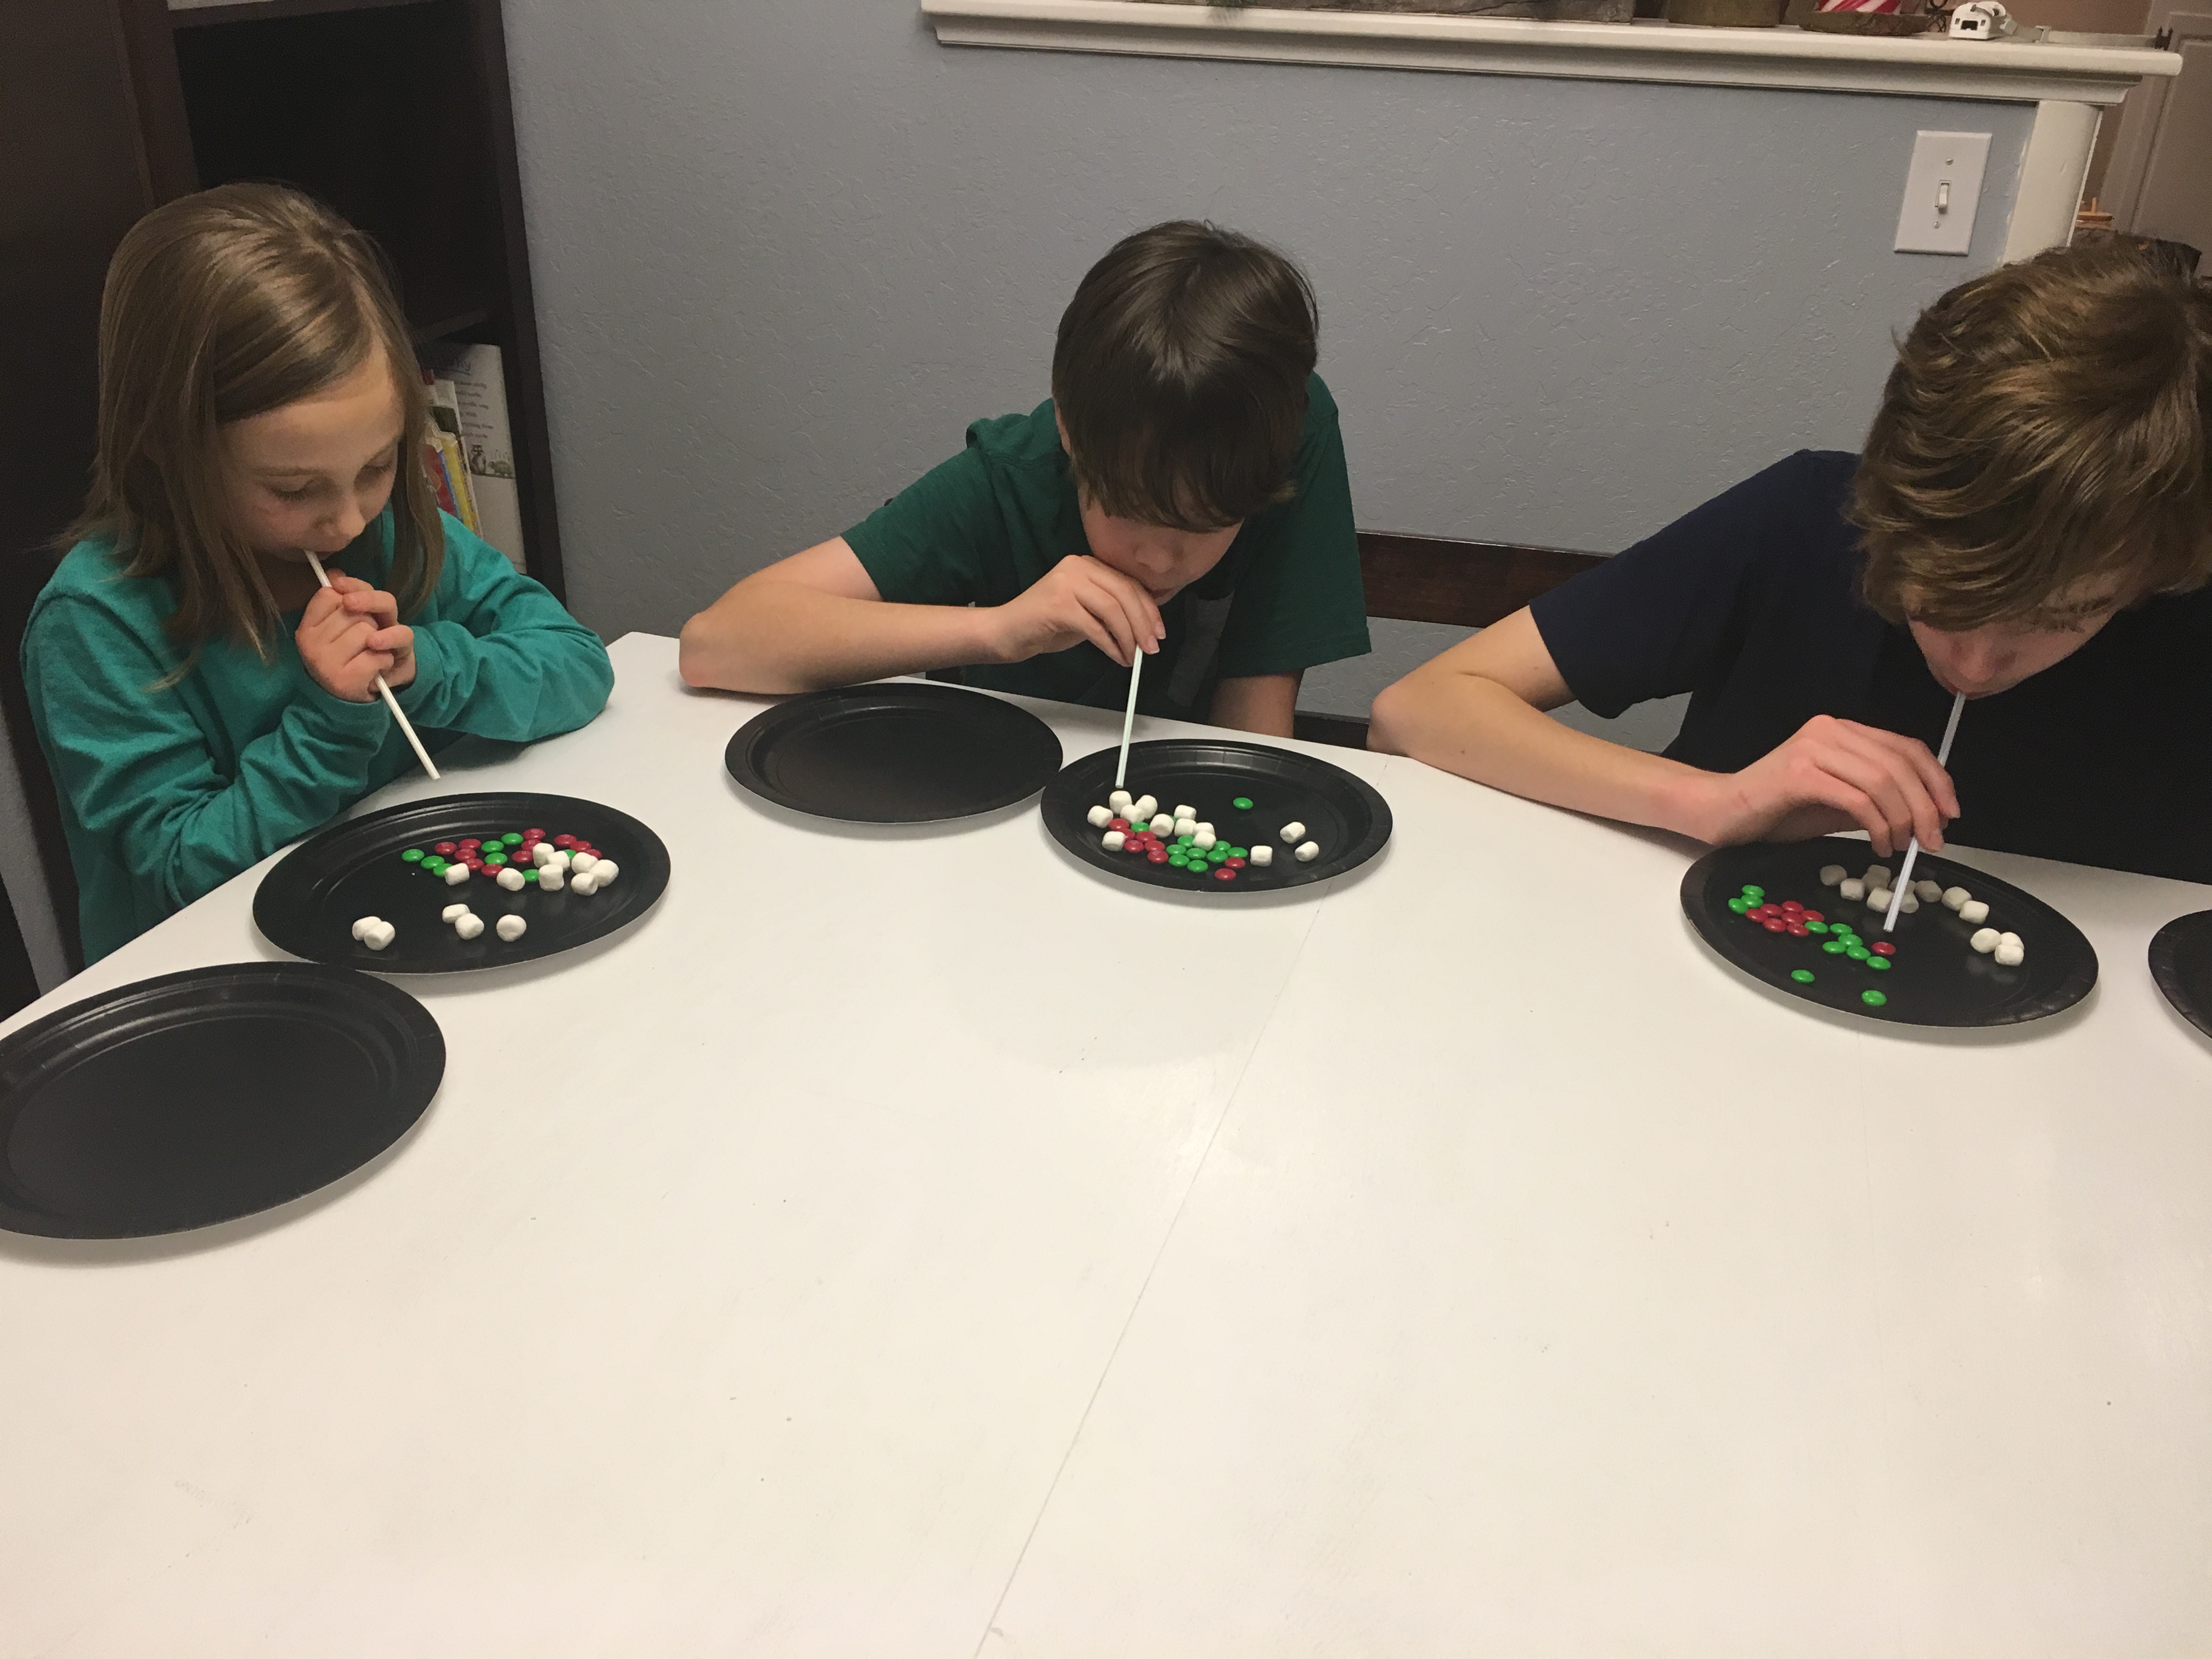
11:00 pm: A Big Bag of Skittles     Make a rainbow science experiment!  I had seen a couple of videos on youtube of this simple and fascinating science experiment, so I thought it would be a fun way to keep my tired children awake that last hour before the ball dropped.  Check out our “make a rainbow” video!

12:00 pm: Cups for Sparkling Cider and Party Horns     We opened our final bag about 10 minutes early.  Little Sister put on her party hat (she was the only one willing to wear one this year).  We filled our cups with cider and got ready to ring in the New Year!  We found a countdown on TV, and when the clock struck midnight, we ran outside yelling Happy New Year!!! Oh, and Micah finally got the chance to use that blow horn he got for Christmas! fullsizeoutput_d5ba

Turn Dad into a Snowman

Turning Dad into a snowman has become one of the most anticipated Advent activities for our children.   We started this tradition 3 years ago and it’s always sure to bring out tons of laughter and joy for all of us!  The kids squealed with delight this morning, when they opened the Advent bag and read that this was the day to make a Dad “snowman!”

The best part of this activity, besides the crazy amount of laughter, is that it is free!  Just gather what you have around the house.  We used a couple of rolls of toilet paper, some scrapes of cardstock for the eyes, coal buttons, nose, mouth, and arms.  I grabbed a scarf out of my closet and a hat out of the kid’s dress up box.  Have some scotch tape handy and you are ready to go.

Last year, by accident, my husband got some toilet paper in his mouth, which made for a hilarious few minutes of giggles for the kids.  So of course, this year, there was the expectation that he would make this happen once again.  He did not disappoint!  Make sure to watch our video to the very end to see the grand finale!

img_4598img_0004img_0008img_0009

Over the last several years, we have switched things up a bit. So far all but one of us has been the snowman. The kids were delighted the year that they opened the advent bag and found the card that said “turn MOM into a snowman!” From that point on, every year we have chosen a different person to be the snowman. Here are a few pics of this silly tradition.

For more Christmas Fun check out the following blogposts:

Advent

Glittery Christmas Silhouettes

Graham Cracker Gingerbread Houses

Breakfast Turkey

It’s the Monday morning of Thanksgiving break.  We are all in our pajamas and enjoying a relaxing day off.  In a couple of days we will pack up and head to Papa and Grandma’s house for Thanksgiving.  But today we are home with virtually no agenda.  I mentioned to my husband that we had cinnamon rolls and bacon in the refrigerator and then inspiration hit!  I had seen a picture of these breakfast turkeys on Pinterest and had wanted to make them.  Today was the perfect day!  These sweet and yummy turkeys didn’t last long in our house…and I think we found a new Thanksgiving Break tradition.

img_4348

For more fun Fall ideas check out my most recent blogpost: Thanksgiving (Turkey Handprint) Kids Table