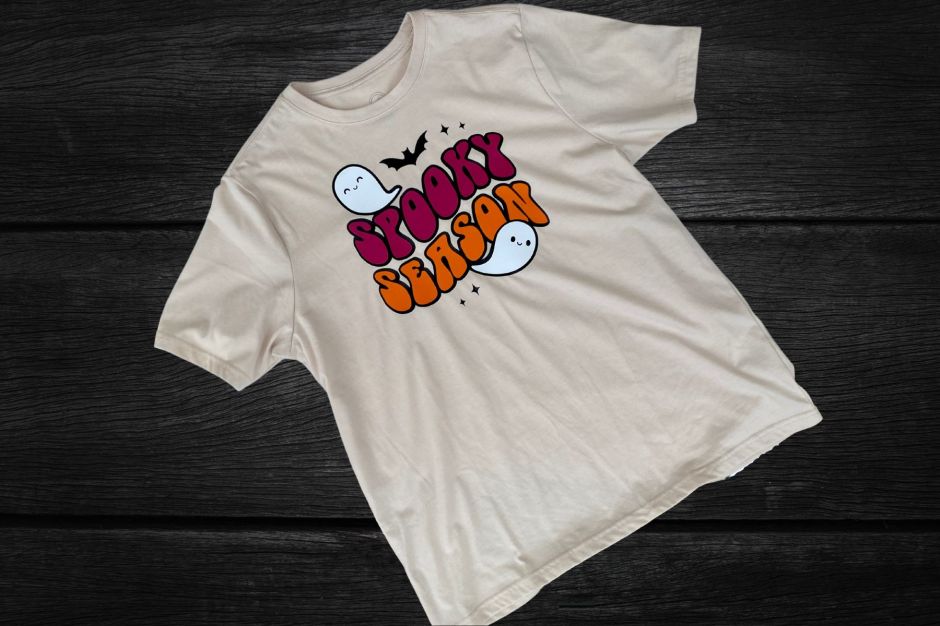
Halloween is just around the corner and my daughter wanted me to make her a fun Halloween tee on my Cricut Maker 3. I recently purchased a huge variety pack of HTVRONT heat transfer vinyl, a heat press machine, and a heat press mat, so I already had most of the supplies I needed. I found an inexpensive tee and went to work. #commissionsearned
We looked through the designs in Cricut Design Space and my daughter loved this “spooky season” SVG. I am still fairly new at layering heat transfer vinyl, so I was really pleased that this shirt turned out perfect. I started with the black vinyl and only pressed it for about 12 seconds. Then added the pink and orange. By cutting the carrier sheet close to the letters, I was able to press both colors at the same time. I only pressed this layer for about 10-12 seconds as well. I finished off by layering the white ghosts and pressed for an additional 20 seconds just to make sure that all of the layers were securely transferred to the t-shirt.
Here are a couple of important tips to remember when doing layers with HTV.
always mirror heat transfer vinyl
press each layer for a short amount of time- usually between 10-12 seconds, just to get the layer to stick to the tee and come off of the transfer paper
trim the transfer paper close to your design to try and save on the amount of layers you are pressing
be sure to use a Teflon sheet or parchment paper between your vinyl and heat press
finish off with a final press of 15-20 seconds to make sure your design is thoroughly pressed onto your tee
wait 24 hours before washing your tee and always wash inside out on cold without fabric softener and hang to dry
For more Halloween Fun, check out some of my other posts:
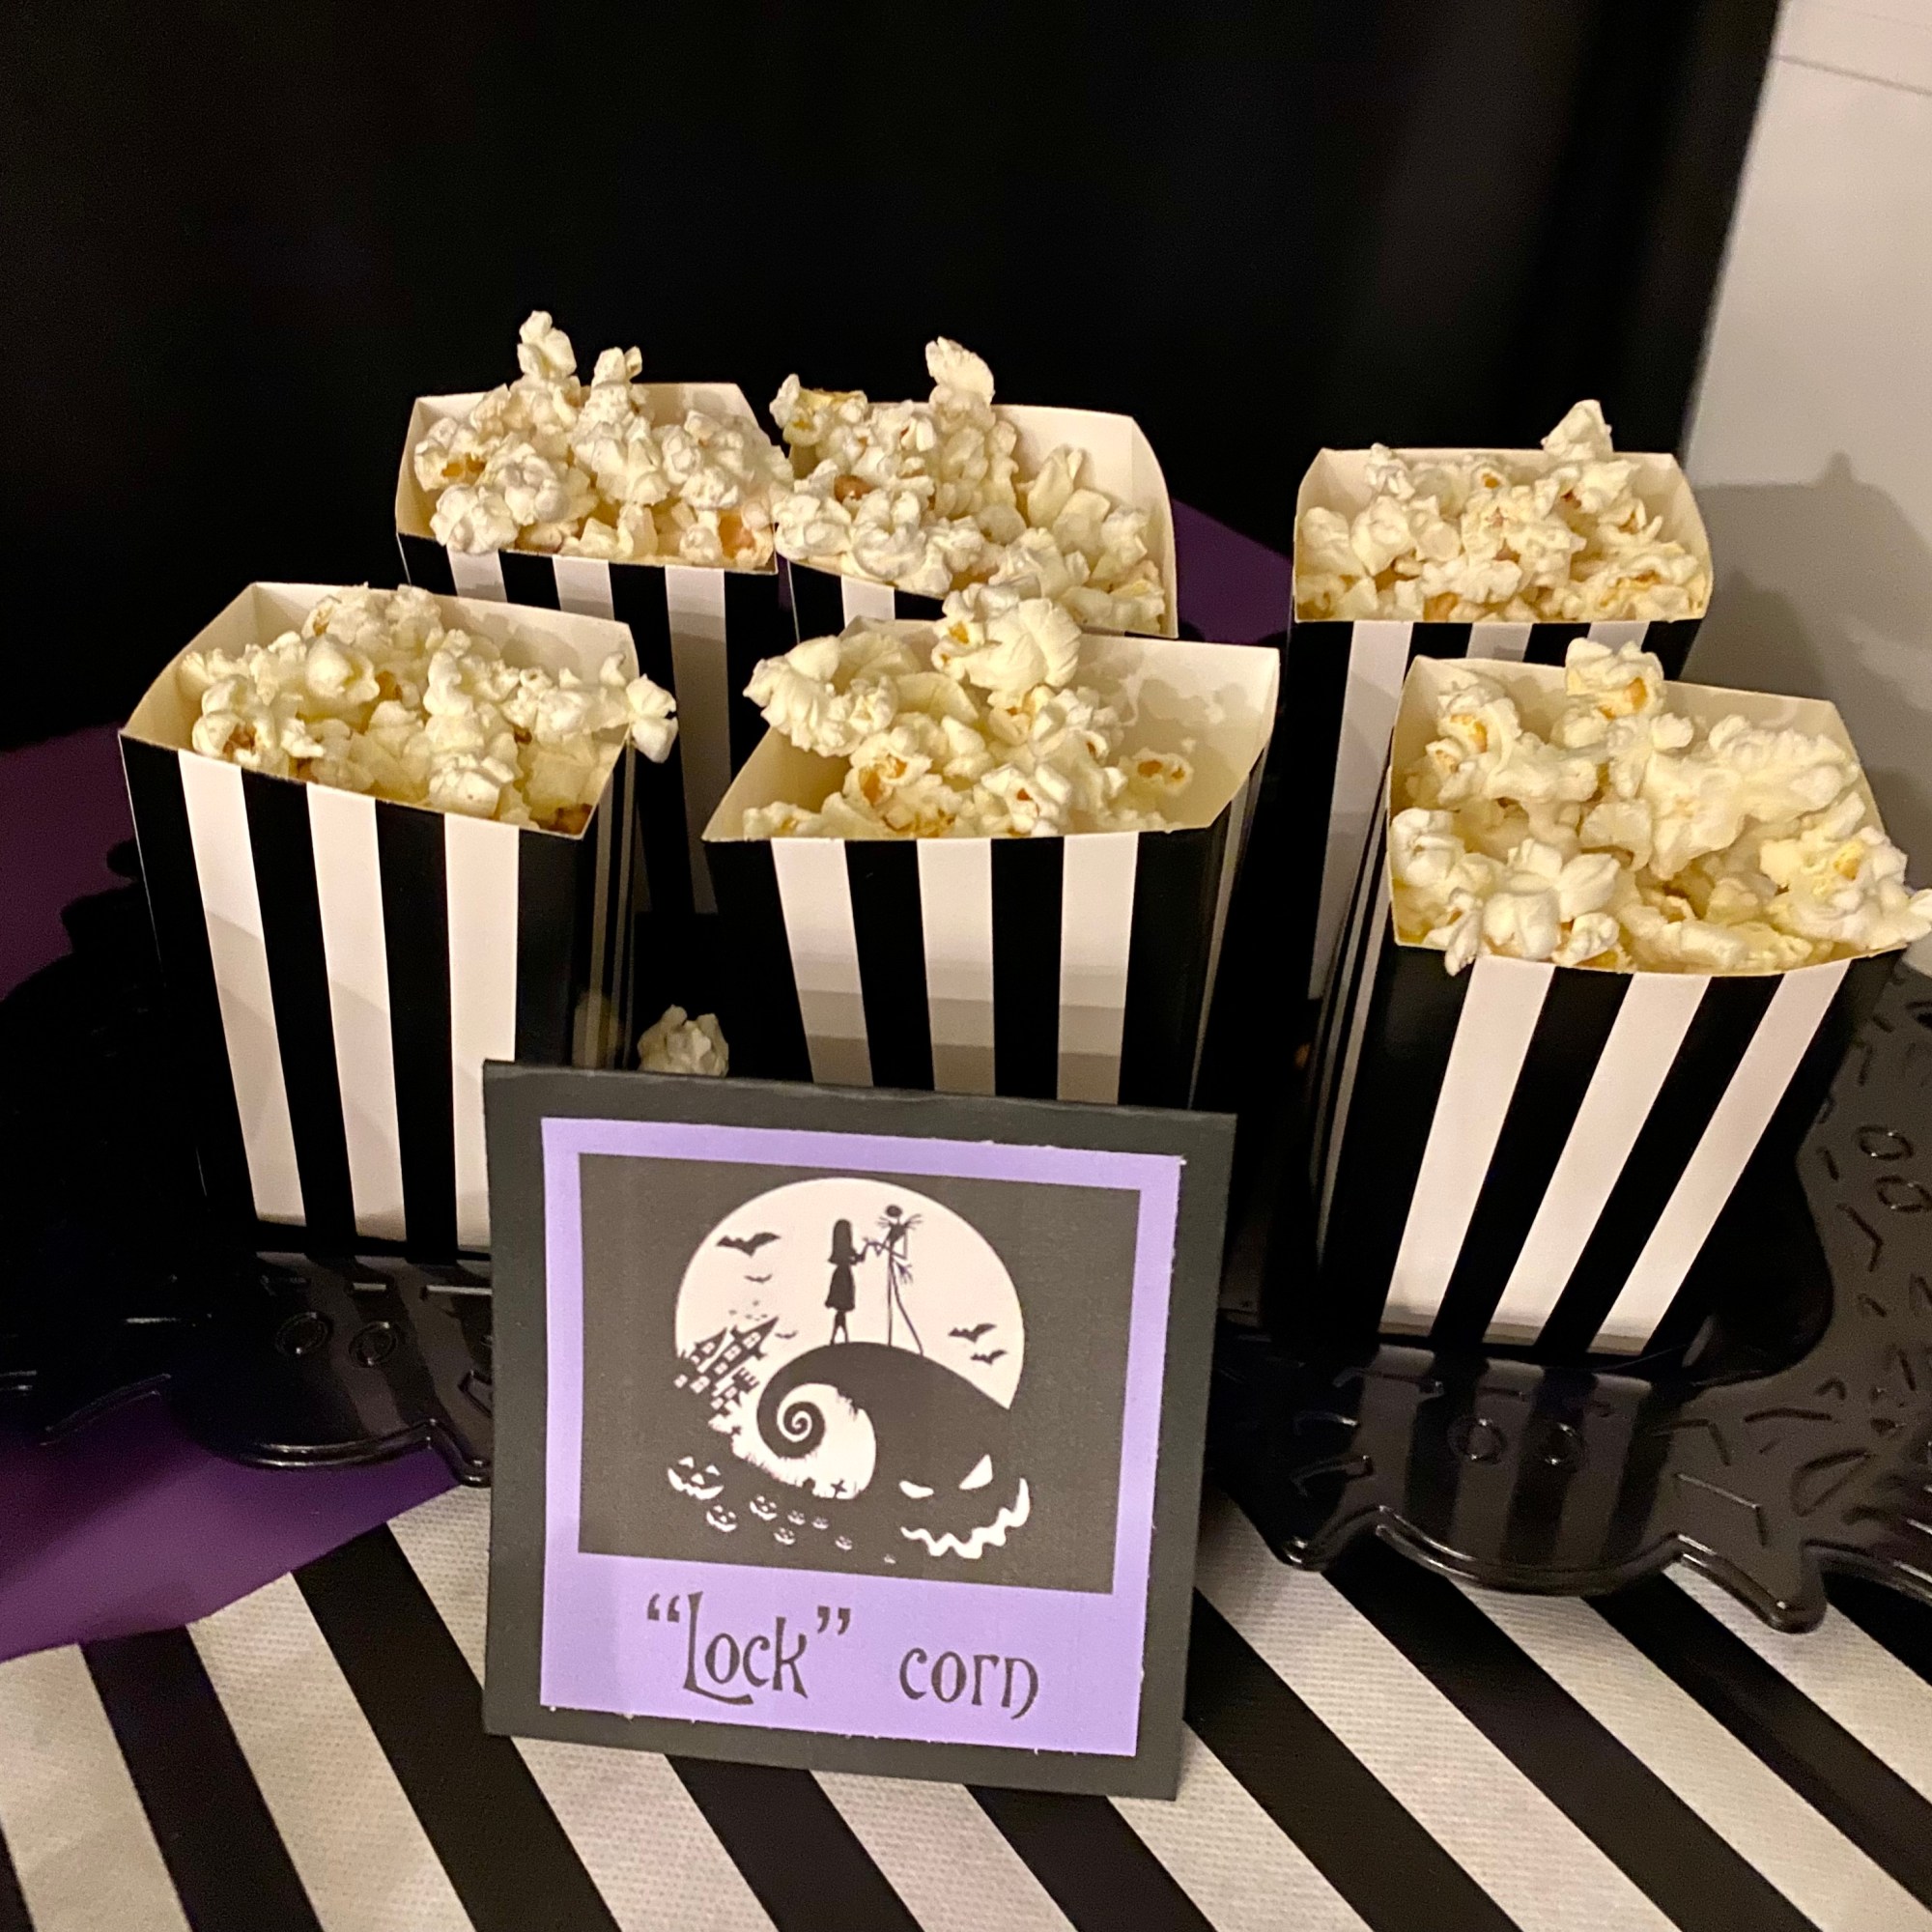
I am always looking for any opportunity to make memories for my kids in creative ways, so earlier this month, when my daughter started talking about Halloween movies that she likes, I suggested that we host a movie night on the weekend before Halloween. I’m not a fan of super scary, especially for middle schoolers, so we decided on Tim Burton’s The Nightmare Before Christmas and went to town browsing Pinterest for fun ideas. I found a super cute and inexpensive backdrop on Amazon and gathered a few things that I already had: white lights, a black backdrop, and a plastic pumpkin. I grabbed a purple plastic tablecloth, a black and white striped runner, popcorn boxes, and some black bowls and made some really fun food labels with names of the movie characters. I also printed off Jack & Sally faces to hang from the ceiling and I made a door hanger, using my Cricut Maker 3, with a black chalkboard style hanging that I found at the Dollar Tree and white vinyl. I’ve included the PDF of the printables that I created for you to use for your own party. #commissionsearned
Planning the food for this party was so much fun! Here’s a list of what was on our Nightmare Before Christmas Food Table.
Oogie Boogie Guts: Sour Gummy Worms
Sally Hair: Red Vines
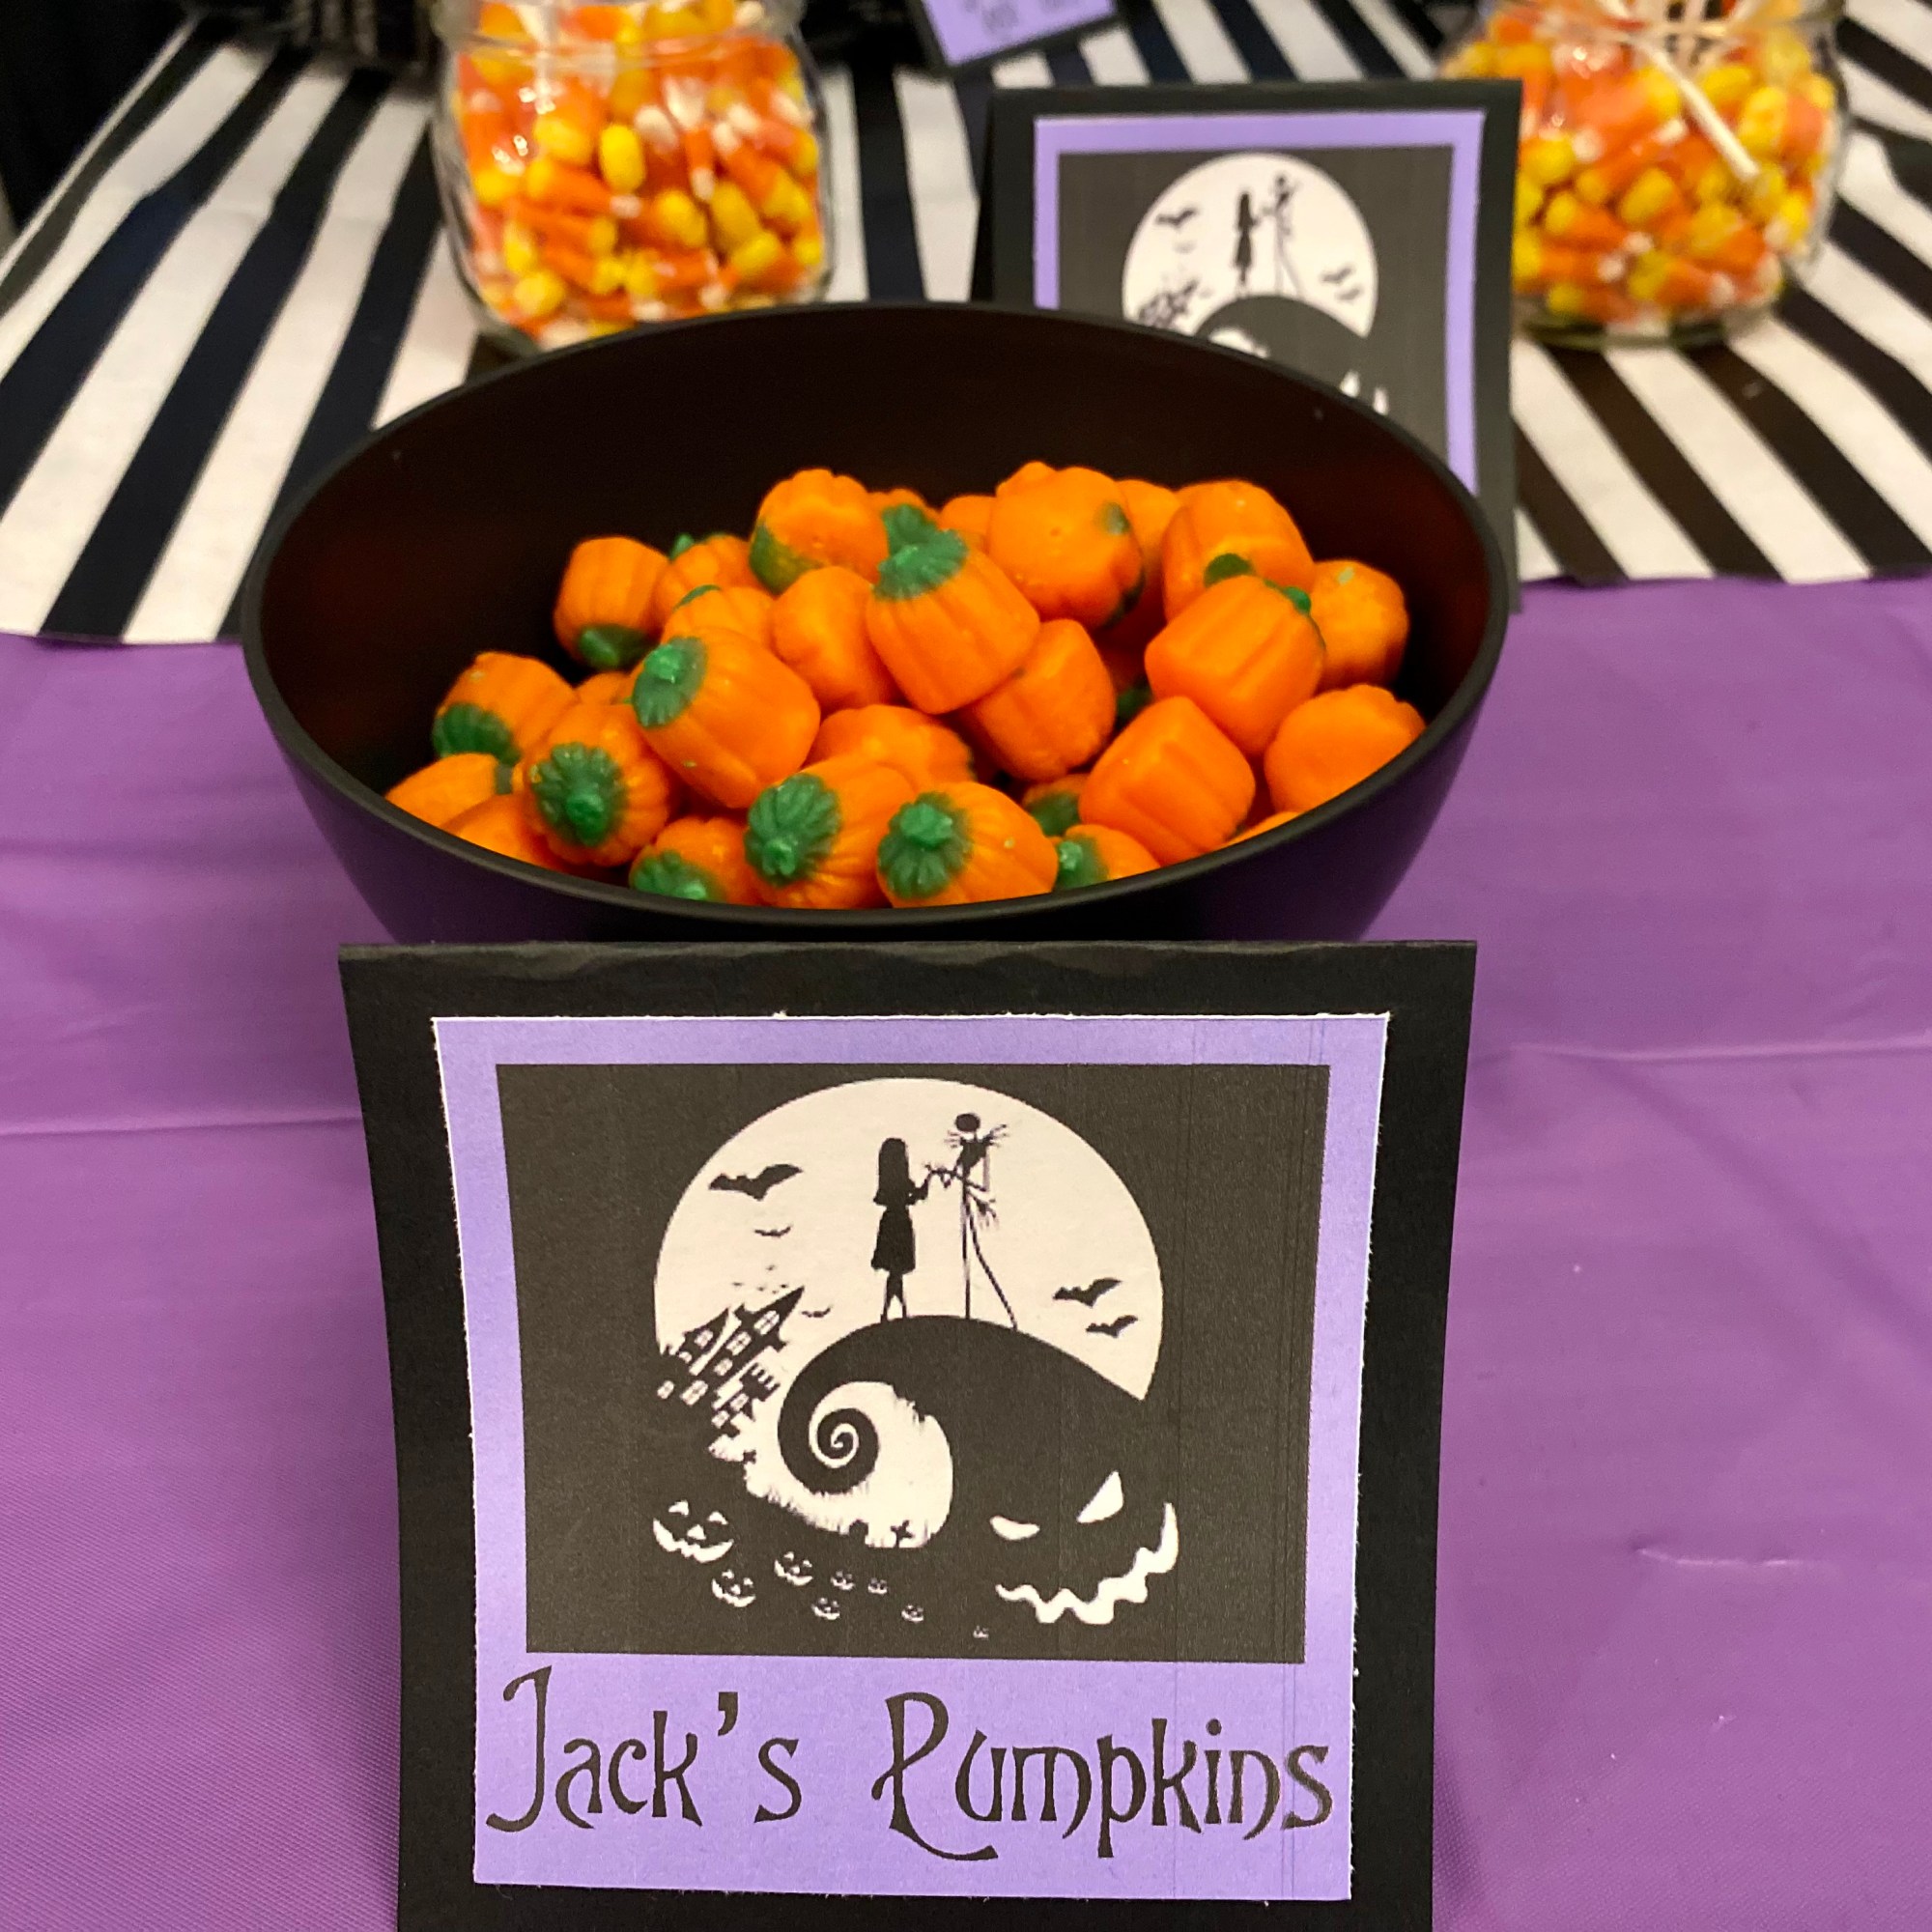
Jack’s Pumpkins: Brach’s Pumpkins
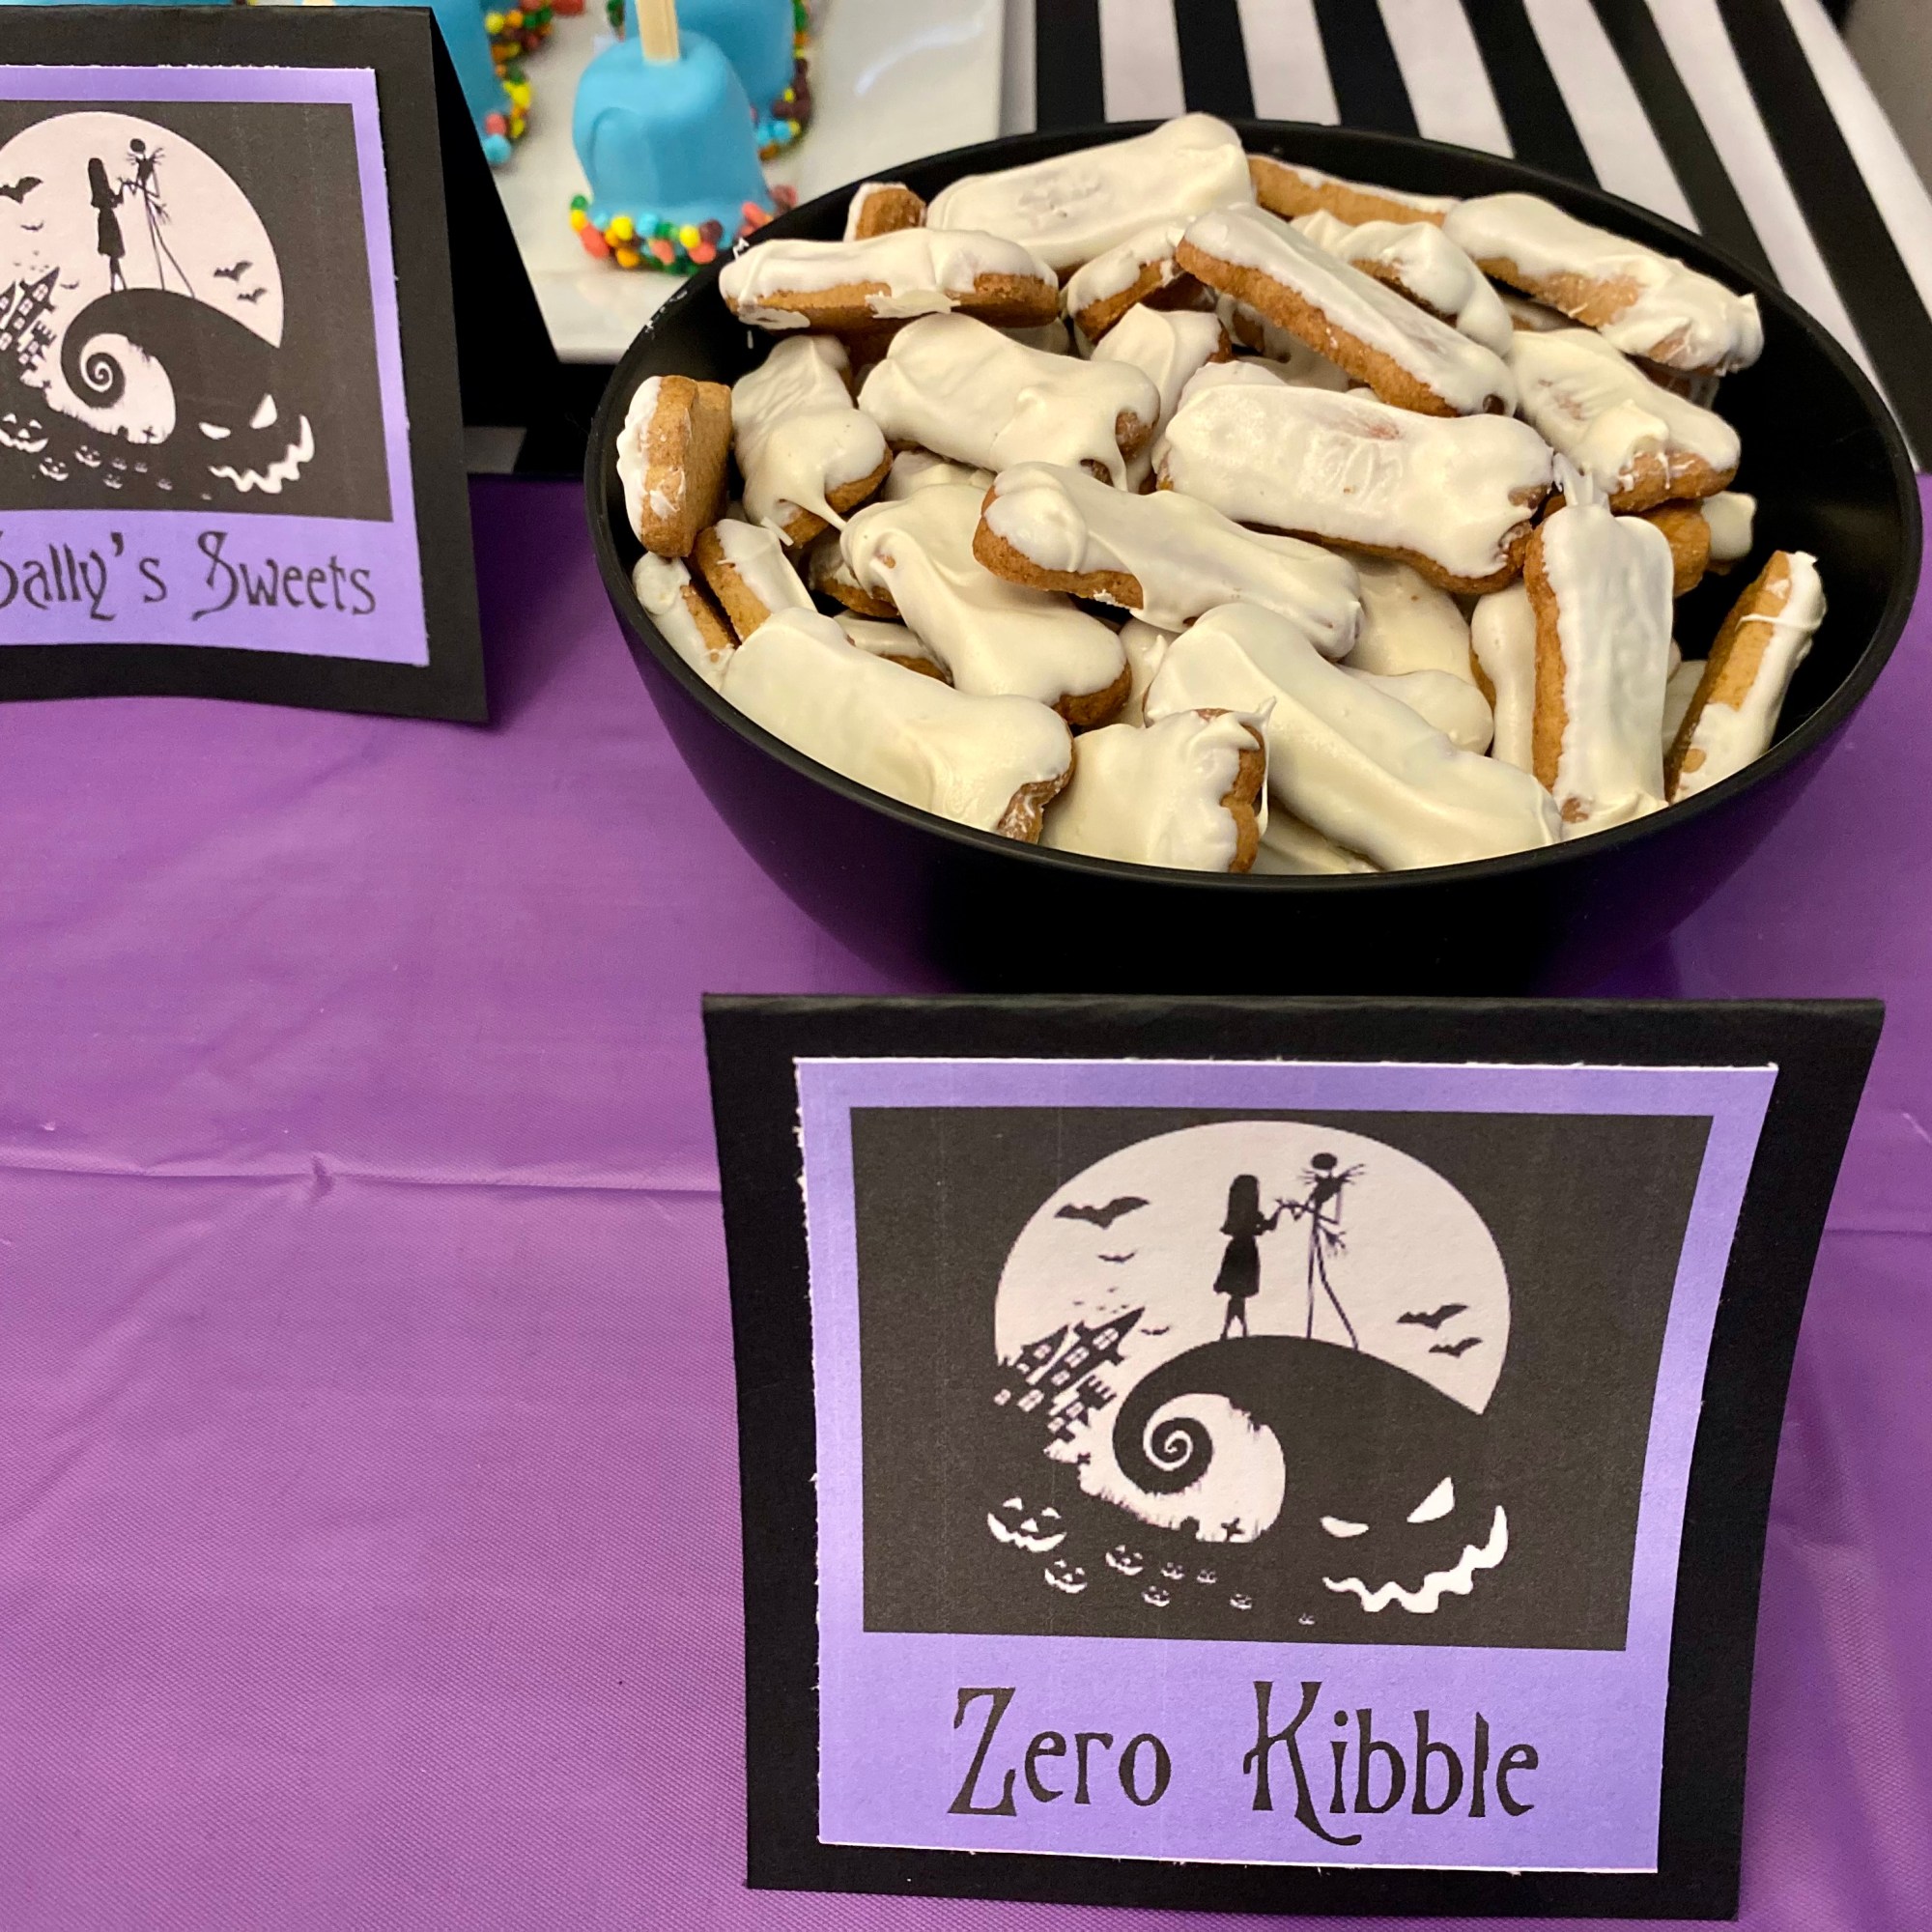
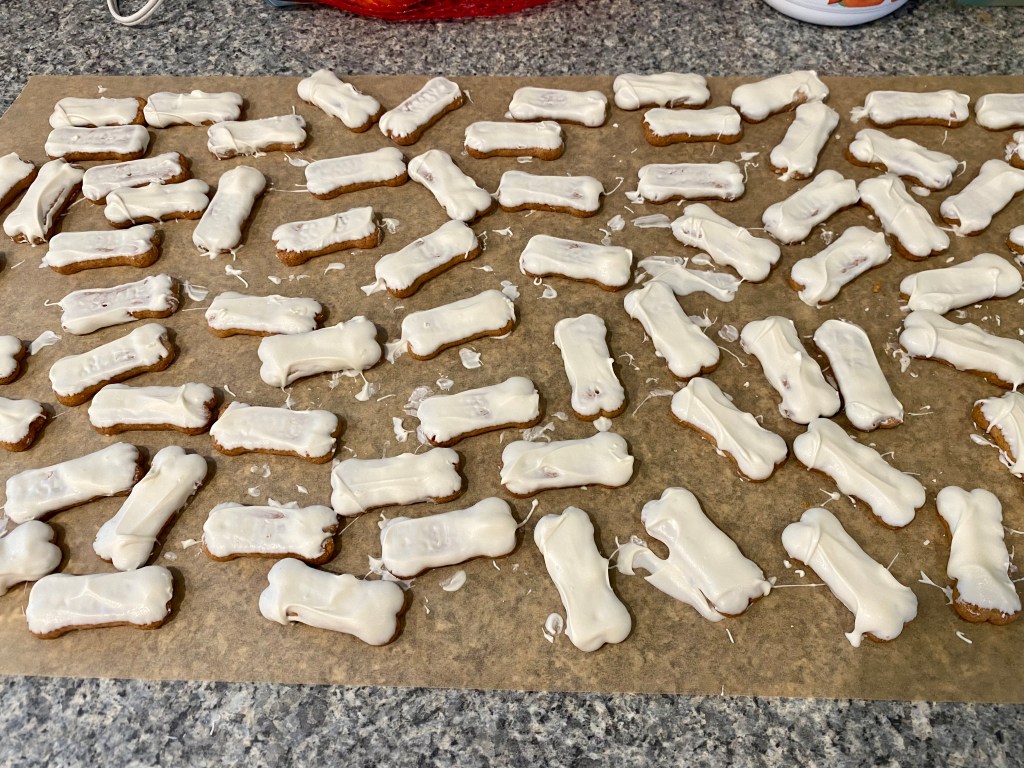
Zero Kibble: Scooby Doo Graham Crackers (dipped in white chocolate candy melts)
Mummy Dogs: Hot Dogs Wrapped in Crescent Roll Dough
Lock Corn & Finkelstein’s Food: Popcorn
Mayor’s Munchies & Nightmare Noms: Potato Chips
Tricks & Treats: Apples With Lemon Juice (one healthy addition)
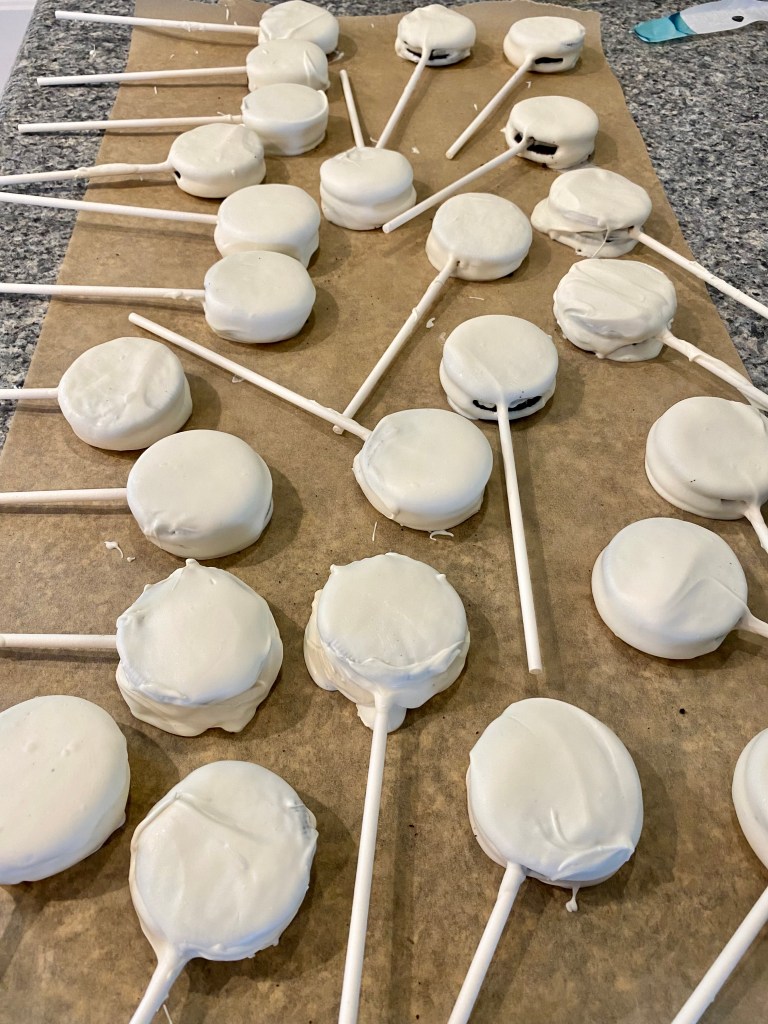
Skellington Sweets: Jack Skellington Oreo Pops
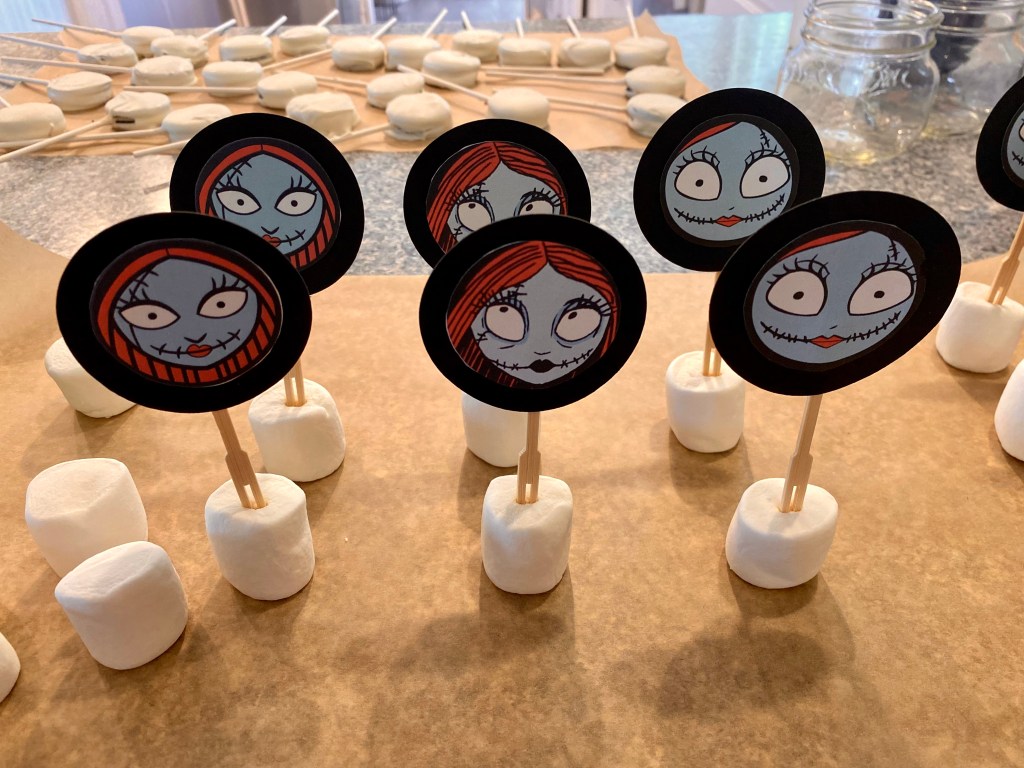
Sally’s Sweets: Sally Marshmallow Pops with Nerds Candy
Barrel’s Beverages: Mini Waters & Mini Sprites
I’ve included some helpful tips if you are making Jack Oreo Pops, Sally Marshmallow Pops, and Zero Kibble:
For the Jack Pops, use Double Stuf Oreos, and be sure to dip your lollipop sticks in white candy melts before you push them into the center of the Oreos. Let them set up in the refrigerator for a few minutes and then dip fully in the white candy melt. Without this step, the Oreos will fall apart when you dip them. Use black candy melts for the eyes, mouths, and bow ties. A toothpick and squeeze bottle will come in handy for the face details. Print out the Jack faces from my PDF and cover with parchment paper. Use the black candy melts in a squeeze bottle to trace the bowties.
For the Sally Pops, use flat toothpicks for the toppers. I used my Cricut Maker 3 to cut the black circles. Glue the toppers to the toothpicks before you make the pops. Pour Rainbow Nerds onto a plate with high edges and leave the pops to set on the plate of Nerds before transferring to your table.
The Scooby- Doo graham crackers actually say “Scooby” on the front, so dipping that side in white candy melts will hide the name and also gives them more of a bone look. Search my blog for “Cookie Pops” & “Marshmallow Pops” for more detailed tutorials on how to make these tasty treats. #commissionsearned
Our movie night was planned for 5:30 pm -8:30 pm, which seemed like enough time, but I think I would have extended by another 1/2 hour if I was to do it again. My daughter has the sweetest group of friends, and although it was loud with 15 middle schoolers running around my house, they were so respectful and everyone had SO MUCH FUN!!! We set up corn hole in the backyard and we have tether ball as well. For the first hour, the kids ran around outside, and the entire group greeted each person as they arrived. The Nightmare Before Christmas is only 1 hour and 16 minutes long, so it’s a great length for a movie night and left enough time for a game before everyone got picked up.
My daughter and her friends love this version of the “telephone game” using paper and pencils. You can order the actual game Telestrations, on Amazon.com but we just cut up paper and it works really well. Here are some simple instructions:
Cut paper in fourths and make a stack for each player. The stacks of paper should contain the same number of papers as the number of players. We had 15 kids, so each kid got a stack of 15 pieces of paper.
Have each player write a phrase (any phrase) on the top of piece #1. Then each player passes their ENTIRE STACK to the right. The next step is to read the phrase and then put that top paper on the bottom of your stack, facing up. The players will then draw a picture of the phrase on the top of page #2. Once everyone is finished drawing their picture, everyone will pass their ENTIRE STACK to the right. Now each player will see the drawing on the top and will have to guess what the phrase is that inspired the drawing. They will place page #2 on the bottom of the stack, face up, and write that phrase on the top of page #3. The process is repeated, phrase, pass, drawing, pass, phrase, pass, drawing, etc until each player ends up with their original stack of paper. Be sure to take some time to read through your entire stack out loud and be ready to laugh until you have tears streaming down your face.
This is where that extra 30 minutes would have come in handy. Unfortunately, we ran out of time for all of the kids to read their telephone stories, so they just had them read their original phrase and the last phrase to see how much it had changed. It was still a ton of fun and I love that the entire group of kids sat and played together. I definitely see us hosting more movie nights with this amazing group of kids in the future. My daughter was smiling from ear to ear the whole time and I had so much fun with all of the party prep. It was a win-win for sure!
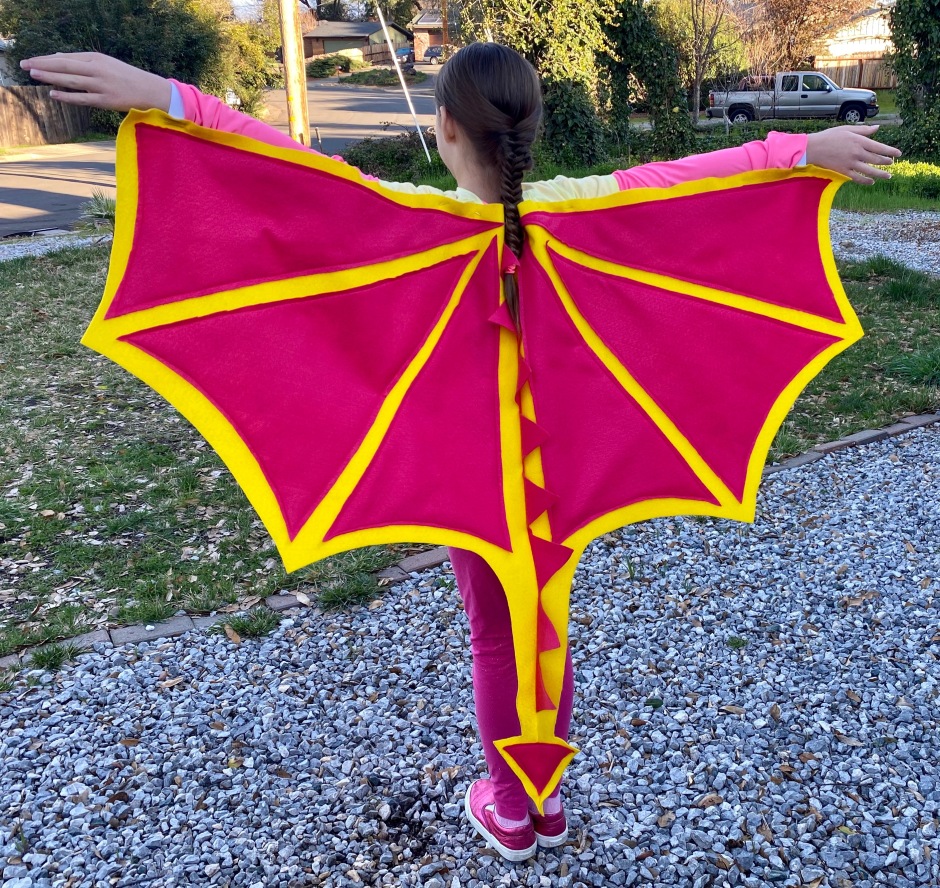
My 11 year old daughter LOVES the Wings of Fire book series. She even chose Wings of Fire as the theme for her most recent birthday party and we had so much fun planning dragon themed food, activities, and decorations. She also got the opportunity to dress up like her favorite book character at school during Spirit Week, and of course, she asked me to make her a Kinkajou (from Wings of Fire) costume.
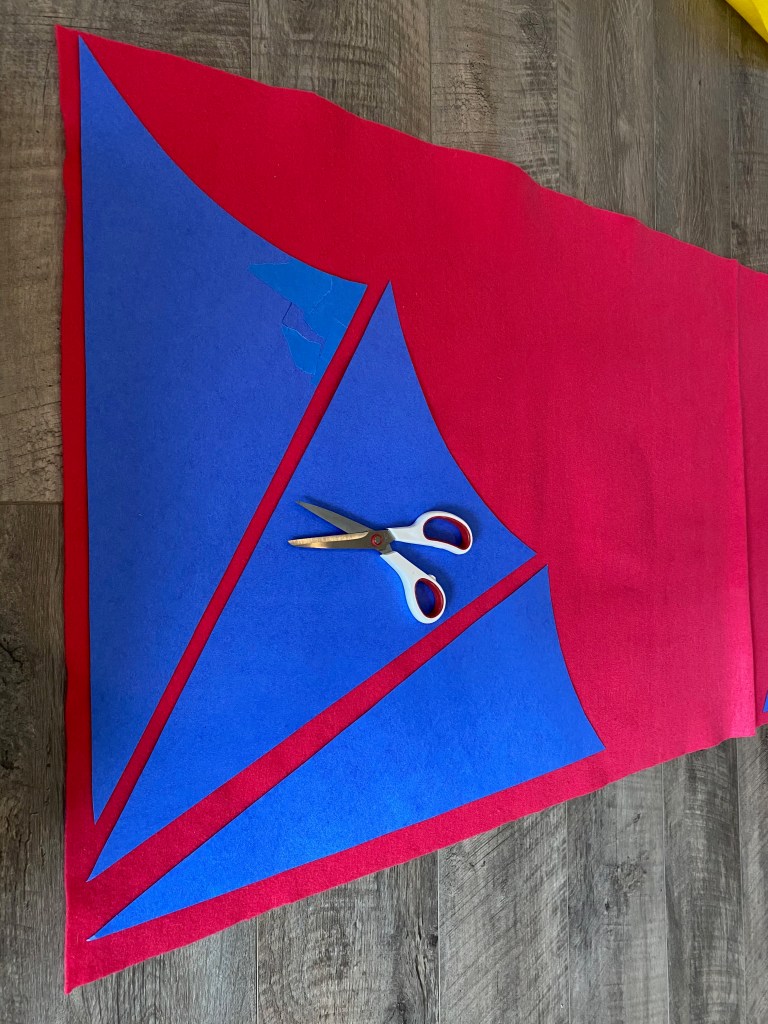
If I’m being honest, I’m not great with a sewing machine, but I can get by, so I set out to make a pair of dragon wings out of pink and yellow felt for my girl. I used a couple of pieces of poster board for the template and tailored it to fit my daughter, who is about 4 ft 10 inches tall. If you are making your own set of dragon wings for your favorite Wings of Fire fan, you’ll also want to purchase some dark pink thread to match the felt, as well as some elastic to attach to the arm portion of the costume. #CommissionsEarned
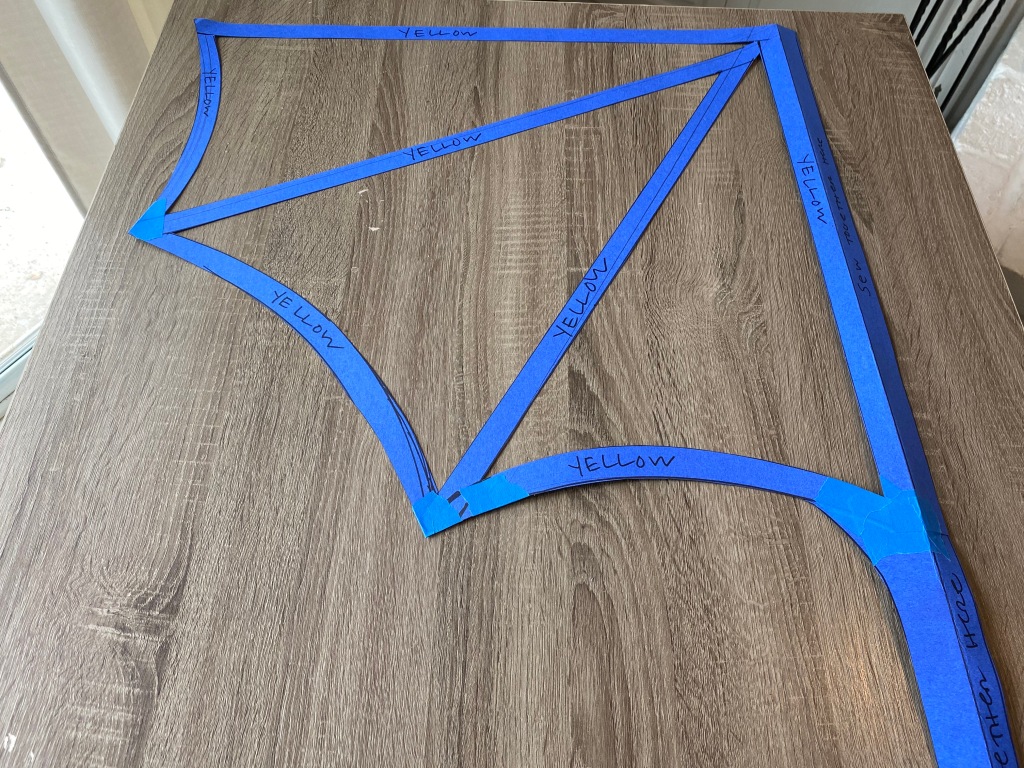
I have included a detailed pic of my template with the measurements I used to create the wings.
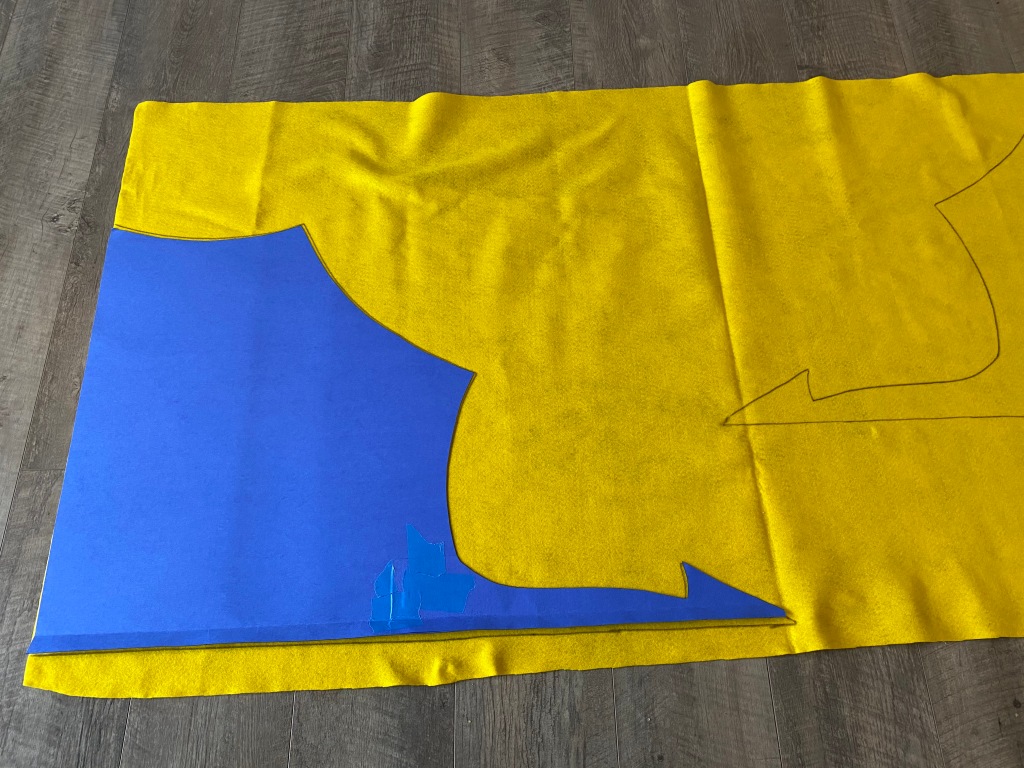
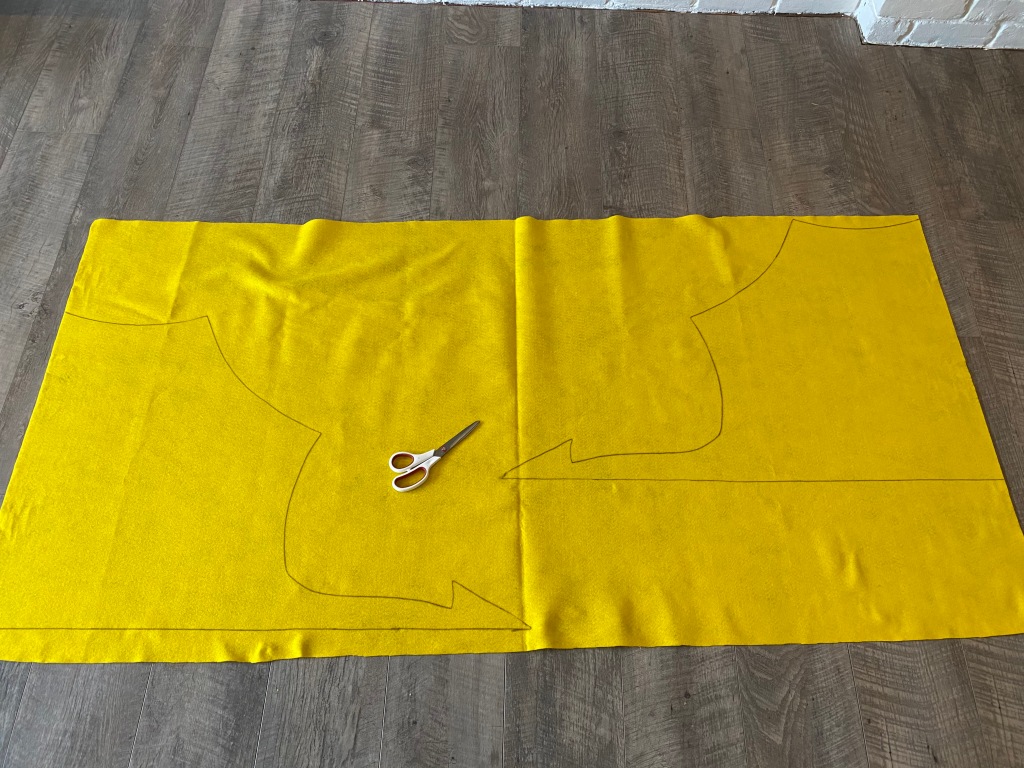
Start by tracing your wings onto the yellow felt. I traced one side up and then turned it over to trace the other side.
Cut out your left and right wings.
Now modify your template to include the pink panels. My triangles left a 1 inch border around and a 2 inch border along the middle to account for the fold that you will sew together to create the middle with the spikes and tail.
Use your triangles as templates to cut your pink pieces.
Trace and cut a second set of pink panels for the other wing.
Cut your spikes out of the pink felt and set aside for later.
Once all of your pieces are cut out, you can assemble your wings. Simply lay the pink pieces over the yellow and pin them in place.
Using your matching pink thread, sew the pink triangular panels to the yellow wings, one wing at a time.
Pin your spikes, folding the wings over each other so that the spikes are in the middle.
Sew a straight stitch all the way along, connecting your two wings with the spikes inside.
Add a little pink triangle to the end of the tail for the finishing touch.
Sew some elastic loops to the ends of your wings that will fit around your child’s wrists. You can also add some elastic to the shoulder area. We chose to safety pin the wings along my daughter’s shoulders and neck to a yellow t-shirt, which worked really well.
My attempt at adding some sparkly pink eye shadow around my daughter’s eyes, made her look more like she had pink eye than dragon eyes, haha, but all in all, she was thrilled to show up to school for Spirit Day as Kinkajou, the pink and yellow dragon from her favorite book series.
For more Wings of Fire fun, check out my daughter’s 11th birthday party post:
Are you looking for a quick and inexpensive Halloween costume? Or maybe you are attending an 80’s themed party. Well, look no further! Recently, my daughter had “time warp” day at school and we decided she would dress up in 80’s attire. This brought back many memories of my childhood…jelly bracelets, leg warmers, crimped hair, side ponytails, charm bracelets. I could almost hear Michael Jackson’s “Thriller” playing in the background as I made this shirt and reminisced. I was the same age as my daughter is now when that album was released, and it was the first record I ever owned!
Fortunately, I had all of what I needed on hand, so this time warp outfit did not cost a thing! I pulled an old “too small” t-shirt out of my son’s drawer and went to work. In less than an hour, my daughter was all ready for her fun dress up day at school.
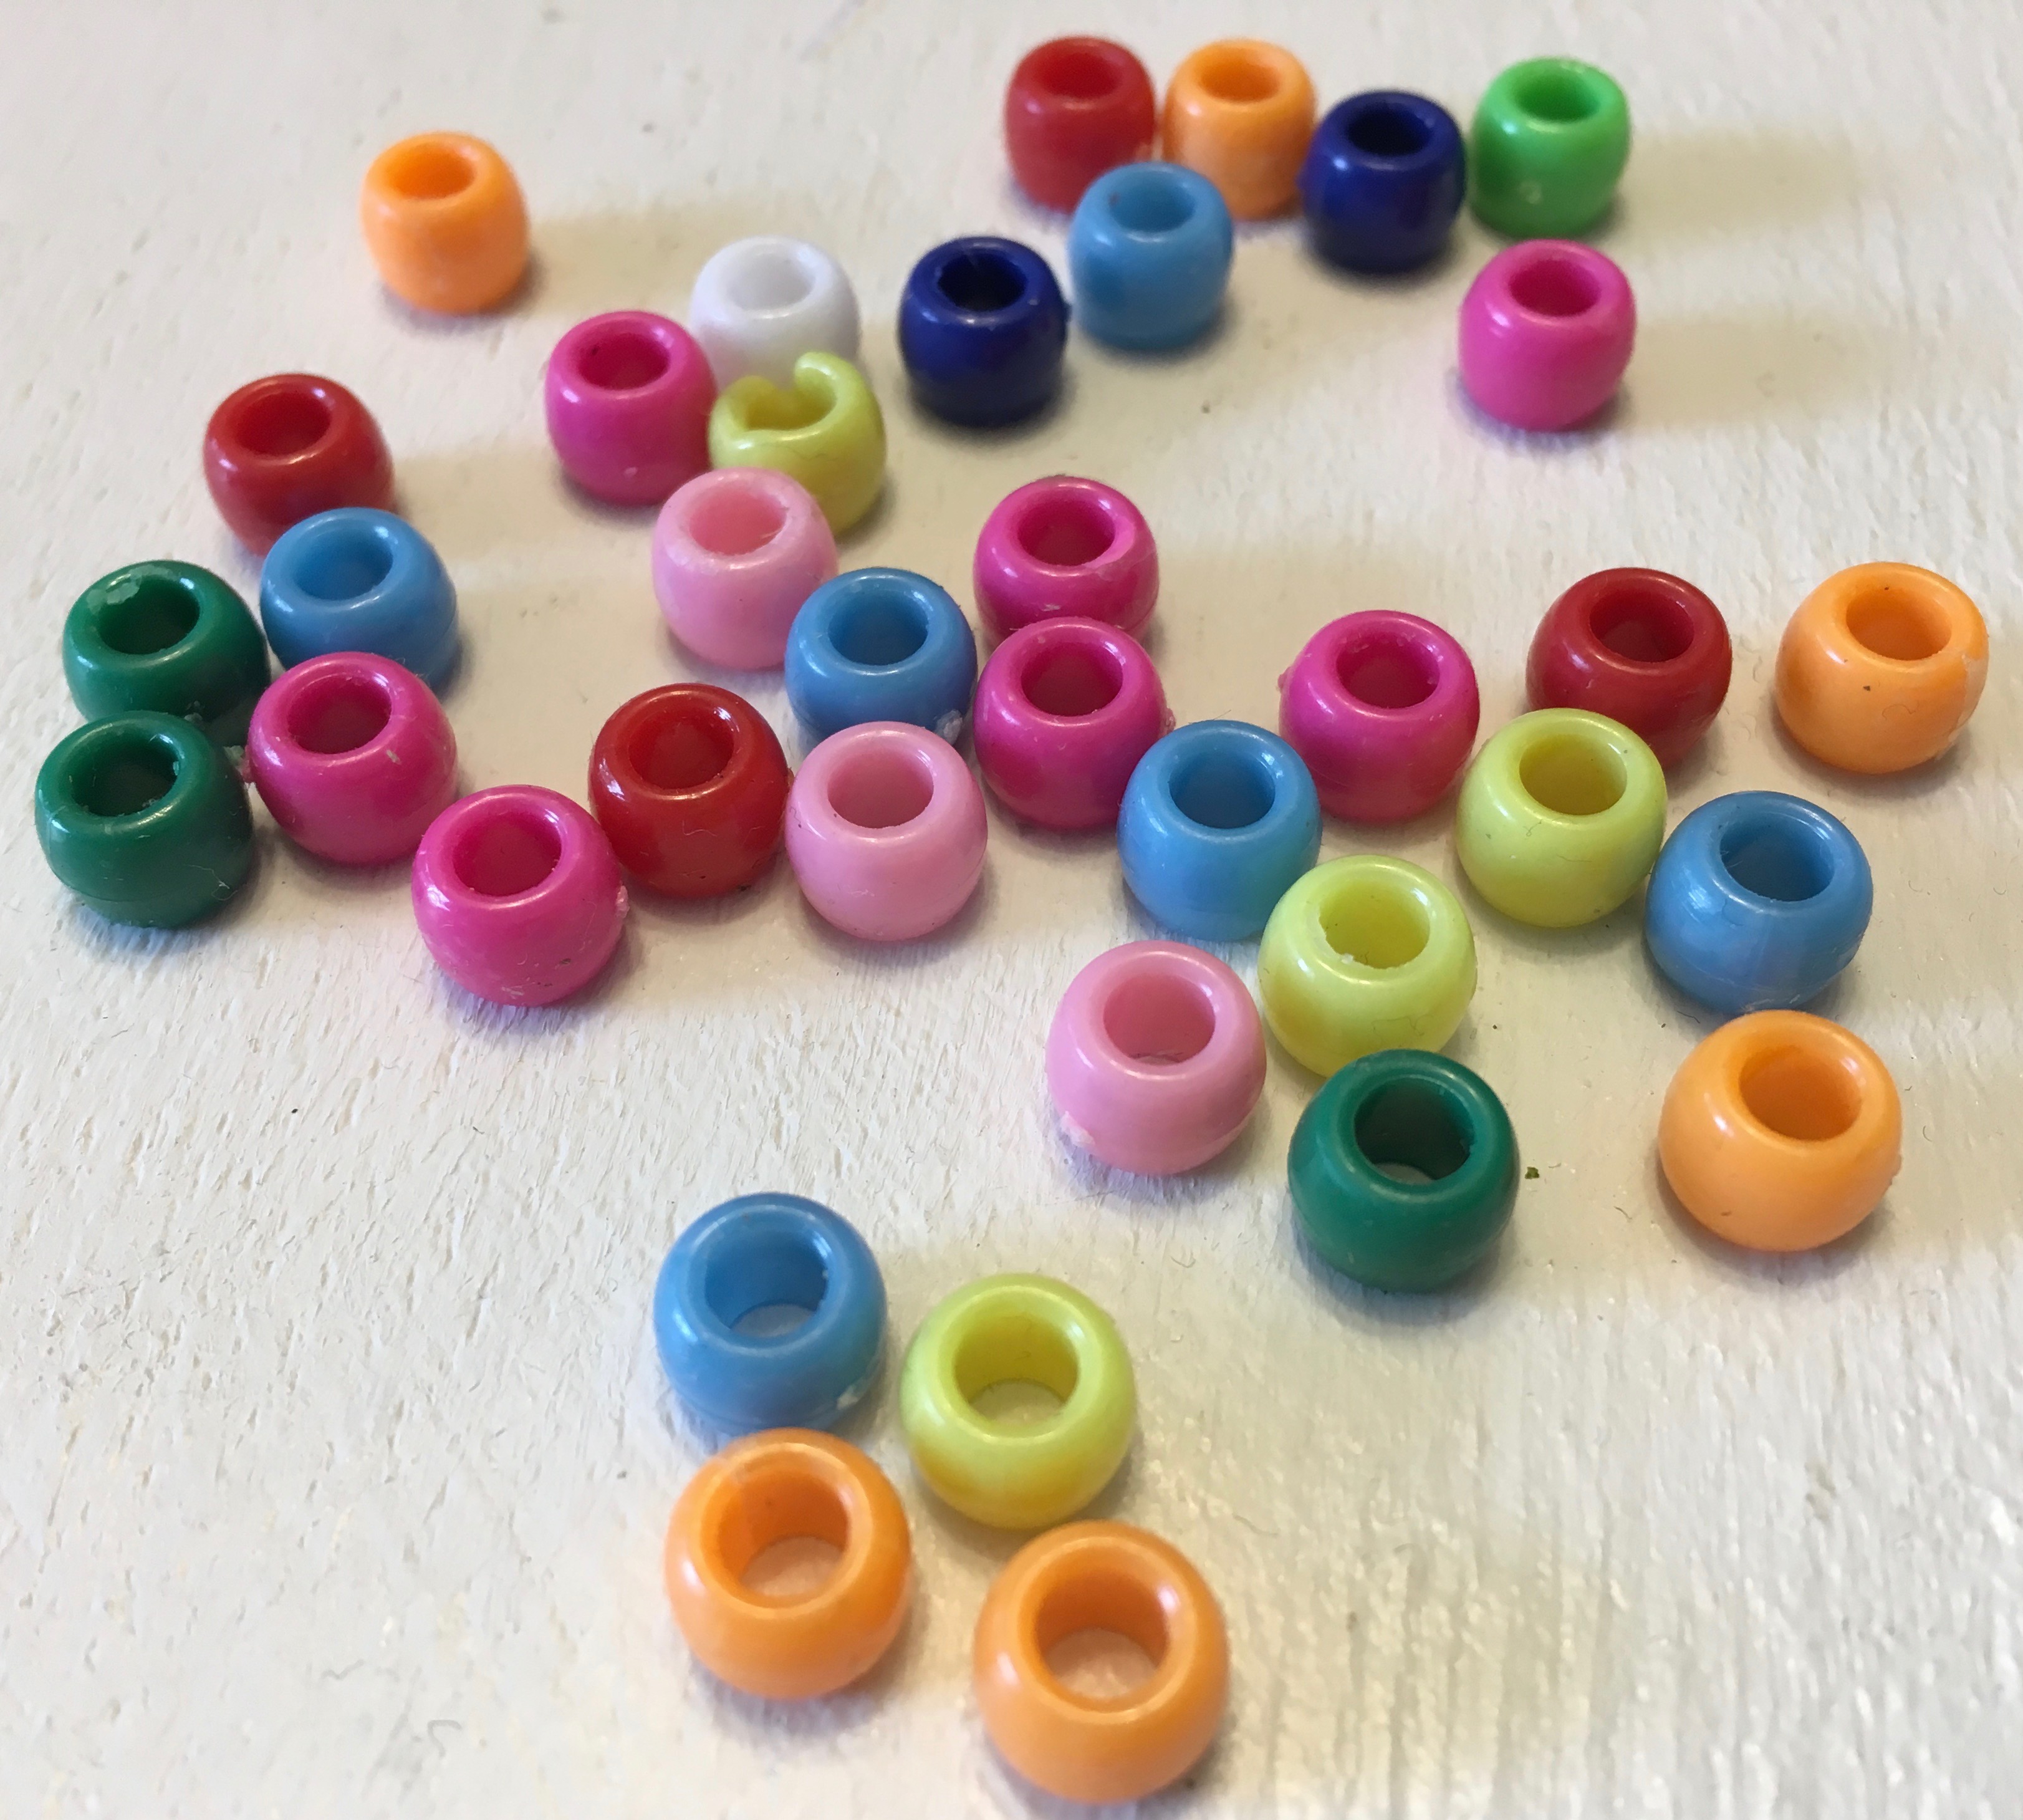
Here’s what you will need: An old t-shirt, pony beads, and scissors #CommissionsEarned
Enjoy my tutorial on how to create the neckline and fringes on this totally 80’s shirt.
For more easy costume ideas check out the following blogposts:
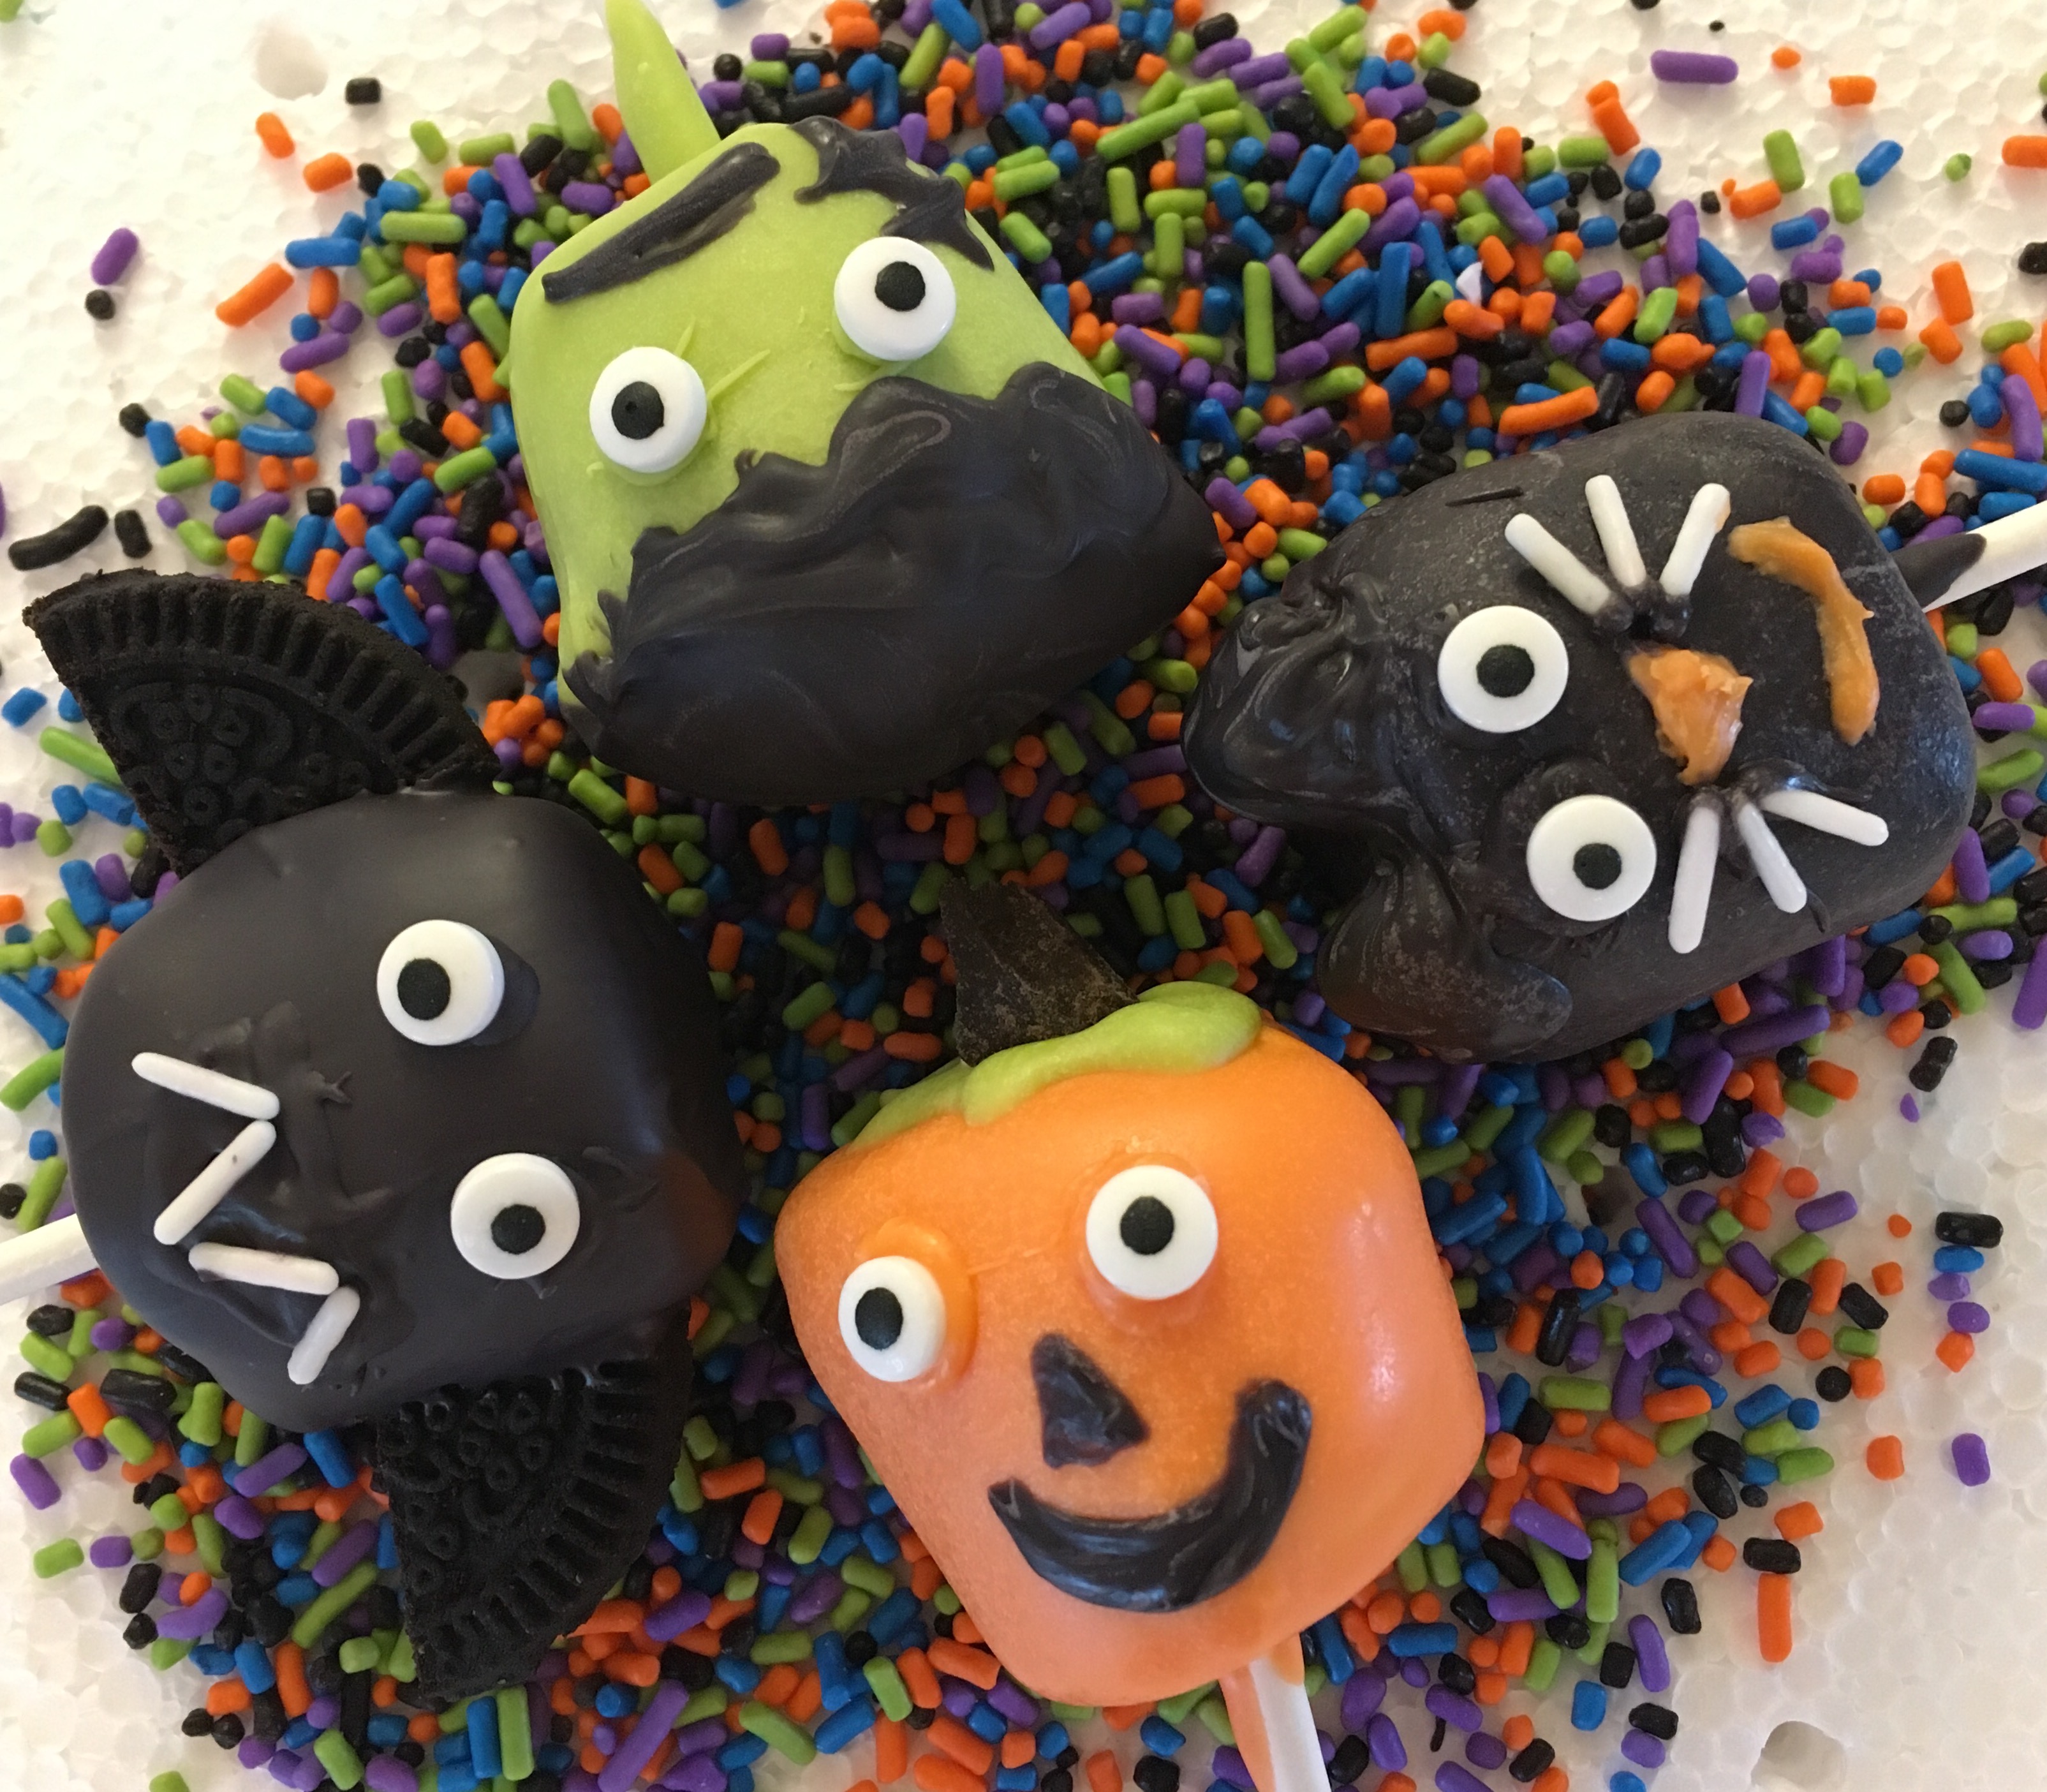
With Halloween just around the corner, I wanted to create something fun and festive. My kids have been asking for marshmallow pops recently, so I thought I’d make these delicious cuties for them to enjoy! Mallow pops are so easy and inexpensive to make and I love how how many variations can be made with just a few modifications. Even though I enjoyed putting these little guys together, I think next time, I will leave the decorating to my kids and see what “spooky” creations they come up with.
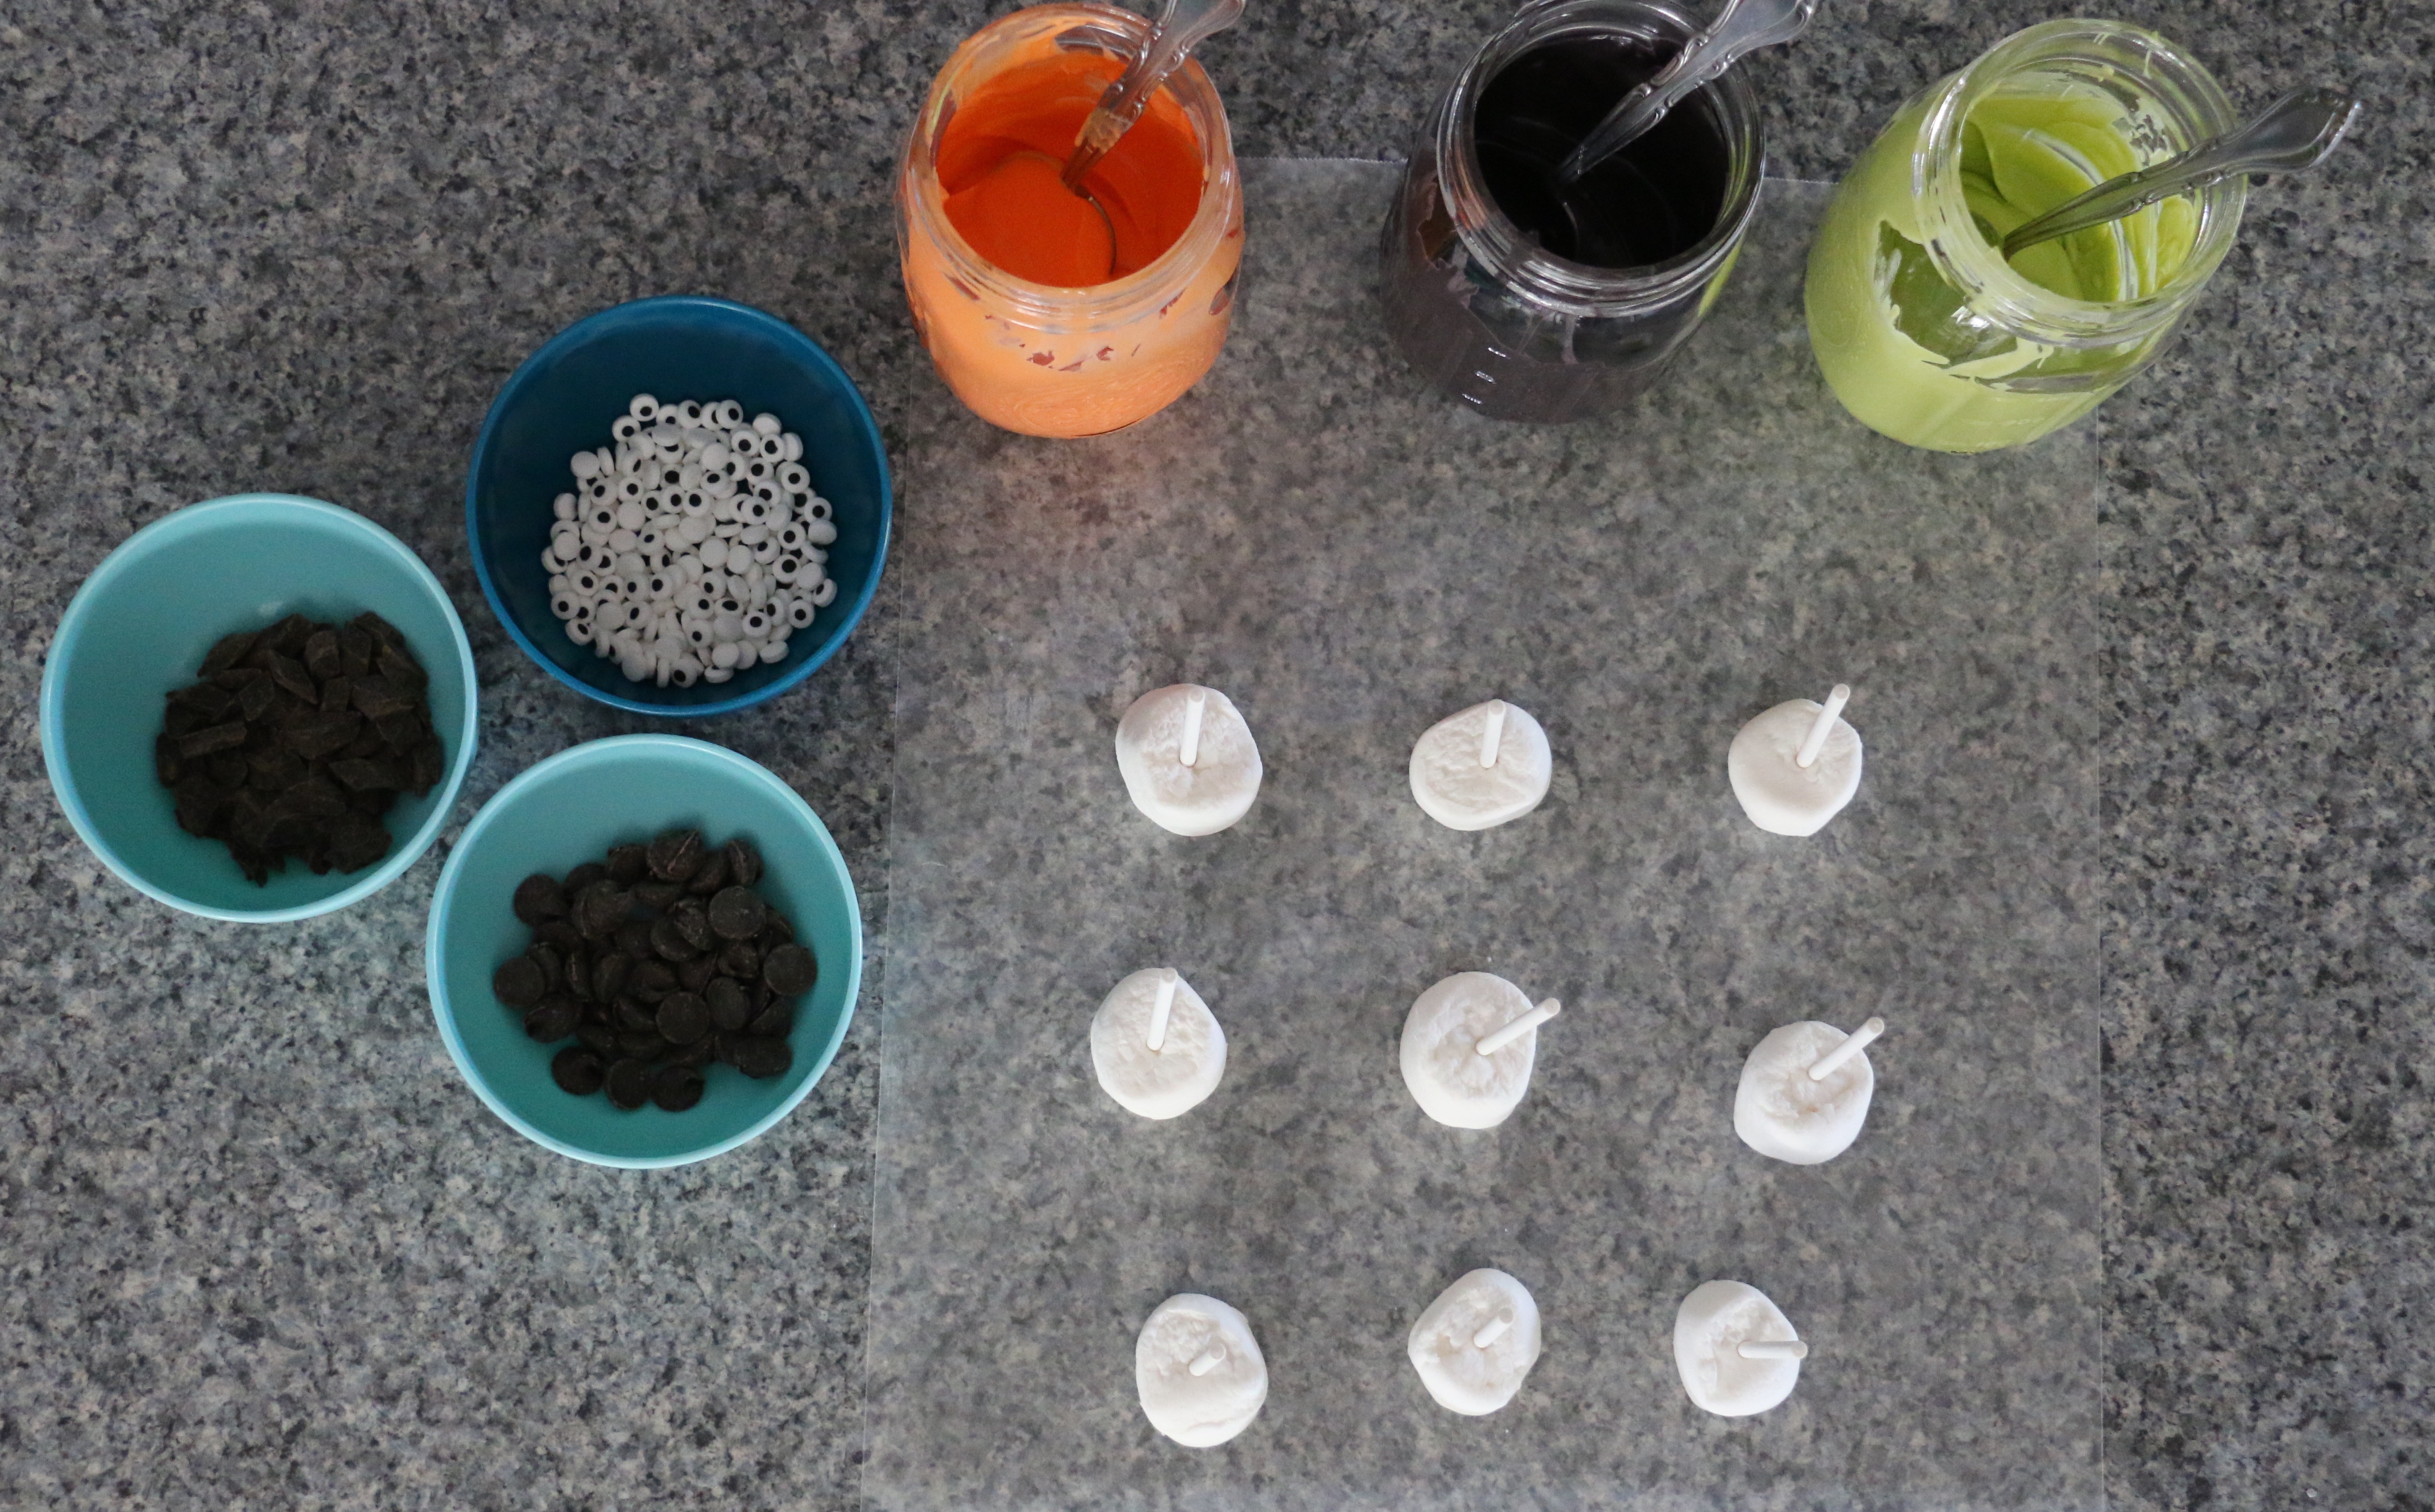
For these Halloween pops you will need the following items: a bag of large marshmallows, Wilton’s lollipop sticks, Wilton’s candy melts in several colors, candy eyeballs, chocolate chips (for the cat ears), chocolate chunks (for the pumpkin stems), oreo cookies (minus the filling, for the bat wings), a toothpick or kabob stick (for the little details like the noses and mouths), white sprinkles (for the cat whiskers and bat fangs)
In addition, it is helpful to have wax paper to place your marshmallows on before you dip and a piece of styrofoam to poke the lollipop sticks in after you dip them, while they dry. I bought an inexpensive styrofoam round at Michael’s that I have used over and over again for marshmallow and cake pops.I like to use mason jars to melt the candy in, but small bowls or coffee mugs work also. Just make sure whatever you use is microwaveable. It’s best to set everything up before melting so your all ready to begin dipping the marshmallows. Line your countertop with wax paper and push a lollipop stick into the center of each marshmallow. Get your candies and sprinkles all ready to go. Follow the directions on the back of the bag of candy melts. I have found it best to start with one minute in the microwave on 50% power. After that, stir, and then go an additional 30 seconds at a time until your candy is easy to stir and completely melted. *Do not over melt…sometimes as you stir, the candy will continue to melt, so give it a good stir each time.
Helpful Tip: If your candy melts start to harden before you are finished dipping or decorating, no worries. Just pop them back in the microwave for 20-30 seconds and they will quickly melt again, so you can finish dipping and decorating.Now comes the fun part! You are ready to dip and decorate! Enjoy my tutorial on making Halloween Marshmallow Pops for more helpful tips!


 I like to use mason jars to melt the candy in, but small bowls or coffee mugs work also. Just make sure whatever you use is microwaveable. It’s best to set everything up before melting so your all ready to begin dipping the marshmallows. Line your countertop with wax paper and push a lollipop stick into the center of each marshmallow. Get your candies and sprinkles all ready to go. Follow the directions on the back of the bag of candy melts. I have found it best to start with one minute in the microwave on 50% power. After that, stir, and then go an additional 30 seconds at a time until your candy is easy to stir and completely melted. *Do not over melt…sometimes as you stir, the candy will continue to melt, so give it a good stir each time.
 Now comes the fun part! You are ready to dip and decorate! Enjoy my tutorial on making Halloween Marshmallow Pops for more helpful tips!