Recently, I picked up a set of blank tote bags to make some library book bags with my Cricut Maker 3. These totes are quite sturdy and they come in 26 different colors, so I definitely will be ordering more in the future. I also decided to purchase a year-long subscription to Cricut Design Space, and I have not been disappointed! The variety of fonts and images is beyond amazing.
My daughter loves axolotls, so this little pink cutie reading a book was the perfect choice for my girl. I found a gorgeous set of heat transfer vinyl on Amazon in boho colors. #commissionsearned. Full disclosure, as beautiful as these colors are, you definitely get what you pay for. This HTV was difficult to weed and I would only recommend it for projects with larger cuts. The more intricate ones were a bit of a pain, even with using the “more pressure” setting on my Cricut. But the colors kind of made it worth it.
For those of you who are new to using Design Space and to layering heat transfer vinyl, here is the step-by-step guide for how I made this fun tote.
Search “axolotl” in Design Space.
If you have not purchased a subscription, this image will cost $0.99. It’s free with a subscription.
Click on the image and then click on “add to canvas”
You can now size your image to fit your tote bag. You can easily add this to a t-shirt or sweatshirt as well.
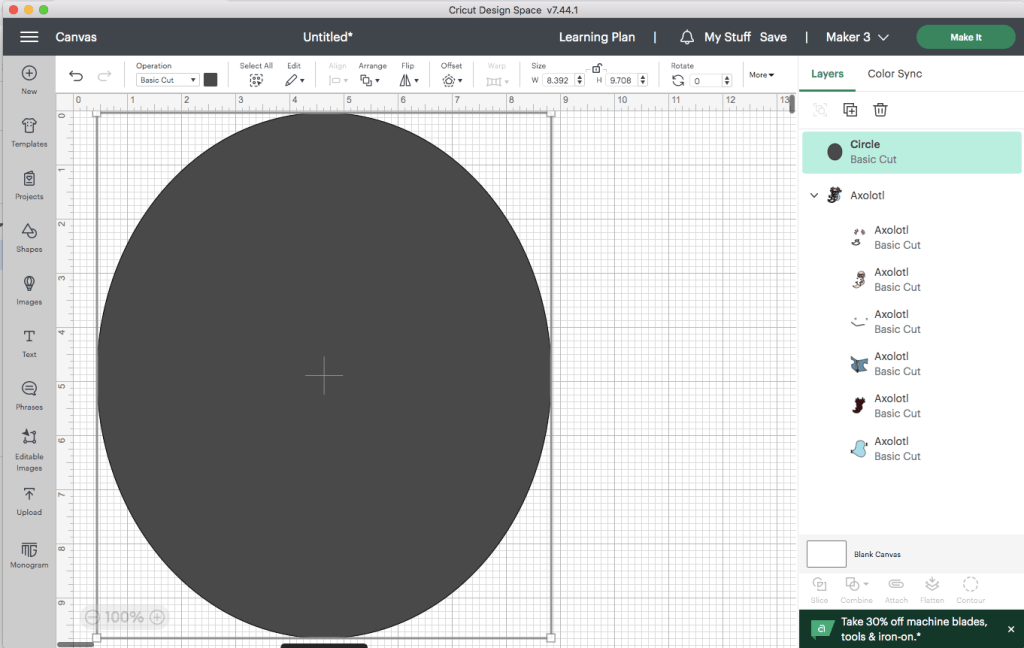
I decided to add a bit of contrast with an oval behind the image. Go to shapes and choose “circle.”
Now you will see a circle added to your canvas.
Go to “size” at the top tool bar and hit the unlock button. Now you can make your circle into an oval that covers your image.
You need to change the position of your oval so that it is behind your image. Go to “arrange” and click “send to back.”
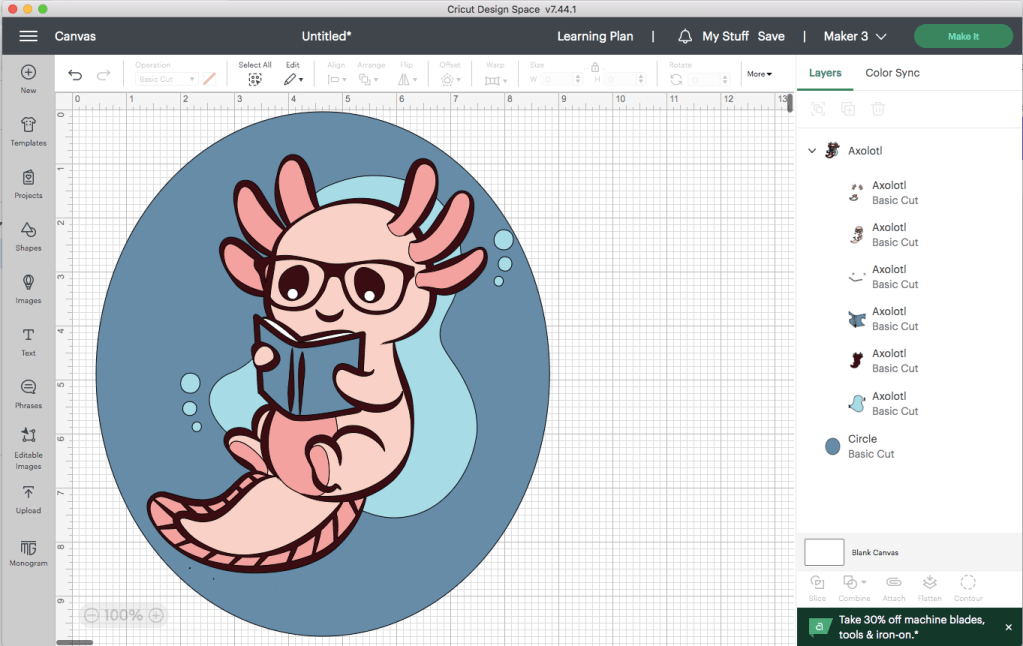
Now you can change the color of the oval. I wanted mine to be the same color as the book that the axolotl is holding.
Make sure that your entire image is the size that you want to put on your tote bag.
Click “Make It.” I chose “on mat.”
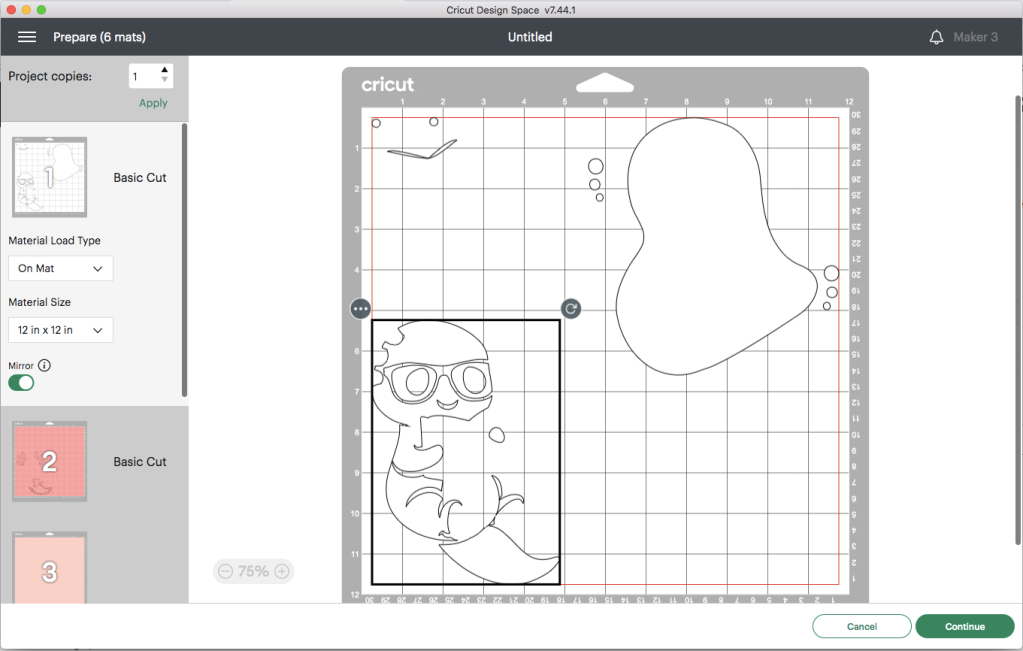
Be sure to click “mirror” on every mat. This step is super important. And don’t forget that you will want your HTV to be shiny side down on the mat.
You can cut each color separately, but I have a little time-saving trick that I like to use. I move several colors onto one mat.
Click on the 3 dots to the left of your object.
Move the objects to the mat of your choosing.
As you can see, I was able to get 3 cuts on one mat. I used the grid to figure out the size of each color of HTV and where to place it on the mat. This saves a lot of time loading and unloading mats. Just be sure to put the right color in the right spot and remember to mirror your image.
You will be asked to select the type of material. I chose “everyday iron-on.” Make sure you have the fine tip blade loaded into your Cricut and now you are ready to go.
After all of your pieces are cut, you can weed each one and begin the process of adding the layers to your tote. I purchased the HTVRONT heat press and it made it so easy to layer the vinyl. I also got an inexpensive heat press mat that is the perfect size for totes and tees. #commissionsearned
One thing I like to do is to layer all of the pieces on each other before I use the heat press, just so that I get the placement right. Then, I peel them apart and layer, one at a time, starting with the back layer. In this case, my first layer was the blue oval.
You only want to heat each layer for about 12-15 seconds, and don’t forget to put a teflon sheet or a piece of parchment paper between your heat press and your HTV. Be sure to check the recommended heat setting and time for the vinyl you are using. Each brand varies slightly. You also need to know if your HTV is hot peel or cold peel.
This is the fun part…seeing your design come to life. In just a few moments, your tote will be finished and ready for your next trip to the library.
Sometimes, I miss the days when my kids were little and life seemed a bit more simple. Everyone was tucked in by 8:00 and the house was quiet for several hours before my bedtime. But other times, I am so grateful for this season of life with older kids. There are joys to be found in all of the stages of parenting.
One of the milestones that we just said goodbye to is the season of lost teeth. Sometime this past year, my youngest lost her last tooth. Bittersweet for sure! I remember when my middle son lost his first tooth. He swallowed it while eating a pretzel and he was so worried that the tooth fairy wouldn’t show up. We reassured him that she absolutely would come and he wrote her a note explaining what happened to his very first missing tooth. Another time, the tooth fairy accidentally forgot… but wouldn’t you know that after searching around my son’s room we discovered that she actually did come, the money just “fell behind his bed.” A little parenting hack for those of you who may need to put this nugget in your back pocket just in case.
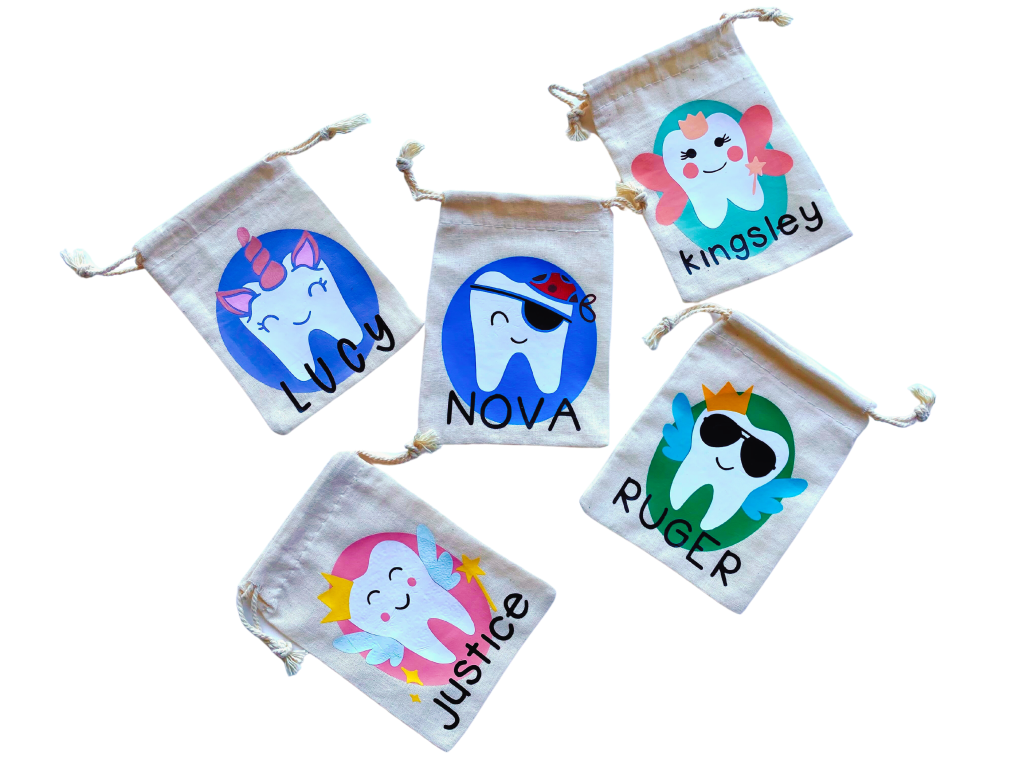
Even though my kids have outgrown the tooth fairy, I have several friends who have littles. I thought it would be fun to make them tooth fairy bags with some adorable SVGs that I found on Cricut Design Space. I have had my Cricut Maker 3 for over a year now, and if I am being honest, I feel like I am just now getting the hang of it. I was pretty intimidated at first, but now I feel confident that I can make a variety of projects that turn out AMAZING. These little tooth fairy bags are just one example.
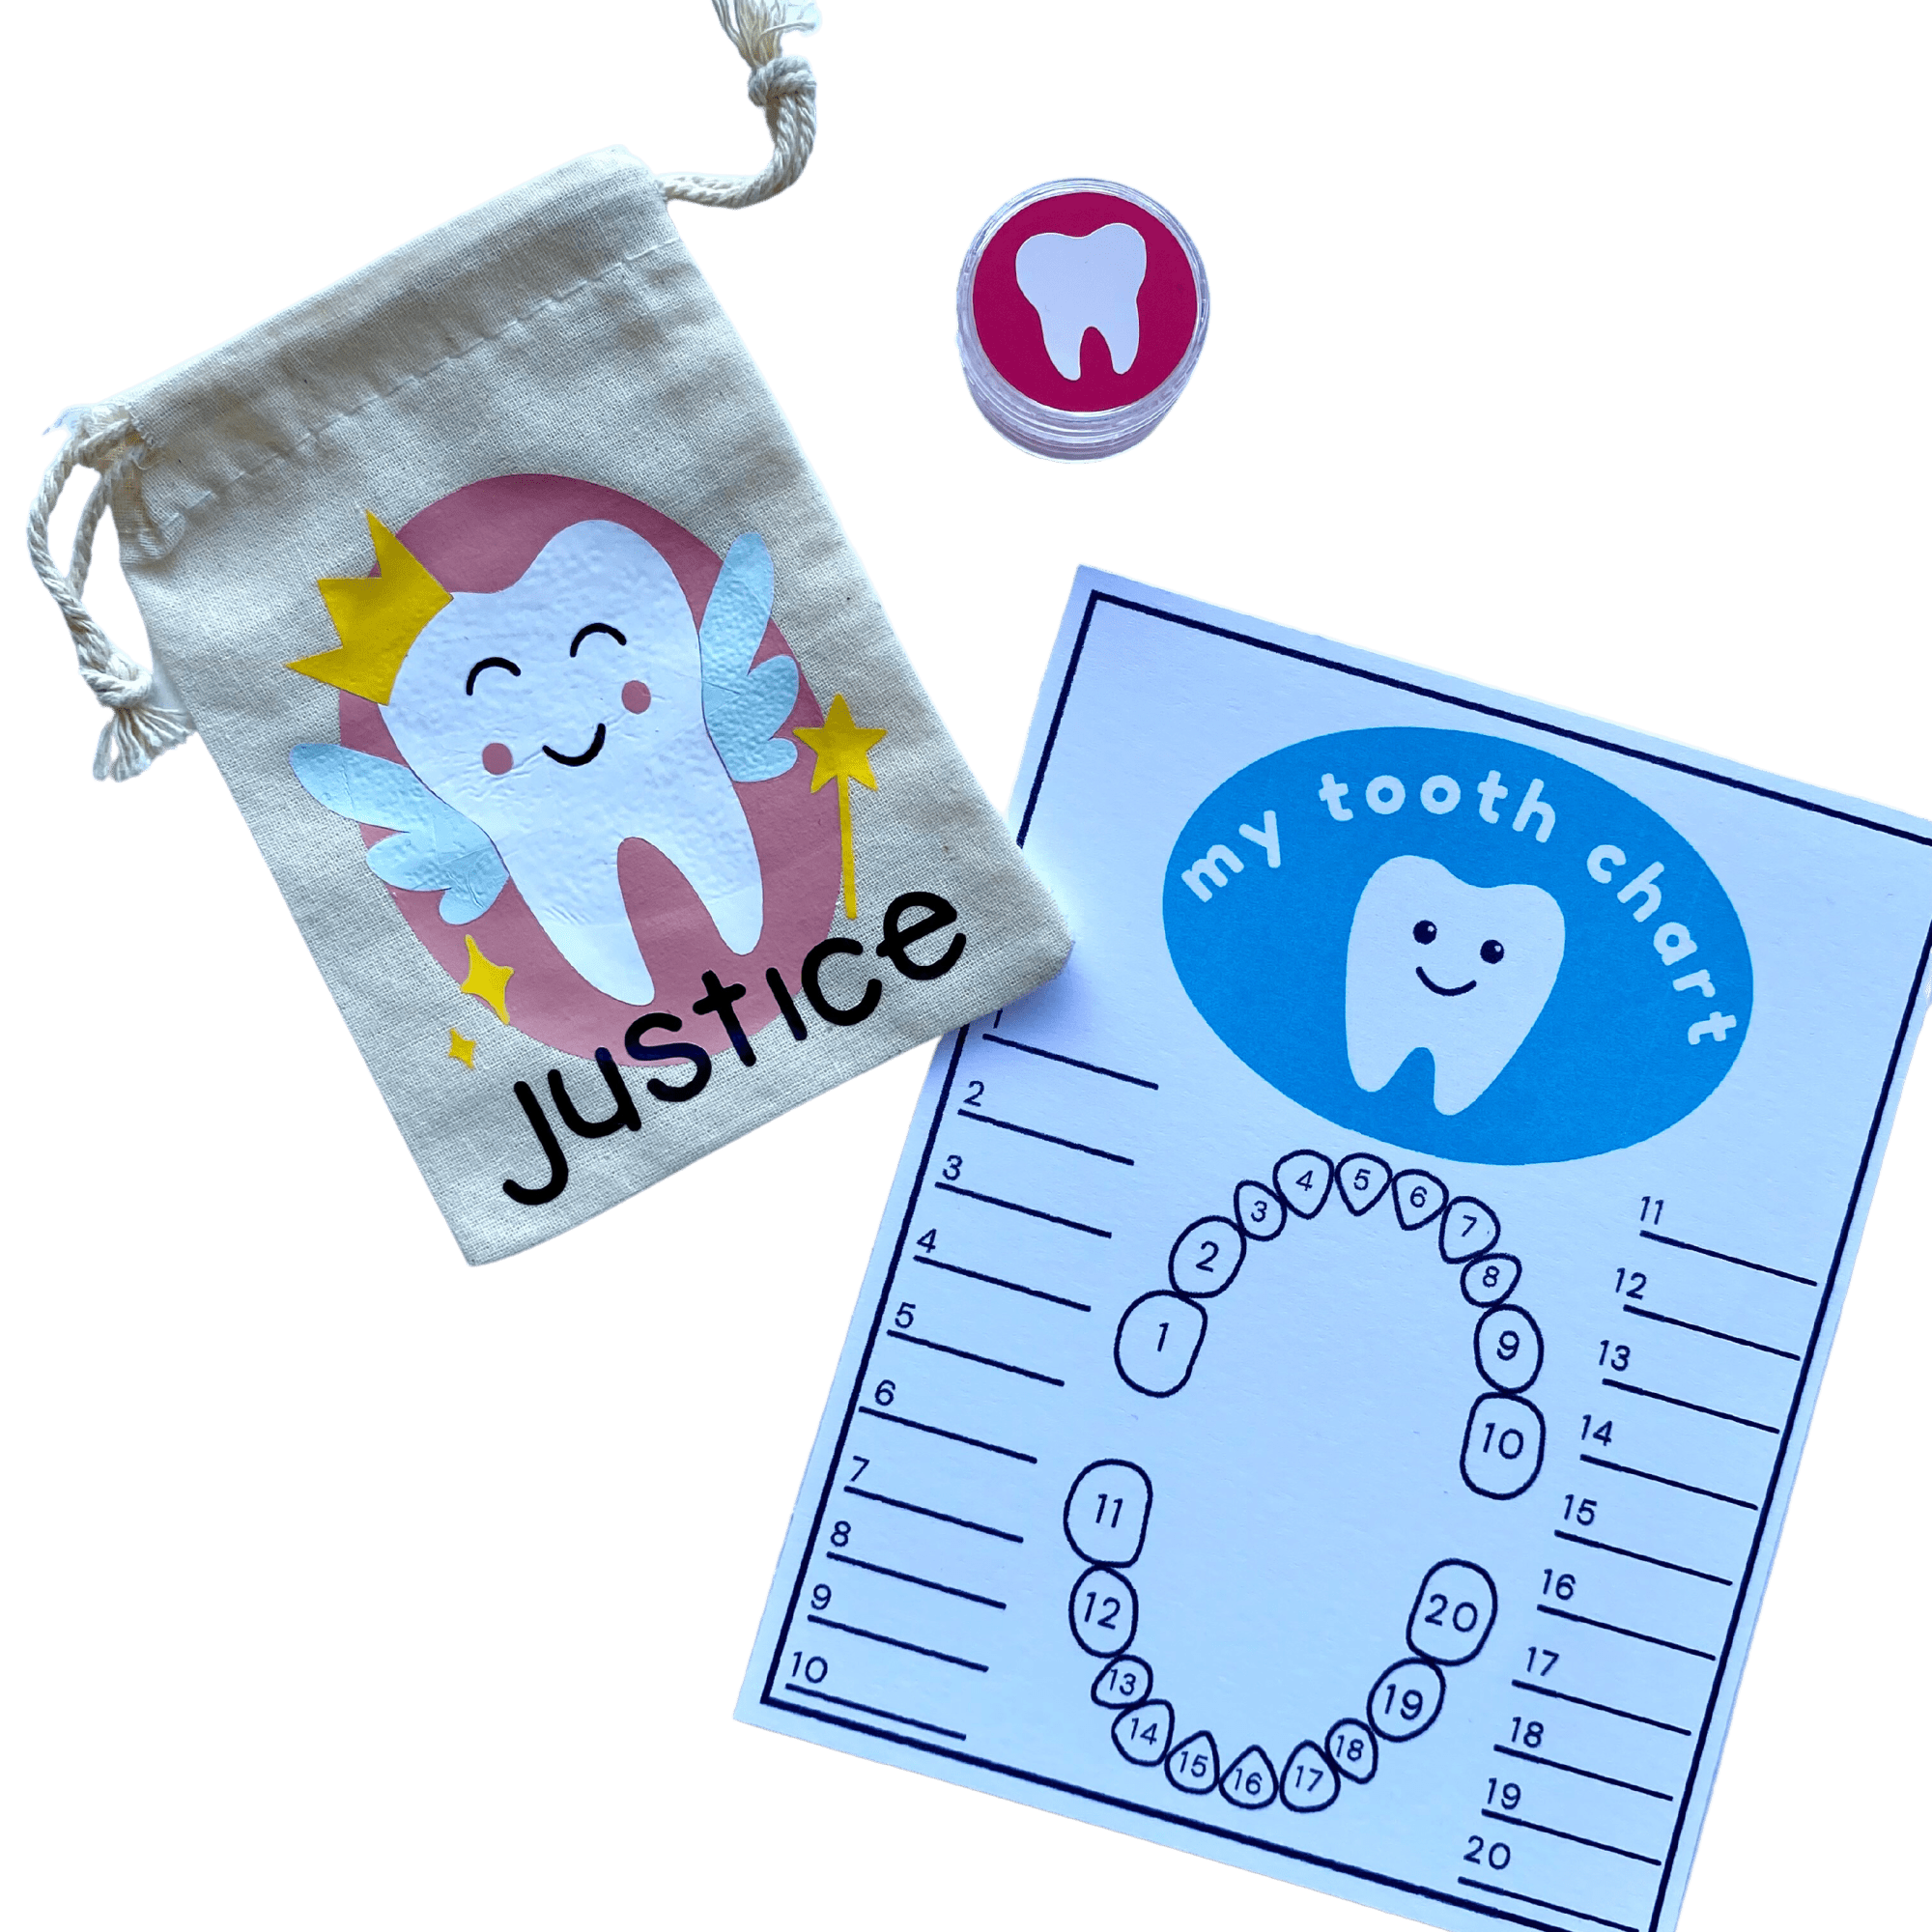
Cricut Design Space has thousands of incredible SVGs to choose from, so it was hard to narrow it down to just a handful. I purchased a set of little canvas drawstring bags from Amazon and a bundle of HTVRONT vinyl with a variety of colors. I also invested in a mini heat press to make it easy to heat the vinyl. It took a few tries to get the sizing just right, and I added ovals behind the designs to give each bag a pop of color so that the white tooth really stands out. #commissionsearned
When you think about it, putting a bloody old tooth inside of a bag is kind of gross, so I ordered a set of tiny plastic containers and used permanent vinyl to make a little tooth sticker for the lid. This way, the kids can put their lost tooth in the container, and put the container in the bag.
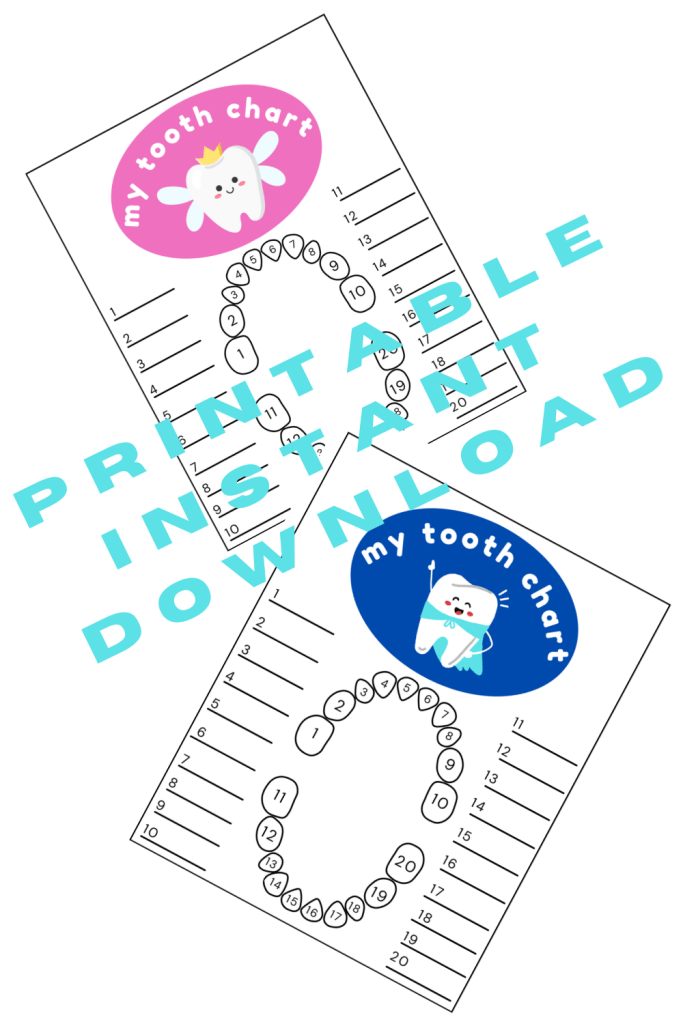
I also created a little tooth chart so that kids can color in the tooth they lost and write the date. By the time they are done losing teeth, they will have a record of how old they were when they lost each tooth.
I’m getting ready to package these little kits up and send them off to my friend’s kiddos. I think they are going to love them!!! #commissionsearned
If you would like to use this tooth chart for your own child you can find the printable PDF on my Etsy shop thistlesandrainbows.etsy.com and the full Tooth Fairy Kits are also now available for purchase in my shop.
This spring, my daughter had the opportunity to participate in the musical Moana Jr. at her school. This meant that I had the privilege of creating some fun “front of house” decor, along with a group of incredibly talented parents and volunteers. One of my favorite items we made was a huge 8 ft x 4 ft floral and glitter MOANA sign that hung above the entrance to the school and made for a very eye-catching advertisement for the show.
I purchased the board at Lowe’s and painted it white. Then I used my Mooka mini projector to trace the letters. I used the free font “MOANAS” and stretched it to make the letters longer so that they fit the length and width of the board. The Mooka mini projector makes projects like this so easy! Within a few minutes, I had the letters traced out in pencil and ready to go.
For the flowers and Heart of Te Fiti we used clear Elmers glue, hot glue, 2 shades of green glitter, and fake flowers that we pulled off of Hawaiian leis in a variety of colors. We separated the flowers into piles by color and mixed the two shades of green glitter together. The Elmers glue was used as a base for the green glittery Heart of Te Fiti and the hot glue was used for the flowers. It took 3 of us several hours to glue all of the flowers in place and then we let the glitter dry overnight. Once the swirl was dry, I brushed a thin coat of Mod Podge over the top to seal the glitter so that it wouldn’t get on everything once it was hung up. #commissionsearned
After the sign was completely dry, my friend’s husband added some hooks to the back so that we could hang it over the entrance to the school. It stayed up for over 3 weeks and even withstood several rainy days, and it still looked just as amazing by the last weekend of the show as it did when we first created it.
If you are hosting a MOANA party, you could make a similar sign on a smaller board or you can even use this concept for a tropical-themed party. And if you are looking for birthday party ideas, check out my Moana Birthday Party post for decorations, cupcakes, marshmallow pops, and more.
This school year, I have the privilege of being a part of the Theater Booster Club at my daughter’s school. The TBC is a group of parents who support the school’s performing arts program. One of my favorite events each year is the Talent Show. I love this incredible opportunity for students to showcase their talents. This year, we had singers, musicians, dancers, a beat-boxer, an aerial silk performer, and so much more. It was an amazing show!
To help make this event even more special for the kids, the TBC got together over the summer to brainstorm theme ideas and to decide on what types of decor we wanted to create. We settled on “Old Hollywood” for our theme, and went to work gathering supplies and crafting all the things. I hit up a local appliance store for as many refrigerator boxes as I could fit in my van. We put 2 aside to make into giant popcorn boxes and another for a “media-inspired” filmstrip countdown to use as a photo backdrop. Two more boxes were designated for giant film reels, and the rest we used for a film strip photo station that we set up for the cutest picture keepsakes from the Talent Show.
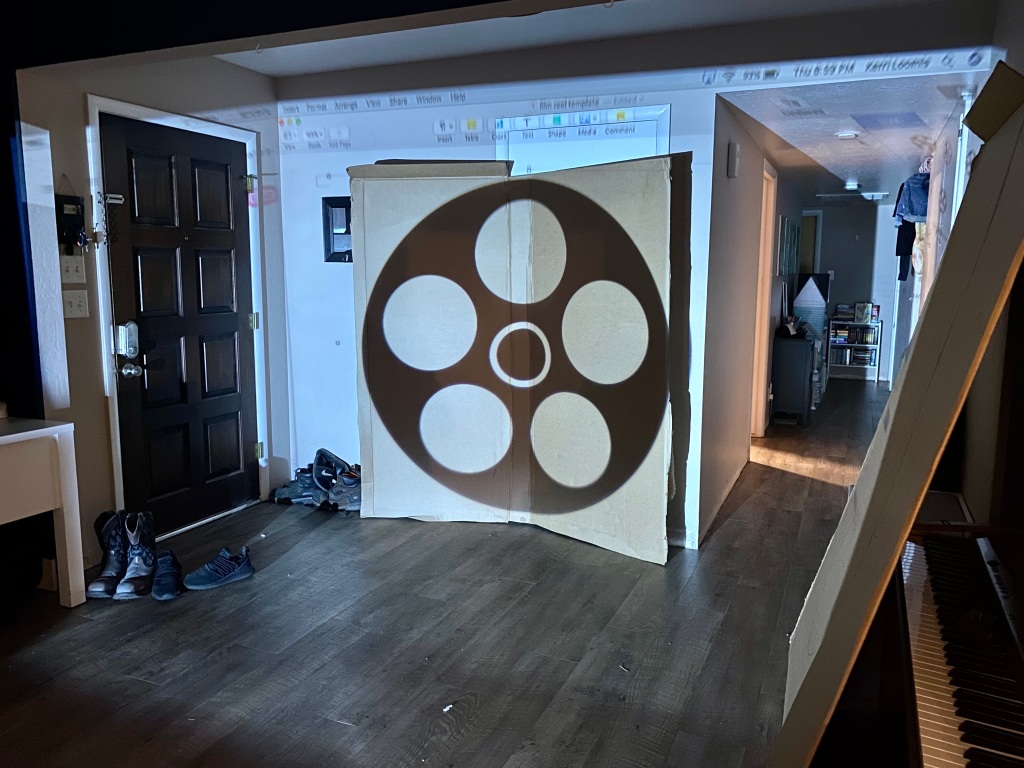
Our team gathered one hot September morning to start painting red and white striped popcorn boxes and black film reels. I had cut out the film reels a couple of days before (after projecting them onto cardboard using my Mouka mini projector). This is a must-have tool for making oversized props and I have gotten a ton of use out of it in the past 2 years. We used painter’s tape to make the lines on the popcorn boxes and used paint from Lowes instead of craft paint for these oversized props because it is thicker and required fewer coats. I also used my projector to trace the POPCORN sign onto a piece of white poster board and then painted it with the same red paint we used for the stripes. #commissionsearned
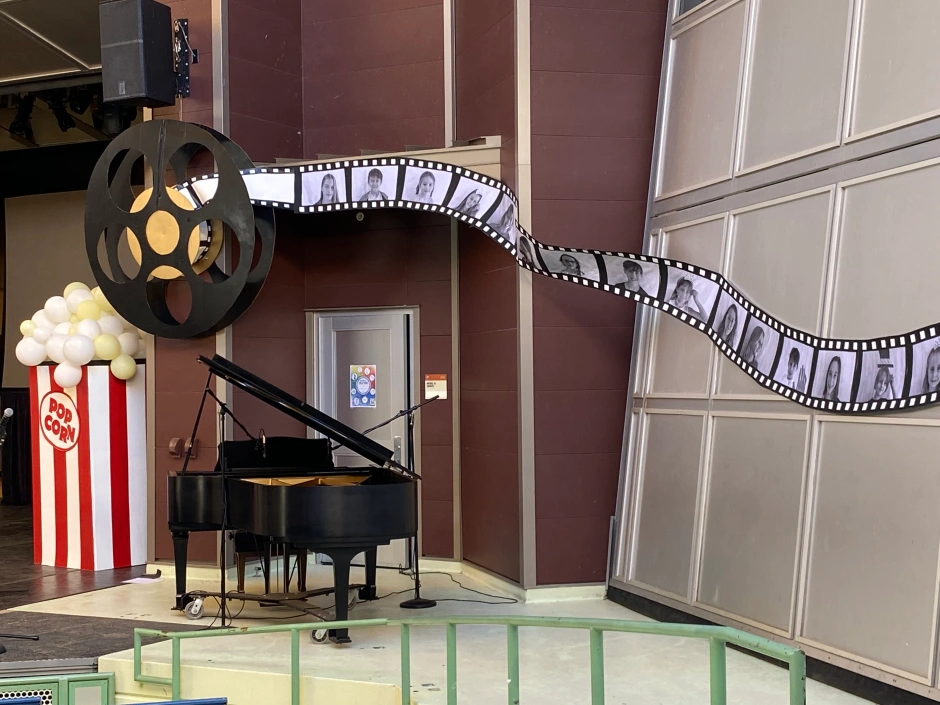
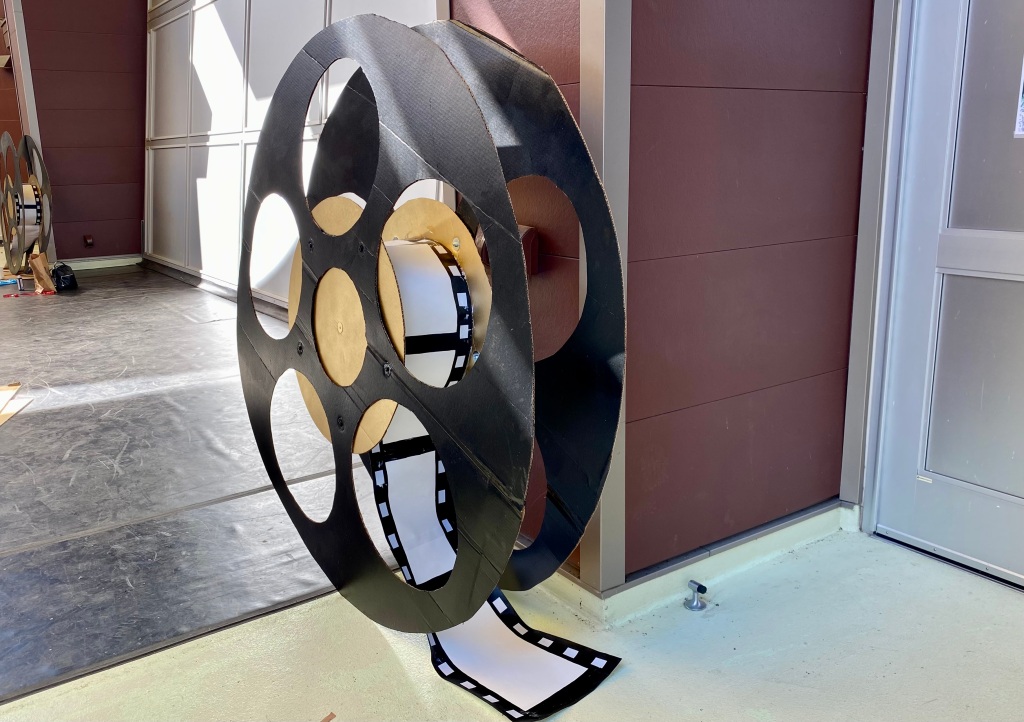
Putting the film reels together was the next project. I purchased 2 small cardboard poster tubes, cut out 4 circles that were smaller than the 6 ft film reels, and asked my husband for some help with attaching the pieces. We spray-painted the inside of the reels with gold Rustoleum spray paint to give them a metallic appearance, attached two cardboard circles to the poster tube, and transported everything to the school because they were too big to transport once they were all put together.
In the meantime, I got to work on the filmstrip of all of the kids who participated in the Talent Show. This was the most amazing prop that we created because it made the kids feel like celebrities! They loved seeing the giant film strip with their faces when they walked into the amphitheater on the night of the show.
To pull this off, our team set up a camera on the days of the talent show auditions. Before each child auditioned, we snapped a photo with a white backdrop behind them. We gave them photo booth prop options and encouraged them to pose in a variety of ways. The kids didn’t know what they were posing for at the time, so we were able to surprise them.
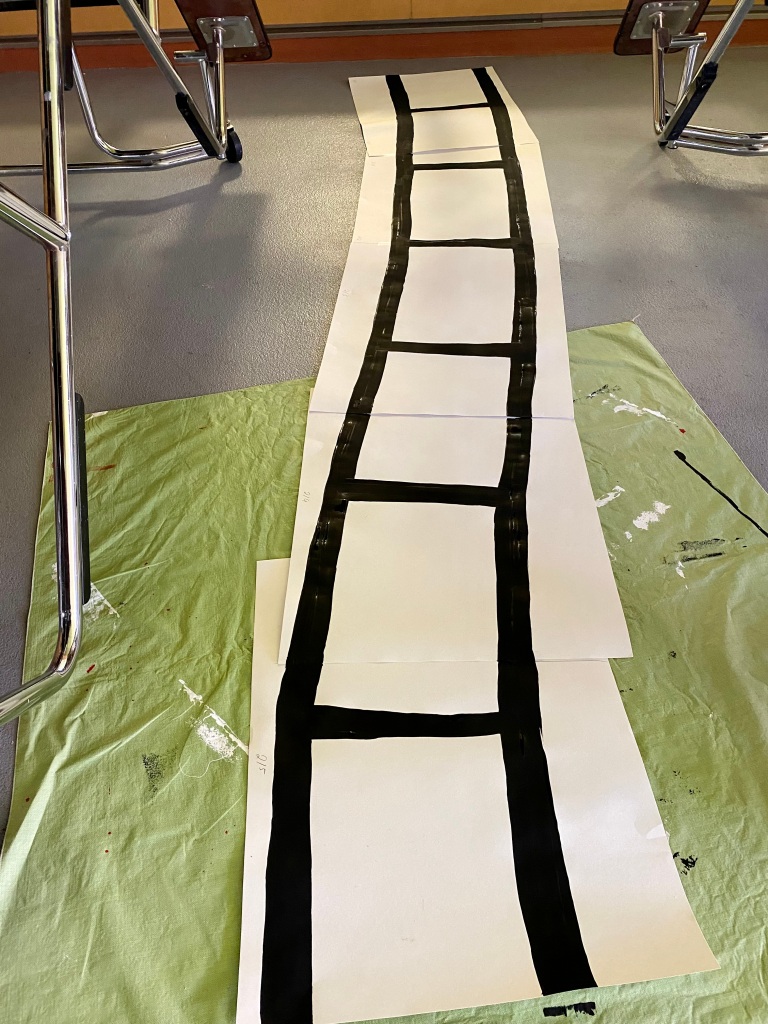
After we gathered all of the photos, our team printed them in black and white onto 11×14 paper. We used white poster board for the film strip and pieced it together with a curve to fit along the walls of the amphitheater. This was definitely not an easy project. It required a lot of measuring, gluing, painting, and cutting, and was very time-consuming…but it was worth every minute when we saw the looks on the kid’s faces on the night of the show.
After painting the 2-inch black film strip lines around each of the kid’s photos, we used white vinyl squares, cut from the Cricut Maker for the finishing touch, making it look very much like a winding film strip. I also added a smaller bit of blank film strip around the inside of the giant 6ft film reels so it gave the illusion that the film strip was coming out of the reel. My husband helped me attach the black reels to the gold centers with screws, washers, and bolts and they held together really well. #commissionsearned
The final project was the photo station. For the backdrop, I used a large sturdy refrigerator box opened up. I had gray and white house paint left over from some projects at home, and I used black duct tape, black electrical tape, black acrylic paint, and my Mouka projector. I also set aside a couple more large pieces of cardboard for the film strip. I started by outlining the entire box with black duct tape. Then I made 4 distinct panels by adding strips of tape to the folds. I painted a white stripe along the top and bottom and then added smaller tape strips to make the film squares. Another strip of tape along the tops of these created the top and bottom of the film strip. Next, I projected two circles onto the middle of each panel and added 1, 2, 3, and 4 for the countdown. I painted the numbers with black acrylic paint and used black electrical tape for the thinner lines.
After projecting the film strip onto a piece of cardboard, I traced it and cut out two more identical pieces. I layered the 3 cardboard cutouts and glued them with E600 glue. I put bricks on top for several hours while they dried and then painted the entire thing black. The 3 layers made the filmstrip a lot more sturdy, which is important when lots of people will be handling a prop. The white rectangles were once again, vinyl cut out from the Cricut, and I added a thick layer of Mod Podge over the top to give it a shiny finish and to keep the white rectangles from falling off. #commissionsearned
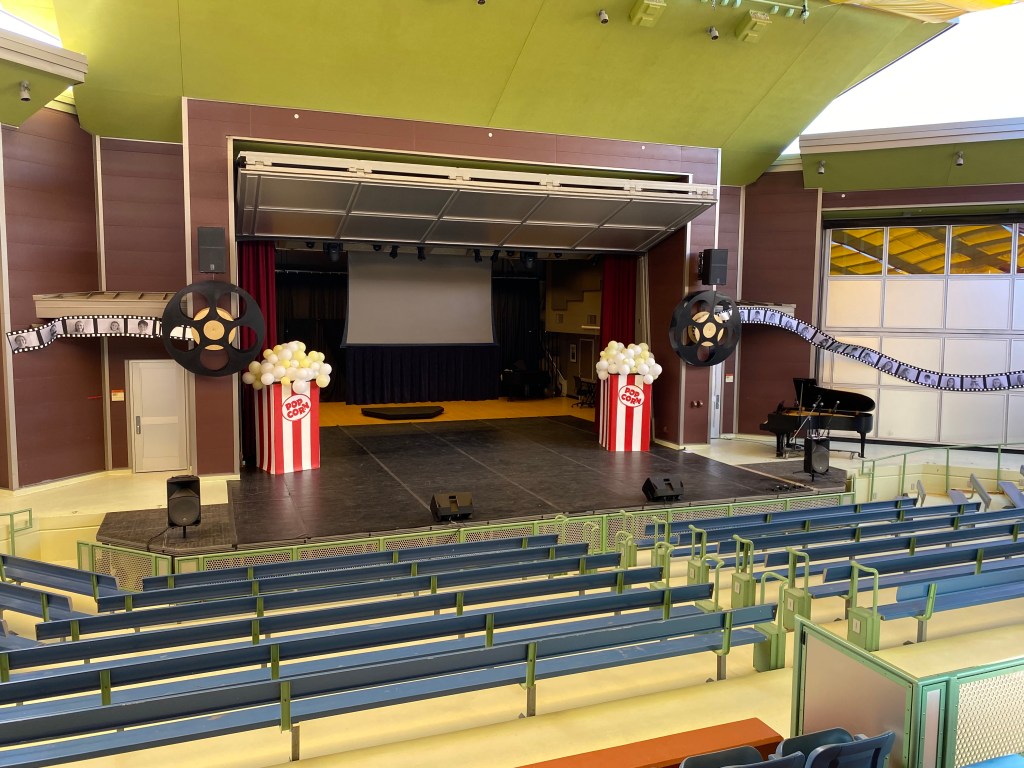
On the day of the event, our team got to work putting up all of the decor so that the room was ready to go at showtime. One of our TBC members is gifted at balloon displays and she made the popcorn boxes “POP” with white and yellow balloons. She also added the black and white balloon displays to the photo station to give it a polished look. The facilities guys at the school were instrumental in hanging the giant film reels and film strips and helping to make our vision come to life.
It was definitely a group effort to pull off this giant undertaking, but our TBC team is full of creative parents who get the job done! The Talent Show was a huge success! The kids felt like “stars” and all of our hours of hard work were so worth it!!! The highlight of the night for me was that my daughter got to perform a song with her dad, which is a memory that I know they will both cherish forever. You can see their smiling faces in the filmstrip at the bottom of this post.
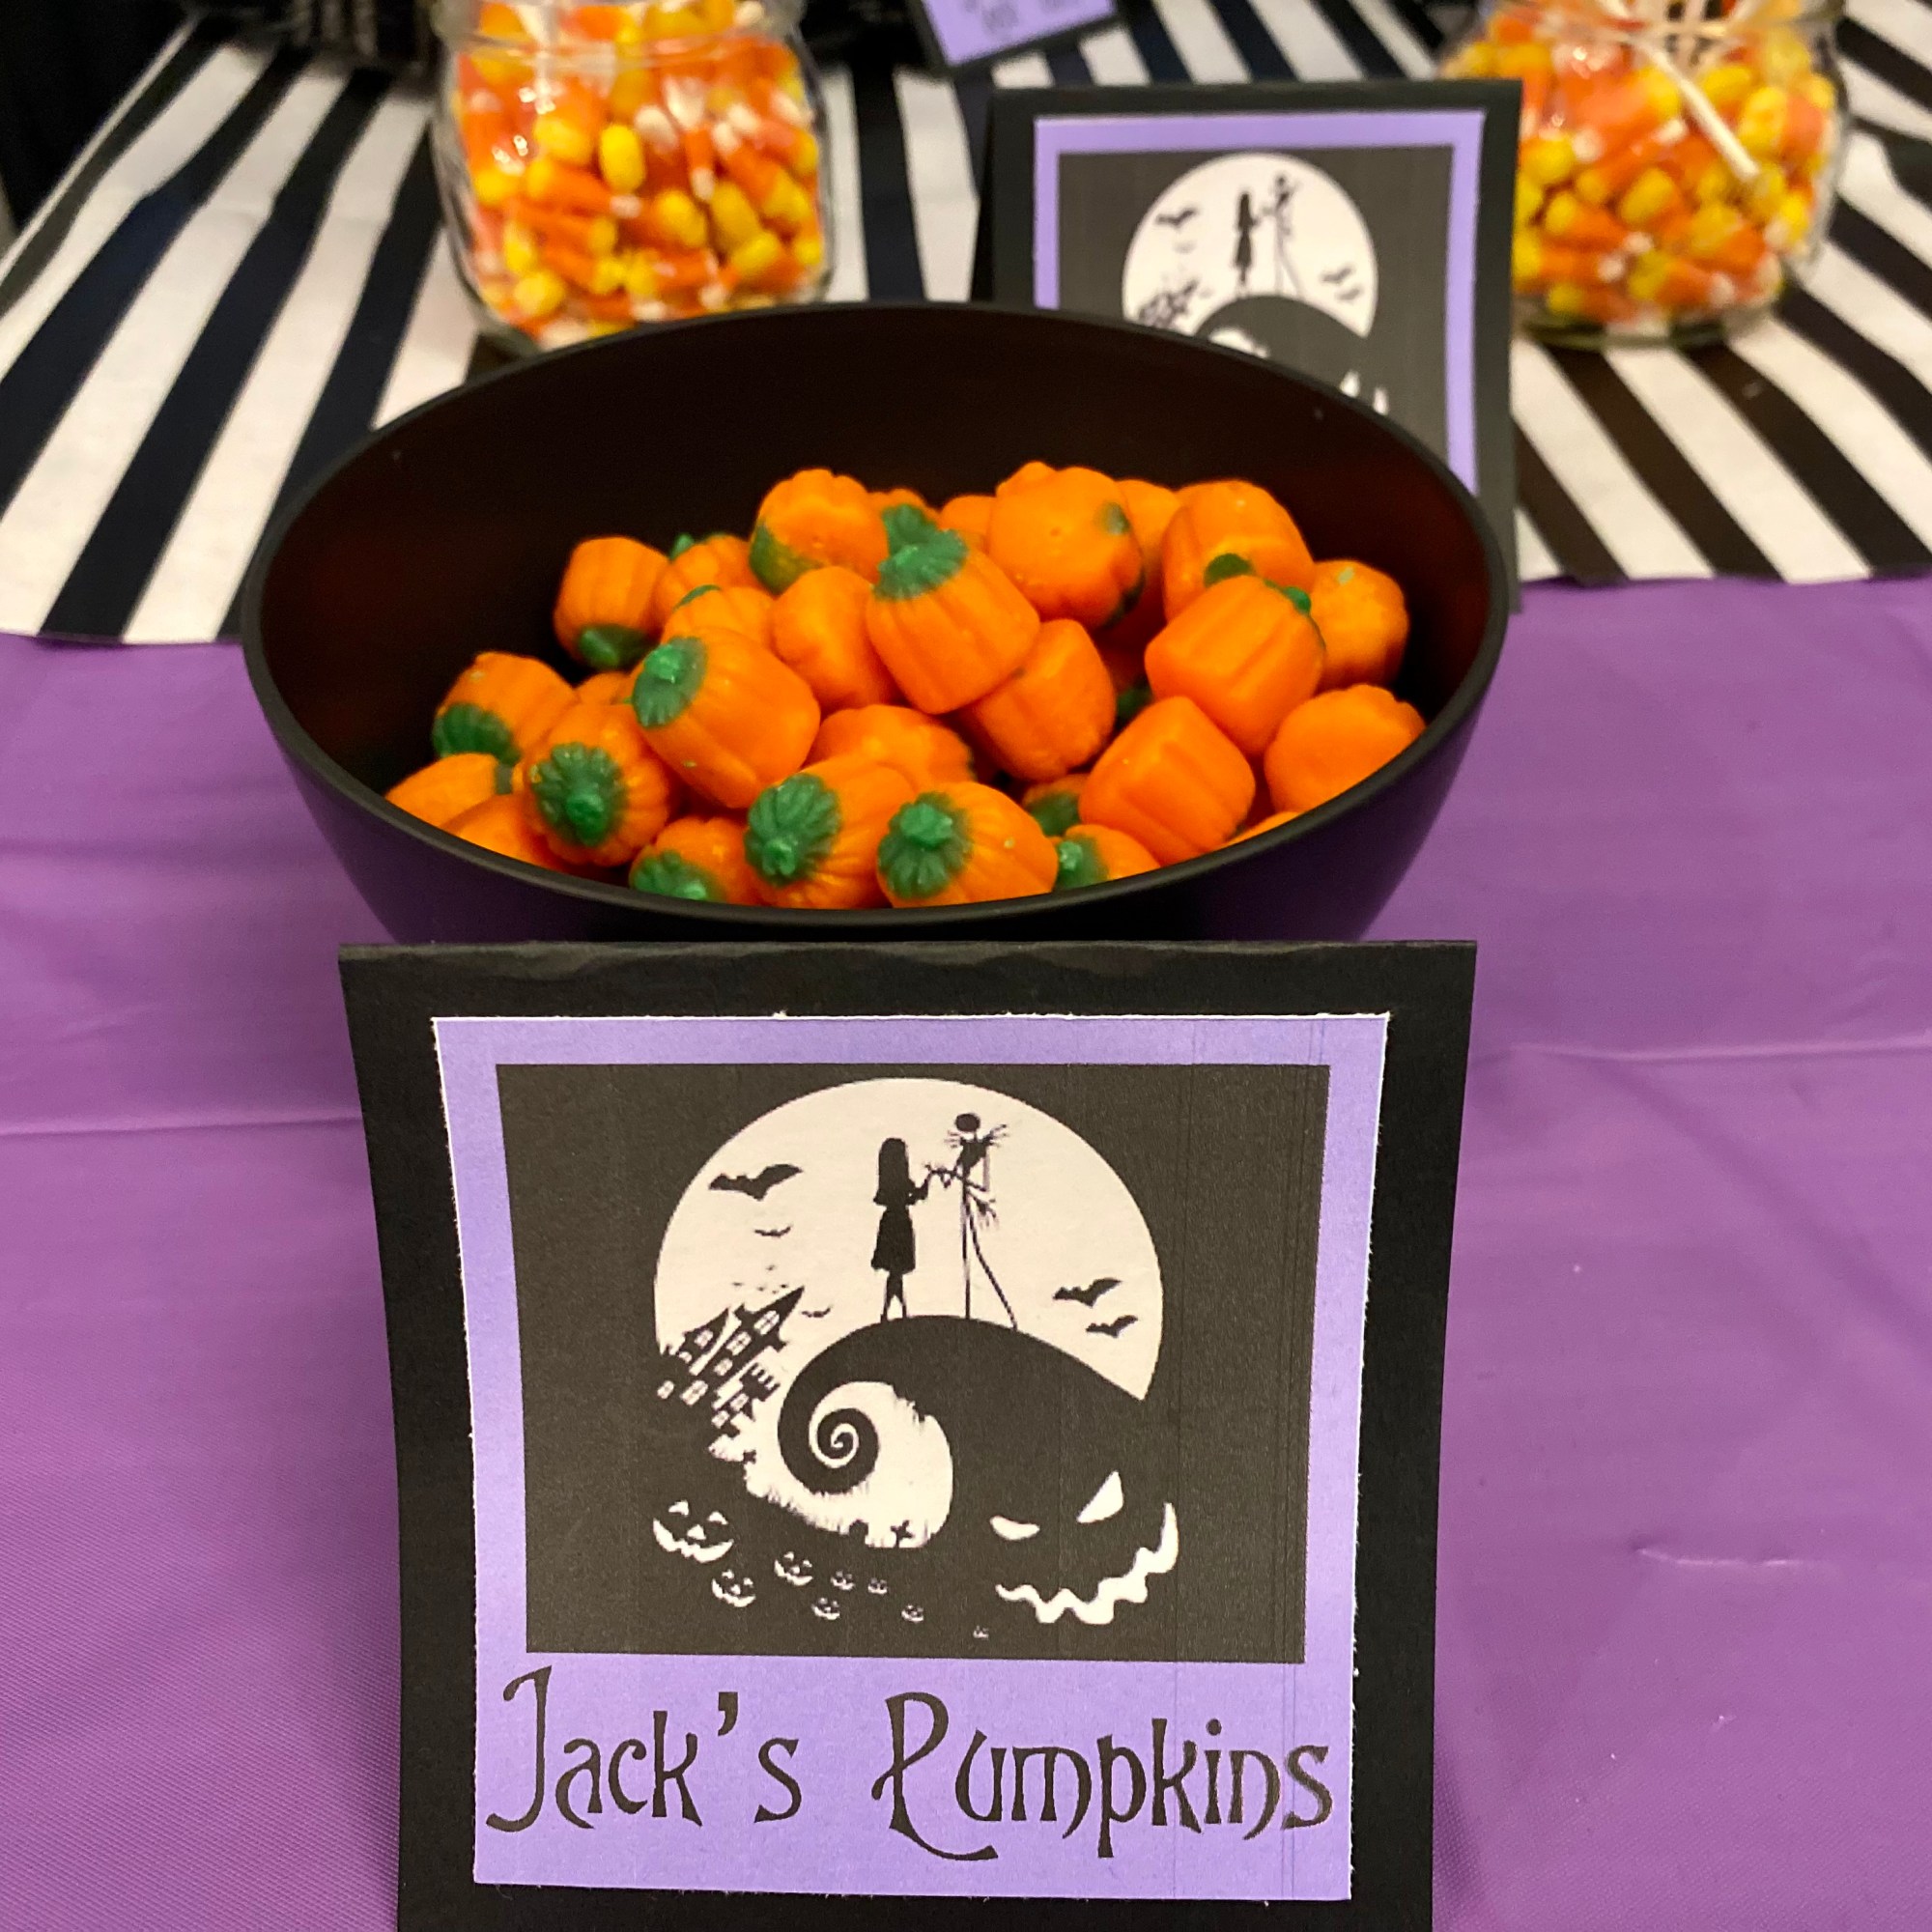
I am always looking for any opportunity to make memories for my kids in creative ways, so earlier this month, when my daughter started talking about Halloween movies that she likes, I suggested that we host a movie night on the weekend before Halloween. I’m not a fan of super scary, especially for middle schoolers, so we decided on Tim Burton’s The Nightmare Before Christmas and went to town browsing Pinterest for fun ideas. I found a super cute and inexpensive backdrop on Amazon and gathered a few things that I already had: white lights, a black backdrop, and a plastic pumpkin. I grabbed a purple plastic tablecloth, a black and white striped runner, popcorn boxes, and some black bowls and made some really fun food labels with names of the movie characters. I also printed off Jack & Sally faces to hang from the ceiling and I made a door hanger, using my Cricut Maker 3, with a black chalkboard style hanging that I found at the Dollar Tree and white vinyl. I’ve included the PDF of the printables that I created for you to use for your own party. #commissionsearned
Planning the food for this party was so much fun! Here’s a list of what was on our Nightmare Before Christmas Food Table.
Oogie Boogie Guts: Sour Gummy Worms
Sally Hair: Red Vines
Jack’s Pumpkins: Brach’s Pumpkins
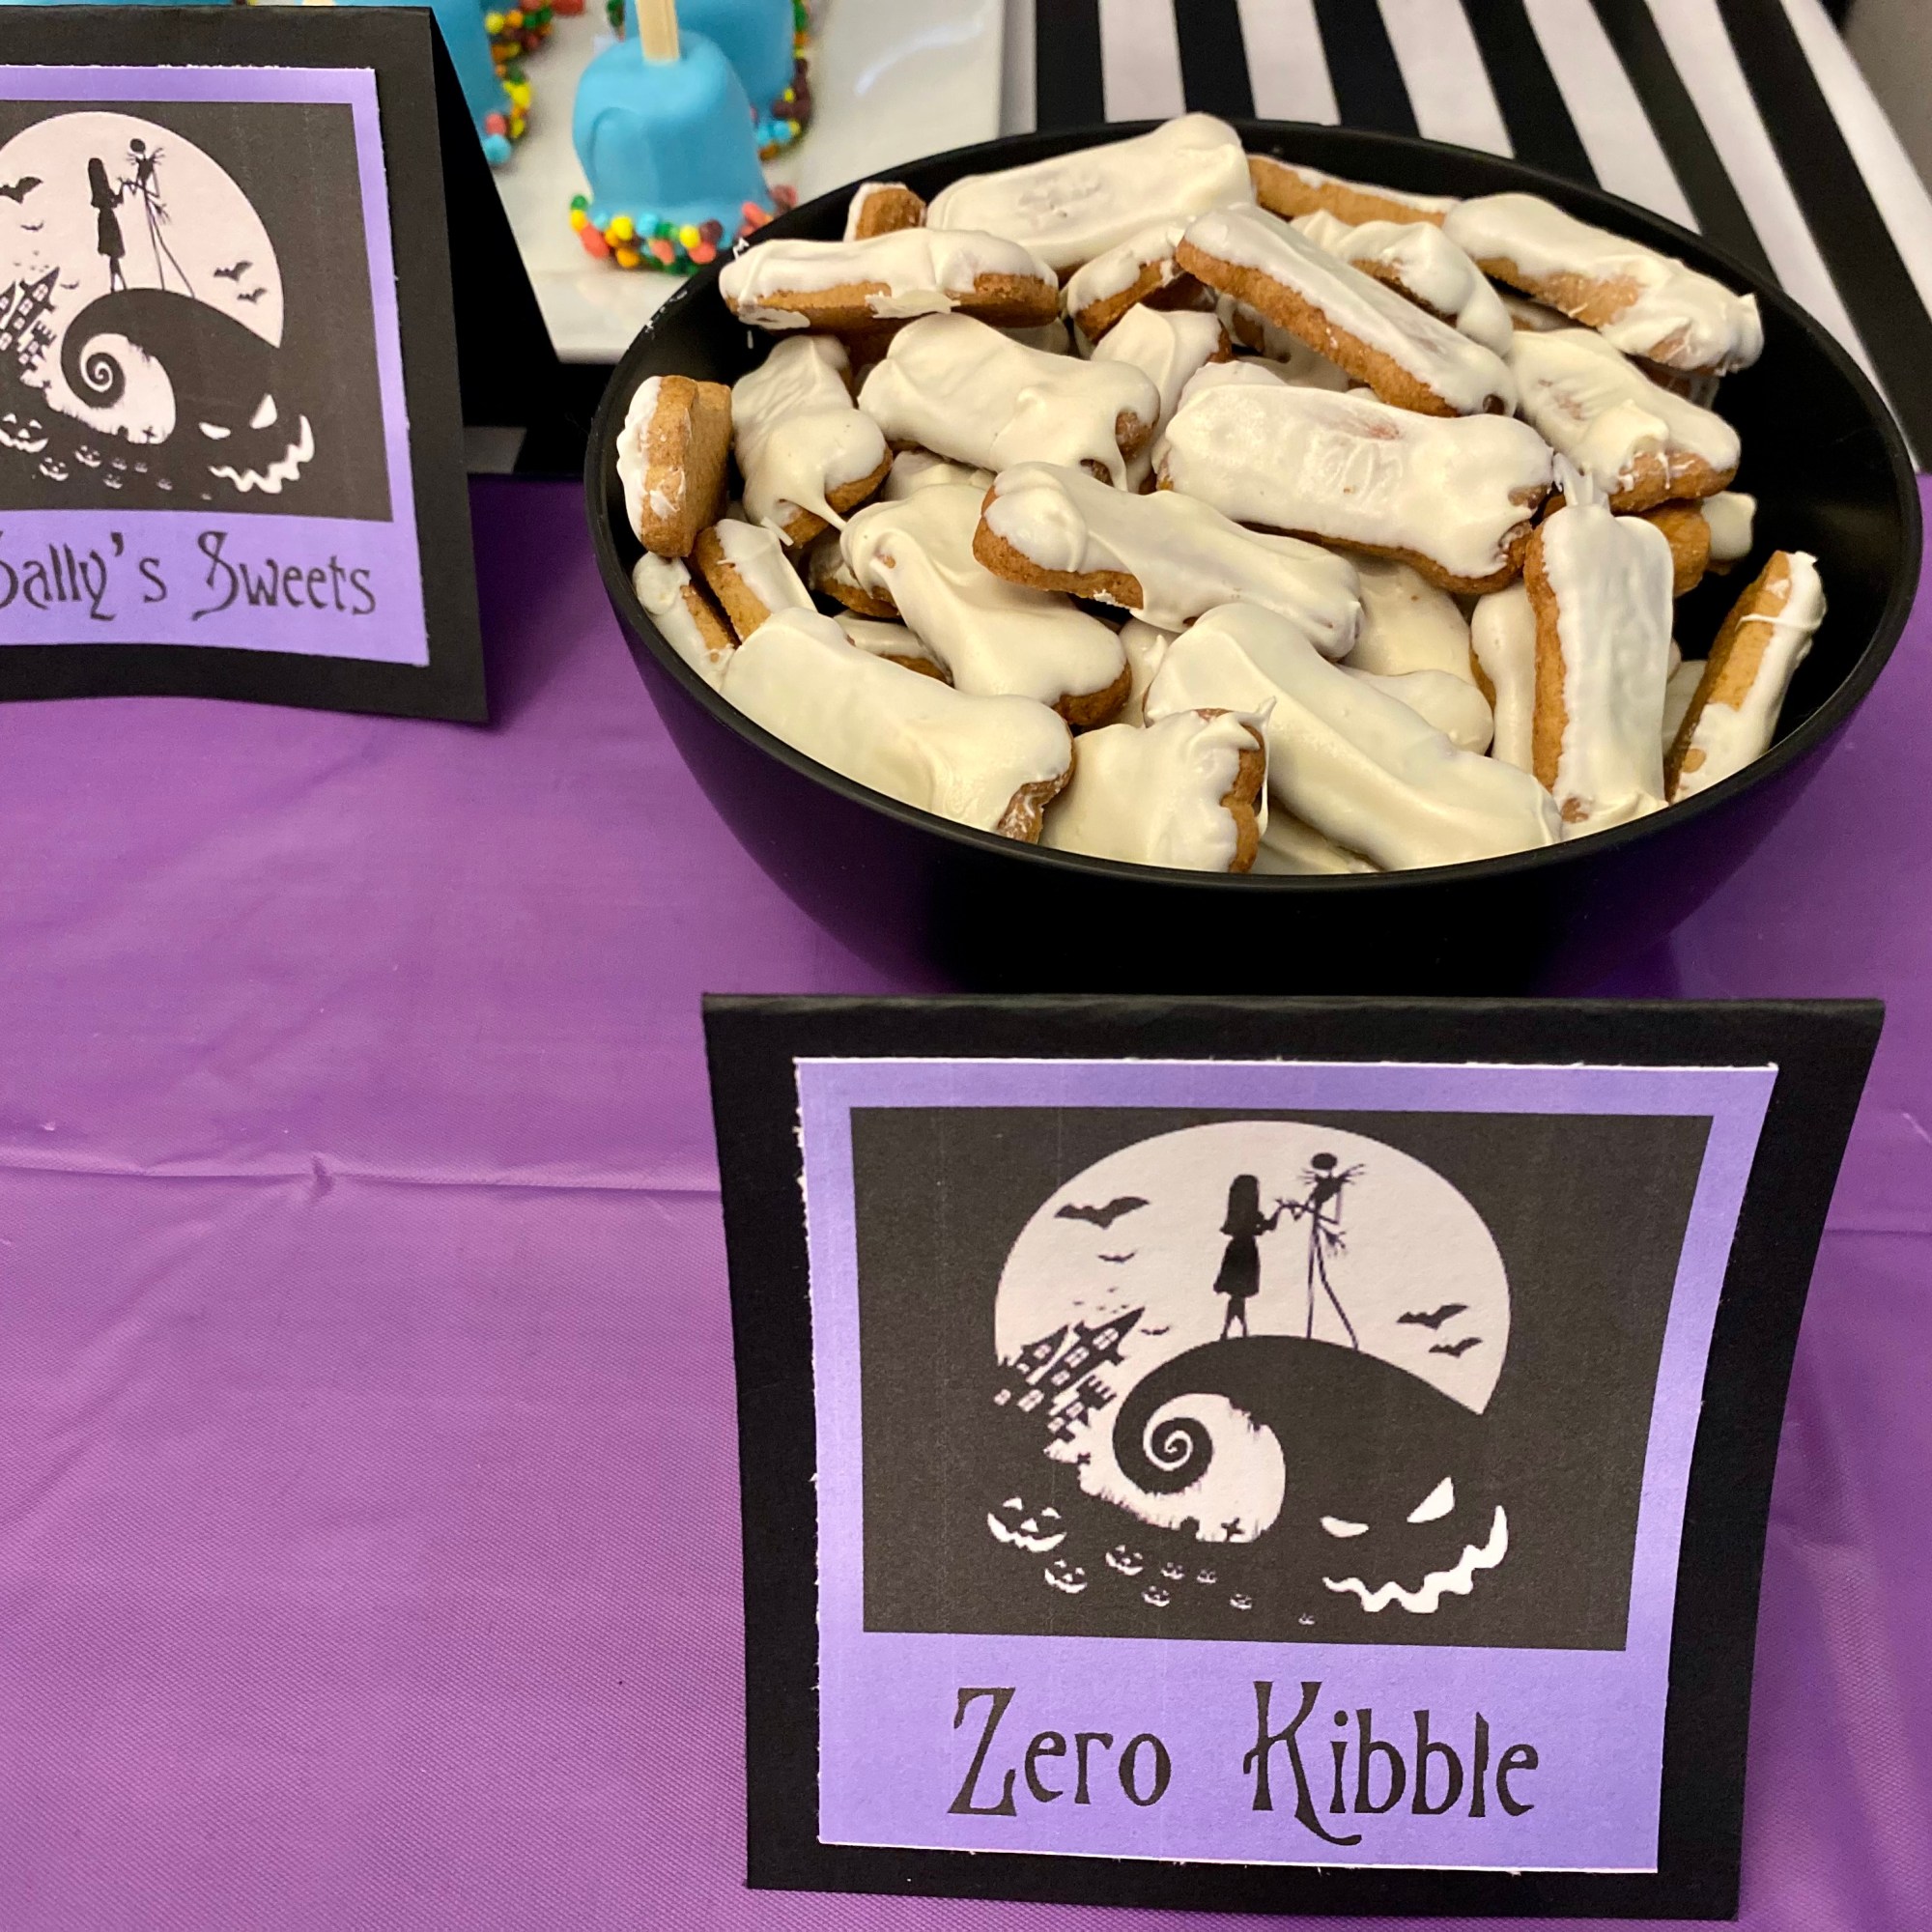
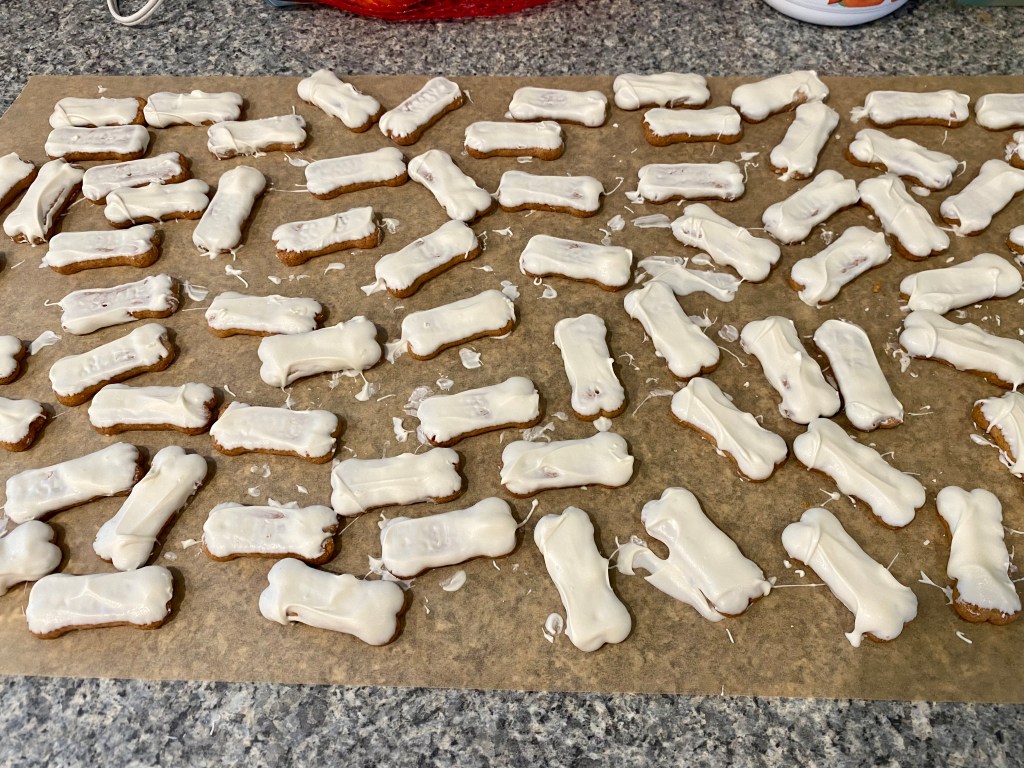
Zero Kibble: Scooby Doo Graham Crackers (dipped in white chocolate candy melts)
Mummy Dogs: Hot Dogs Wrapped in Crescent Roll Dough
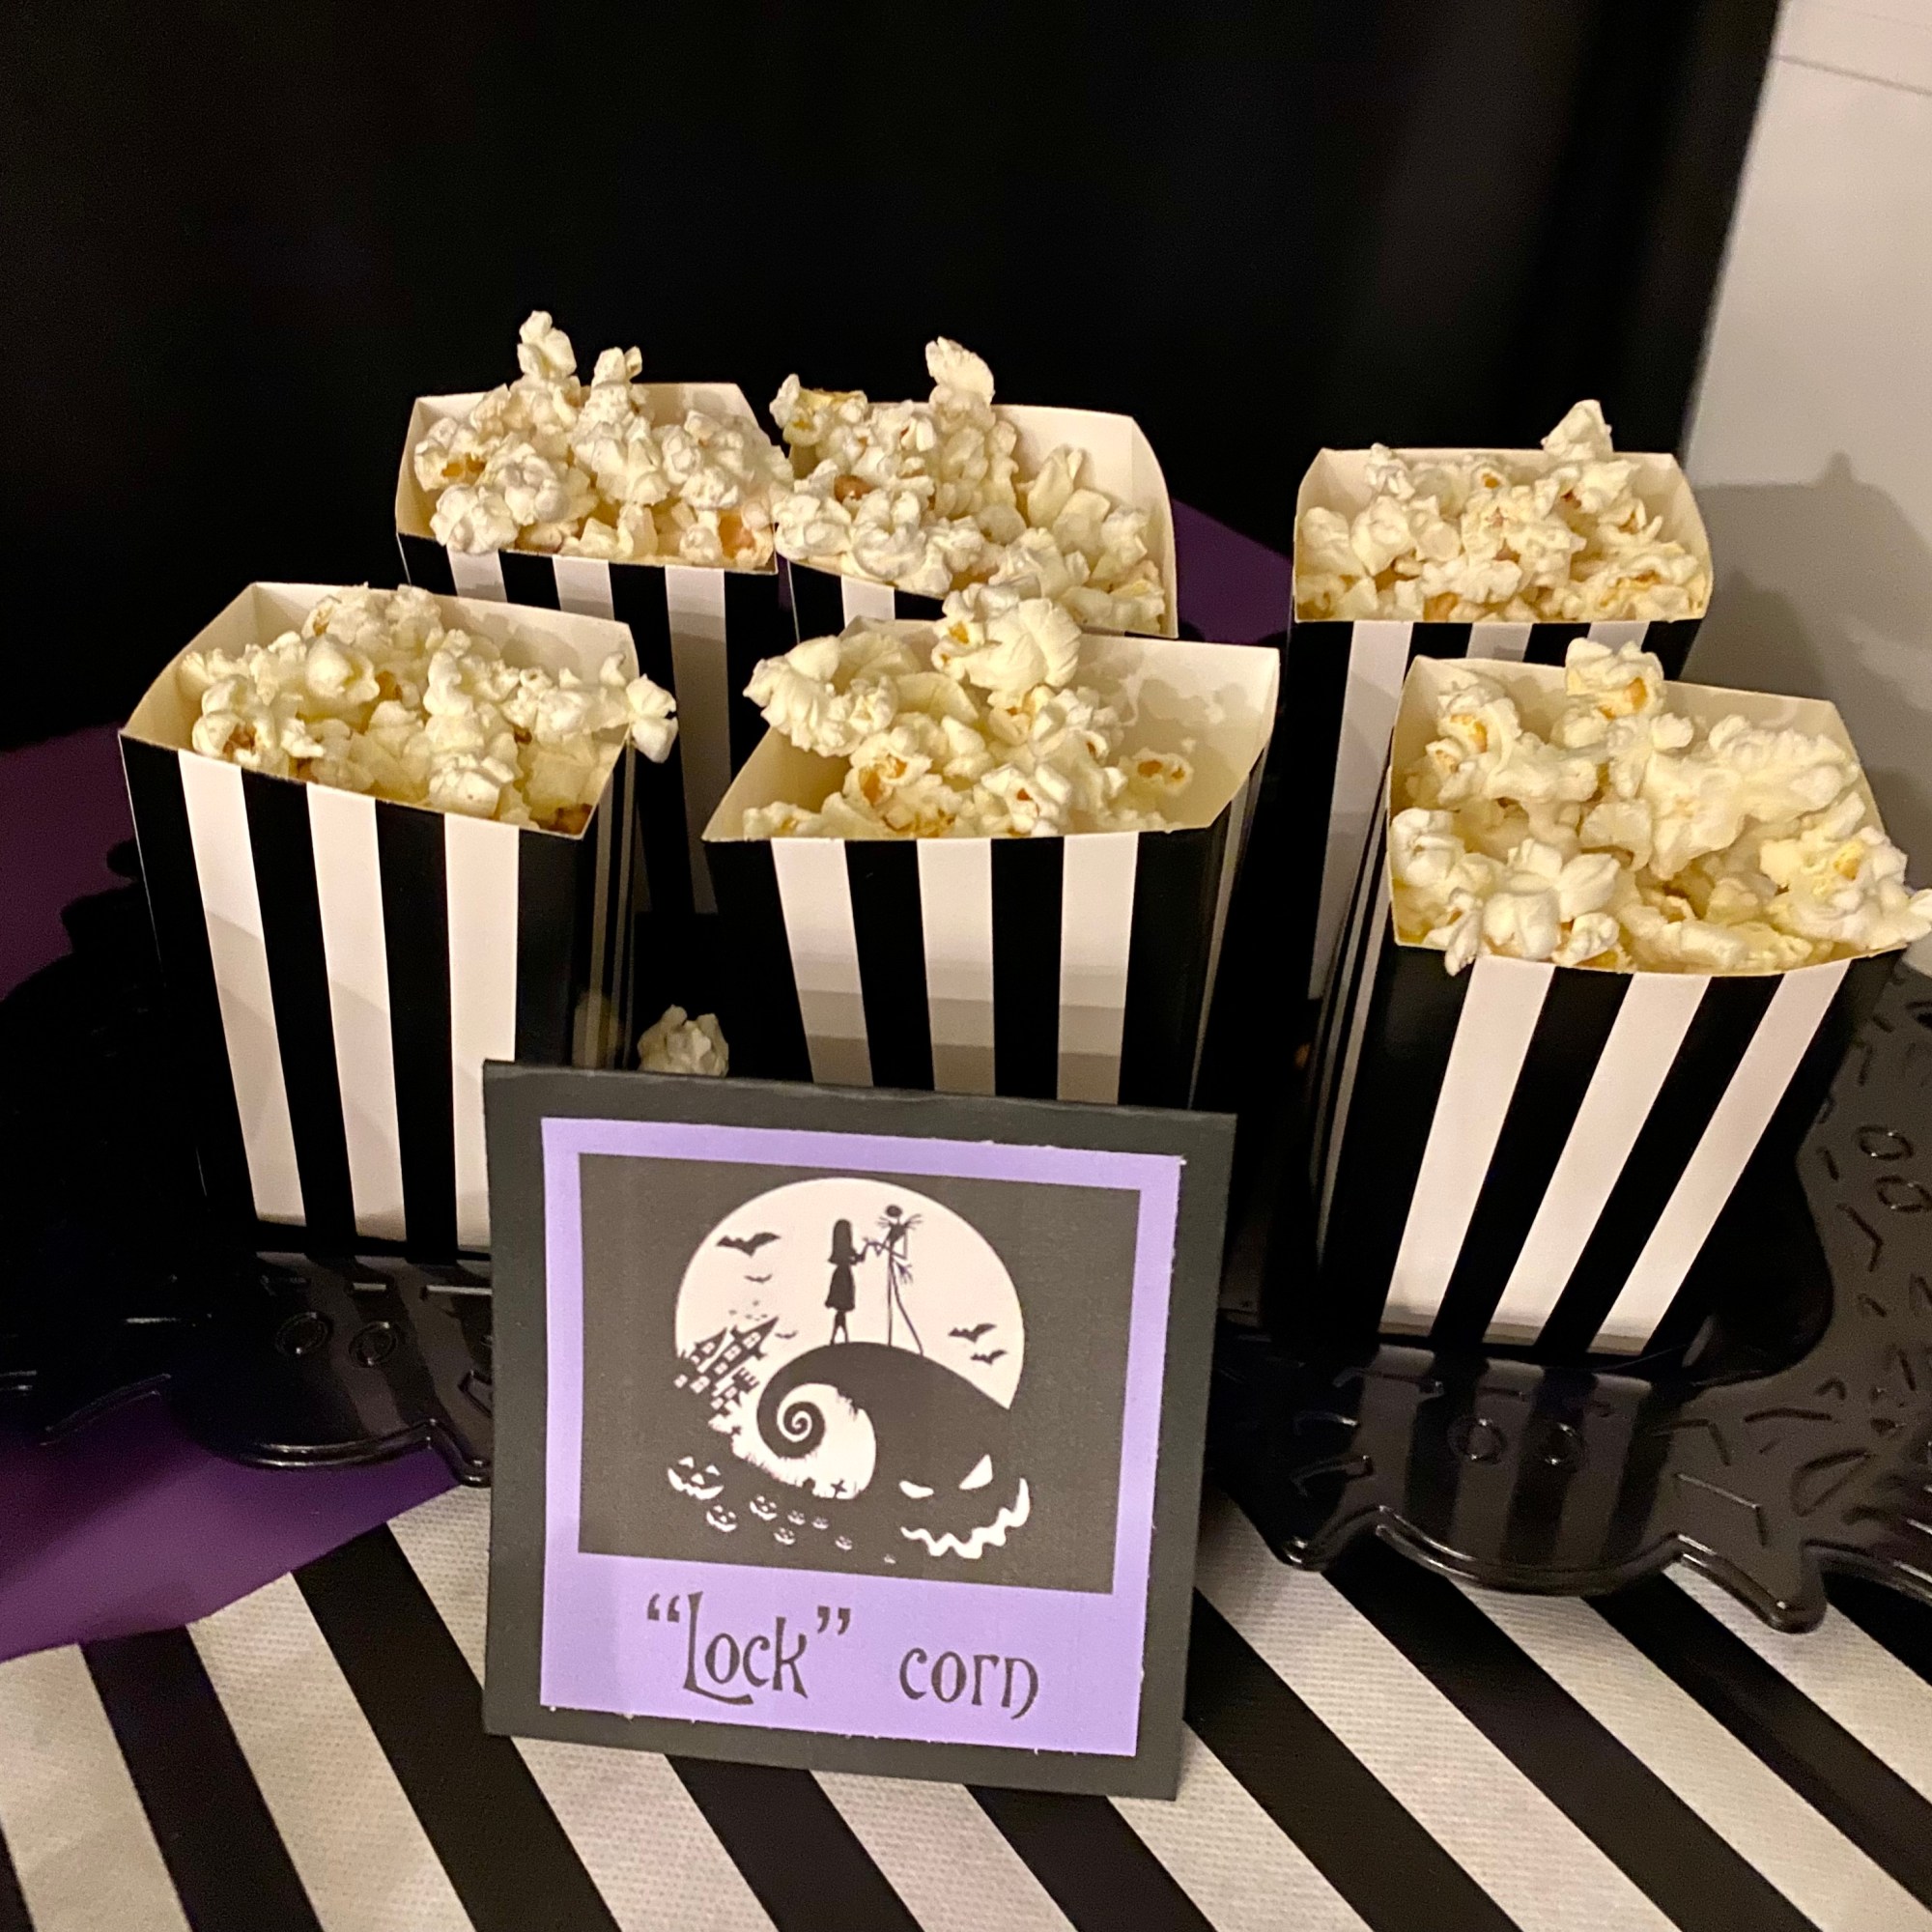
Lock Corn & Finkelstein’s Food: Popcorn
Mayor’s Munchies & Nightmare Noms: Potato Chips
Tricks & Treats: Apples With Lemon Juice (one healthy addition)
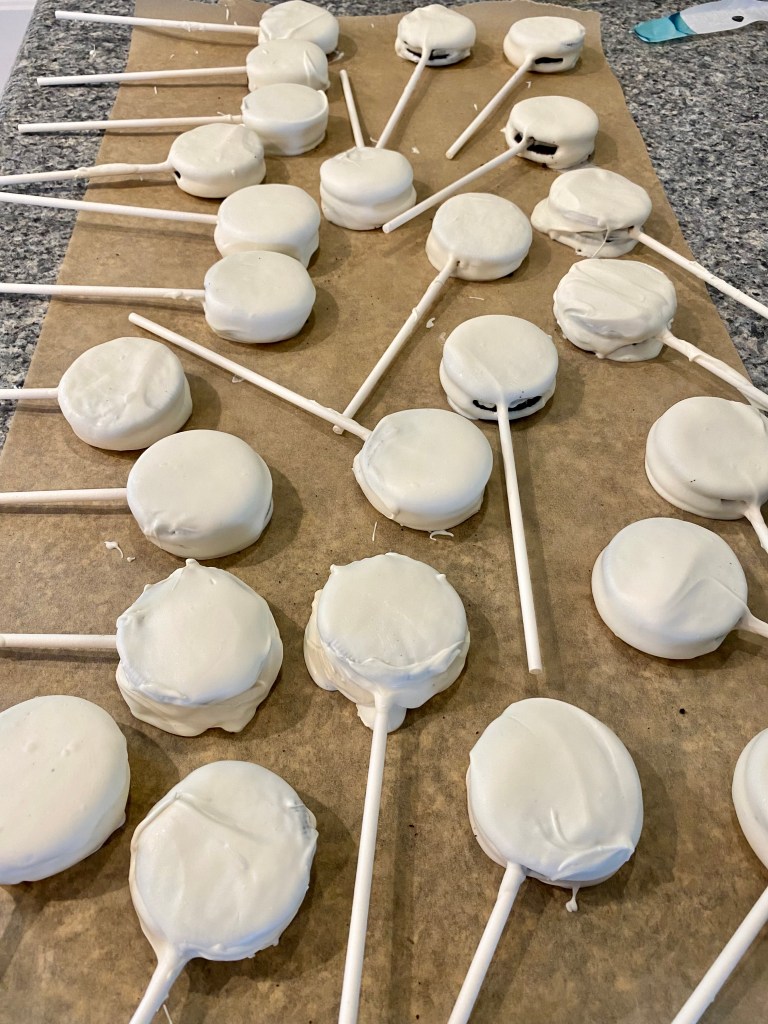
Skellington Sweets: Jack Skellington Oreo Pops
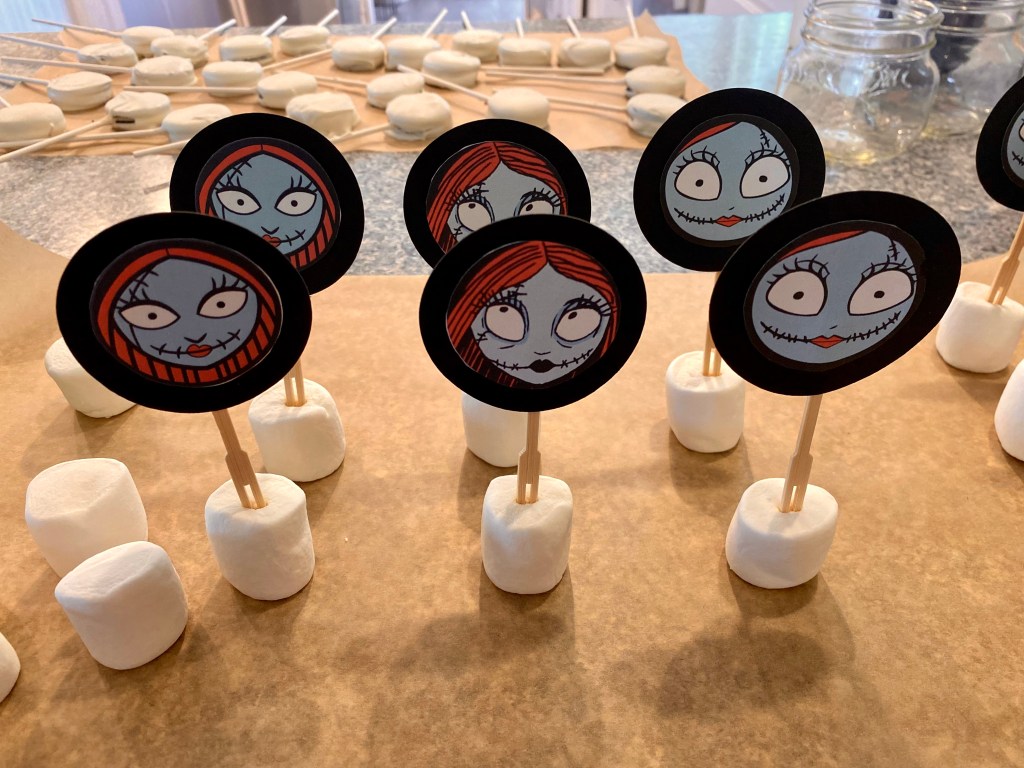
Sally’s Sweets: Sally Marshmallow Pops with Nerds Candy
Barrel’s Beverages: Mini Waters & Mini Sprites
I’ve included some helpful tips if you are making Jack Oreo Pops, Sally Marshmallow Pops, and Zero Kibble:
For the Jack Pops, use Double Stuf Oreos, and be sure to dip your lollipop sticks in white candy melts before you push them into the center of the Oreos. Let them set up in the refrigerator for a few minutes and then dip fully in the white candy melt. Without this step, the Oreos will fall apart when you dip them. Use black candy melts for the eyes, mouths, and bow ties. A toothpick and squeeze bottle will come in handy for the face details. Print out the Jack faces from my PDF and cover with parchment paper. Use the black candy melts in a squeeze bottle to trace the bowties.
For the Sally Pops, use flat toothpicks for the toppers. I used my Cricut Maker 3 to cut the black circles. Glue the toppers to the toothpicks before you make the pops. Pour Rainbow Nerds onto a plate with high edges and leave the pops to set on the plate of Nerds before transferring to your table.
The Scooby- Doo graham crackers actually say “Scooby” on the front, so dipping that side in white candy melts will hide the name and also gives them more of a bone look. Search my blog for “Cookie Pops” & “Marshmallow Pops” for more detailed tutorials on how to make these tasty treats. #commissionsearned
Our movie night was planned for 5:30 pm -8:30 pm, which seemed like enough time, but I think I would have extended by another 1/2 hour if I was to do it again. My daughter has the sweetest group of friends, and although it was loud with 15 middle schoolers running around my house, they were so respectful and everyone had SO MUCH FUN!!! We set up corn hole in the backyard and we have tether ball as well. For the first hour, the kids ran around outside, and the entire group greeted each person as they arrived. The Nightmare Before Christmas is only 1 hour and 16 minutes long, so it’s a great length for a movie night and left enough time for a game before everyone got picked up.
My daughter and her friends love this version of the “telephone game” using paper and pencils. You can order the actual game Telestrations, on Amazon.com but we just cut up paper and it works really well. Here are some simple instructions:
Cut paper in fourths and make a stack for each player. The stacks of paper should contain the same number of papers as the number of players. We had 15 kids, so each kid got a stack of 15 pieces of paper.
Have each player write a phrase (any phrase) on the top of piece #1. Then each player passes their ENTIRE STACK to the right. The next step is to read the phrase and then put that top paper on the bottom of your stack, facing up. The players will then draw a picture of the phrase on the top of page #2. Once everyone is finished drawing their picture, everyone will pass their ENTIRE STACK to the right. Now each player will see the drawing on the top and will have to guess what the phrase is that inspired the drawing. They will place page #2 on the bottom of the stack, face up, and write that phrase on the top of page #3. The process is repeated, phrase, pass, drawing, pass, phrase, pass, drawing, etc until each player ends up with their original stack of paper. Be sure to take some time to read through your entire stack out loud and be ready to laugh until you have tears streaming down your face.
This is where that extra 30 minutes would have come in handy. Unfortunately, we ran out of time for all of the kids to read their telephone stories, so they just had them read their original phrase and the last phrase to see how much it had changed. It was still a ton of fun and I love that the entire group of kids sat and played together. I definitely see us hosting more movie nights with this amazing group of kids in the future. My daughter was smiling from ear to ear the whole time and I had so much fun with all of the party prep. It was a win-win for sure!
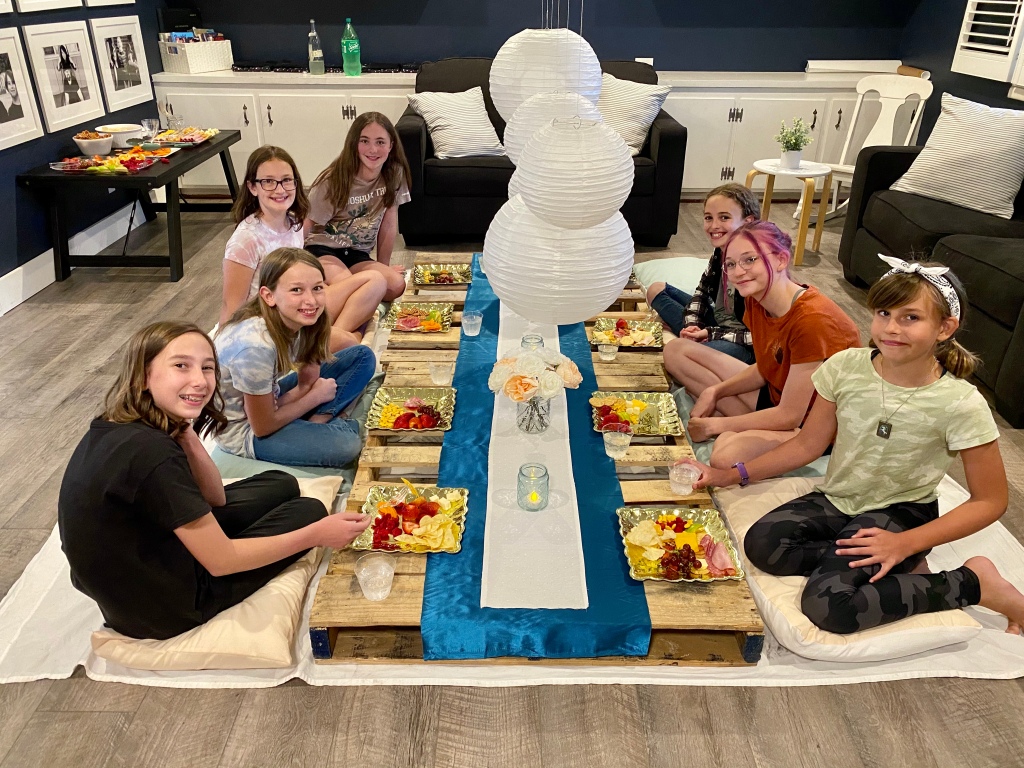
My beautiful girl turned 12 last week! I can hardly believe we are just one year away from the having another teenager in the house! Karis could not decide on a theme for her party, so I asked her if she wanted me to come up with something fun. She agreed, so I went to work, browsing Pinterest for ideas. Around that time, I was dropping my son off at youth group and I saw a stack of wooden pallets behind the dumpster of a neighboring business. I called and asked if I could take some of the pallets and they said that was fine, so I grabbed a couple and started dreaming of creating an elegant pallet table for my girl and her friends to enjoy during the party.
I took inventory of what I already had at home: extra pillows, a white king sized sheet, twine. Then I made a list of the things that I wanted to purchase: paper lanterns, mason jars, tea lights, flowers, twinkle lights, material. I walked the aisles of Hobby Lobby trying to come up with a color combination, and because Karis is a big fan of pastels, I settled on peach, light green, white, and some pops of dark teal. I bought 6 white paper lanterns in various sizes, a string of white battery operated lights, some aqua tinted mason jars, two larger clear jars, white and peach flowers, tea lights, and material to use as pillow covers and a table runner. I also picked up some fancy gold paper plates and gold number candles. #CommissionsEarned
I set the table a couple of days before the party so that I had plenty of time to get my house cleaned and to prep for the food and games. I found some amazing game ideas on Pinterest and hit up the Dollar Tree for supplies. Karis wanted to swim, make s’mores, and play games. We started the party at 5:00 pm and I put together a simple charcuterie board style dinner with a variety of meats, cheeses, crackers, fruits, and veggies. The girls loved eating a “fancy dinner” by candlelight (I turned the main light on to get this photo).
I saved the “Beach Ball Question Game” from our New Year’s Eve party and that was once again, a huge hit with 11 & 12 year old girls. They actually played this game several times throughout the party. All you need is a beach ball and a sharpie marker. Blow up the ball and then write questions all over it with the sharpie. Some favorites are: What do you want to be when you grow up? What is your favorite book? movie? food? place? What superpower do you wish you had? Who do you admire? The ball gets tossed around and whoever catches it has to answer the question that is under their right hand when they catch it.
My favorite game/activity of the night was called “Foil Fashion Show.” This is where the Dollar Tree came in handy. I picked up a roll of tin foil for each girl, as well as several crafty type items: tape, pom poms, ribbon, pipe cleaners, glowsticks, and some flowered leis that we pulled apart. I told the girls that their goal was to create an outfit and when they were done, we would have a foil fashion show. I honesty expected them to take about 15-20 minutes on their creations, but they surprised me and took at least an hour. Some of them went all out, creating jewelry and headbands. One even made a super long train that dragged behind her as she walked the living room “runway.” The giggles and chatter were so fun to take in as the girls went to work, helping each other put together their best looks. I found some “runway” music for kids on youtube to play while they strutted their stuff and it was pure entertainment from start to finish.
The last game we played is a form “telephone” only with phrases and drawings. The girls played two rounds at night and then another round in the morning. All you need is blank paper and pencils. Cut paper in fourths and make a stack for each player. The stacks of paper should contain the same number of papers as the number of players. We had 7 girls, so each girl got a stack of 7 pieces of paper.
Have each player write a phrase (any phrase) on the top of piece #1. Then each player passes their ENTIRE STACK to the right. The next step is to read the phrase and then put that top paper on the bottom of your stack, facing up. The players will then draw a picture of the phrase on the top of page #2. Once everyone is finished drawing their picture, everyone will pass their ENTIRE STACK to the right. Now each player will see the drawing on the top and will have to guess what the phrase is that inspired the drawing. They will place page #2 on the bottom of the stack, face up, and write that phrase on the top of page #3. The process is repeated, phrase, pass, drawing, pass, phrase, pass, drawing, etc until each player ends up with their original stack of paper. Be sure to take some time to read through your entire stack out load and be ready to laugh until you have tears streaming down your face. This is definitely a perfect game for tweens, teens, and adults alike.
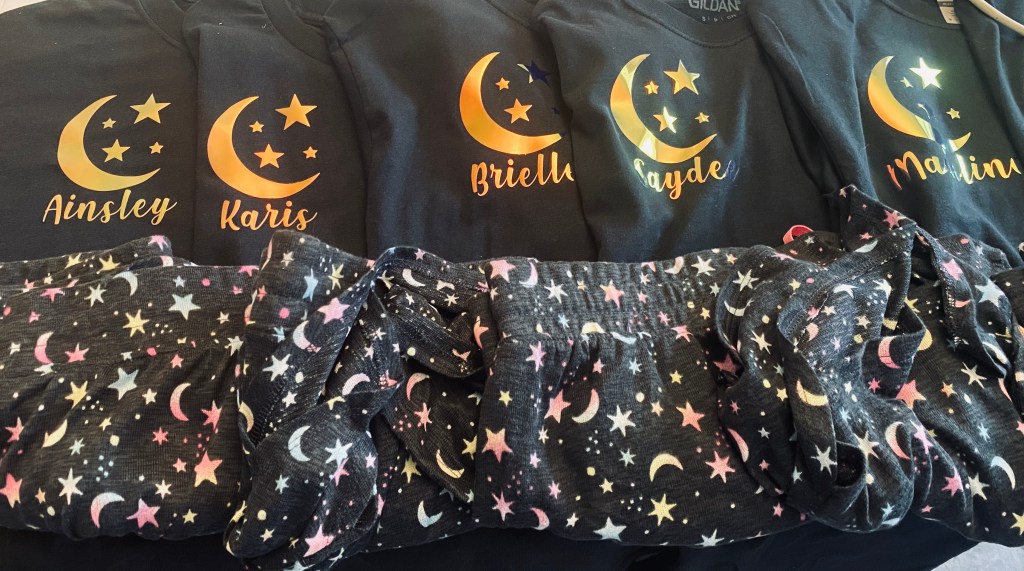
It was an unusually cool day in June this year, so we had to slightly modify our original plans. The girls actually braved the cold and jumped in the pool for a short swim. Fortunately, one of the things that I got for them was matching pjs, so they dried off after a bit and got comfy for the night. My husband got me a Cricut Maker 3 for Mother’s Day this year and I haven’t had a ton of time to use it, so I made sure to test it out on a couple of things for Karis’s party. I found some adorable moon and star pj shorts for a great deal at Walmart and bought plain black t-shirts to make personalized tops to match the shorts. I tried out holographic iron on for the first time and it was such a cool product. I found a free moon and stars SVG online and watched a few tutorials. I must say that for my first try at making shirts with my Cricut, it was pretty easy and I loved the way they turned out. #CommissionsEarned
I used my Cricut Maker 3 for a couple of other decorations as well. I found a free Happy Birthday cake topper SVG and cut it out on two pieces of gold card stock. I used the smaller one as an accent for the Marshmallow Pops I made. Karis is not a fan of cake, so every year, I make marshmallow pops as an alternative. This year, I used Jett Puffed S’more Marshmallows and diluted orange candy melts with white ones to make a pastel peach color. I mixed blue and green candy melts with a bit of white to create teal for the flowers, and I used gold colored sprinkles on white candy melt dots for the centers of the flowers. They were the perfect complement to the colors of the elegant pallet table and Karis loved them! For more marshmallow pop inspiration, check out some of my marshmallow pop tutorials.
I decided that the door needed a “Happy Birthday” sign at the last minute, so I used the larger gold cutout and gathered some items that I already had laying around. A wooden embroidery hoop, leftover material from the table runner and the pillow covers, and the leaves that I pulled off of the peach and white flowers came together beautifully as an elegant birthday wreath. I used three long scraps of fabric that I twisted and hot glued to form the flowers. It added the perfect finishing touch to my girl’s elegant 12th birthday party.
The rain picked up as the night went on and Karis still had her heart set on making s’mores. Dad to the rescue. He grabbled our little propane camping fire pit and set it up on the front porch. Before the girls settled in for the night, they sat outside on the porch, roasted marshmallows, and made s’mores. It was actually a very sweet moment seeing them all circled around, chatting under the overhang in their matching pjs while it rained.
You would think that after late night s’mores it would be hard to settle 7 girls down for bed, but after dinner, swimming, a foil fashion show, and paper telephone, they spontaneously grabbed the beach ball for another round of the question game. They got their beds ready and snuggled in for some late night chats. I only had to come out once to remind them to keep it to a whisper and I actually got some sleep myself. Twelve is a fun age, and I am so thankful for the sweet group of girls that my daughter gets to do life with. I would have to say that this was one of the most enjoyable parties I’ve done, and the joy on Karis’s face always makes it so worth the creative effort it takes to pull of a memorable birthday party.
For more fun ideas for tweens and teens check out some of my other blogposts…
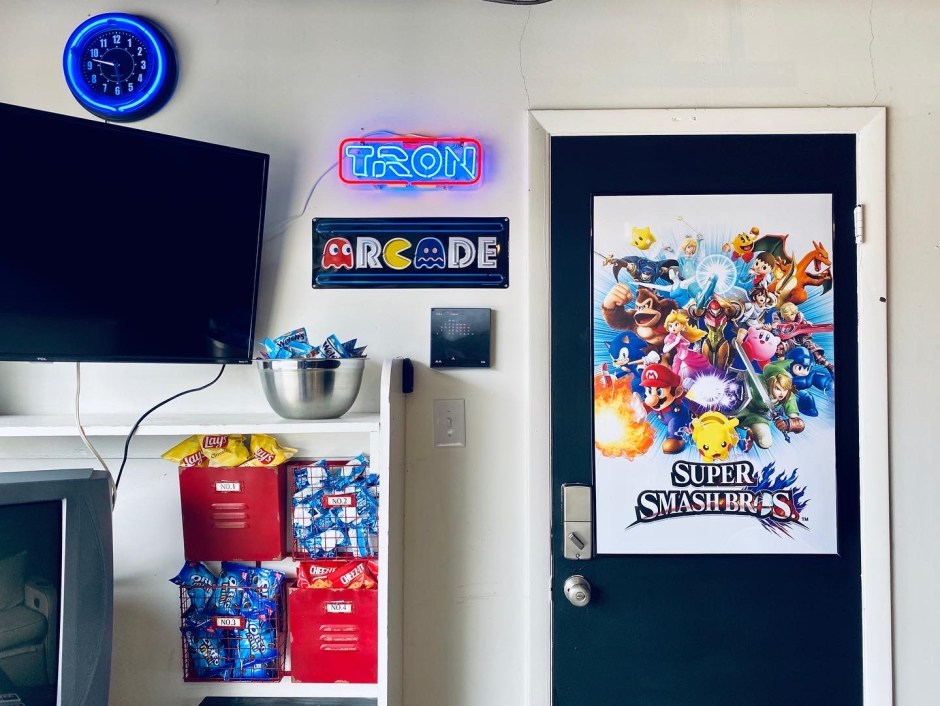
My middle son, Micah, turned 16 this month and we had a blast celebrating him by creating the coolest Retro Video Game Room in our garage where he can hang out with his friends. Micah loves old school games and is a huge fan of the TRON movies. In fact, one of the first things we purchased for his game room was an awesome neon TRON sign. I also bought him a vintage style FLYNN’S ARCADE t-shirt from Amazon as one of his birthday gifts.
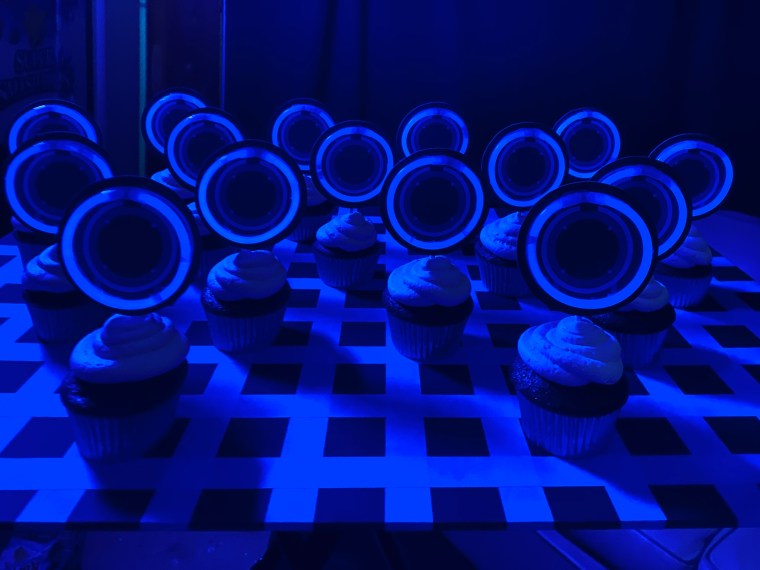
To make the cupcake toppers, I created a printable of the TRON disks and mounted them on circles of black poster board. I used a hot glue gun to secure lollipop sticks to the back of each topper. About an hour before the party, I cracked the blue glow sticks and made them into circles, then I secured them to the front of the TRON disks with hot glue as well. After frosting the cupcakes, I inserted a topper into the center of each one and they looked amazing. I made sure to wait until it got a bit darker to bring out the cupcakes, so that the glow of the toppers was in full effect. Micah loved them!!!
I wanted to display the cupcakes on something that looked like the “TRON grid” and I found a really inexpensive option. I used a black foam board and made a grid with blue painters tape…super simple, but it worked, and the glow sticks even gave the “grid” the illusion of being lit up, once it got dark. #CommissionsEarned
For more content from my son’s 16th birthday party, check out my recent post:
My middle son, Micah, turned 16 last week, and if you know anything about me, you know that I started planning his birthday party several months ago. Micah has been talking about converting a portion of the garage into his own space for the last year or so, but our garage was super unorganized and overflowing with junk. Getting a creative idea in my head became my motivation for doing some “pre-spring cleaning” and a Garage Arcade/Game Room sounded like the perfect 16th birthday gift for my boy.
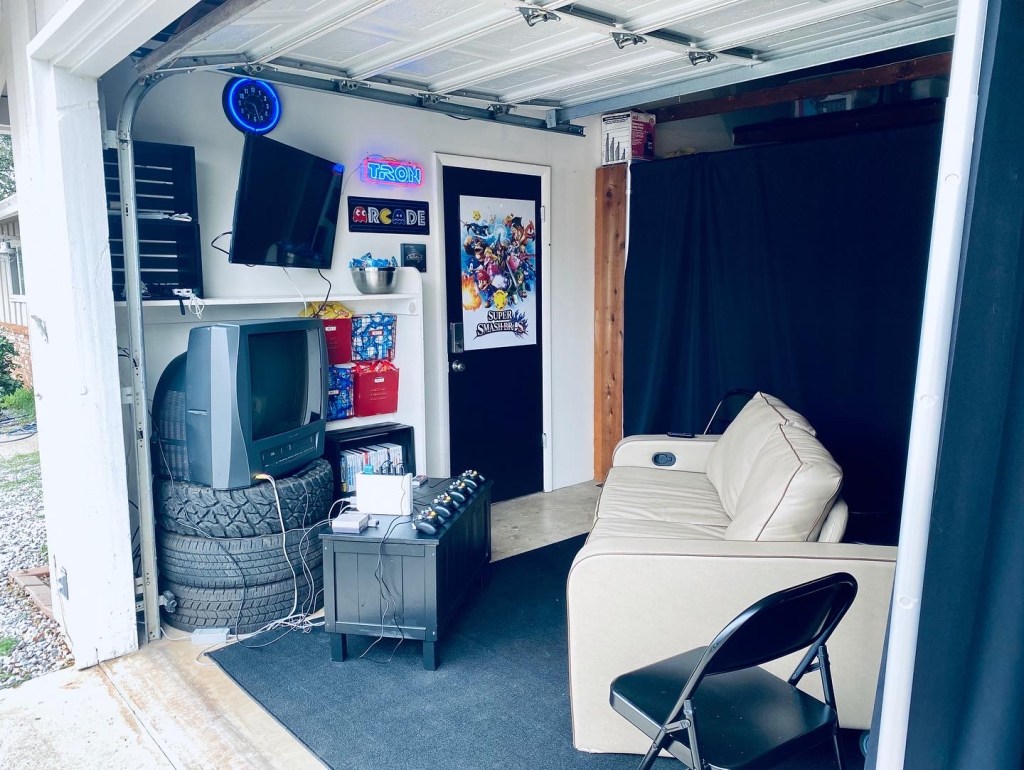
My husband and I cleared about a 1/4 section of our garage and planned it so that the door leading to the outside was incorporated into this space, making it a separate entrance for friends to come and go. We already had an old tube TV, 4 crates from another project, a couch that we had pulled out of our RV, and a wooden toy box. My husband had the great idea to use some old tires as a TV stand for a bit of a “Mario Kart” look. I like to repurpose what we already have to save money, so we were off to a great start.
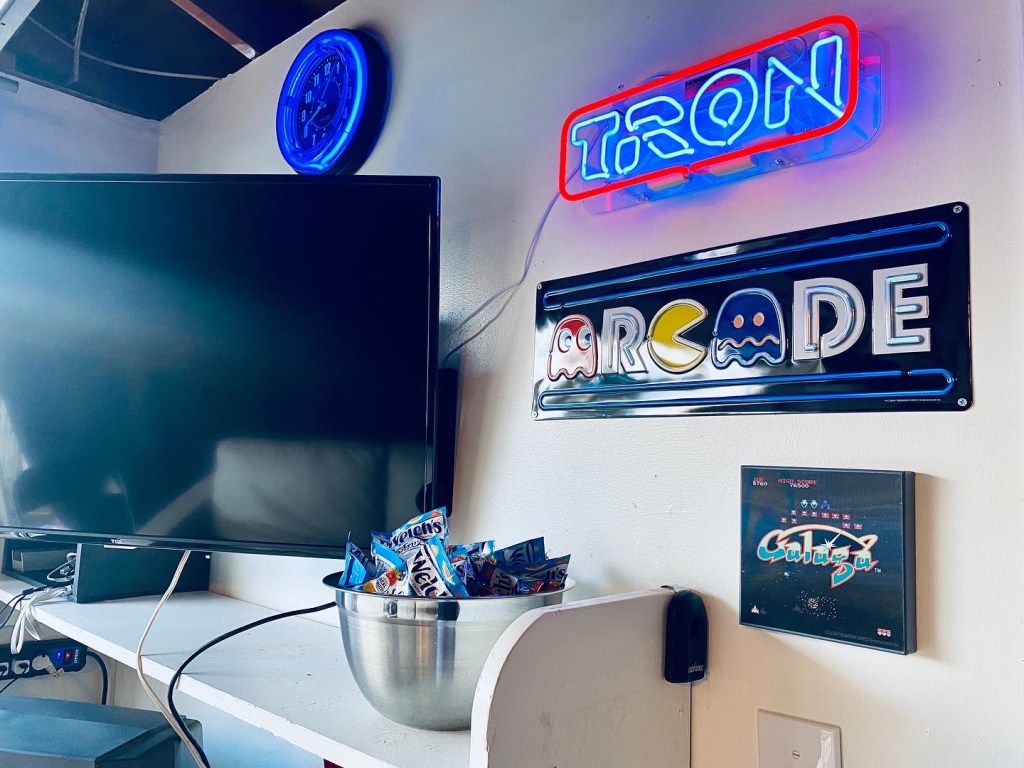
Micah likes more of a retro vibe and wanted the “Game Room” to have a bit of an 80’s feel. He is a huge fan of old school video games like TRON, so the very first thing we purchased was this incredibly cool neon TRON sign. I also grabbed the Pac Man ARCADE sign, the Galaga wall art, and the red metal magazine rack from Hobby Lobby. I love to use unexpected things, like the magazine rack as a holder for snacks. I found the neon clock at Walmart and my son picked out the Super Smash Bros poster for the door. I had 1/2 a can of black Chalkboard Paint that I used on the door to make it pop. We also painted the crates and the toy box black and hit up Walmart for an inexpensive black rug and a couple of stools and chairs for extra seating.
We wanted to make sure to have plenty of controllers available so the a bunch of kids could play at the same time, so we purchased a few extra wireless ones as well as four new Gamecube controllers that are also comparable with the Wii. To complete the space, we ordered a pipe and drape kit to hide all of the other “stuff” in our garage, which gave the game room a finished look. #CommissionsEarned
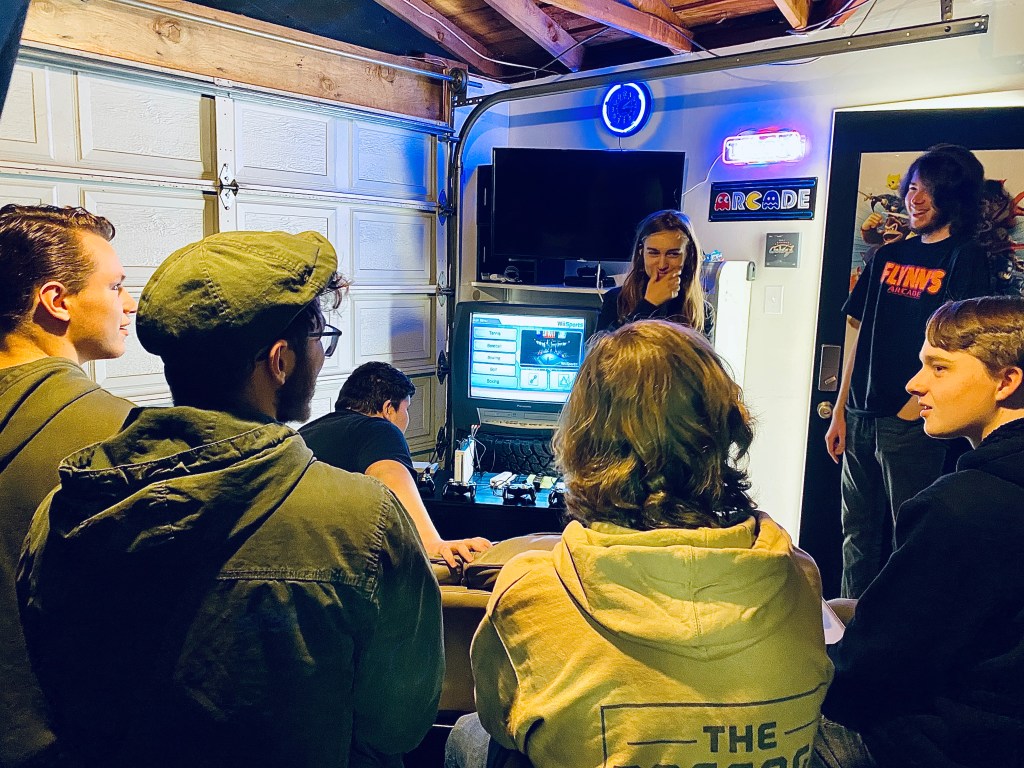
This past weekend, we held Micah’s 16th birthday party in the newly completed “Garage Arcade.” I wasn’t sure how comfortable the small space would be for 8 teenage boys, but I was reassured about 10 minutes in as I listened to their laughter and shouts. Four hours flew by with only a couple of breaks for pizza, gifts, and cupcakes. Micah was beaming at the end of the night and told me it was the best birthday he’s ever had, which of course made all of the hard work and effort we put into creating this space for him so worth it.
I have always wanted my home to be a safe place for my kids to have their friends over, and I think this is even more important in their teen years. I would much rather have my own kids at home than out who knows where, doing who knows what. Having this dedicated space just make it so much easier to say yes. I’m not always up for having my living room invaded by sweaty teenage boys, so now I can sit in my house and relax, while my kids host their friends in the game room. That feels like a win win to me!
For more about how to make the glow in the dark TRON cupcake toppers, check out my latest blogpost!
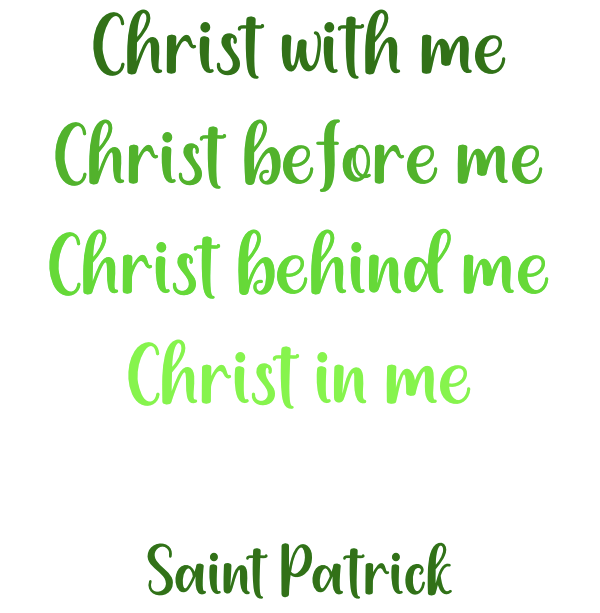
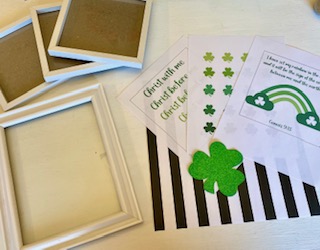
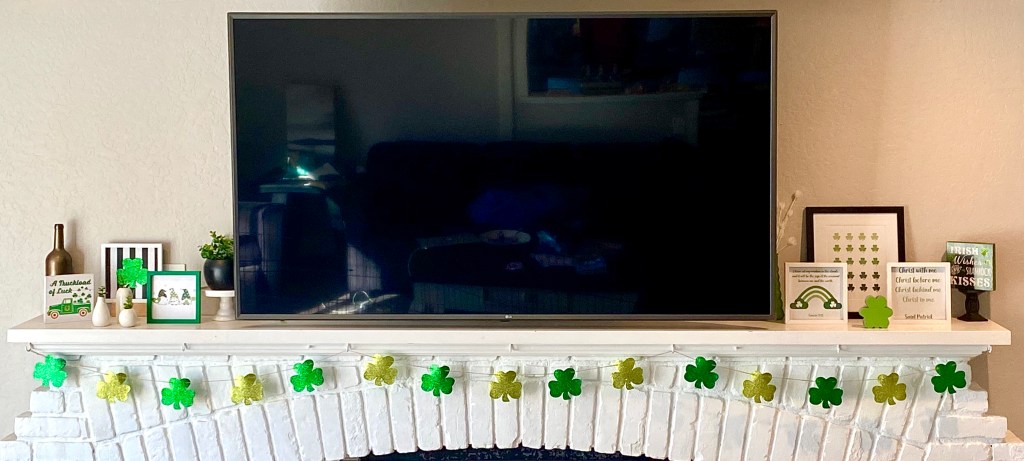
I don’t usually go all out for St. Patrick’s Day, but I had so much fun styling my Valentine Mantel that I decided I needed to add some rainbows and shamrocks to my living room this year. I didn’t want to spend a lot of money, so I hit up the local Dollar Tree for inexpensive frames and decorations and created my own printables. I love the story of St. Patrick (see my St. Patrick’s Day Treasure Hunt post for a bit about this Irish saint) so I wanted to incorporate one of his famous quotes in my collection.
I also found the cutest set of white vases in the spring section of the dollar spot at Target and I spray painted an old pot black. I was able to style my entire mantel for about $20 and I will definitely be able to use several of the items other times of the year.
For more fun St. Patrick’s Day ideas check out the following blogposts:
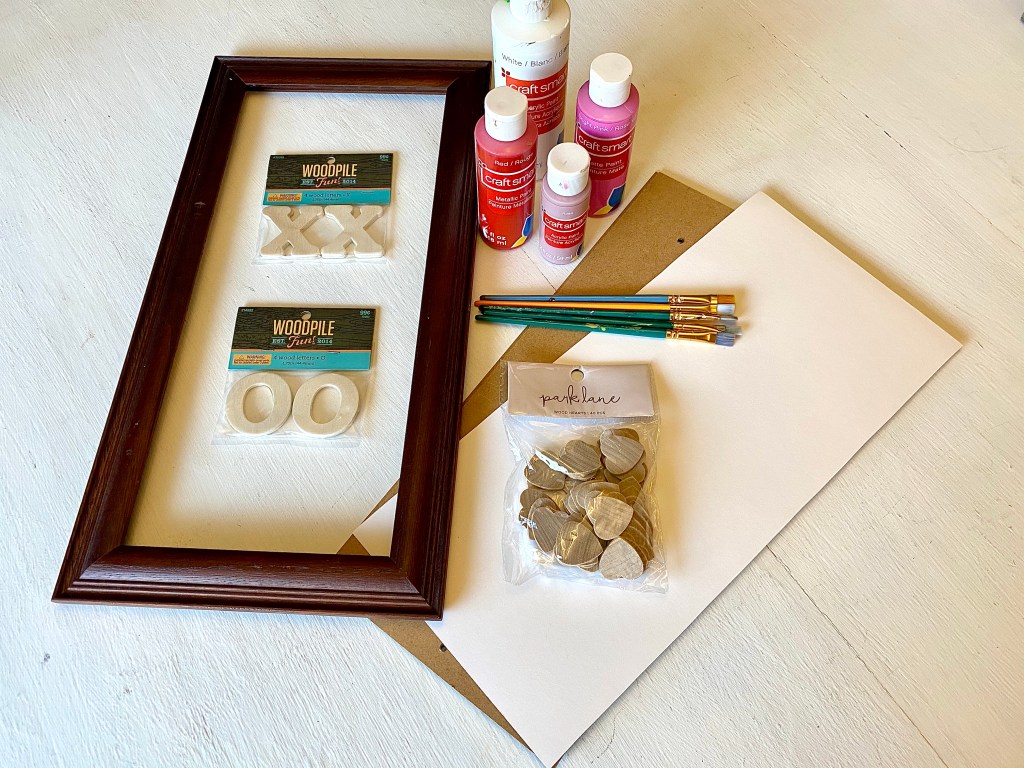
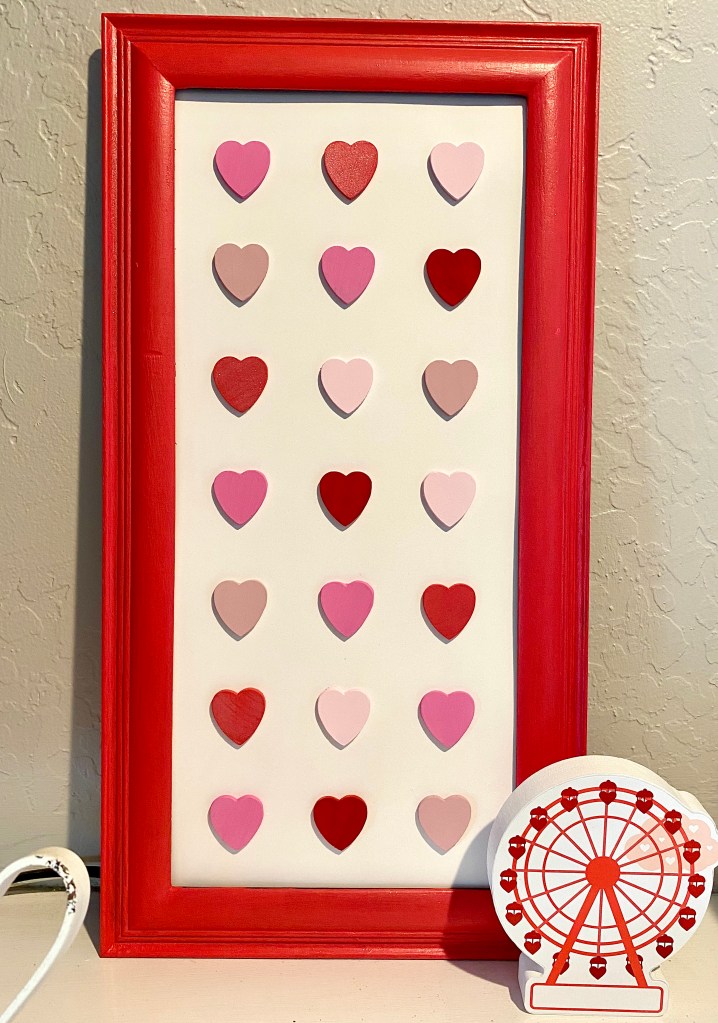
Valentine’s Day is just a week away and I have slowly been adding a few pops of pink and red to my mantel. I decided that I was lacking something tall to balance out all of the little nicknacks I picked up here and there. After looking at several different stores, I realized I wasn’t finding what I wanted. I already had planned to purchase some wooden X’s and O’s to paint pink and red, but inspiration struck when I saw a bag of little wooden hearts. I knew that I had an old frame somewhere in the garage that would be perfect for my project, so I went home ready for a fun Friday night of crafting…and the best part is that I only spent $4.50. #CommissionsEarned
I pulled out some pink, red, and white acrylic paints, sanded down the frame, mixed up several different shades of pink, cut a piece of white poster board as the backing, and went to work on this super simple, but adorable wooden hearts craft. The only glitch was that I should have sanded the frame a bit more, because it took about 15 coats of paint to cover the old ugly brown stain. Other than that small annoyance, the project was actually quite simple and I am thrilled with how it turned out. It’s the perfect addition to complete my Valentine collection on our mantel, and I plan to use it for years to come.
This is a little trick I used to keep all of the hearts lined up straight, and the clear tacky glue worked perfectly for securing the little wooden hearts to the poster board. #ComissionsEarned
My daughter said that she wanted to pop them off and eat them because they look like Brach’s Conversation Hearts.
For more Valentine fun check out the following blogposts: