DIY Valentine Wooden Hearts Craft

Valentine’s Day is just a week away and I have slowly been adding a few pops of pink and red to my mantel. I decided that I was lacking something tall to balance out all of the little nicknacks I picked up here and there. After looking at several different stores, I realized I wasn’t finding what I wanted. I already had planned to purchase some wooden X’s and O’s to paint pink and red, but inspiration struck when I saw a bag of little wooden hearts. I knew that I had an old frame somewhere in the garage that would be perfect for my project, so I went home ready for a fun Friday night of crafting…and the best part is that I only spent $4.50. #CommissionsEarned

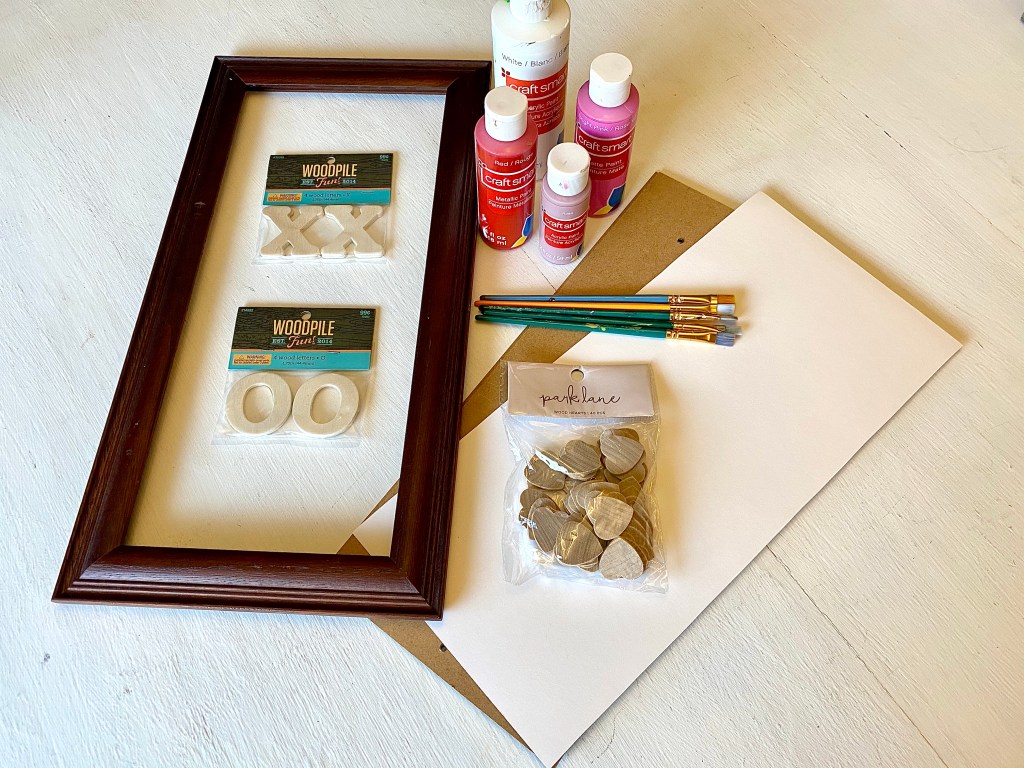
I pulled out some pink, red, and white acrylic paints, sanded down the frame, mixed up several different shades of pink, cut a piece of white poster board as the backing, and went to work on this super simple, but adorable wooden hearts craft. The only glitch was that I should have sanded the frame a bit more, because it took about 15 coats of paint to cover the old ugly brown stain. Other than that small annoyance, the project was actually quite simple and I am thrilled with how it turned out. It’s the perfect addition to complete my Valentine collection on our mantel, and I plan to use it for years to come.

This is a little trick I used to keep all of the hearts lined up straight, and the clear tacky glue worked perfectly for securing the little wooden hearts to the poster board. #ComissionsEarned

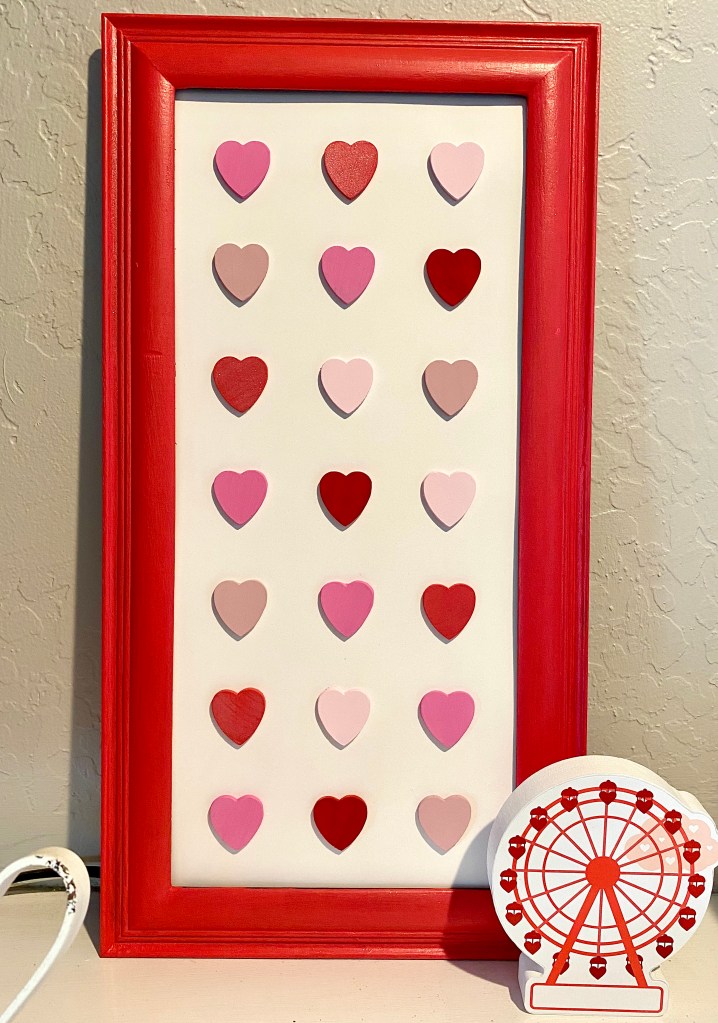
My daughter said that she wanted to pop them off and eat them because they look like Brach’s Conversation Hearts.

For more Valentine fun check out the following blogposts:

Valentine Marshmallow Pops

Valentine Paper Garlands

Valentine Craft: Cookie Cutters & Paint

Valentine Words of Affirmation for Kids

Advertisement

DIY Framed Chalkboard Wall

I absolutely love chalkboards!  They are so versatile and you can change them anytime to create a new look in your home.  You can add quotes and drawings to go with seasons and holidays.  The possibilities with a blank chalkboard are endless!

When we moved into our home over a year ago, there was an odd roll up door in the living room.  It seems like the previous owners had used it as a sort of bar to serve drinks, but we didn’t quite know what to do with it.  We have talked about closing it off, but haven’t gotten around to it.  A couple of weeks ago, while sitting in my living room, I was struck with inspiration.  I saw the frame around the roll up door and thought, “I wonder what it would look like if I turned this into a giant chalkboard?”

A few coats of chalkboard paint later and project complete!  I am happy to report that it turned out even better than I expected! I used Rust-oleum ChalkBoard Paint and it took 3 coats of paint to cover the area thoroughly.  I let each coat dry for at least an hour before adding another, and one 30 oz. can of paint did the trick.  I purchased a white chalk marker and found a quote on that I love.  I used our projector on my new chalkboard to get the quote just right and then traced it with the chalk pen.  I filled in some of the lighter areas with a regular piece of white chalk to create some contrast of texture and I absolutely love it!!!  This is definitely a great addition to the decor in our living room. #CommissionsEarned

img_3853img_3735img_3745img_3747img_3766

IMG_4524IMG_5600

IMG_0525IMG_1059

Update: over the years, I have transformed our chalkboard many times over and have included several pics (above) of various quotes. I have found that it helps to paint a new coat of chalkboard paint over the blank board each time I do a new quote because sometimes the outline of the previous quote shows through a bit as you can see in “Find Joy In The Journey.”

For more fun DIY projects check out some of my recent blogposts:

DIY Board & Batten Feature Wall

Oversized Scripture Scroll: Ephesians 3

DIY Lemonade Stand

DIY Tinkering Workshop For Kids