This week I finally made the time to create a tutorial for the My Little Pony Capes that I make for my daughter’s ponies. While she was in school the other day, I made 3 new capes and when she came home she was thrilled! Just a couple of scraps of material, some pretty embellishments, and a little bit of my time has led to hours of imaginary play with ponies the past 2 days. Definitely time well spent!
To see more ideas for “My Little Pony” Capes, you can read my original post here. To learn how to make some of these tiny capes for your child’s own My Little Ponies, watch my tutorial above.
This past Monday was the first day of Spring, and boy am I ready for some sunshine! This weekend, in anticipation of the arrival of the new season, I made this simple “Book Page Banner” and I absolutely love the way it turned out! Book Page Banners are great, because they are so inexpensive to make and you can modify them to fit any occasion.
For this Bunny Rabbit and Carrot Banner you will need…
pages out of an old book (I got mine from the dollar store)
bunny & carrot template (google bunny silhouette & carrot silhouette to find ones you like and size them to fit your book pages)
white, orange, and green card stock
scissors
ruler
pencil
paper cutter
glue stick
scotch tape
twine
Watch my tutorial above to make your own Spring Book Page Banner.
My son Micah is that kid who is always trying to figure out “how things work.” He absorbs information like no one I know and often amuses us with the most off the wall, interesting facts that he “read somewhere in a book.” He also loves science and technology. We always say that he’s going to be a famous inventor someday!
For the last couple of years, Micah would often say, “Mom, I wish I had a workshop of my very own! I wish I had a place that I could just go and build stuff.” Whenever he said this, I was left feeling like I didn’t even know where to begin, so I’d look up a project on Pinterest or try to get him engaged in a creative activity. I never really thought it would be possible to make his dream a reality.
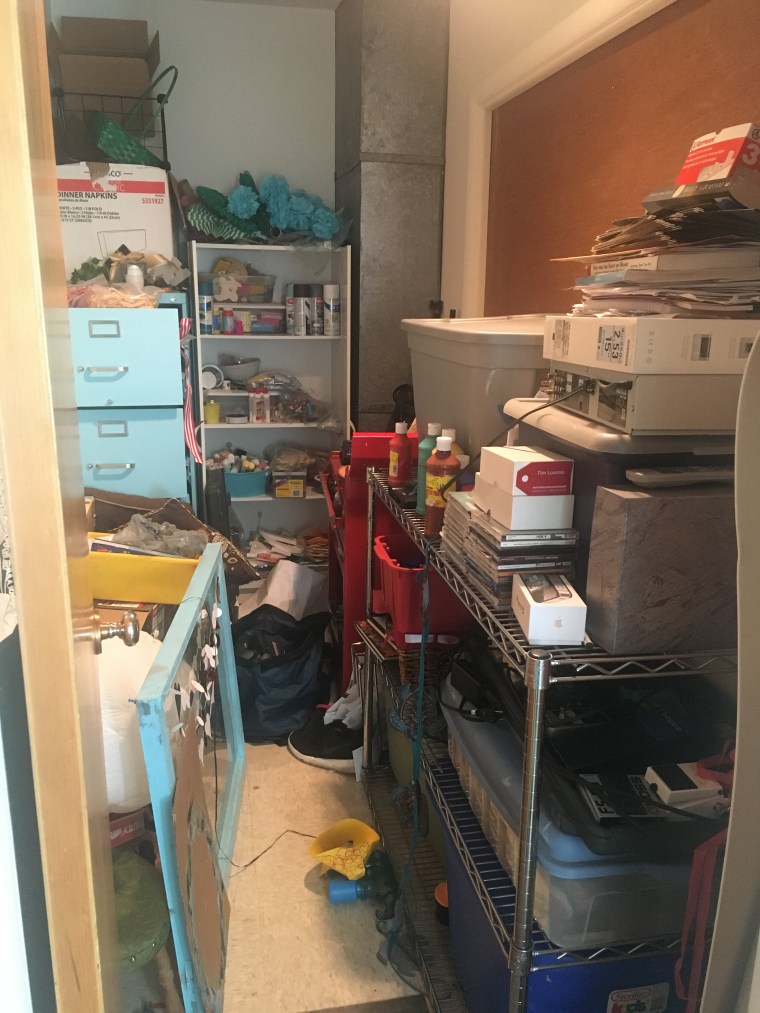
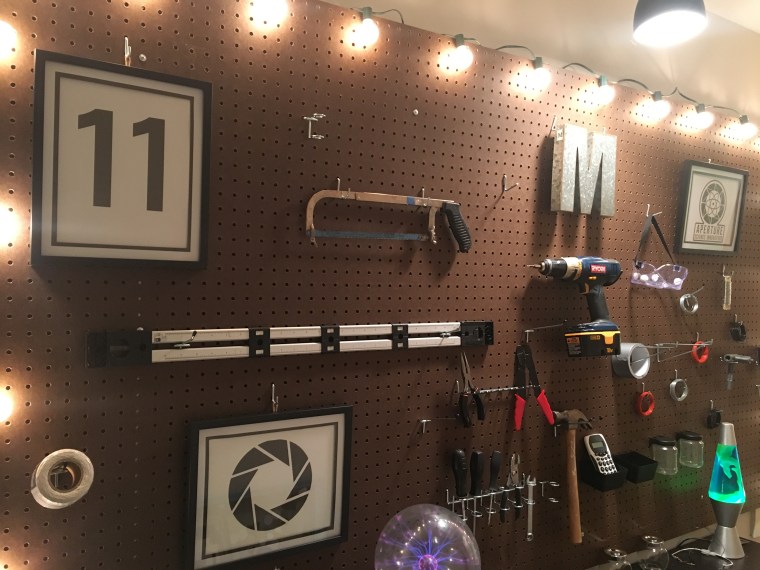
Recently, I started talking to Micah about what he wanted for his 11th birthday. He didn’t have a specific gift in mind. Then inspiration struck! I started dreaming about how we could make a special workshop just for Micah in our house. We have this random, small utility room between our living room and garage that had basically become a storage space for all kinds of random things. I realized that this could become a perfect tinkering space for Micah.
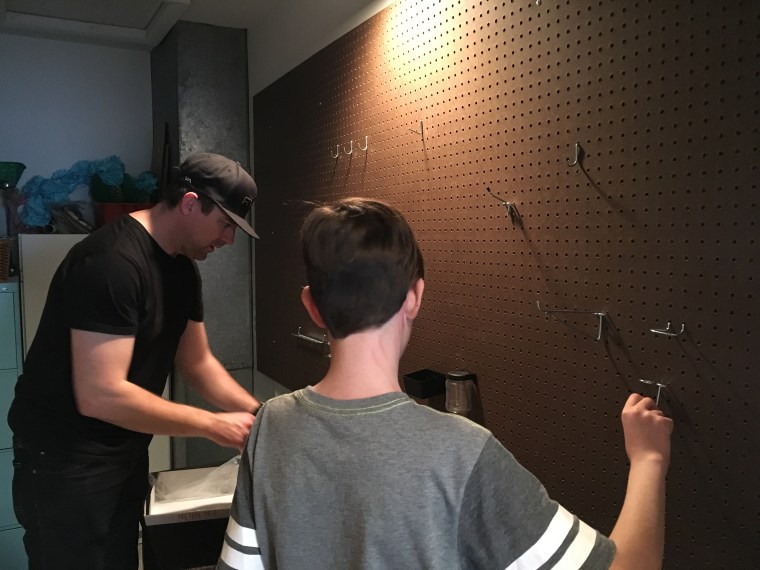
I knew that I wanted to start with large pegboard on one wall, so we took a trip to Lowe’s to see what we could find. In a matter of days, Micah’s workshop came together, and I was very pleased that we were able to keep the cost down to under $60 by using a bunch of thing we already had in our garage and in our house.
I put together this little video (below) of “The Making of Micah’s Tinkering Workshop” which includes a cost breakdown and a few fun moments with Micah too! Micah is thoroughly enjoying his “place to go build stuff.” The first day it was finished, he spent over 4 hours in there working on building a robotic arm that was given to him by a friend.
BEFORE
AFTER
We would love to hear from you! If you know of any cool building projects for kids or ideas of what Micah could do in his workshop, leave us a comment and let us know!
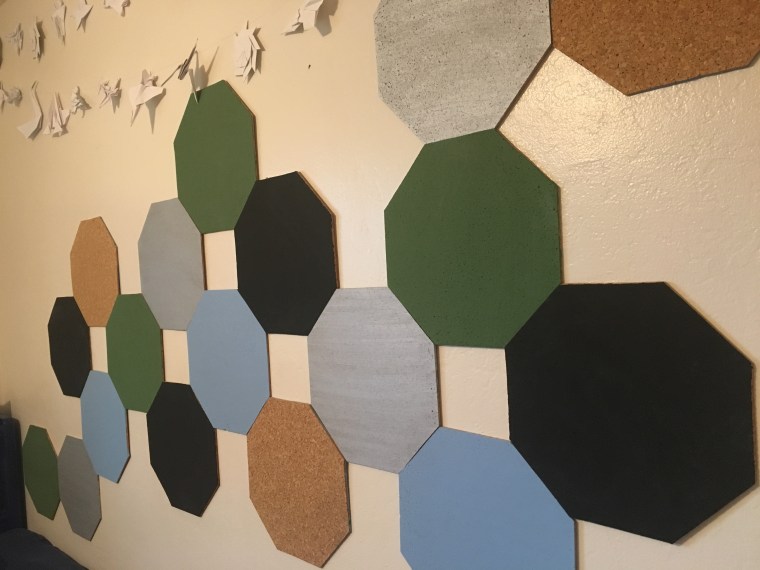
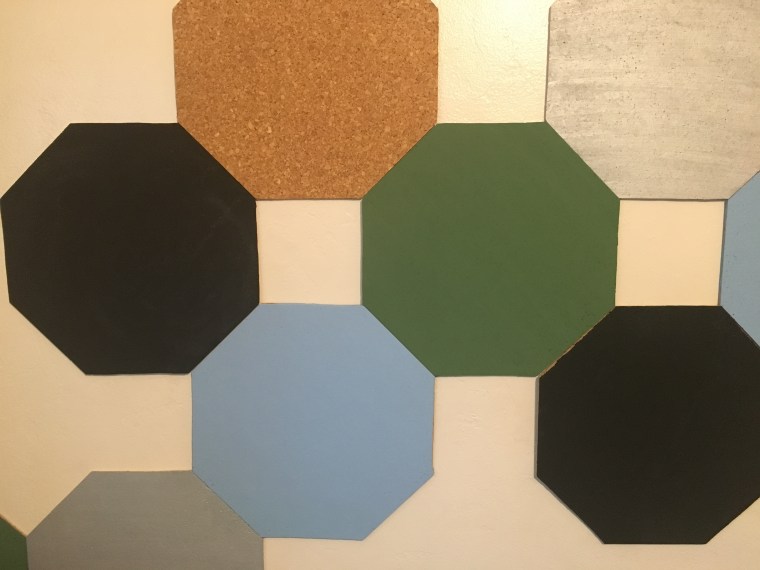
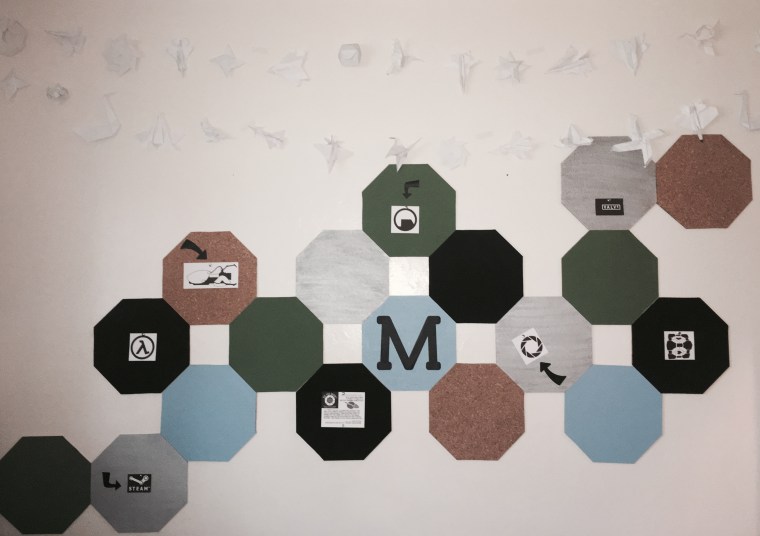
I have had this huge stack of cork tiles in my son’s room for several years… just sitting there… taking up space! So this week, I finally decided to do something fun with them! I created a geometric bulletin board for my 10 year old son’s bedroom wall and I am so happy with the way it turned out. It was a bit tricky getting the right cut to create the octagons, but with a little help from my husband, (who measured and cut the template for me) I was on my way. A couple of coats of paint and some command strips later, and these cork tiles became a really cool memo board for my son to pin up a “few of his favorite things.”
Watch my tutorial on how to create your own Octagon Memo Board. This would be perfect in a bedroom, a dorm room, or an office.
Here are a couple of tips:
Use different textures of paint for contrast
Paint at least 2 coats on each octagon
Leave some octagons unpainted
Lay out your tiles on the ground and play around with different configurations before hanging them up
Use command strips to hang each tile on the wall
Also featured in this video is a collection of my son’s amazing origami creations, strung up across the top of the Octagon Bulletin Board. He has spent hours making these incredible creations, one intricate fold after another. I love seeing them all on display in his bedroom. For those of you who love origami, check out MicahsToyReviews to learn how to make some origami creations of your own.
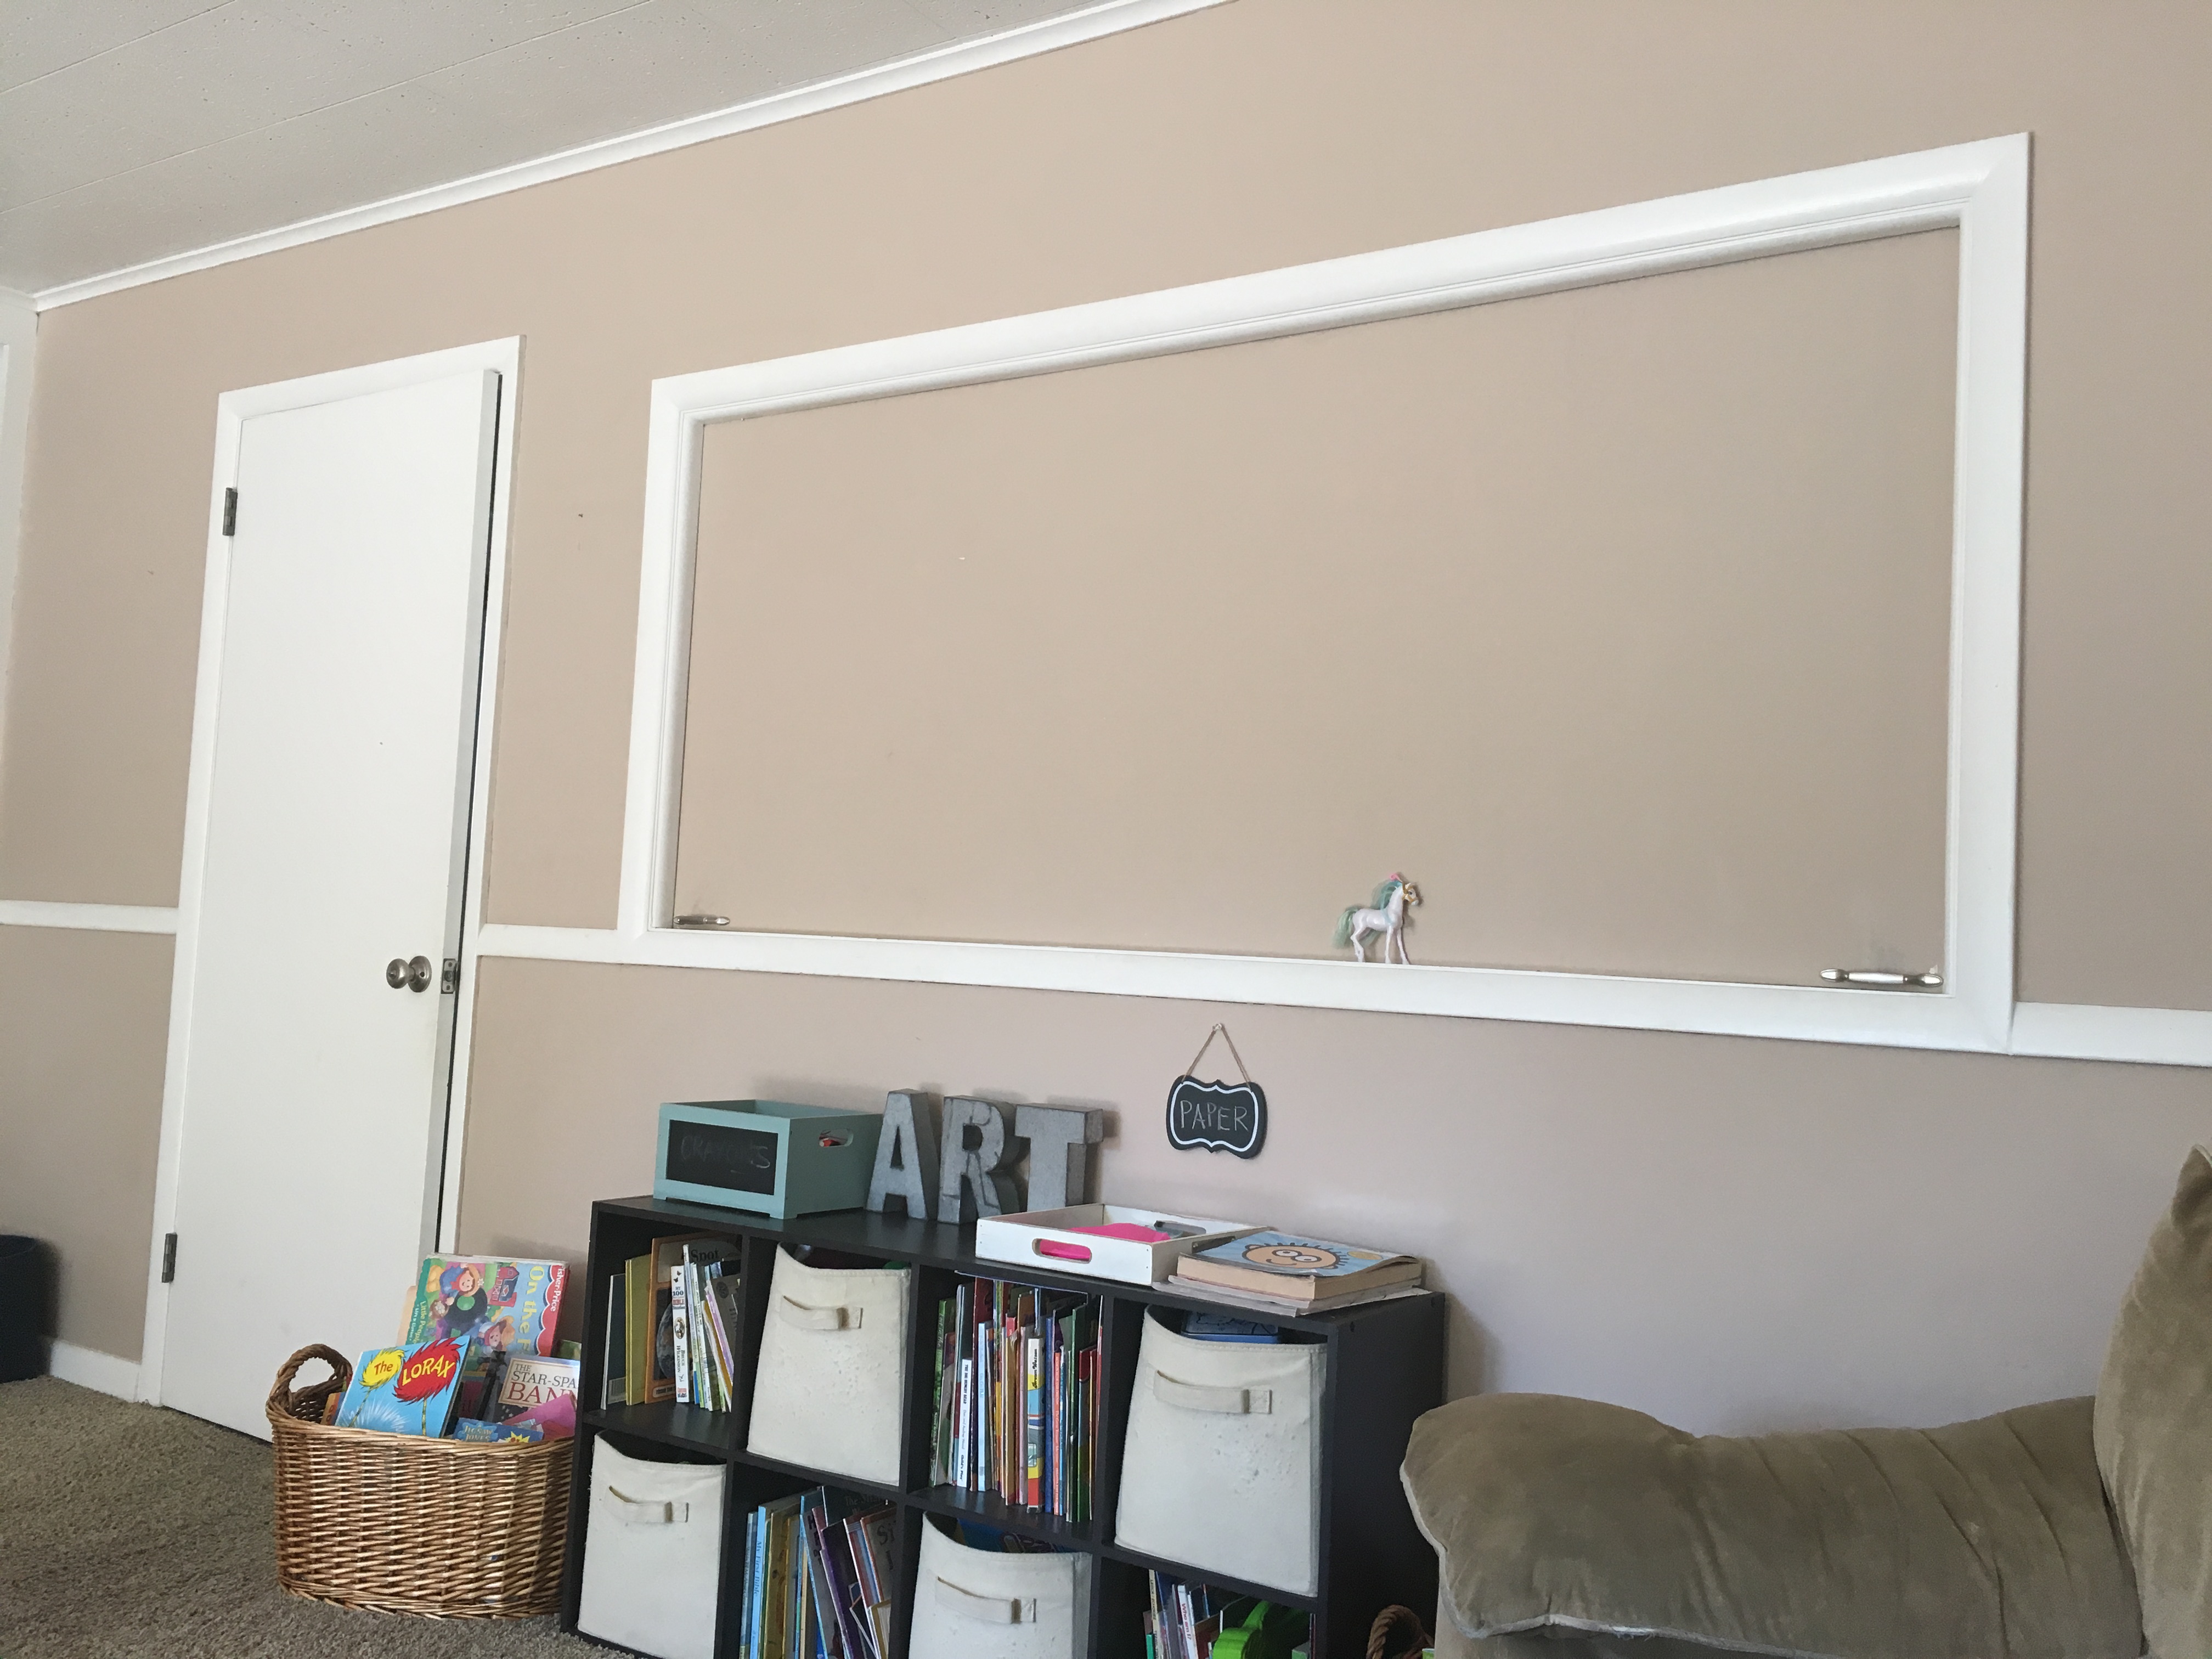
My daughter loves art! She will sit for hours drawing, writing stories, and coloring pictures. I have several areas set up around our house with art supplies, but I recently decided to put together a more intentional art space for her.
Michael’s was having a huge sale one day, so I headed over (with my coupons of course) and picked up these metal A R T letters, the chalkboard box for crayons, and the off white tray for paper. The rest, I already had around my house.
These adorable chairs were made for me by my brother when I was a child. They were in my childhood room, painted light pink, with dark pink carpet covering the seats. My mom gave them to me several years ago and I repainted and recovered them for my daughter. The wicker table belonged to my mom, who passed away a year and a half ago, so it means a lot for my daughter to have something so special to remind her of her sweet Grandma.
I bought the metal bucket years ago at the dollar store and it has held colored pencils in various locations around our house. Now it has a permanent home. I had used the mini white shutters last year for my Christmas mantle, but realized they were the perfect addition to this little art corner. The finishing touch was this bright and cheerful pennant banner. I had already cut the triangles for another project, so it only took me a few minutes to thread them through a piece of twine.
I absolutely love when I can use what I already have to create an inviting space for my children to enjoy. This little art corner has already gotten a lot of use in our home and is the perfect setting for inspiration to take place!
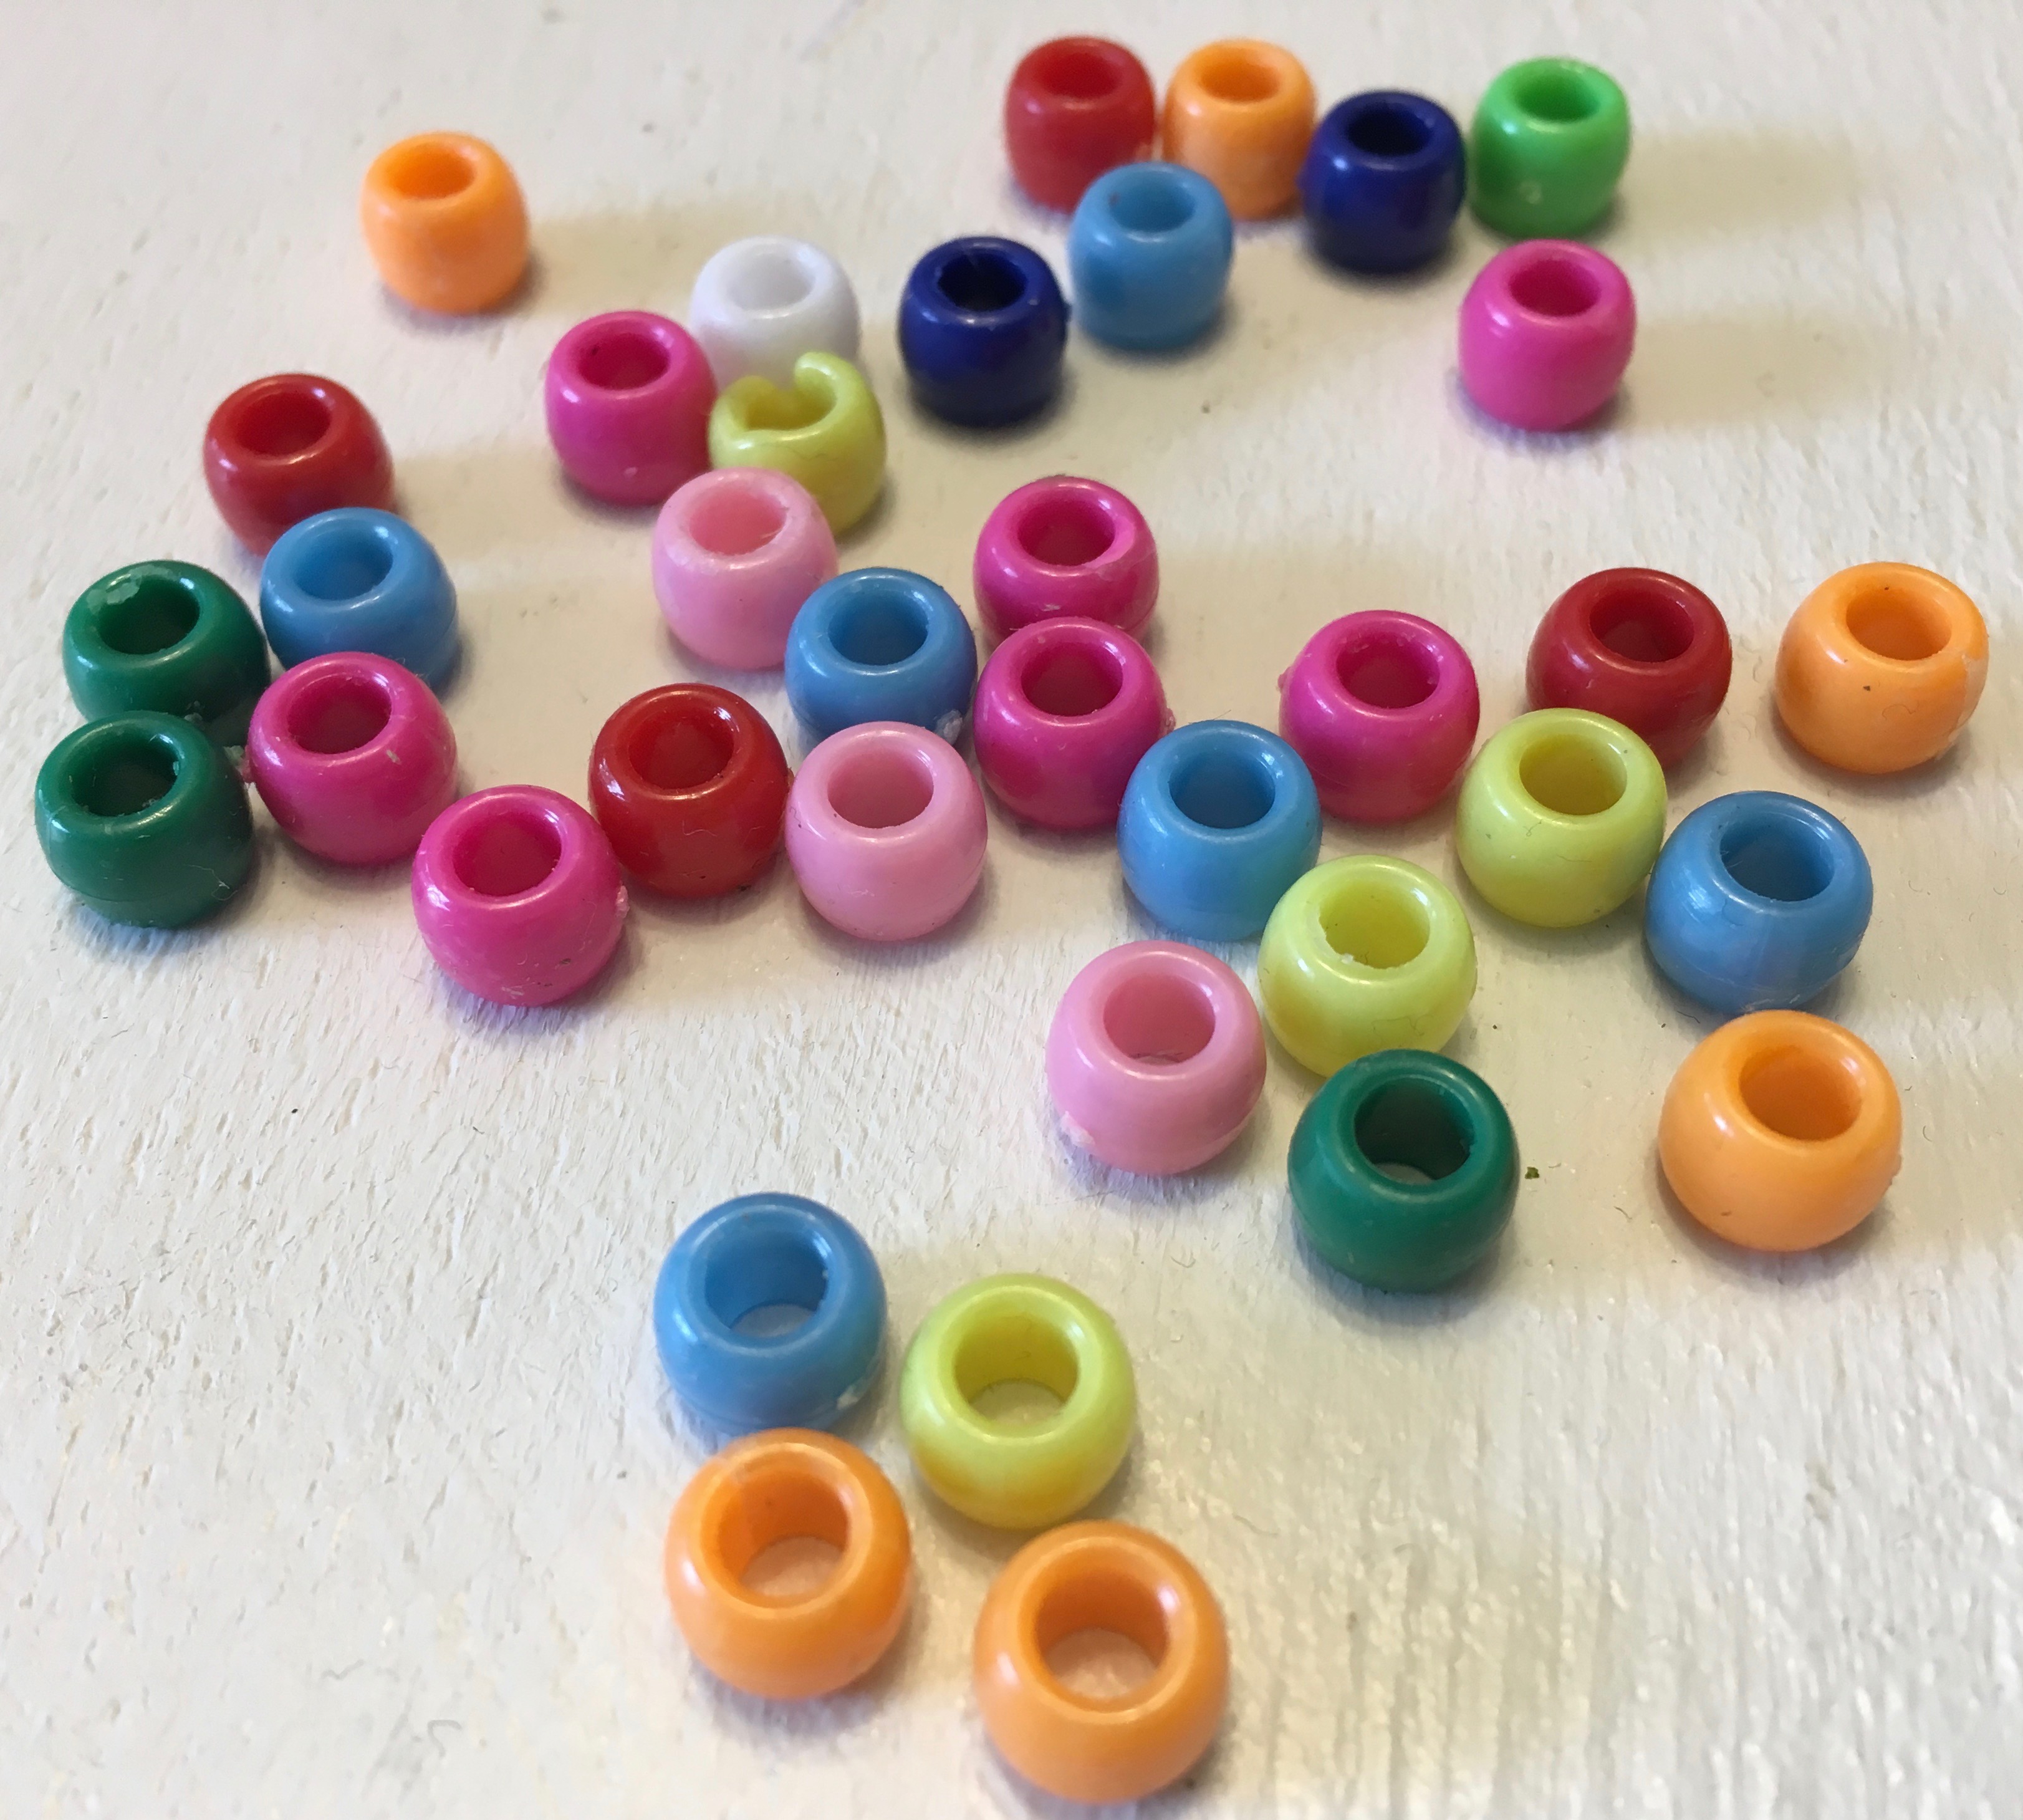
Are you looking for a quick and inexpensive Halloween costume? Or maybe you are attending an 80’s themed party. Well, look no further! Recently, my daughter had “time warp” day at school and we decided she would dress up in 80’s attire. This brought back many memories of my childhood…jelly bracelets, leg warmers, crimped hair, side ponytails, charm bracelets. I could almost hear Michael Jackson’s “Thriller” playing in the background as I made this shirt and reminisced. I was the same age as my daughter is now when that album was released, and it was the first record I ever owned!
Fortunately, I had all of what I needed on hand, so this time warp outfit did not cost a thing! I pulled an old “too small” t-shirt out of my son’s drawer and went to work. In less than an hour, my daughter was all ready for her fun dress up day at school.
Here’s what you will need: An old t-shirt, pony beads, and scissors #CommissionsEarned
Enjoy my tutorial on how to create the neckline and fringes on this totally 80’s shirt.
For more easy costume ideas check out the following blogposts:
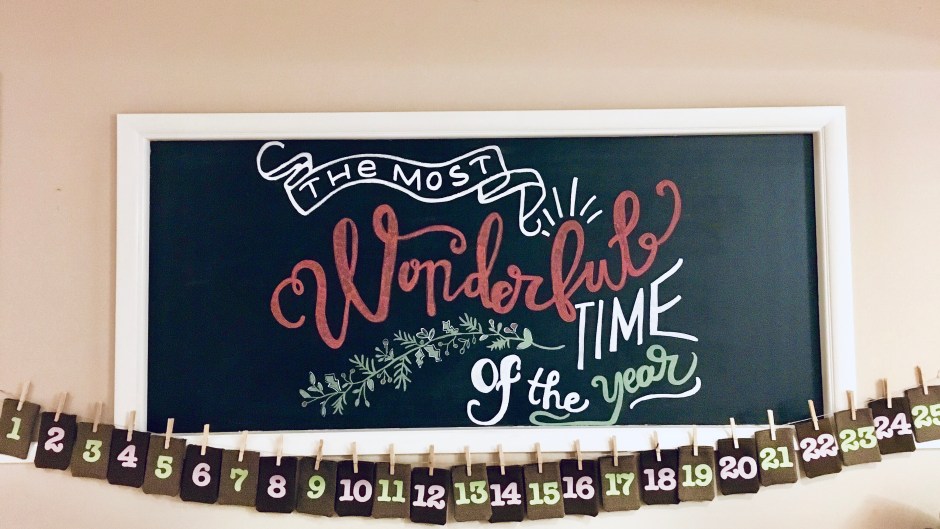
I absolutely love chalkboards! They are so versatile and you can change them anytime to create a new look in your home. You can add quotes and drawings to go with seasons and holidays. The possibilities with a blank chalkboard are endless!
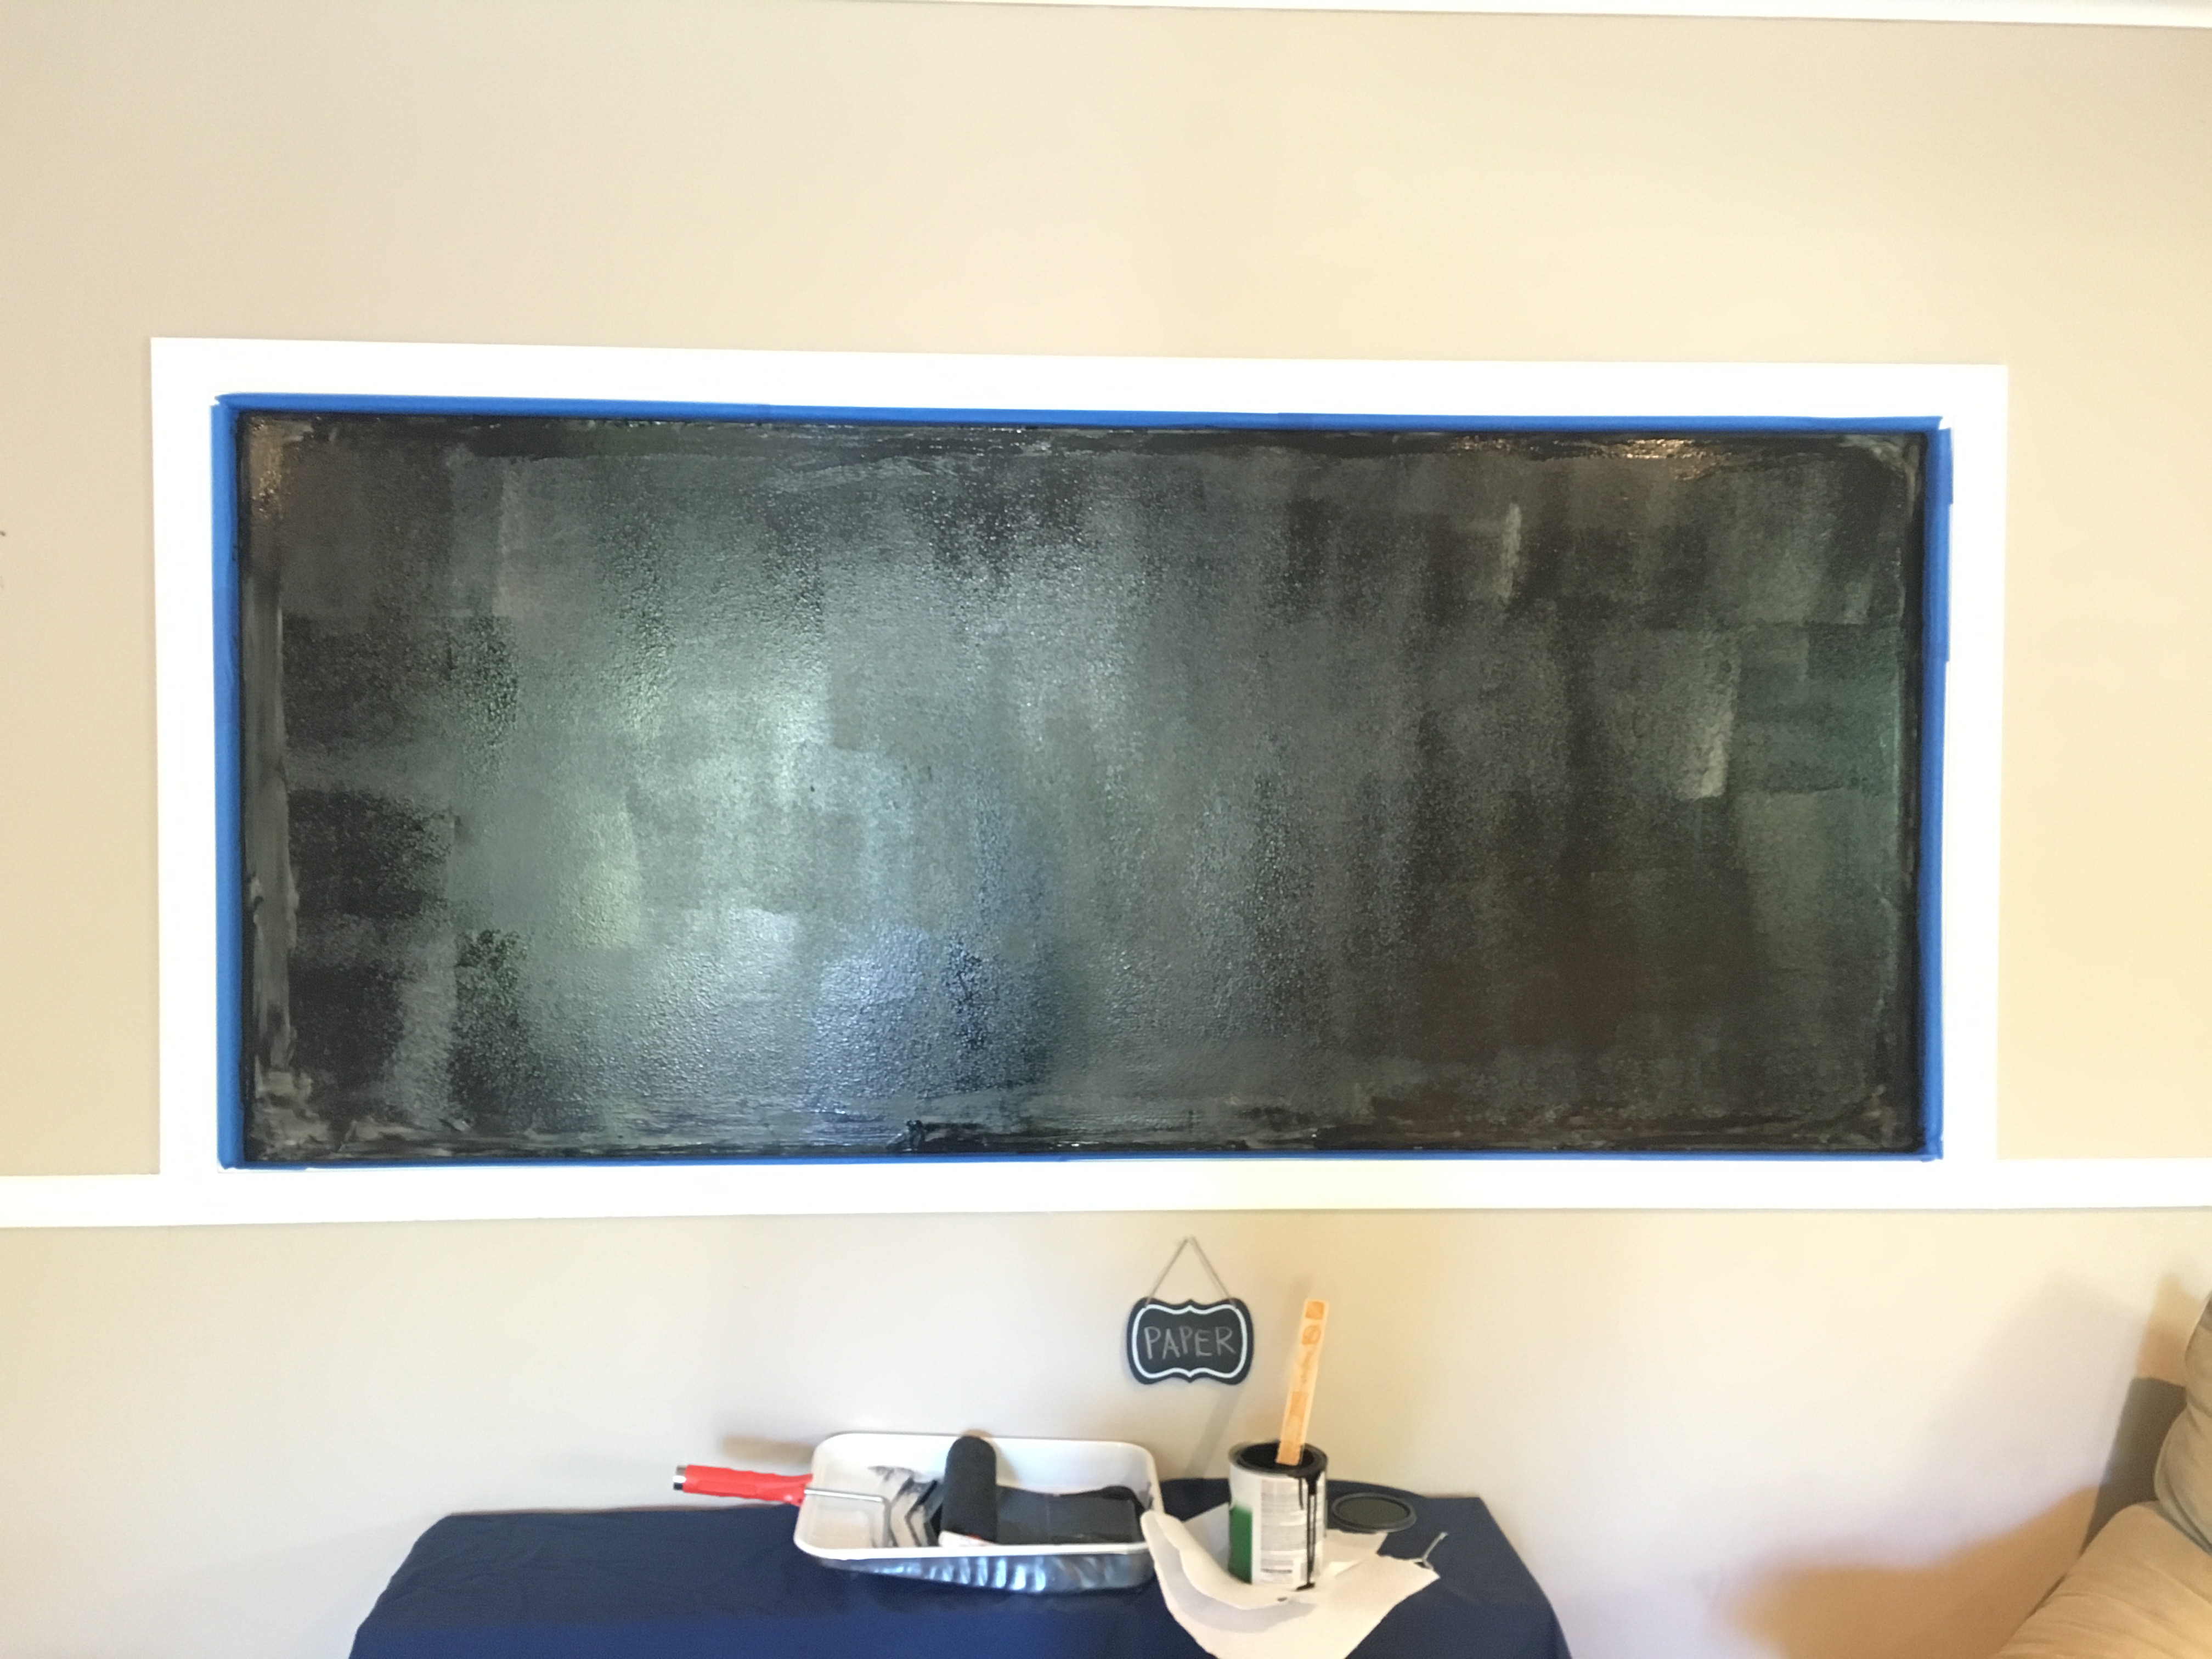
When we moved into our home over a year ago, there was an odd roll up door in the living room. It seems like the previous owners had used it as a sort of bar to serve drinks, but we didn’t quite know what to do with it. We have talked about closing it off, but haven’t gotten around to it. A couple of weeks ago, while sitting in my living room, I was struck with inspiration. I saw the frame around the roll up door and thought, “I wonder what it would look like if I turned this into a giant chalkboard?”
A few coats of chalkboard paint later and project complete! I am happy to report that it turned out even better than I expected! I used Rust-oleum ChalkBoard Paint and it took 3 coats of paint to cover the area thoroughly. I let each coat dry for at least an hour before adding another, and one 30 oz. can of paint did the trick. I purchased a white chalk marker and found a quote on that I love. I used our projector on my new chalkboard to get the quote just right and then traced it with the chalk pen. I filled in some of the lighter areas with a regular piece of white chalk to create some contrast of texture and I absolutely love it!!! This is definitely a great addition to the decor in our living room. #CommissionsEarned
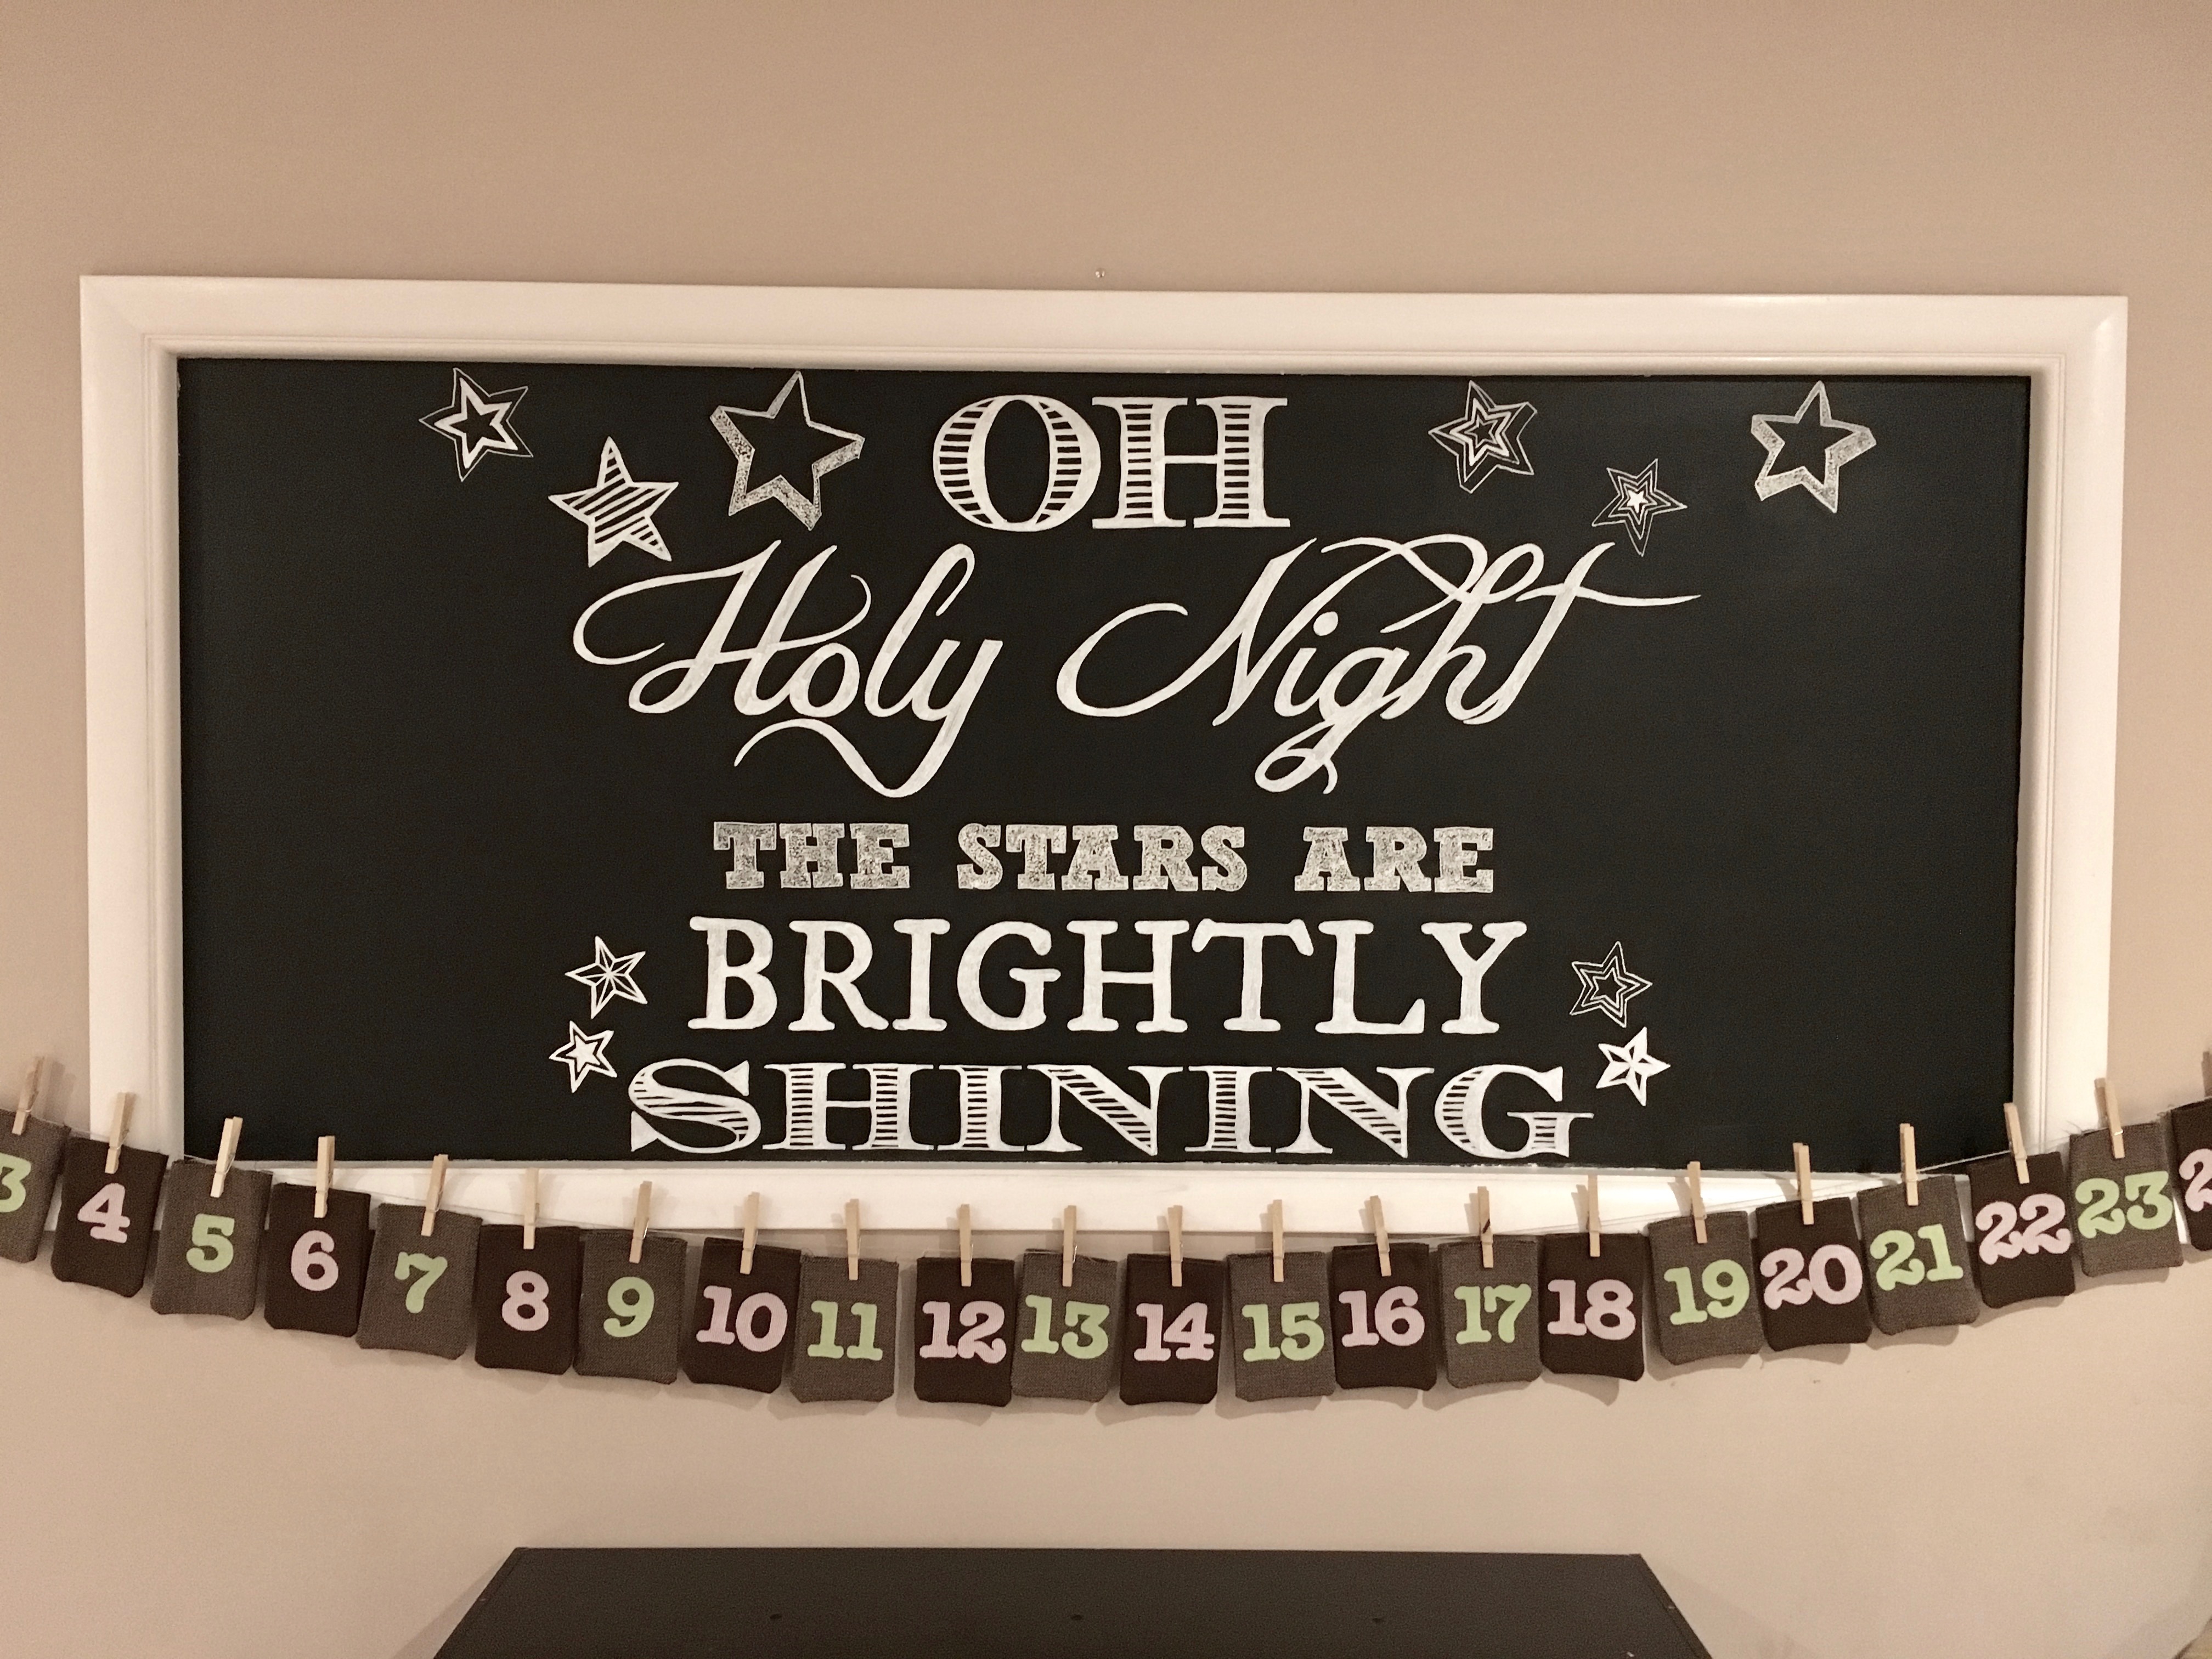
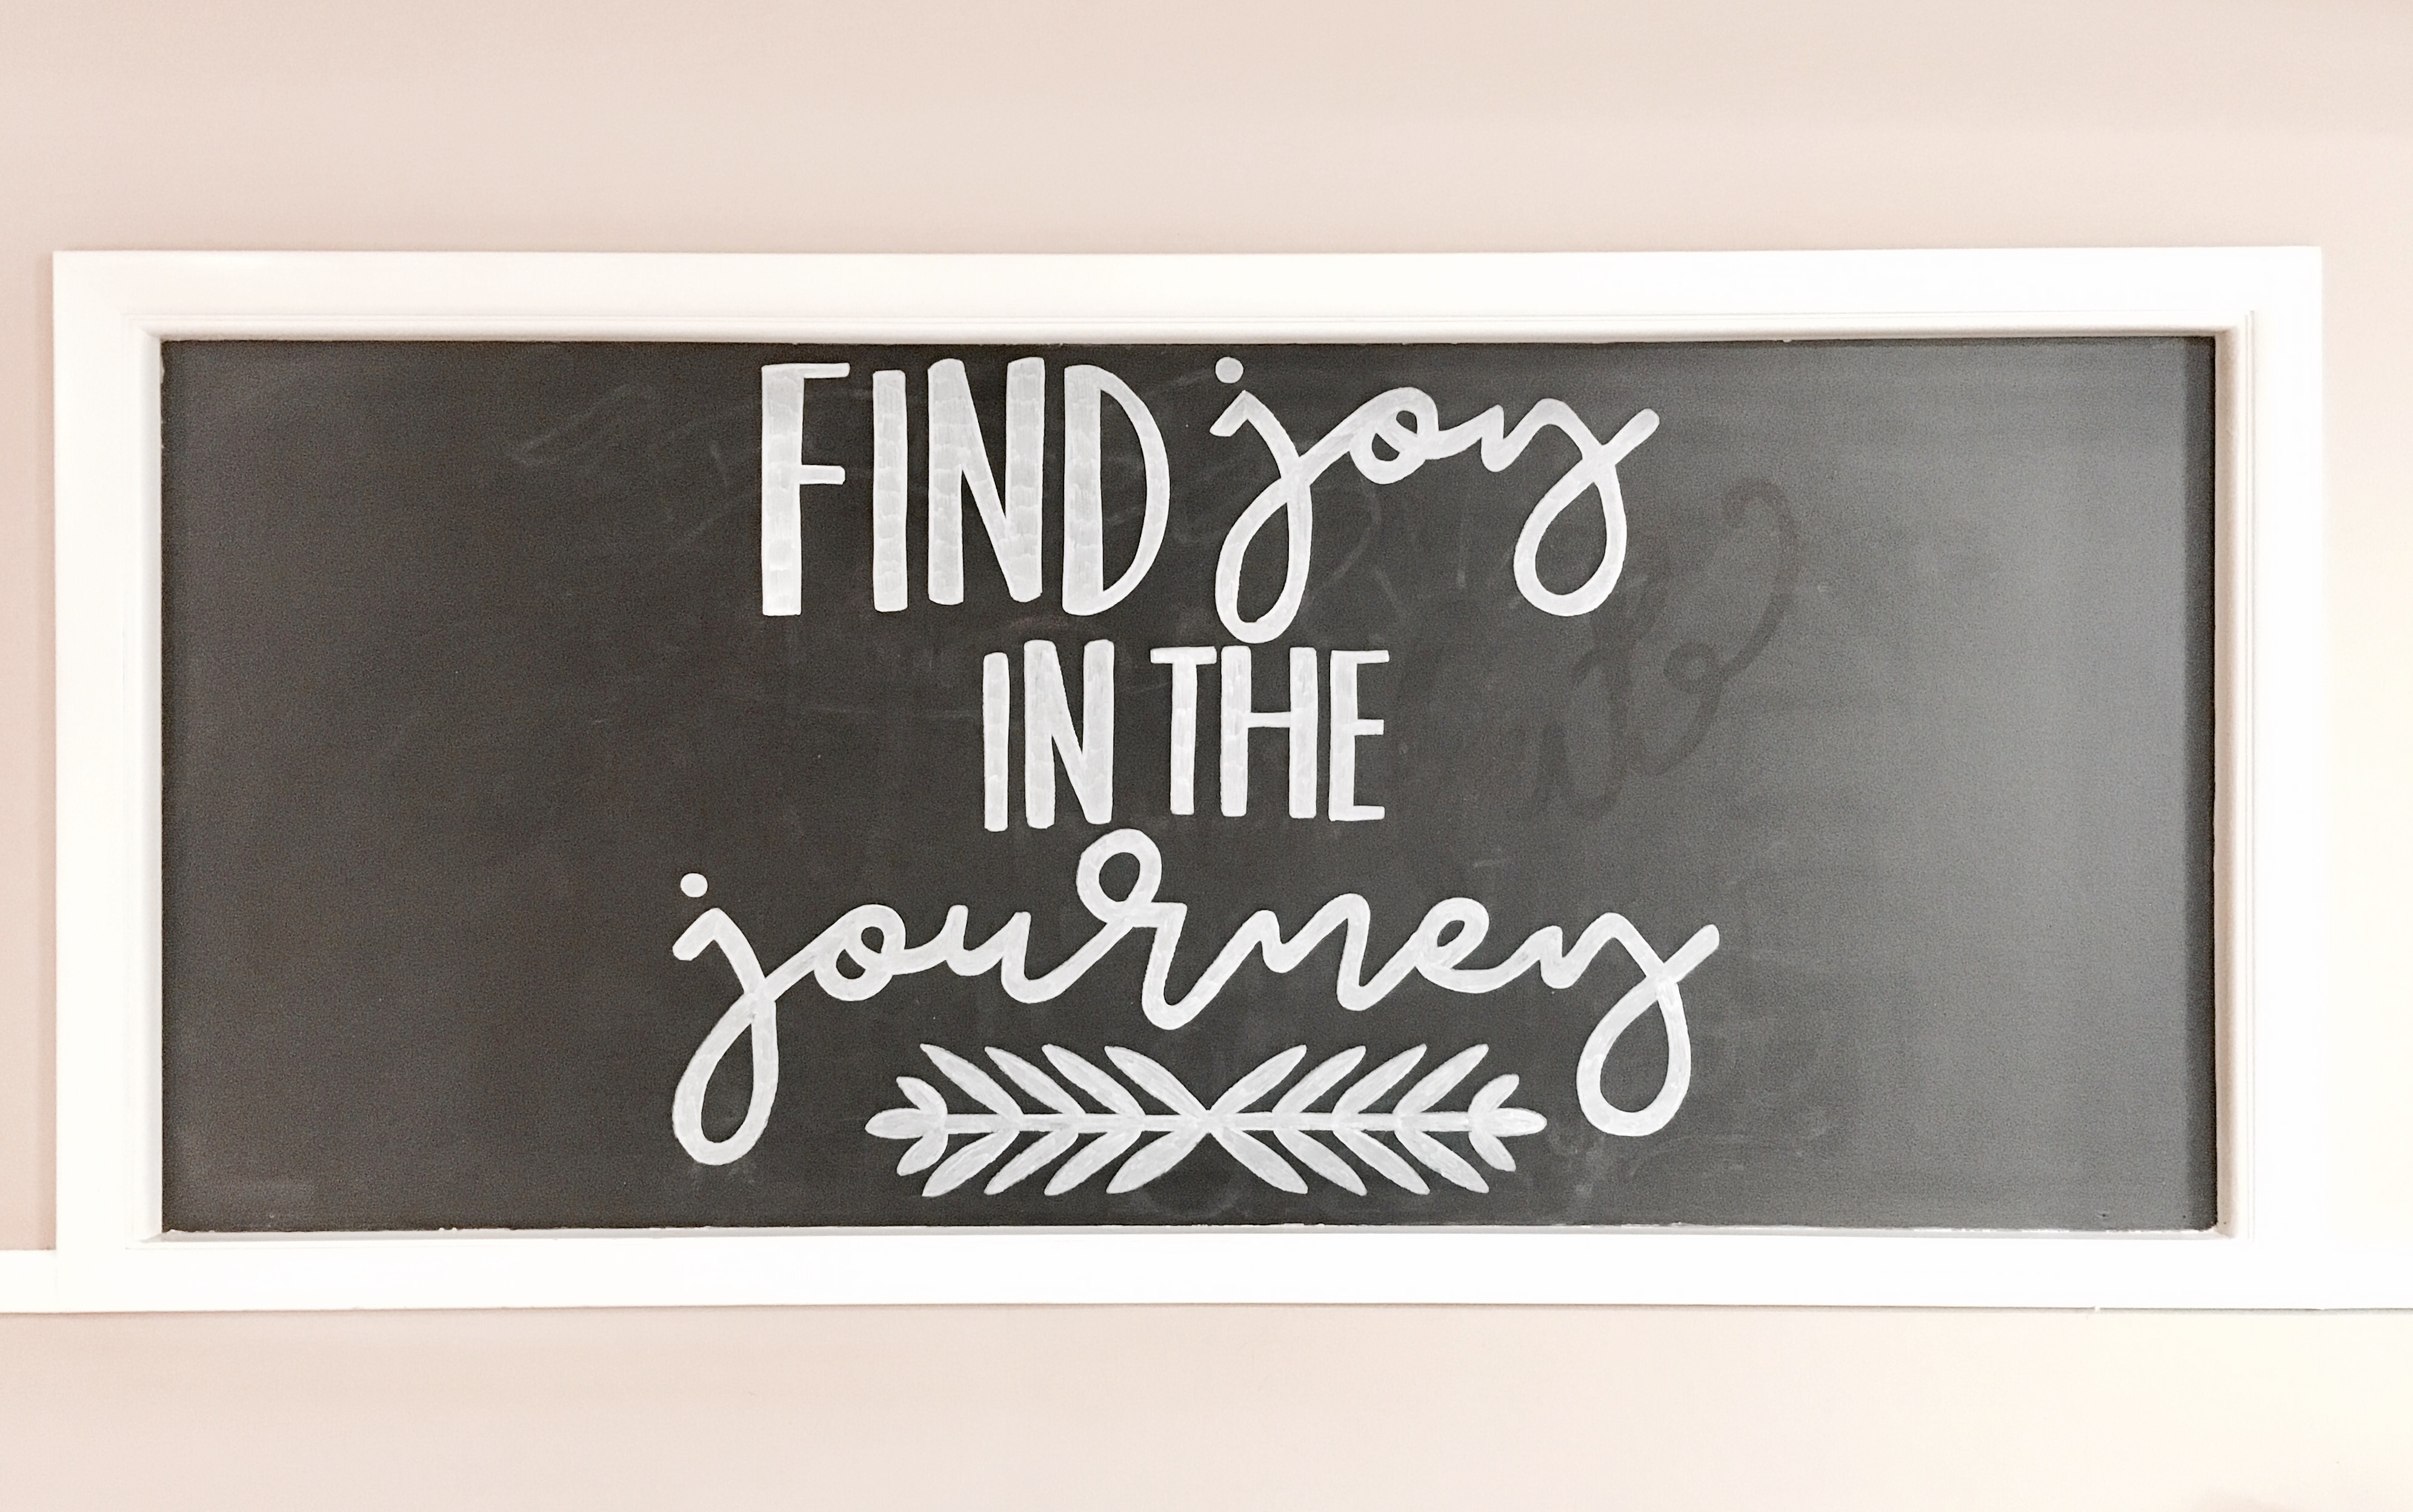
Update: over the years, I have transformed our chalkboard many times over and have included several pics (above) of various quotes. I have found that it helps to paint a new coat of chalkboard paint over the blank board each time I do a new quote because sometimes the outline of the previous quote shows through a bit as you can see in “Find Joy In The Journey.”
For more fun DIY projects check out some of my recent blogposts:
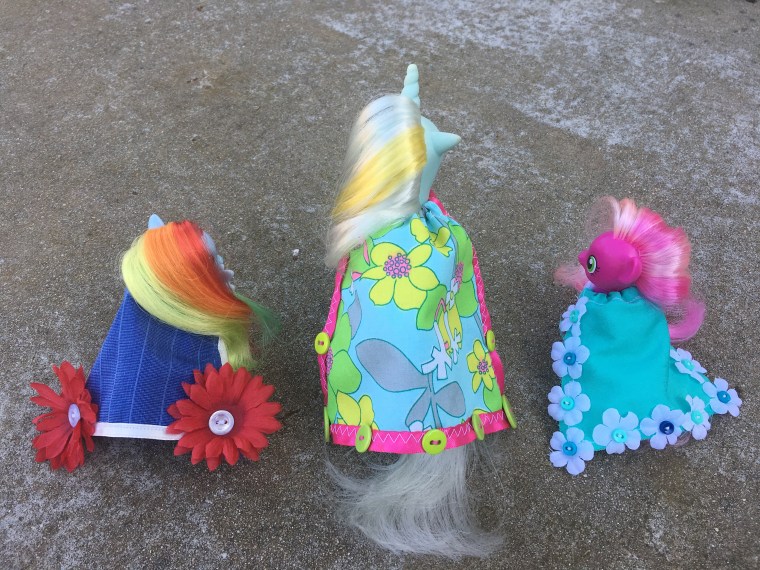
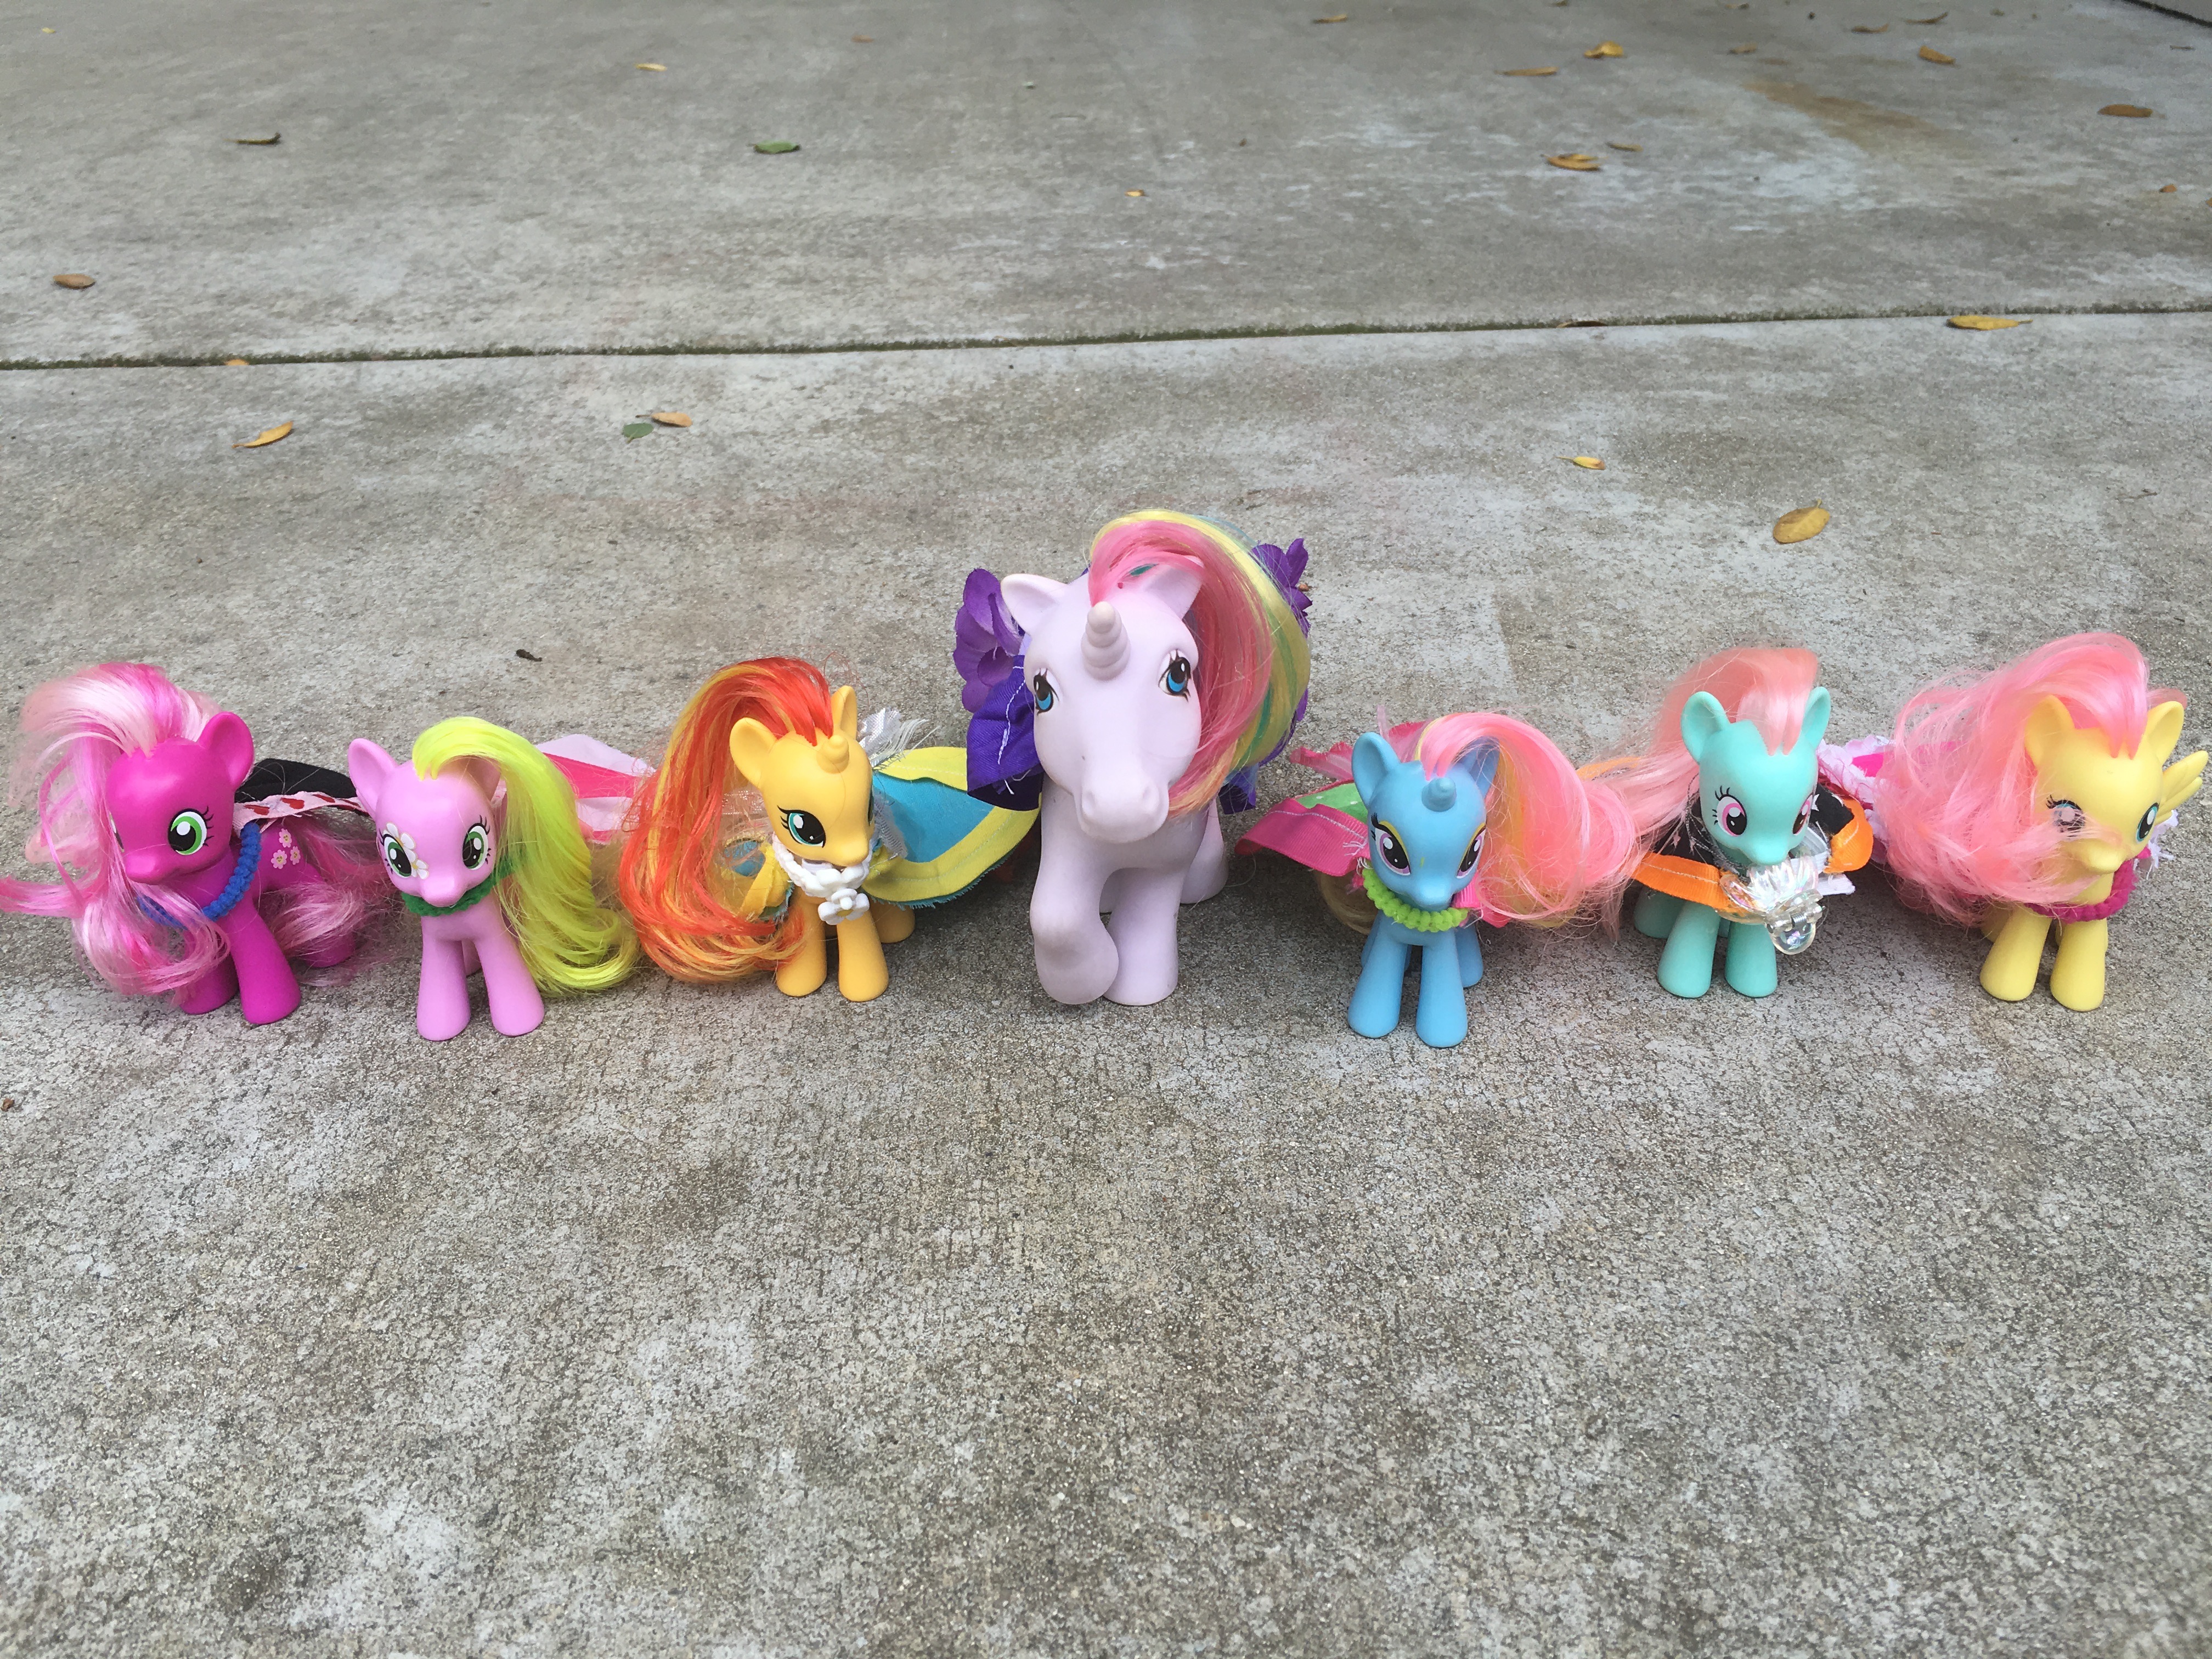
My daughter loves My Little Ponies! The thing that makes me so happy about this, is that I loved My Little Ponies as a little girl too! In fact, my mom actually saved several of my ponies and gave them to Karis a couple of years ago. I cannot even tell you how much fun it is to see my own child enjoying the very toys that I so often played with when I was her age.
One afternoon when Karis was playing ponies she asked me if we could make clothes for them. Now I can sew a little bit, but making clothes for tiny horses is beyond my abilities. I noticed that a couple of her newer ponies came with little capes. With a little trial and error, I figured out a simple way to make pony capes by using small hair scrunchies, scraps of material, and various ribbons, buttons, and fabric flowers that I had in my craft drawers. We spent several hours together designing these “outfits” for the ponies to wear. Most definitely time well spent with my girl, and it brings me joy to watch her play pretend while dressing her ponies up in their beautiful capes.
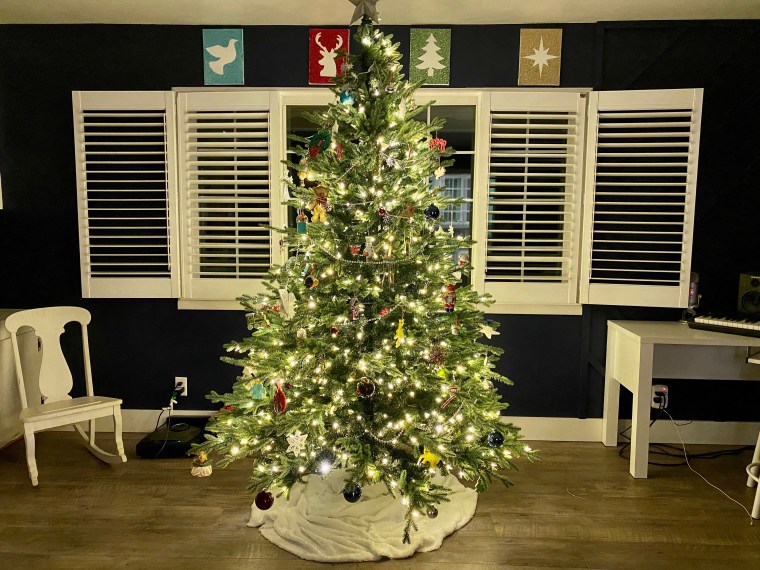
One of our Advent Activities for this year was “make a craft.” I decided that Glittery Christmas Silhouettes would make the perfect actvity for my kids. I have to say, I am very happy with how they turned out and it will be fun to put them up each December for years to come. My kids range in age from 5-13 and they were each able to do this with just a little help from me. Here’s what you will need for your glittery silhouettes. Four rectangular canvases, adhesive-backed vinyl, a computer, scissors, cardboard or newspaper (to cover your work area), white school glue, paintbrushes or foam brushes, and four different colors of glitter. #CommissionsEarned
Google Christmas silhouettes online and find four that you want to use. Size them to fit in the center of your canvas with enough space around each for the glitter. Try and make all 4 about the same size. Print out your silhouettes and cut them to use as templates. Trace your silhouettes on the back of your adhesive-backed vinyl. Cut them out to create four stickers. Place one “sticker” on each canvas.Paint glue evenly all over the white parts of your canvas. It’s ok to get a bit of glue on the stickers, but try to keep it to a minimum so that you can see the outline for when you peel it off later. Sprinkle glitter all around your silhouette and be sure to go over the edges a bit to make sure you create a nice line all around each image.Wait about 45 minutes. You will want to peel your stickers before the glue and glitter completely dry. This will create a cleaner line. Allow your canvases to dry completely. Shake the glitter off. Then paint over them one more time with white school glue. This will seal the glitter in so that it doesn’t fall off everywhere when you they are hanging up on your wall. Let them dry overnight. Hang up and admire your beautiful Glittery Christmas Silhouettes!
Update: We have now been using these for the past 5 years and they are holding up beautifully. For a tip when storing them: use plastic wrap to cover each canvas individually, then stack them and wrap the stack in plastic wrap as well. I store mine inside of a closet on a shelf, and each year they look as lovely as they did the first year we made them. Here is a picture from last Christmas so that you can see how nice they look in my navy blue living room next to my Board & Batten Feature Wall .
For more fun Christmas ideas check out the following blogposts:


 AFTER
AFTER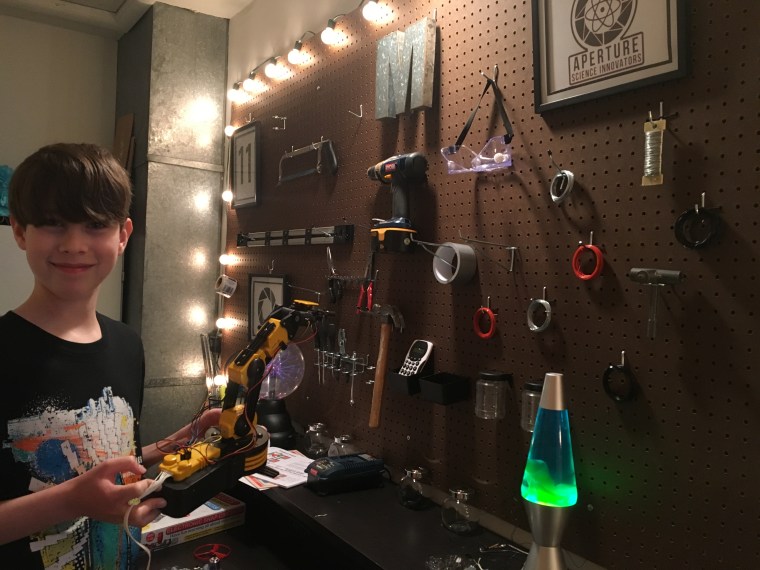


 Google Christmas silhouettes online and find four that you want to use. Size them to fit in the center of your canvas with enough space around each for the glitter. Try and make all 4 about the same size. Print out your silhouettes and cut them to use as templates.
  Trace your silhouettes on the back of your adhesive-backed vinyl. Cut them out to create four stickers.
 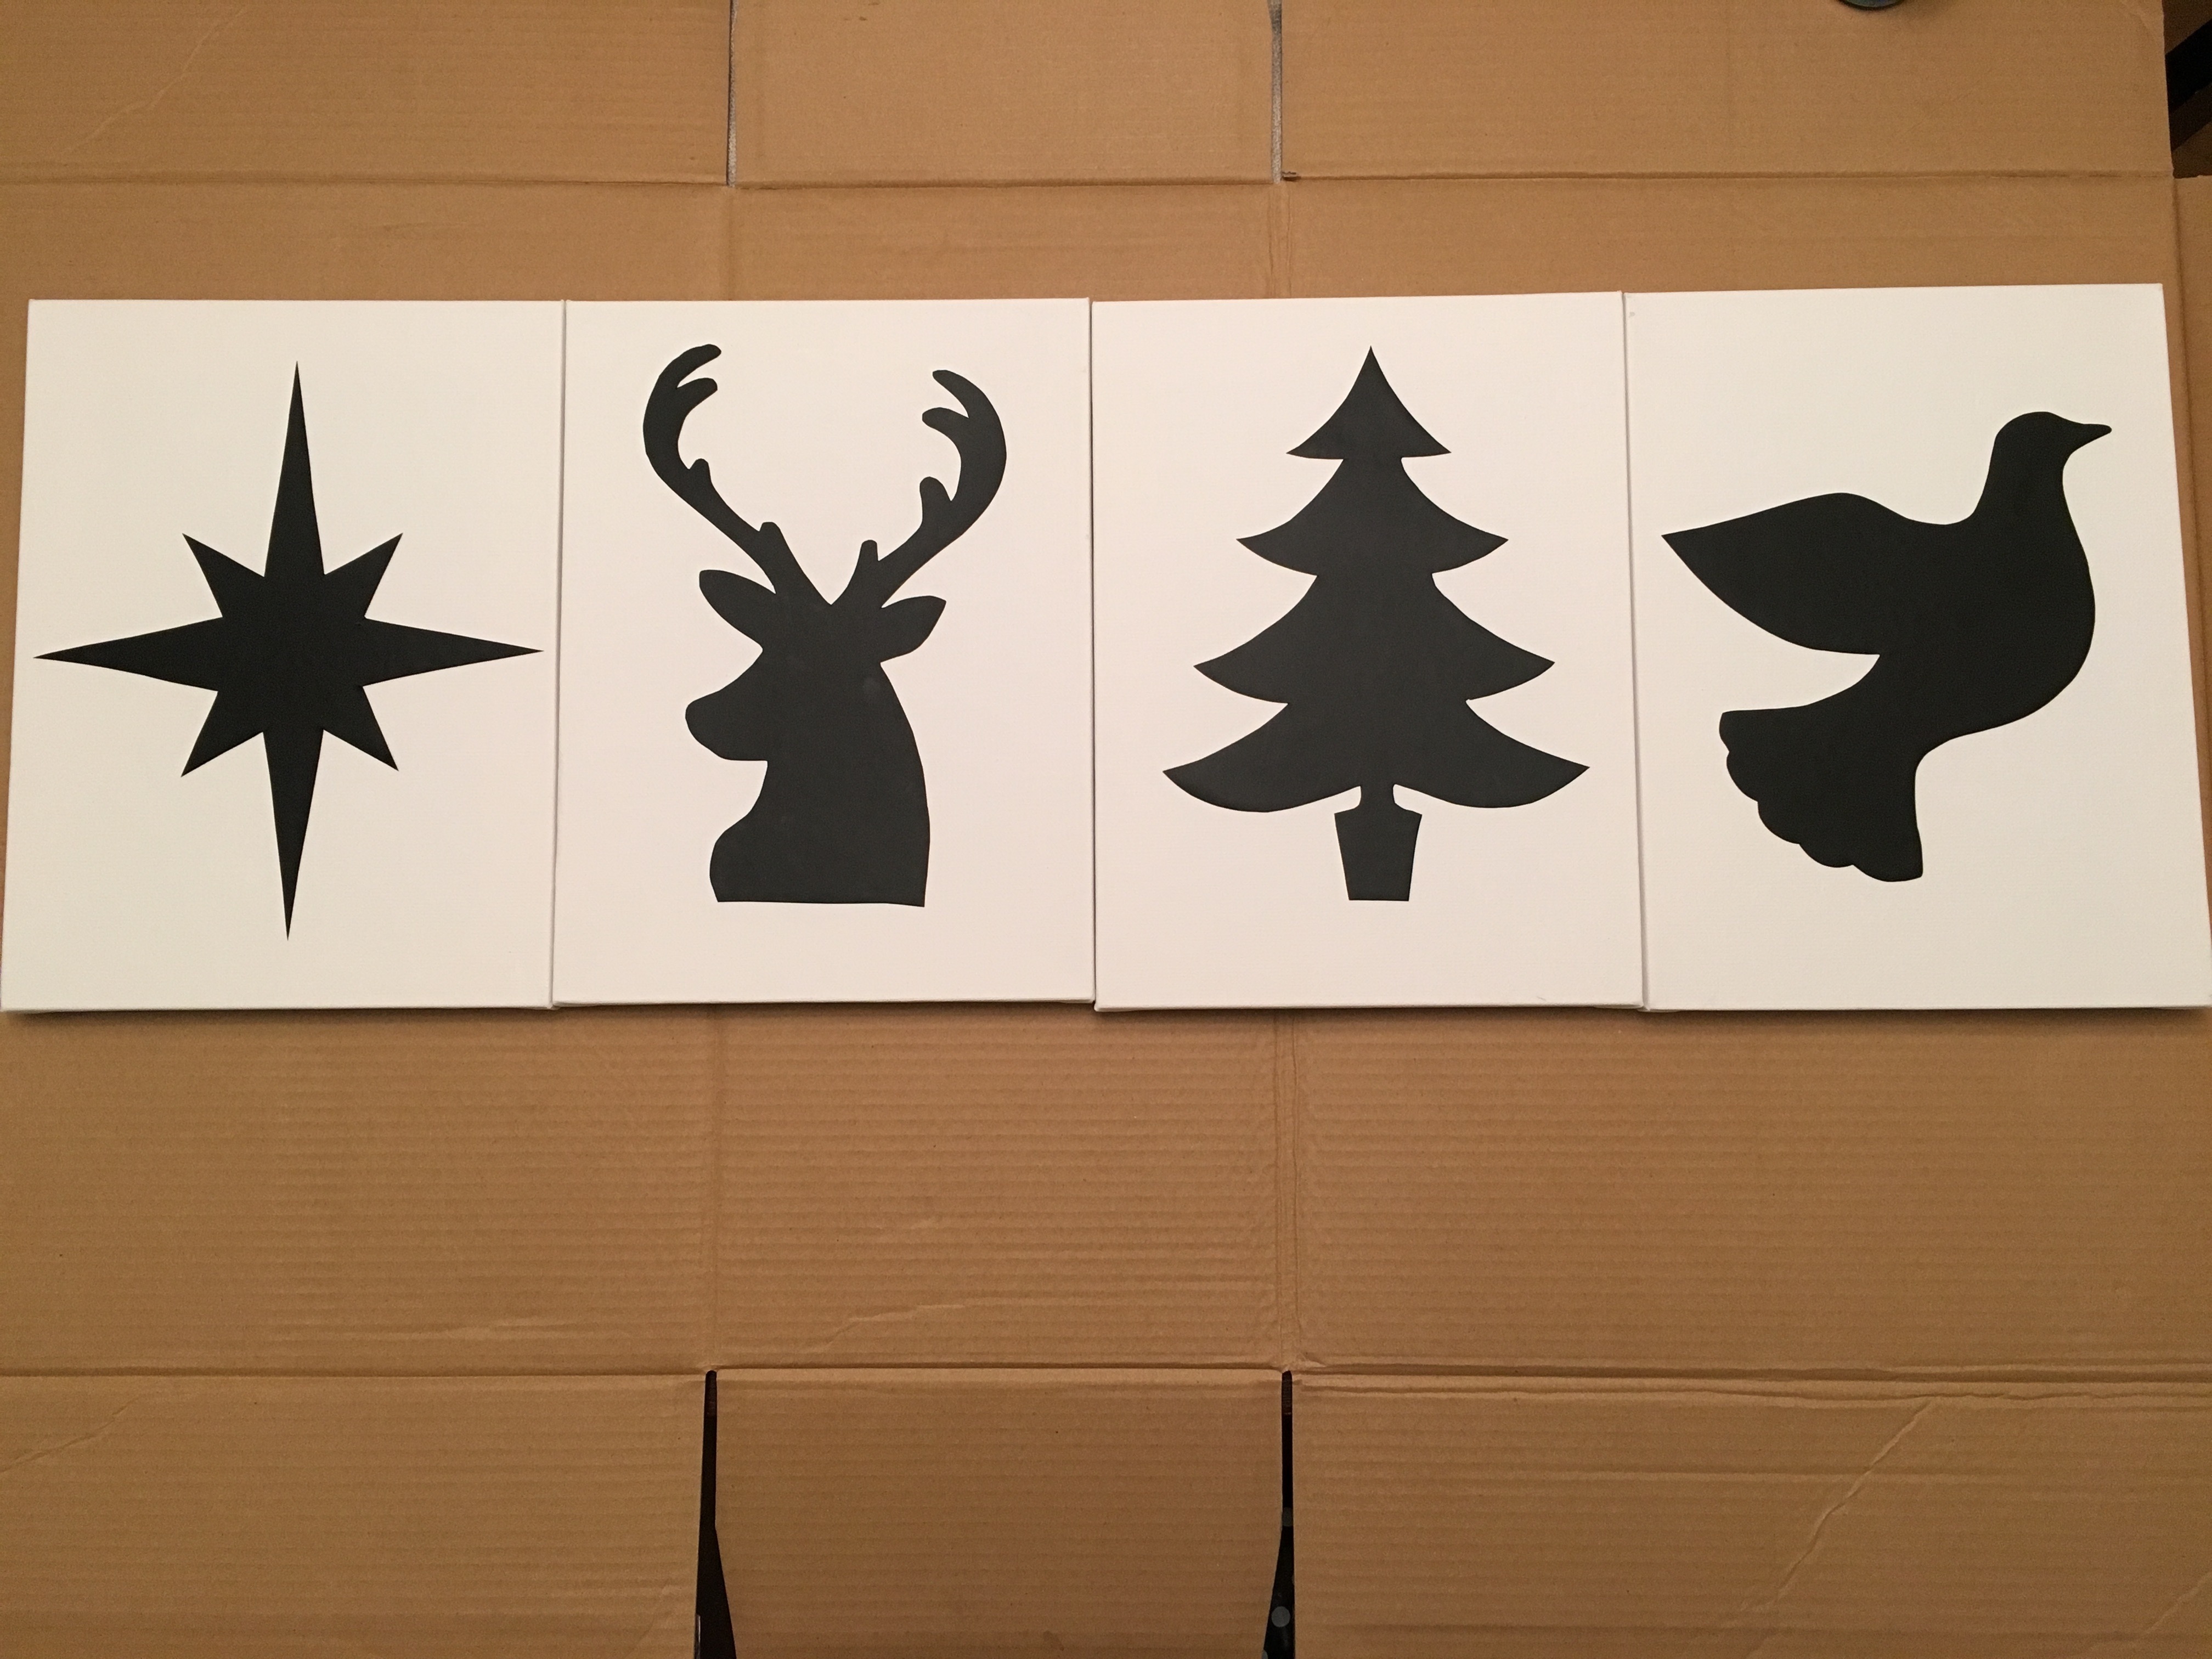 Place one “sticker” on each canvas.
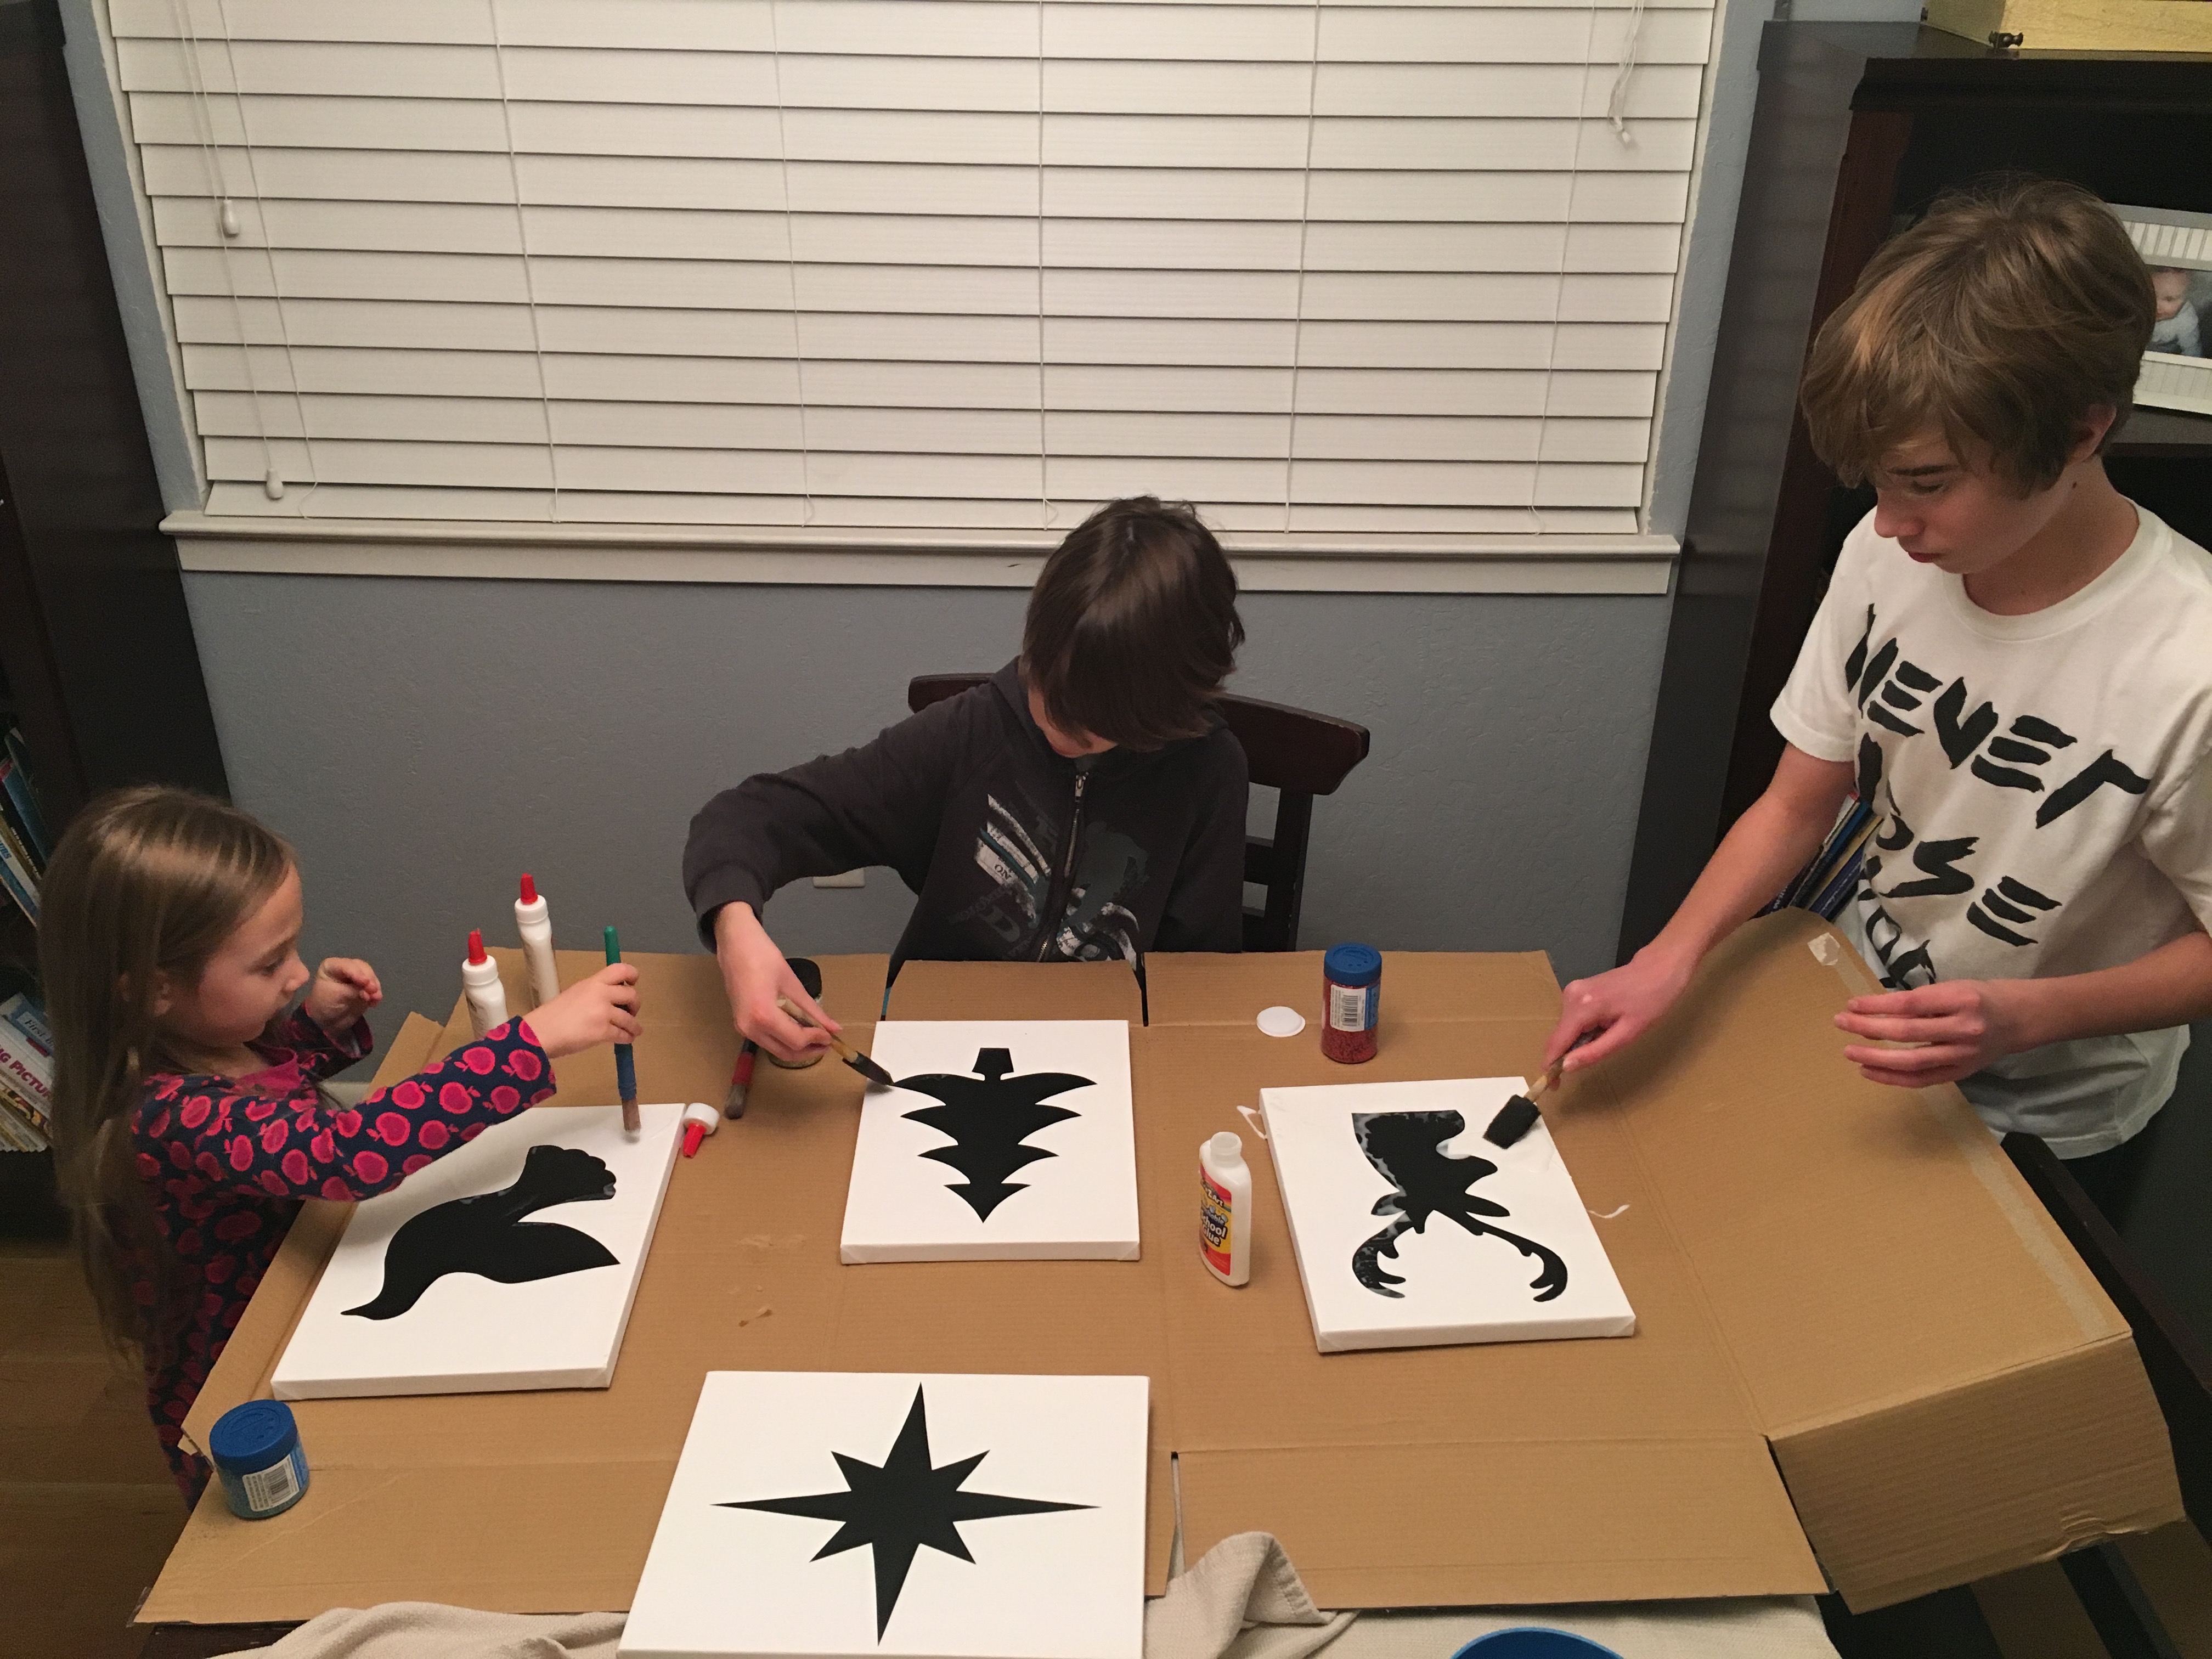 Paint glue evenly all over the white parts of your canvas. It’s ok to get a bit of glue on the stickers, but try to keep it to a minimum so that you can see the outline for when you peel it off later.
  Sprinkle glitter all around your silhouette and be sure to go over the edges a bit to make sure you create a nice line all around each image.
 Wait about 45 minutes. You will want to peel your stickers before the glue and glitter completely dry. This will create a cleaner line.
  Allow your canvases to dry completely. Shake the glitter off. Then paint over them one more time with white school glue. This will seal the glitter in so that it doesn’t fall off everywhere when you they are hanging up on your wall. Let them dry overnight.
 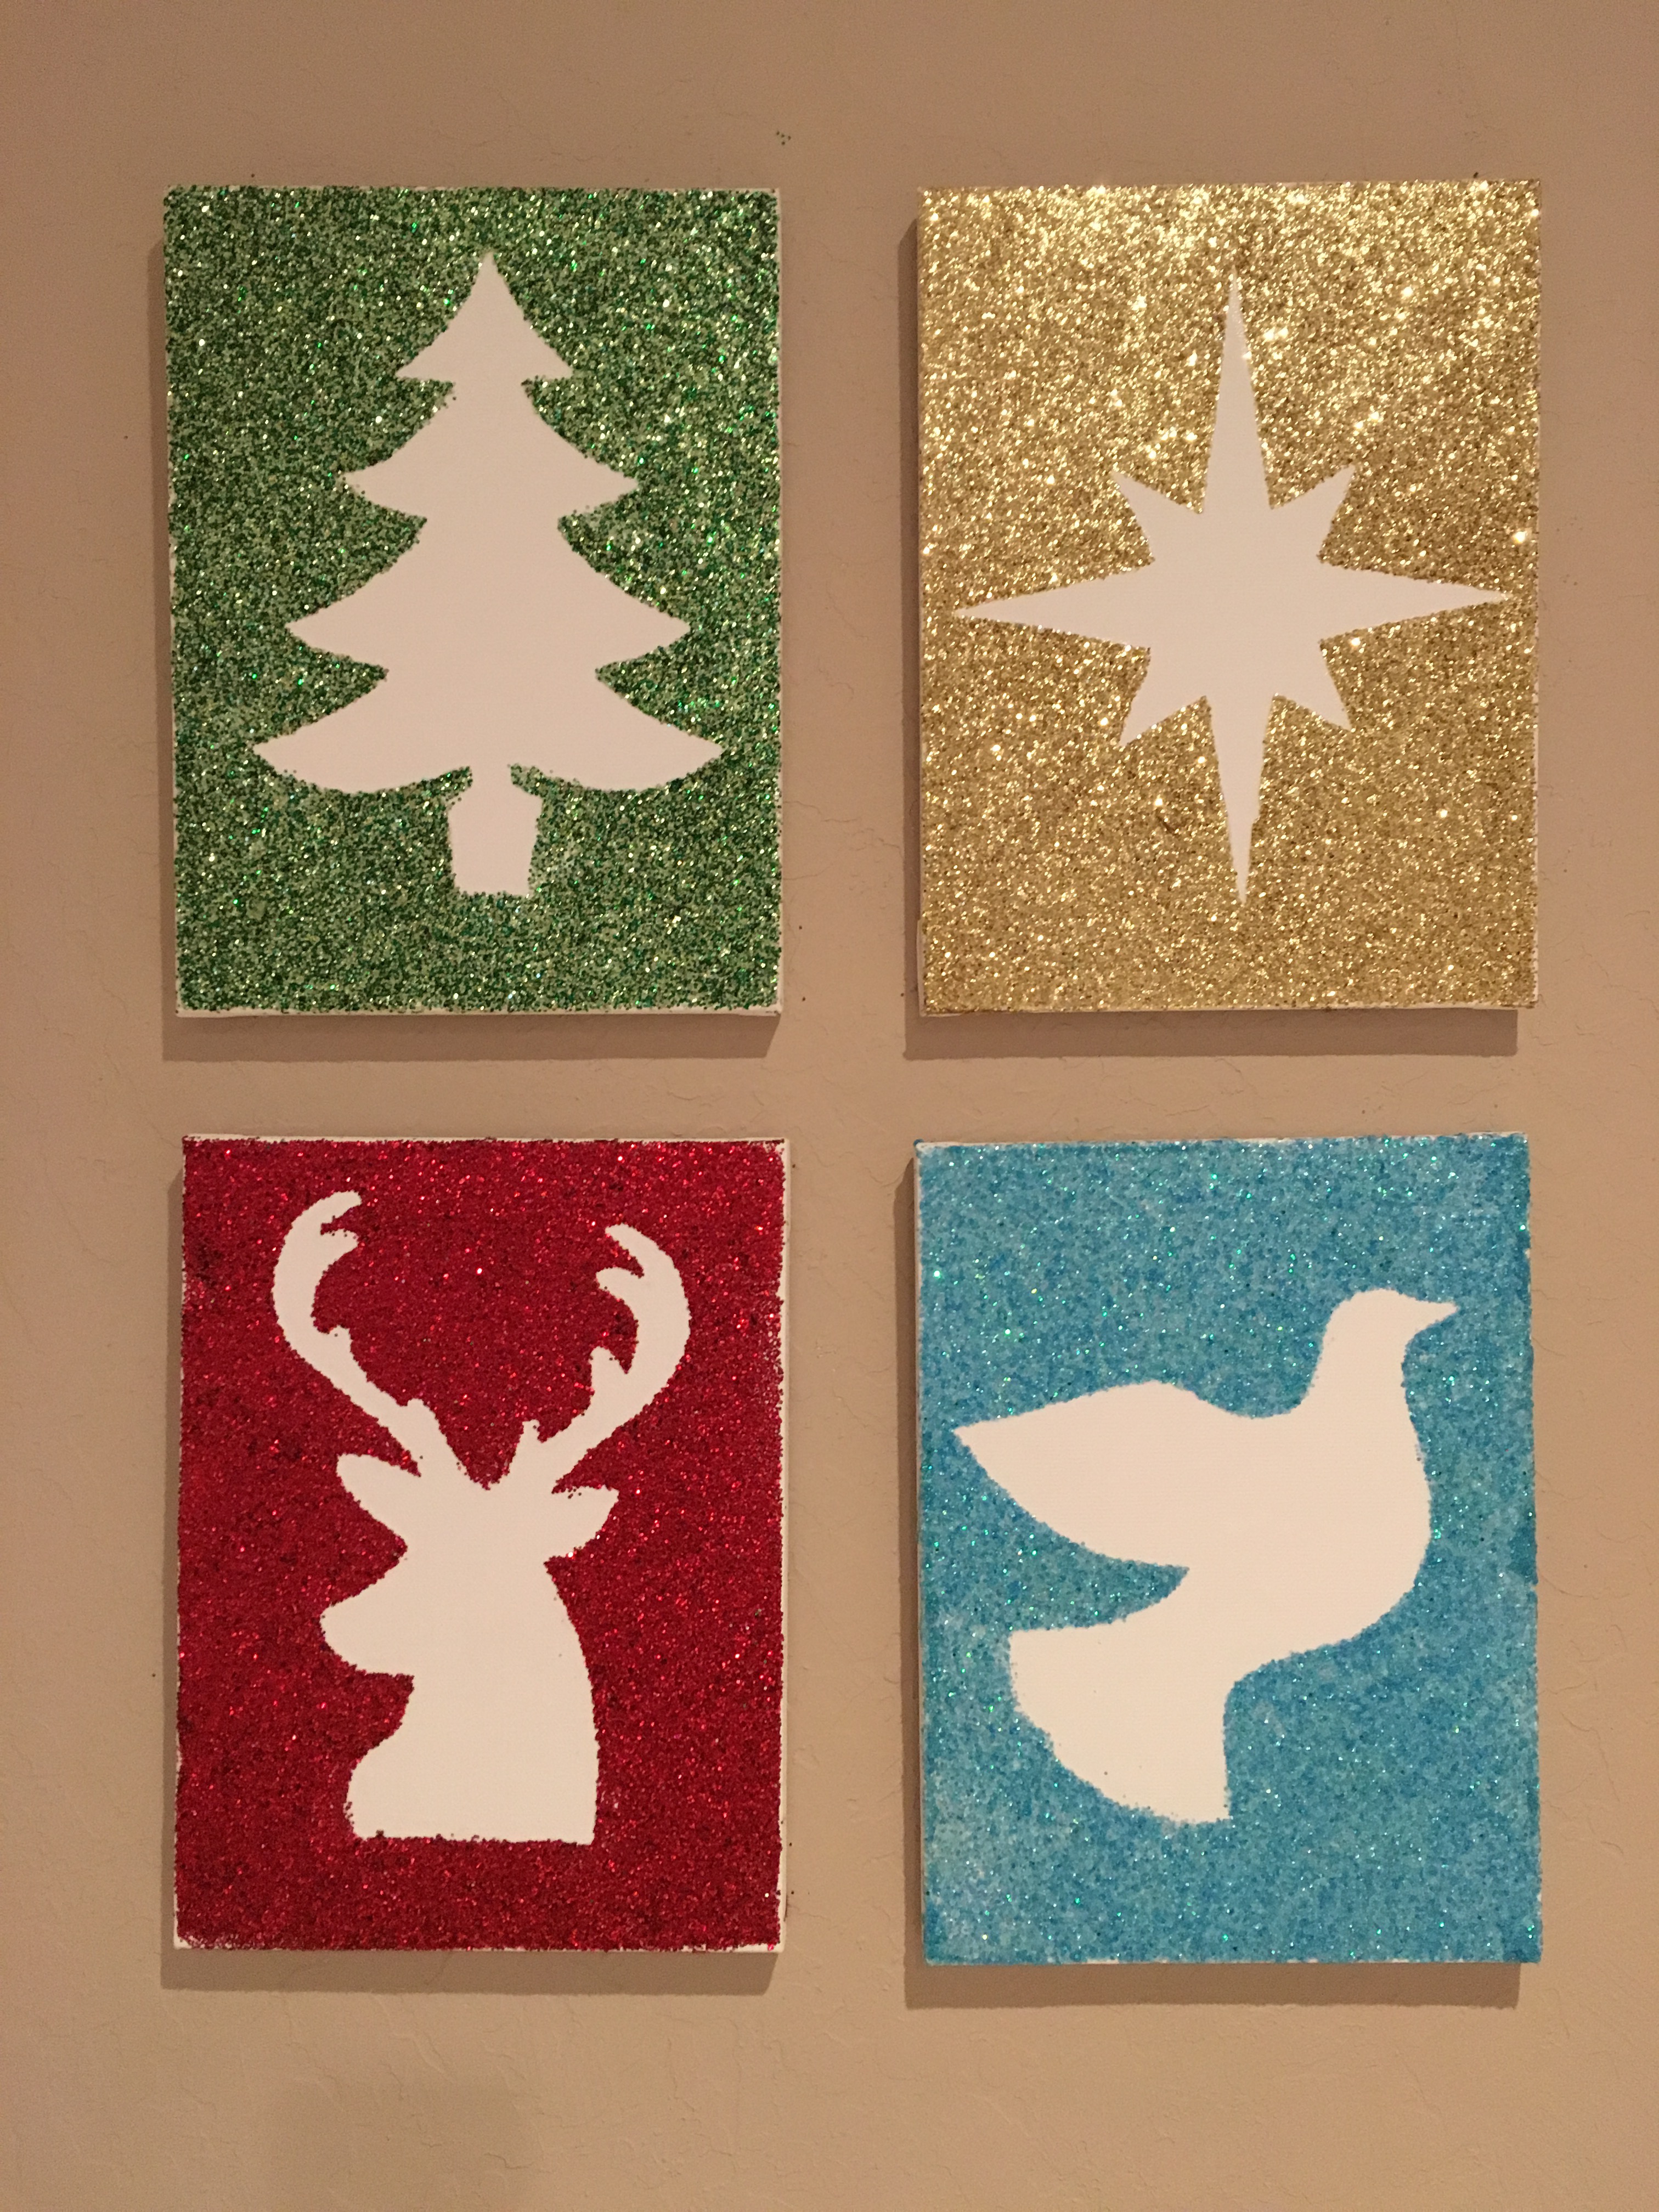 Hang up and admire your beautiful Glittery Christmas Silhouettes!