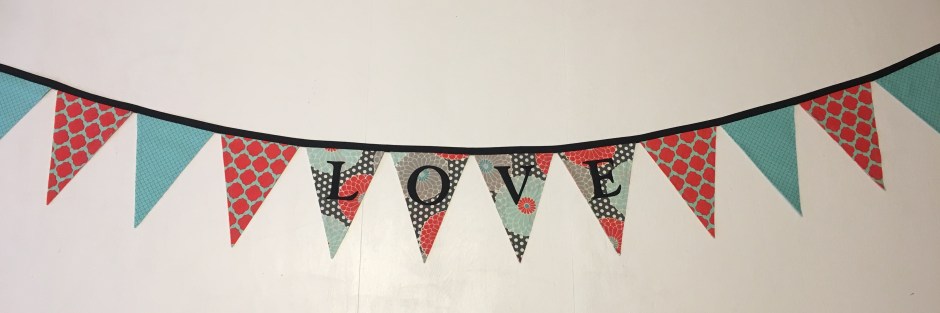
Pennant Banners are one of the most simple sewing projects and can add pops of color to any room or front porch. They can be used as a party decoration, on a mantle or mirror during the holidays, or in a child’s room. They can be made out of paper, material, or burlap. The possibilities are endless! I have made various kinds of pennant banners for many occasions. For this post, I’m featuring the most recent one I made for a friend of mine, but I’m also including one of my most popular youtube video tutorials on how to make a pennant banner.
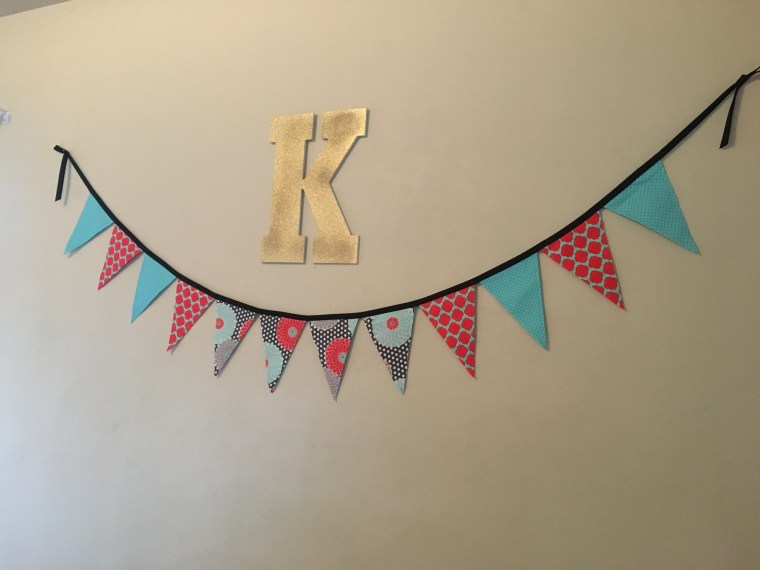
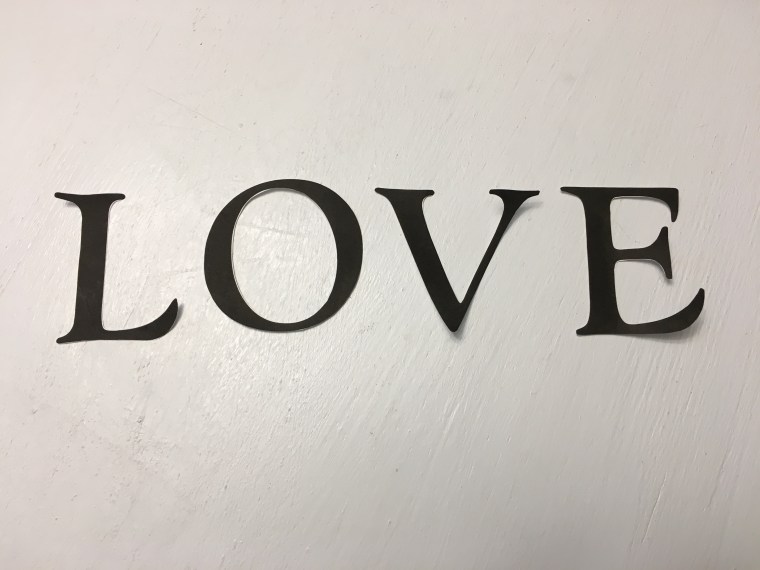
With Valentine’s Day only a couple of weeks away, you may want to make your own version of this LOVE Pennant Banner to hang on your mantle! After watching my tutorial on How to Make A Pennant Banner, you will need a couple of additional steps to add letters to your banner.
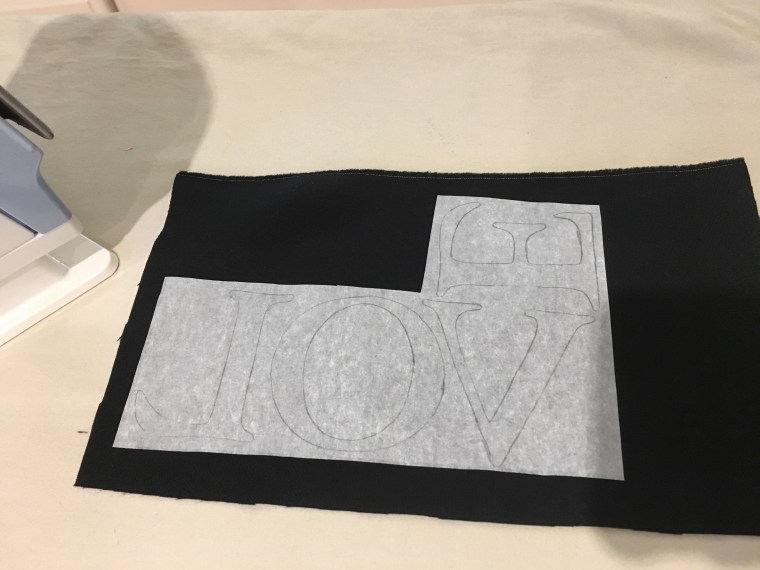
You will need to purchase a package of light Seam A Seam 2 from your local fabric store. Find a font you like on your computer. Print your letters in the size you want them to be on your banner. Cut out the letters. Turn your letters over and trace them onto a sheet of the Seam A Seam. Peal the bottom off and adhere to the fabric you have chosen for your letters. Iron over the top to attach the Seam A Seam to your fabric. Cut out the letters, following the lines you initially traced. Peel the backing off. Your fabric letters should now be slightly tacky on the back. Position them on your banner exactly as you want them. Iron them for about 20 -30 seconds one at a time. Your banner is now complete. For a more in depth tutorial on how to use the Seam A Seam to attach letters to fabric, watch my Advent Bags Tutorial.
My friend decided to use this pennant banner for her daughter’s nursery. It just so happened to work perfectly with the colors she chose and I am so thrilled to see it hanging up in this precious baby girl’s bedroom.
My daughter loves art! She will sit for hours drawing, writing stories, and coloring pictures. I have several areas set up around our house with art supplies, but I recently decided to put together a more intentional art space for her.
Michael’s was having a huge sale one day, so I headed over (with my coupons of course) and picked up these metal A R T letters, the chalkboard box for crayons, and the off white tray for paper. The rest, I already had around my house.
These adorable chairs were made for me by my brother when I was a child. They were in my childhood room, painted light pink, with dark pink carpet covering the seats. My mom gave them to me several years ago and I repainted and recovered them for my daughter. The wicker table belonged to my mom, who passed away a year and a half ago, so it means a lot for my daughter to have something so special to remind her of her sweet Grandma.
I bought the metal bucket years ago at the dollar store and it has held colored pencils in various locations around our house. Now it has a permanent home. I had used the mini white shutters last year for my Christmas mantle, but realized they were the perfect addition to this little art corner. The finishing touch was this bright and cheerful pennant banner. I had already cut the triangles for another project, so it only took me a few minutes to thread them through a piece of twine.
I absolutely love when I can use what I already have to create an inviting space for my children to enjoy. This little art corner has already gotten a lot of use in our home and is the perfect setting for inspiration to take place!
New Year’s Eve is always a much anticipated night for our family. It is, of course, the one night a year that my little night owls are given permission to stay up until midnight! We started the tradition of celebrating a “family friendly” New Year’s Eve a couple of years ago. Some years we have joined together with other families. This year it was just the 5 of us at home for the evening.
I kept things inexpensive by hitting up our local Dollar Tree for supplies, and then I went to work. I already had paper bags, card stock, and glue sticks, so our “On the Hour Bags” didn’t cost a dime! My plan was to start our evening festivities at 6:00, so I made a bag for each hour from 6:00 pm – Midnight. I googled “free printable clock templates” and then added the clock hands to each one before printing them out onto white card stock. I traced around a bowl to get perfect circles on the shiny blue and sparkly card stock behind the clocks. A few finishing touches later, and the bags were done.
What was in each bag? Each bag contained something that had to do with the activity for that hour.
6:00 pm: Time Capsule Printouts & A Mason Jar We started a new tradition this year, and it was a huge hit! I looked up some ideas for the time capsule template on Pinterest, and then created my own for our family. We began our evening by sitting at the table together and filling in our favorites, reflections from 2016, & resolutions for 2017. Then we read them to each other, rolled them up and placed them in a mason jar. Our plan is to open them up on New Year’s Eve 2017, read them together, and then create a new time capsule. I’m pretty sure this will continue to be a treasured tradition.
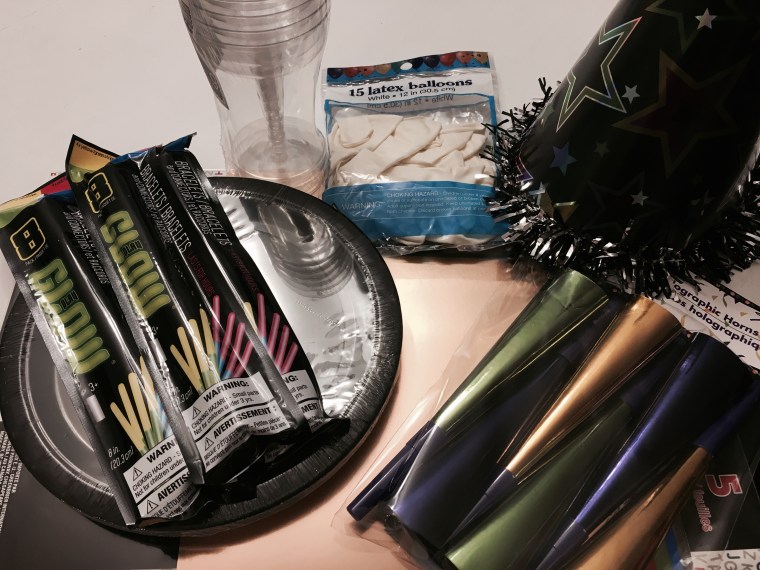
7:00 pm: Glow Sticks & Balloons This was SO….MUCH….FUN! We put glow sticks in balloons and then had an epic living room battle. Boys vs. Girls with Dad as the DJ. We turned off all the lights and made a line of glow sticks dividing the floor in half, girls on one side, boys on the other, with 6 glowing balloons on each side. When Dad played the music, we would try to get all the balloons onto the opposing side. When the music stopped the team with the least balloon on their side was the winner. The girls started off strong, but after 5 rounds, the boys were the ultimate winners! I’m telling you…I haven’t laughed that hard in a long time!
8:00 pm: Popcorn & A Red Box Movie Popcorn and movie nights are a family favorite for us, and my kids really wanted to see the movie Storks! Perfect for one of our New Year’s Eve activities!
9:00 pm: Gummy Worms with a “Dessert Break” note attached We took an intermission from the movie to get dessert. This year, I made a delicious ice cream pie with a clock face. I used gluten free Joe Joe’s cookies from Trader Joes to make an “oreo” crust, filled it in with vanilla bean ice cream, and poured homemade chocolate fudge frosting over the top. While it was setting in the freezer, I made a clock on wax paper out of melted white chocolate and placed it on top of the frozen pie. We also included gummy worms for the “non ice cream eater” in our family.
10:00 pm: M&M’s, Marshmallows, and Straws Game Time: I found this idea under “minute to win it” games on Pinterest. I set the table with two paper plates for each player. One plate contained M&M’s and marshmallows. The other was empty. Each player was given a straw (cut to about 3/4 size). At my “GO” the players had to suck up the candies and mallows to make them stick to their straw and transfer them from one plate to the next. The first player to get all of theirs transferred had to call out “Happy New Year!” Micah for the win!
11:00 pm: A Big Bag of Skittles Make a rainbow science experiment! I had seen a couple of videos on youtube of this simple and fascinating science experiment, so I thought it would be a fun way to keep my tired children awake that last hour before the ball dropped. Check out our “make a rainbow” video!
12:00 pm: Cups for Sparkling Cider and Party Horns We opened our final bag about 10 minutes early. Little Sister put on her party hat (she was the only one willing to wear one this year). We filled our cups with cider and got ready to ring in the New Year! We found a countdown on TV, and when the clock struck midnight, we ran outside yelling Happy New Year!!! Oh, and Micah finally got the chance to use that blow horn he got for Christmas!
Who doesn’t love a good old fashioned Nerf Battle? My 10 year old son was who I had in mind when I added Nerf Wars and Target Practice to our Advent activities this year. But let’s be honest…this is fun for any age…even the grown ups!
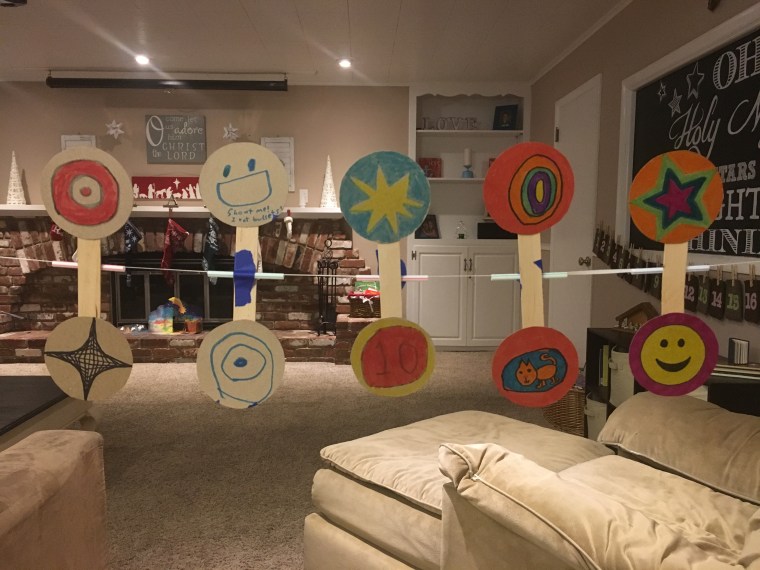
We started our evening by creating these spinning targets, which were a big “hit!” I prepared everything ahead of time by cutting circles out of empty food boxes and setting out markers, tape, two circles per person, large craft sticks, straws cut to size, pennies to weigh the spinners down at the bottom, a piece of string, and a couple of push pins. Then we sat down at our coffee table to create. Check out my tutorial to see how we made the spinners.
Next we each selected our Nerf Gun, grabbed a couple of soft bullets and had target practice. We also stacked up some red cup pyramids to shoot down and then ended our evening with a boys vs. girls living room Nerf Battle, using a jump rope to divide the room in half. The last one standing was the winner. Want to know who the epic champion of the night was? You guessed it…little sister for the win! #CommissionsEarned
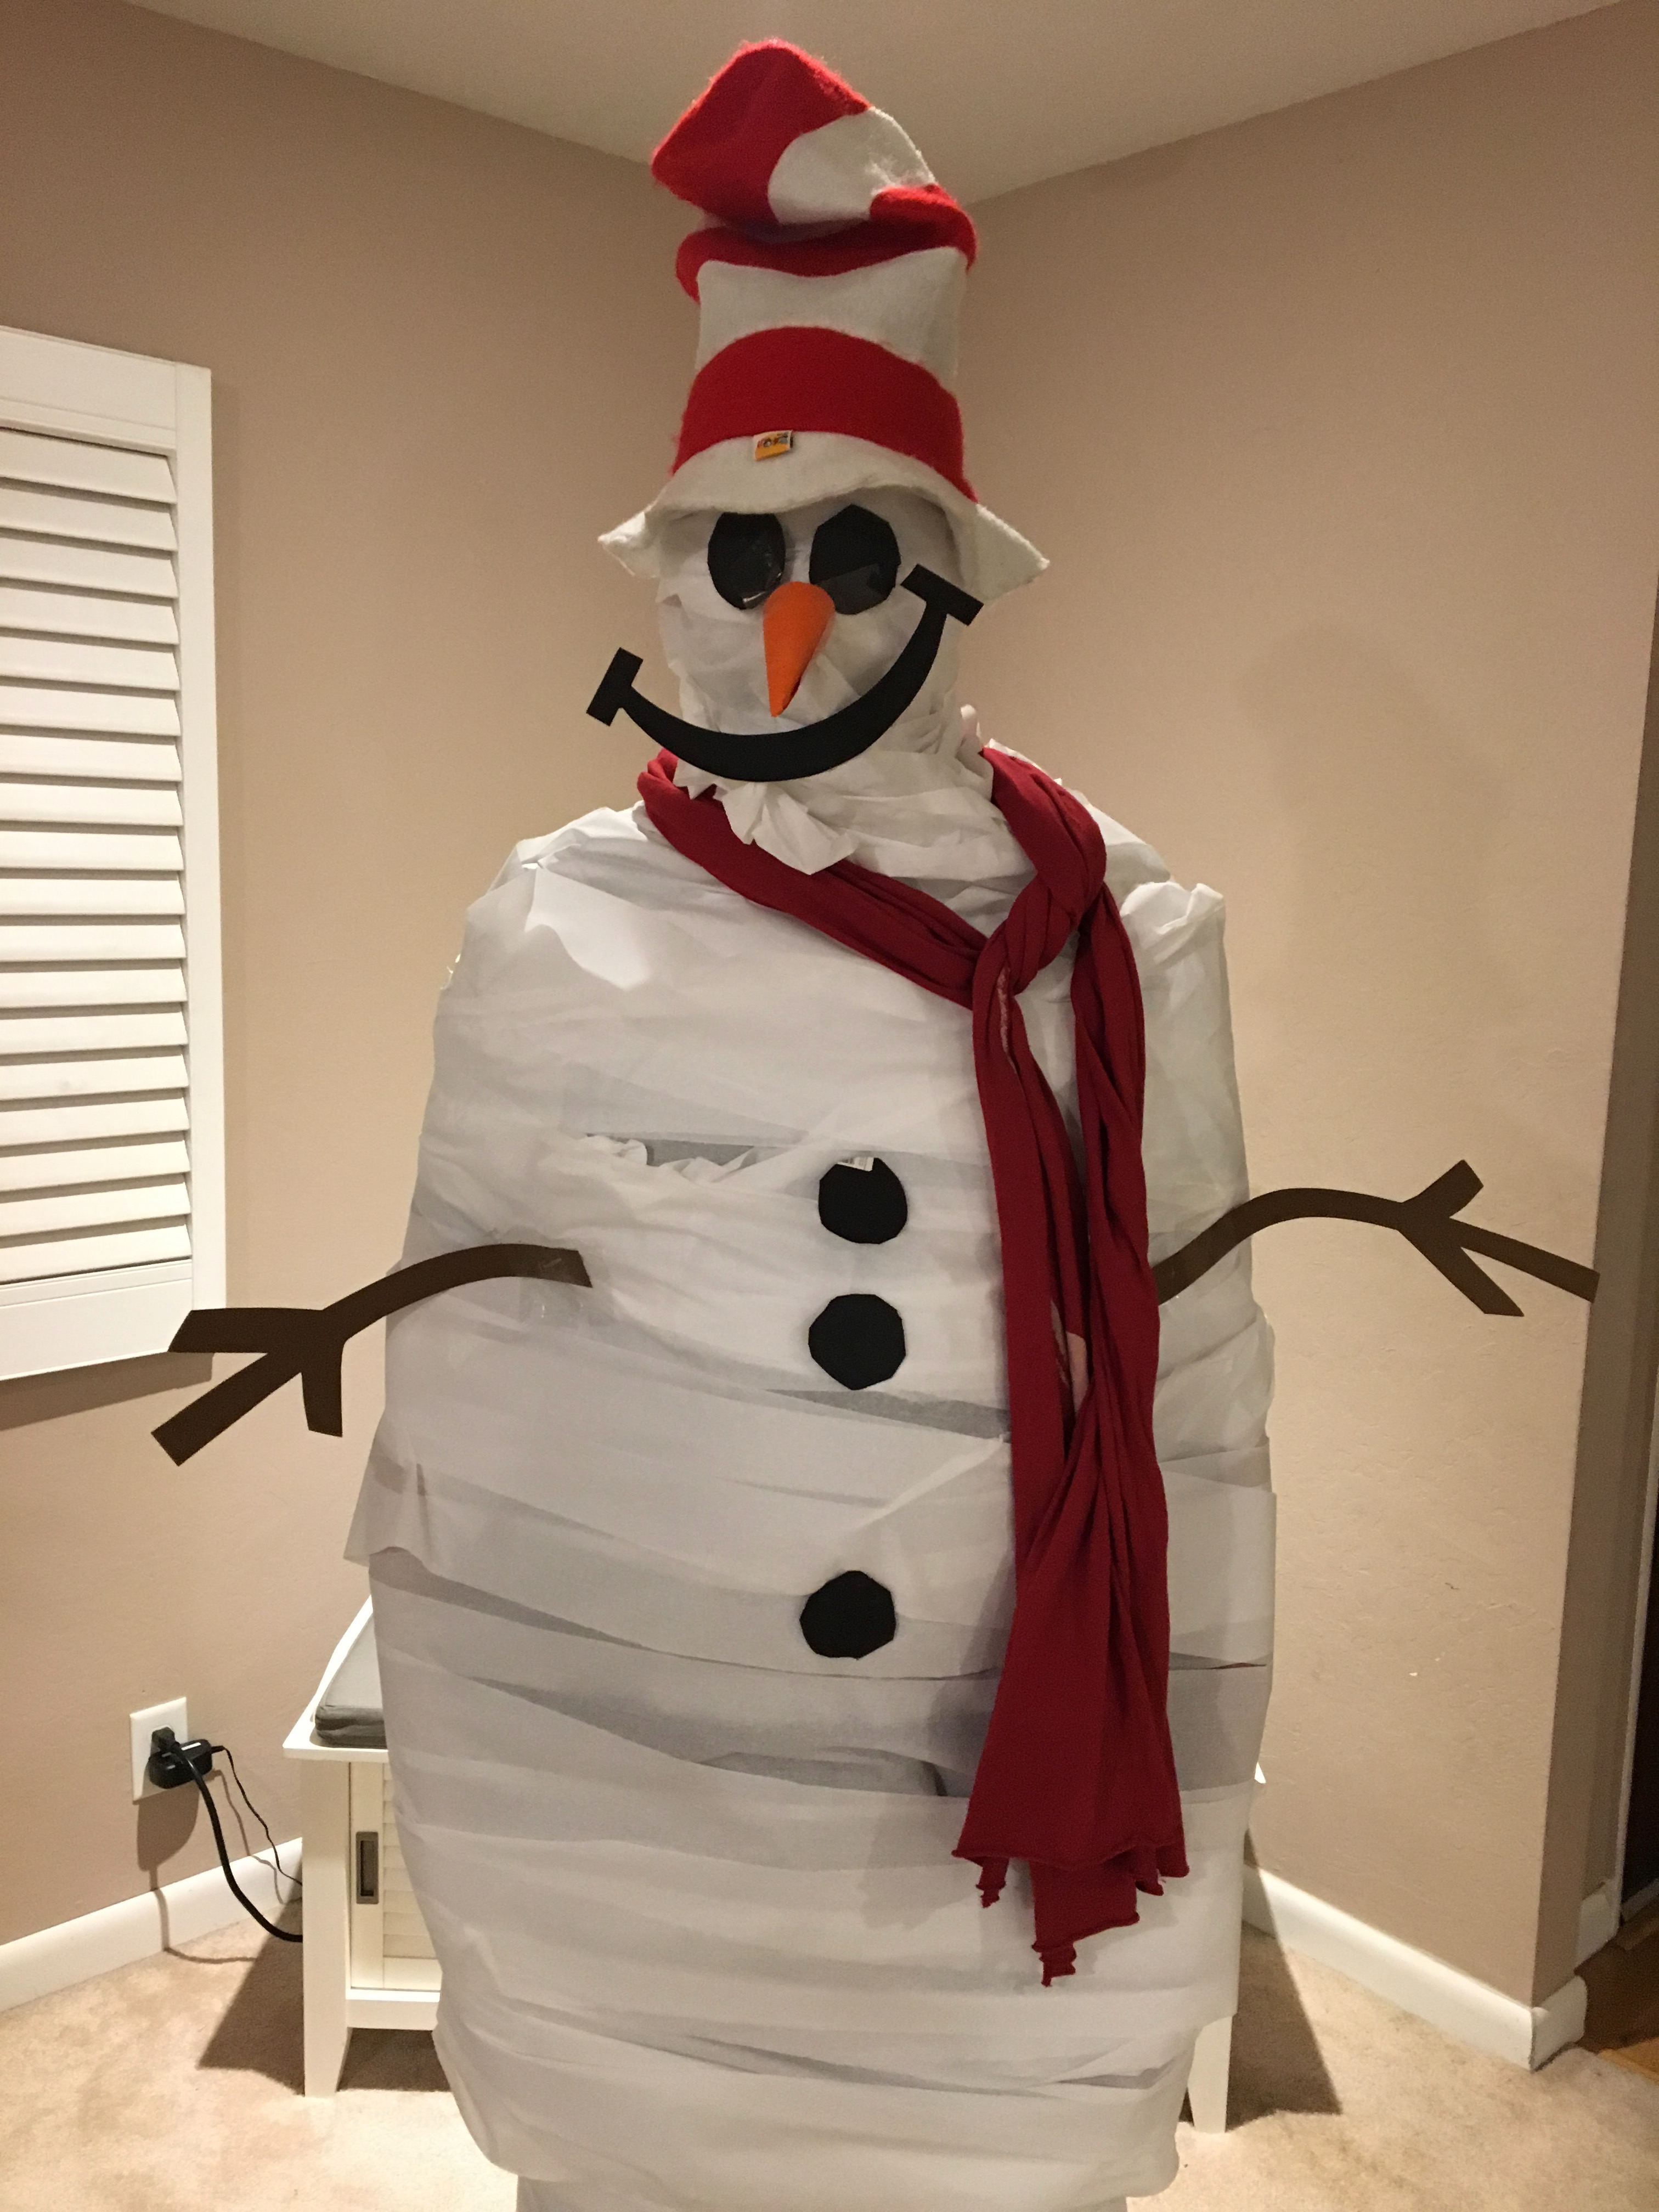
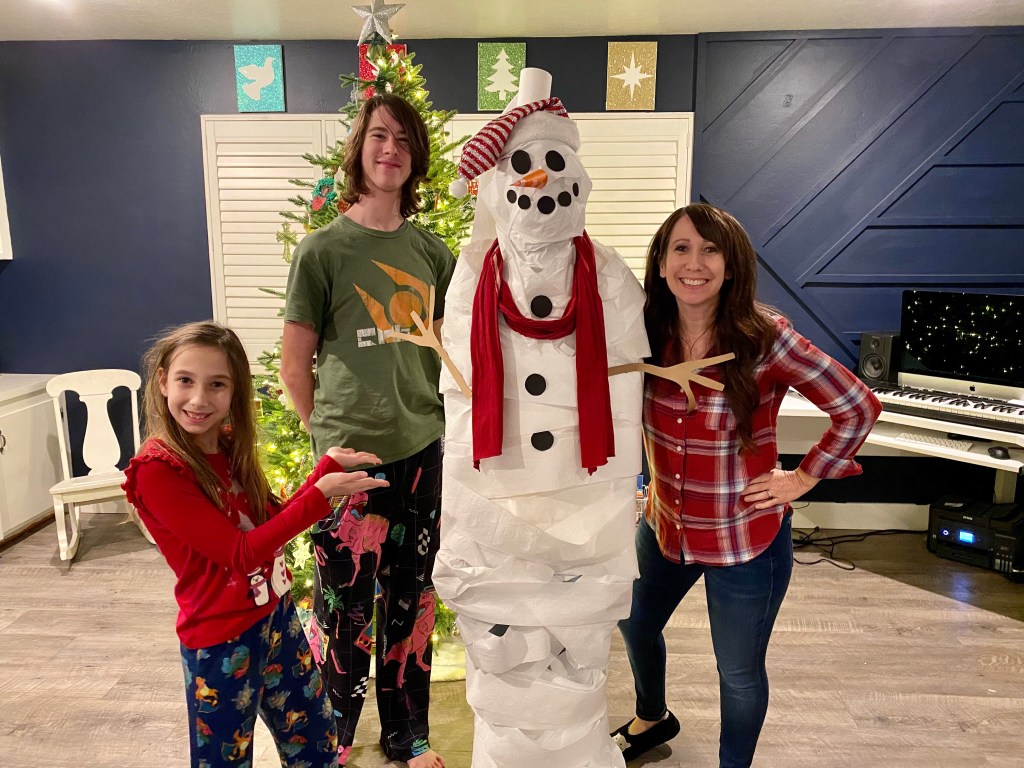
Turning Dad into a snowman has become one of the most anticipated Advent activities for our children. We started this tradition 3 years ago and it’s always sure to bring out tons of laughter and joy for all of us! The kids squealed with delight this morning, when they opened the Advent bag and read that this was the day to make a Dad “snowman!”
The best part of this activity, besides the crazy amount of laughter, is that it is free! Just gather what you have around the house. We used a couple of rolls of toilet paper, some scrapes of cardstock for the eyes, coal buttons, nose, mouth, and arms. I grabbed a scarf out of my closet and a hat out of the kid’s dress up box. Have some scotch tape handy and you are ready to go.
Last year, by accident, my husband got some toilet paper in his mouth, which made for a hilarious few minutes of giggles for the kids. So of course, this year, there was the expectation that he would make this happen once again. He did not disappoint! Make sure to watch our video to the very end to see the grand finale!
Over the last several years, we have switched things up a bit. So far all but one of us has been the snowman. The kids were delighted the year that they opened the advent bag and found the card that said “turn MOM into a snowman!” From that point on, every year we have chosen a different person to be the snowman. Here are a few pics of this silly tradition.
For more Christmas Fun check out the following blogposts:
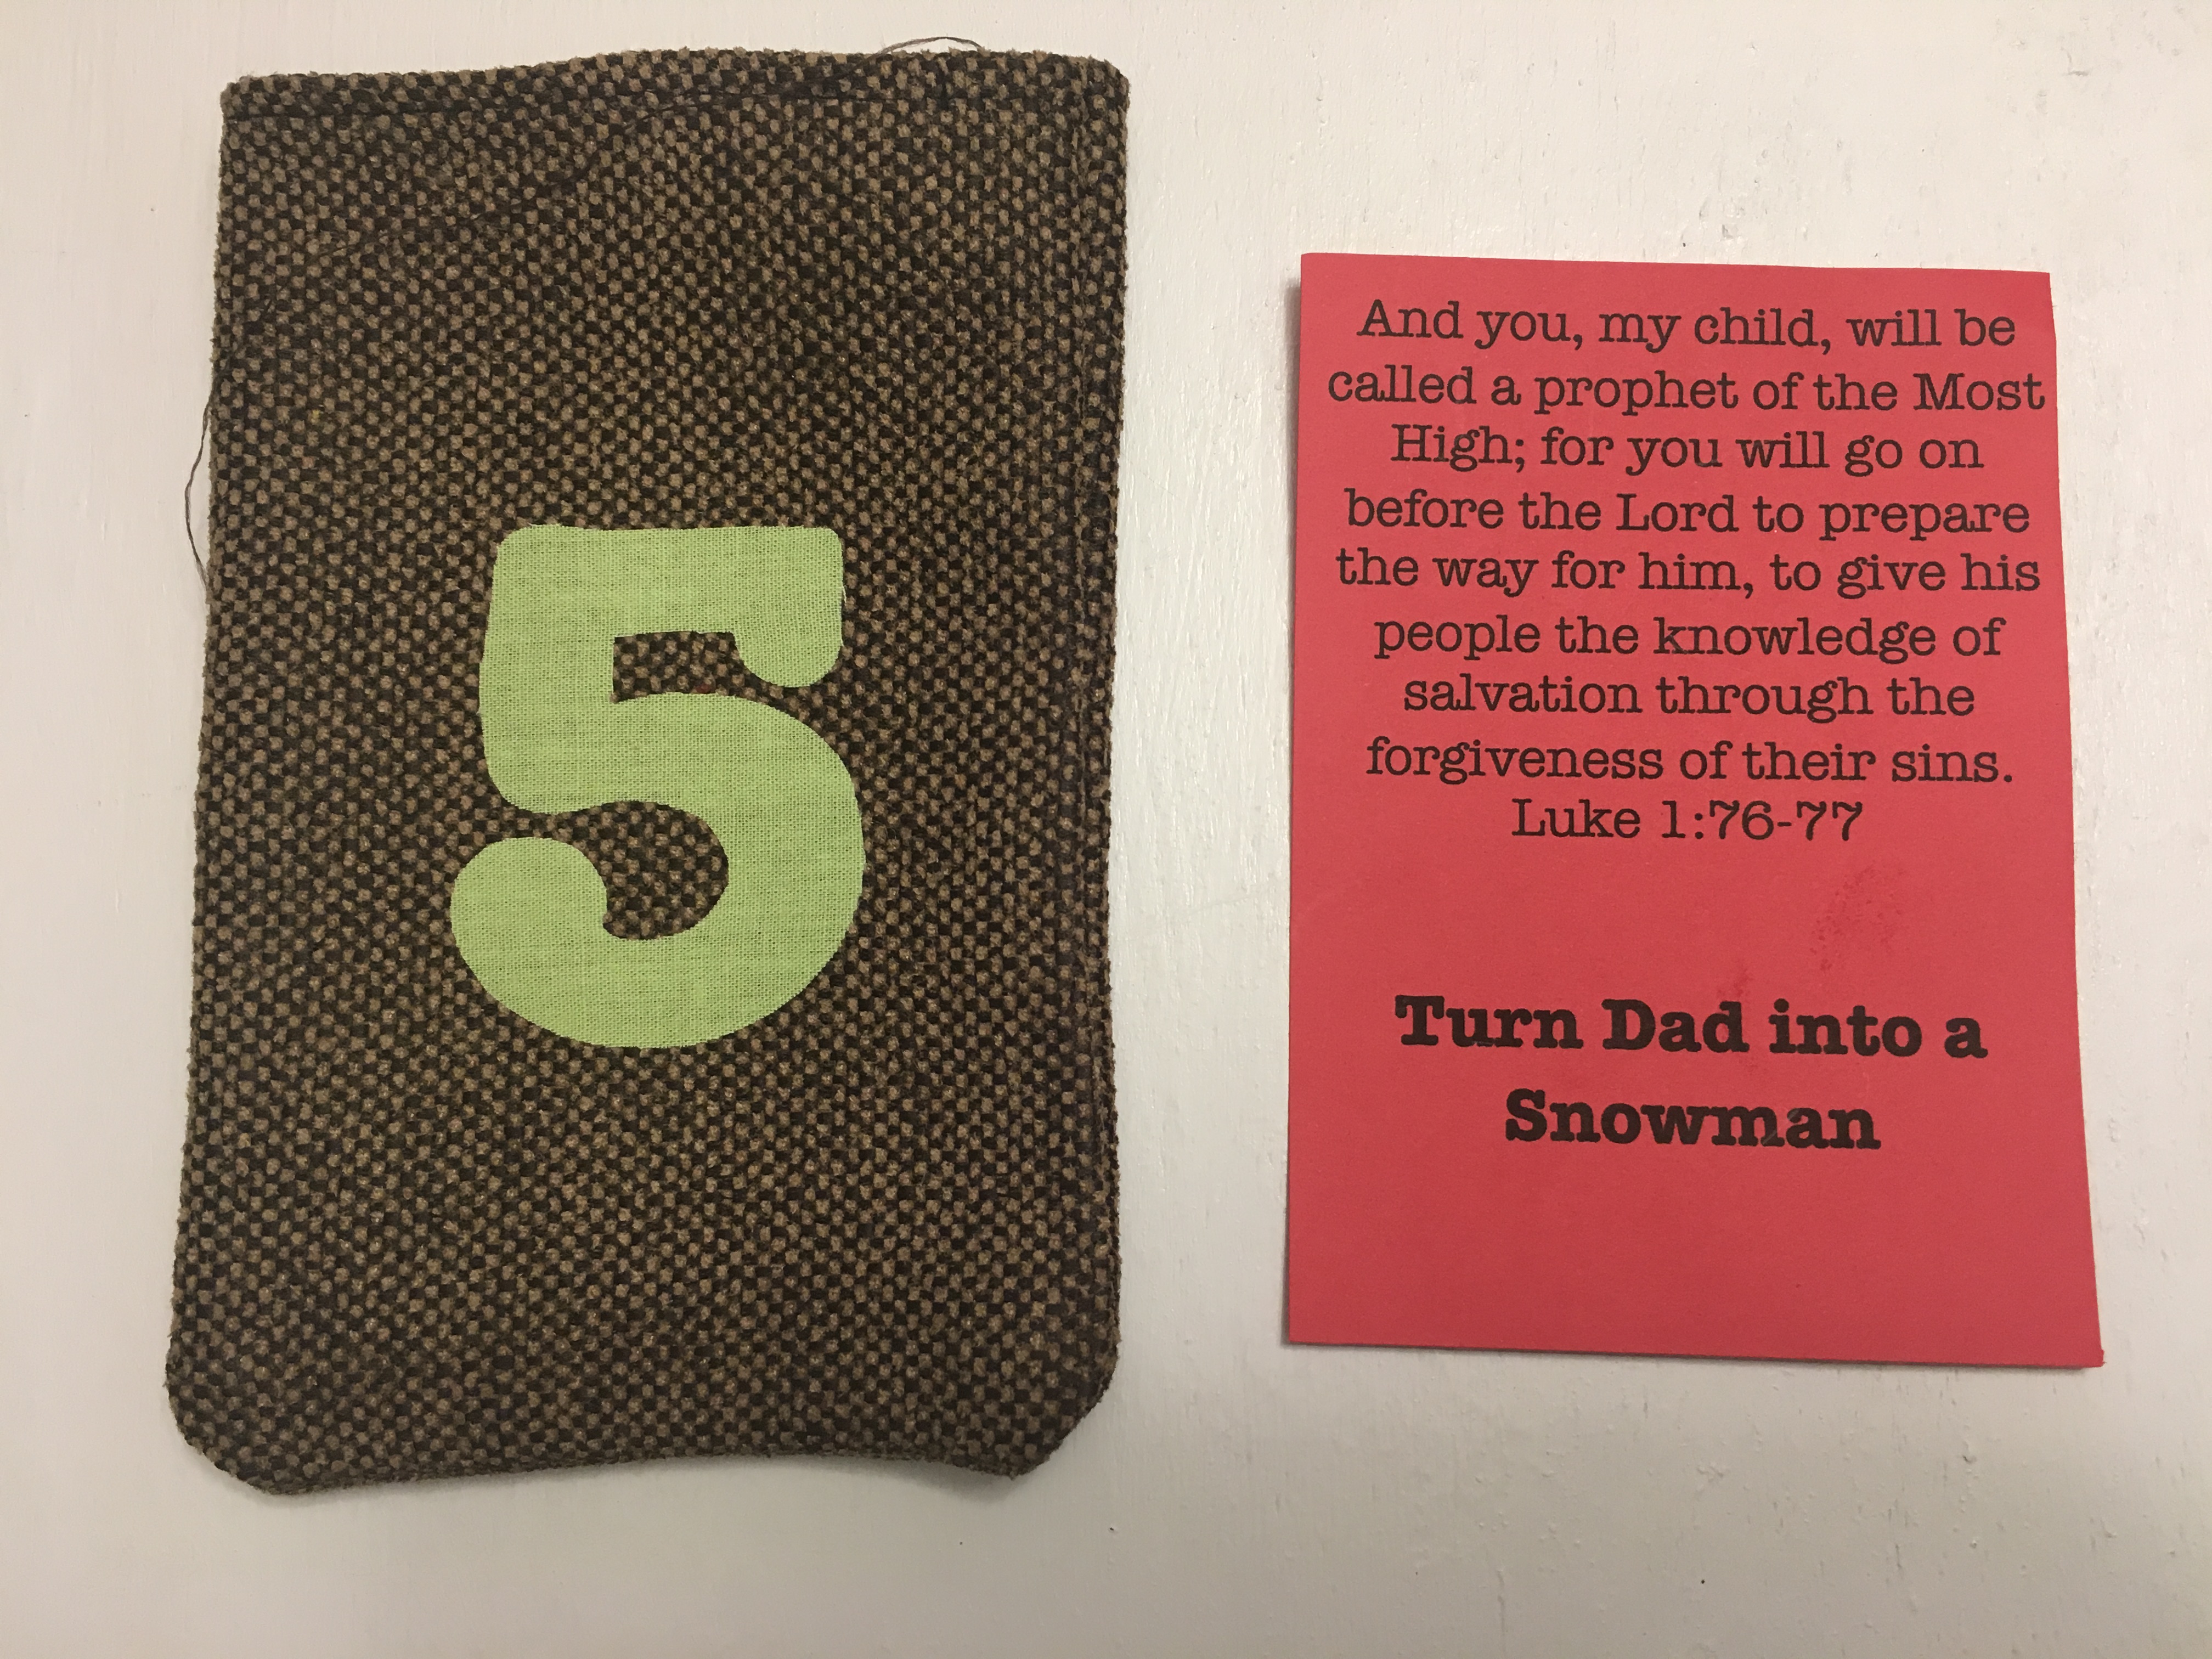
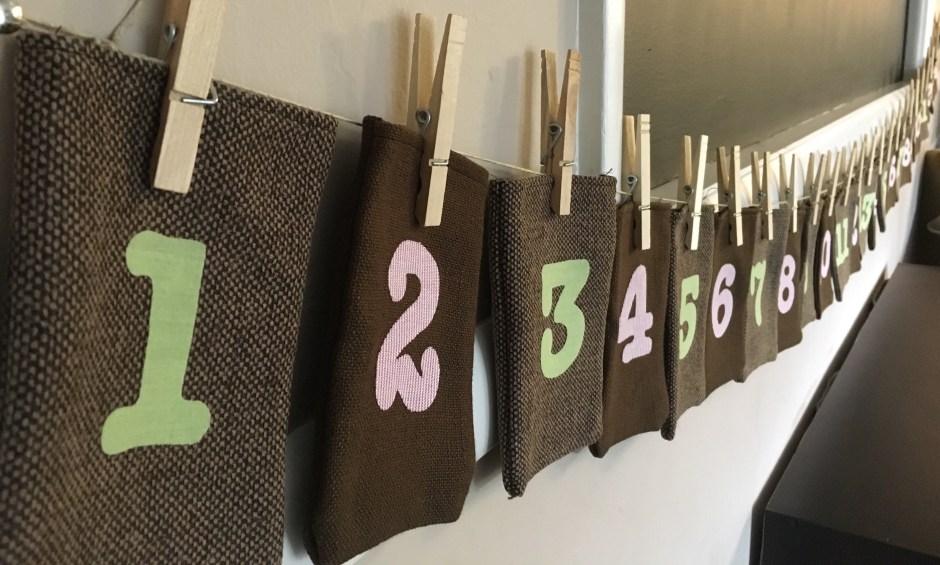
Every year, in the month of December, we spent time focusing on preparing our hearts to celebrate the birth of our Savior, Jesus Christ. One tangible way we do this as a family is by doing Advent Activities. Each day, December 1-25, our kids open the Advent Bag that corresponds with that day. Each bag contains a card with a Bible verse and a family activity printed on it.
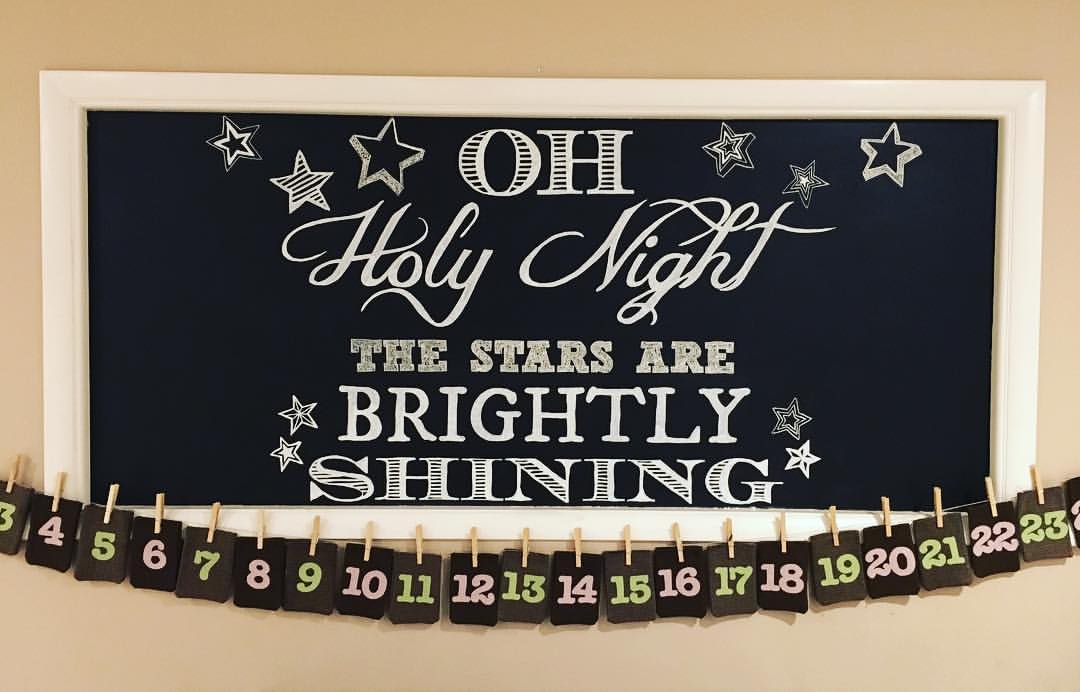
I’ve included a video tutorial on how I made my Advent Bags. They are simple to make and have held up for over 5 years. My kids get so excited when they see them hung up across a wall of our house each December.
I’ve also given you a list of the Bible verses that we use, as well as our Advent activities for this year. Just an FYI, some of our activities may not be in the order I have posted. I try to plan ahead, but adjust as necessary depending on how life goes. Follow my blog this month for more detailed blog posts on some of our crafts and family activities.
ADVENT BIBLE VERSES
Therefore the Lord himself will give you a sign: The virgin will be with child and will give birth to a son, and will call him Immanuel. Isaiah 7:14
Give thanks to the Lord for He is good; His love endures forever. Psalm 118:29
My sheep listen to my voice; I know them and they follow me. I give them eternal life and they shall never perish; no one can snatch them out of my hand. John 10:27-28
But the angel said to him: “Do not be afraid, Zecharaiah; your prayer has been heard. Your wife Elizabeth will bear you a son, and you are to give him the name John.” Luke 1:13
And you, my child, will be called a prophet of the Most High; for you will go on before the Lord to prepare the way for him, to give his people the knowledge of salvation through the forgiveness of their sins. Luke 1:76-77
But the angel said to her, “Do not be afraid, Mary, you have found favor with God. You will be with child and give birth to a son, and you are to give him the name Jesus. He will be great and will be called the Son of the Most High.” Luke 1: 30-32
And everyone went to his own town to register. Luke 2:3
And Mary said: “My soul glorifies the Lord and my spirit rejoices in God my Savior.” Luke 1:46-47
She will give birth to a son, and you are to give him the name Jesus because he will save his people from their sins. Matthew 1:21
The Word became flesh and made his dwelling among us. We have seen his glory, the glory of the One and only, who came from the Father, full of grace and truth. John 1:14
She wrapped him in cloths and placed him in a manger, because there was no room for them in the inn. Luke 2:7
On the eighth day, when it was time to circumcise him, he was named Jesus, the name the angel had given him before he had been conceived. Luke 2:21
The shepherds returned, glorifying and praising God for all the things they had heard and seen, which were just as they had been told. Luke 2:20
After Jesus was born in Bethlehem in Judea, during the time of king Herod, Magi from the east came to Jerusalem and asked, “Where is the one who has been born king of the Jews? We saw his star in the east and have come to worship him.” Matthew 2:1-2
On coming to the house, they saw the child with his mother Mary, and they bowed down and worshiped him. Matthew 2:11a
Then they opened their treasures and presented him with gifts of gold and of incense and of myrrh. Matthew 2:11b
When they had gone, an angel of the Lord appeared to Joseph in a dream. “Get up,” he said, “take the child and his mother and escape to Egypt. Stay there until I tell you, for Herod is going to search for the child to kill him.” Matthew 2:13
For to us a child is born, to us a son is given, and the government shall be on his shoulders. And he will be called Wonderful Counselor, Might God, Everlasting Father, Prince of Peace. Isaiah 9:6
And this is the testimony: God has given us eternal life, and this life is in his Son. 1 John 5:11
And live a life of love, just as Christ loved us and gave himself up for us as a fragrant offering and sacrifice to God. Ephesians 5:2
Jesus answered, “I am the way and the truth and the life. No one comes to the Father except through me.” John 14:6
Your word is truth. John 17:17
For God so loved the world that he gave his one and only Son, that whoever believes in him shall not perish but have eternal life. John 3:16
Jesus is the Son of God. Acts 9:20
This is how God showed his love among us: he sent his one and only Son into the world that we might live through him. 1 John 4:9
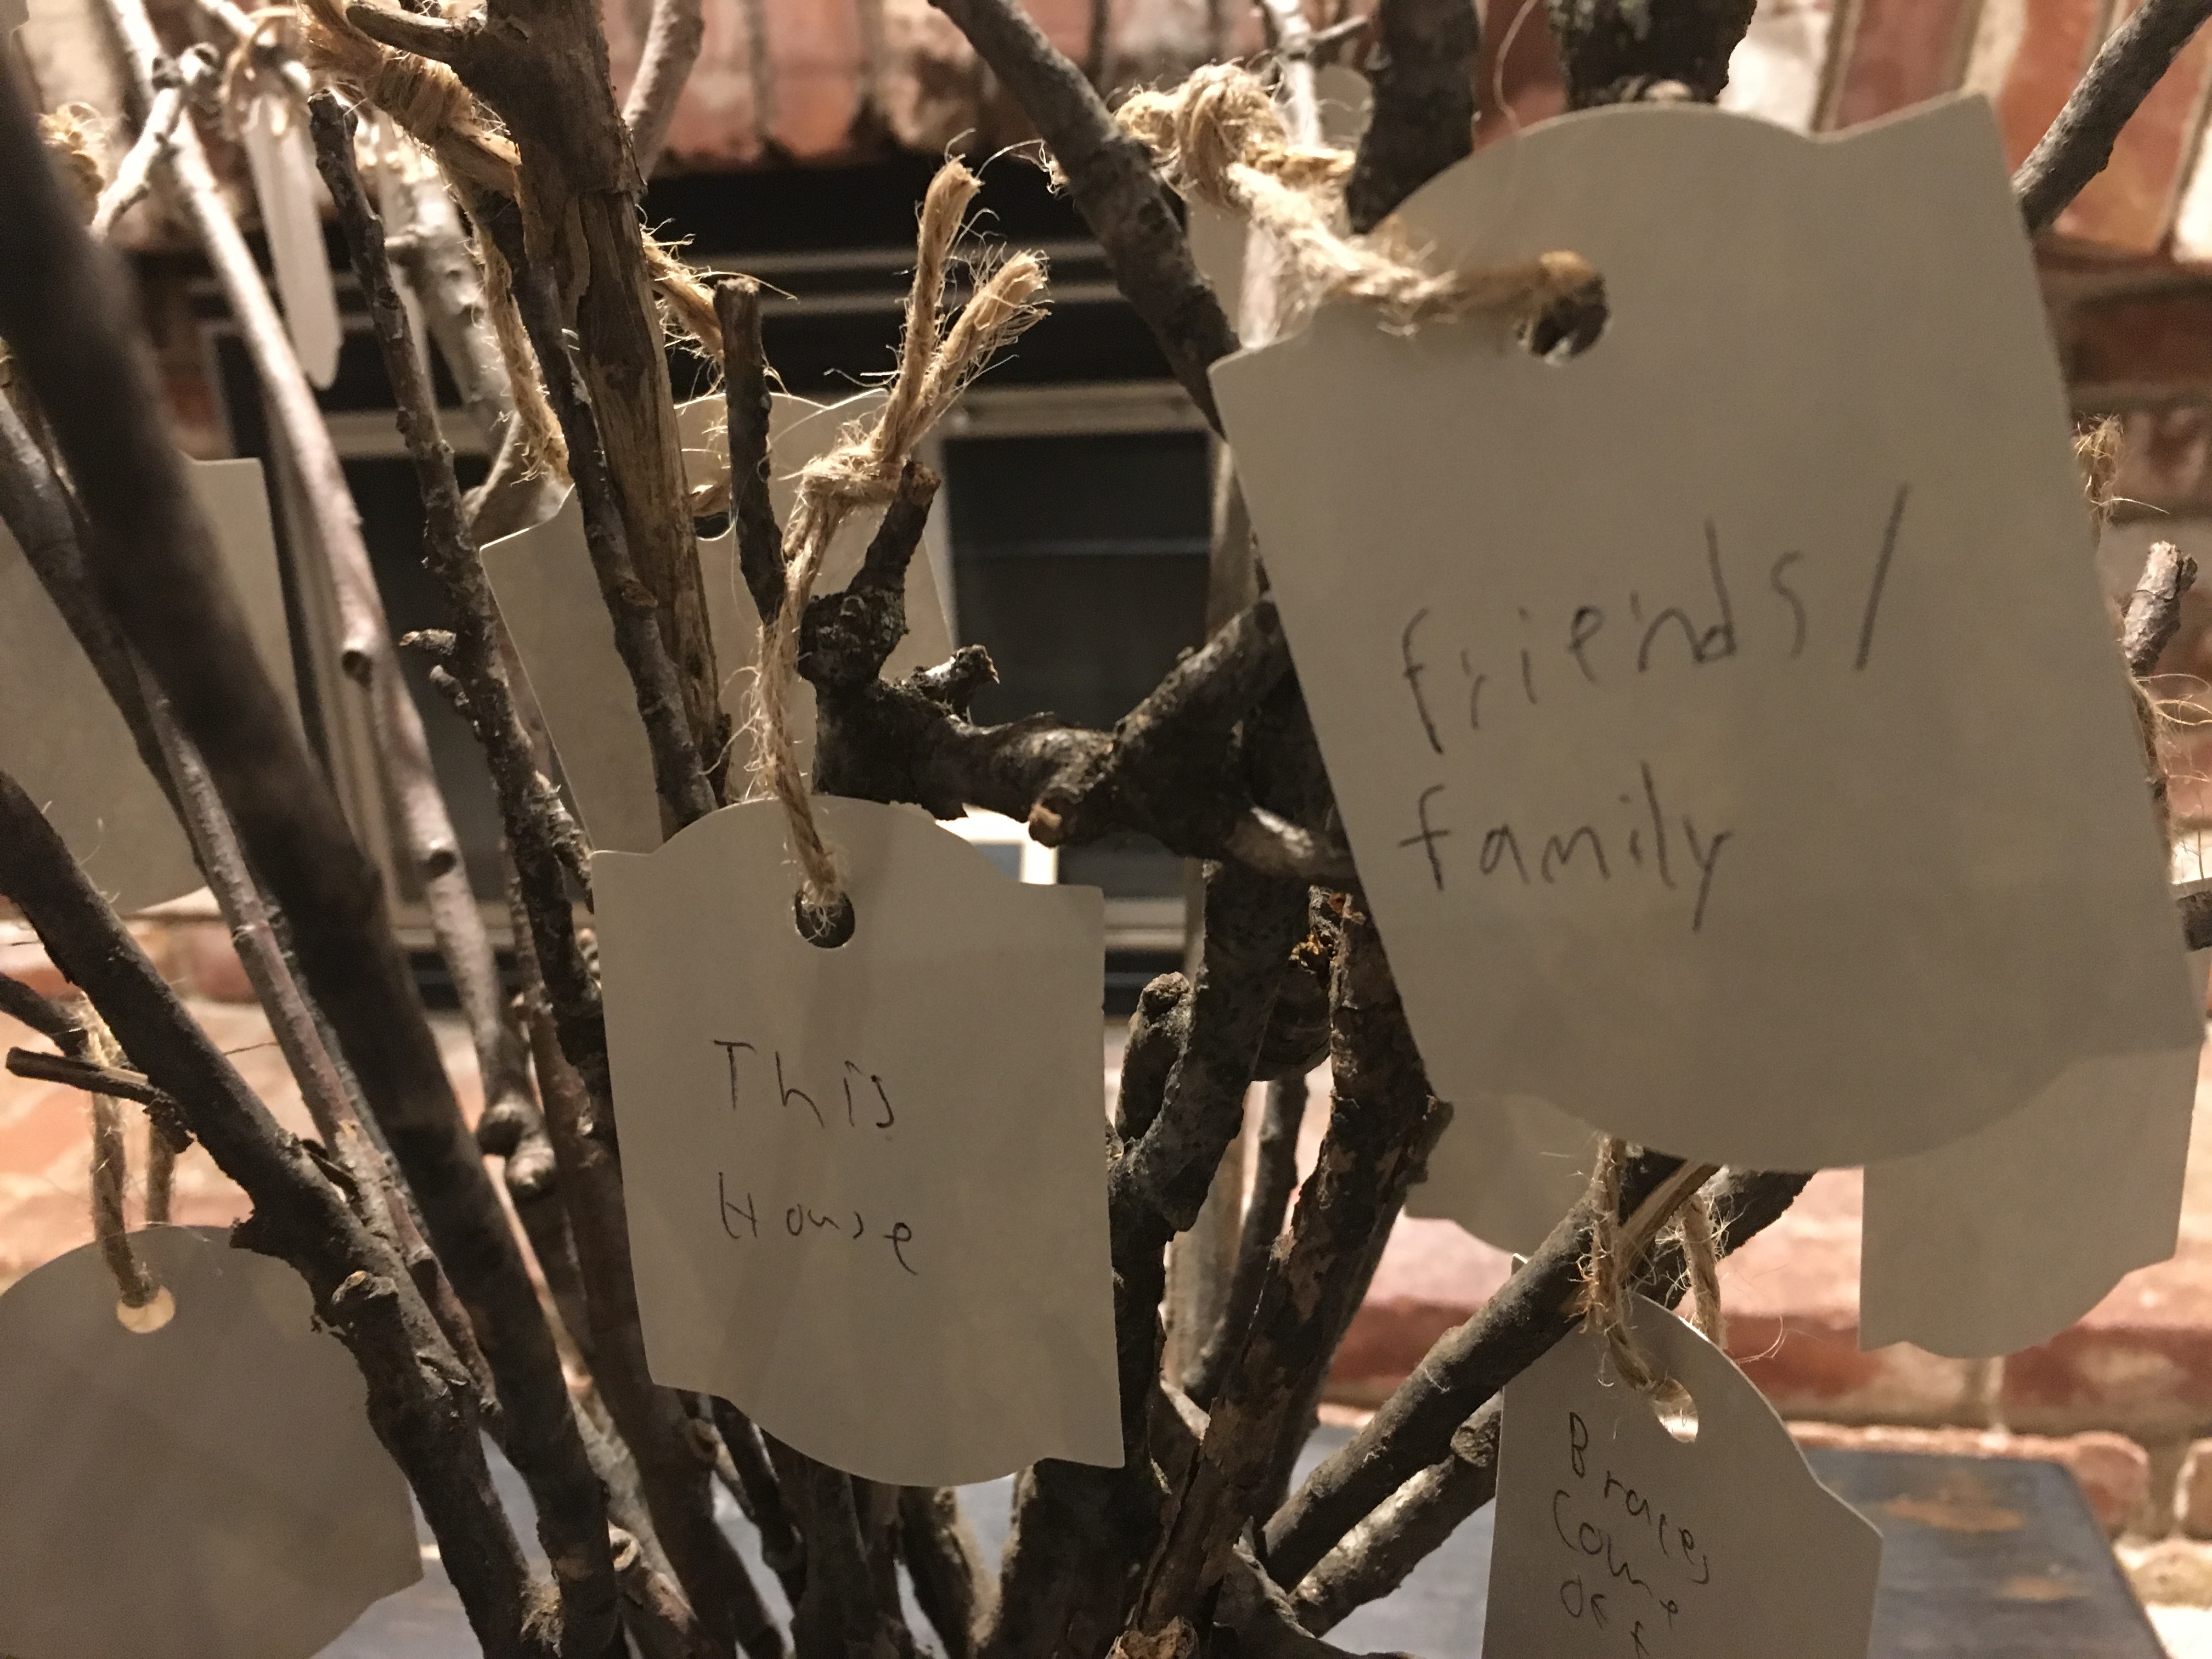
One of our Thanksgiving traditions is to create a thankful tree. We have done this several ways throughout the years, but this has become my favorite way to display our gratitude in the month of November. It is a great activity that encourages families to spend quality time together and to focus on the things we are grateful for.
Fall walks are full of beauty with the changing colors and leaves and twigs scattered throughout. We are blessed to have gorgeous walking trails in our city. This year we took our kids out to collect branches near the river. We brought the branches home and placed them in a vase. This year I just used a large mason jar. I cut out simple tags using my Cricut machine, punched a hole in the top, and threaded a loop of twine through each one. #CommissionsEarned
One evening, when we were all home together, we sat down in the living room and spent a few minutes writing the things that we are thankful for, then decorated our “tree.” This activity can be done anytime in the month of November and can become part of your Fall decor, or it can be an activity that you do with extended family and friends on Thanksgiving day when many are gathered, as a part of your time together.
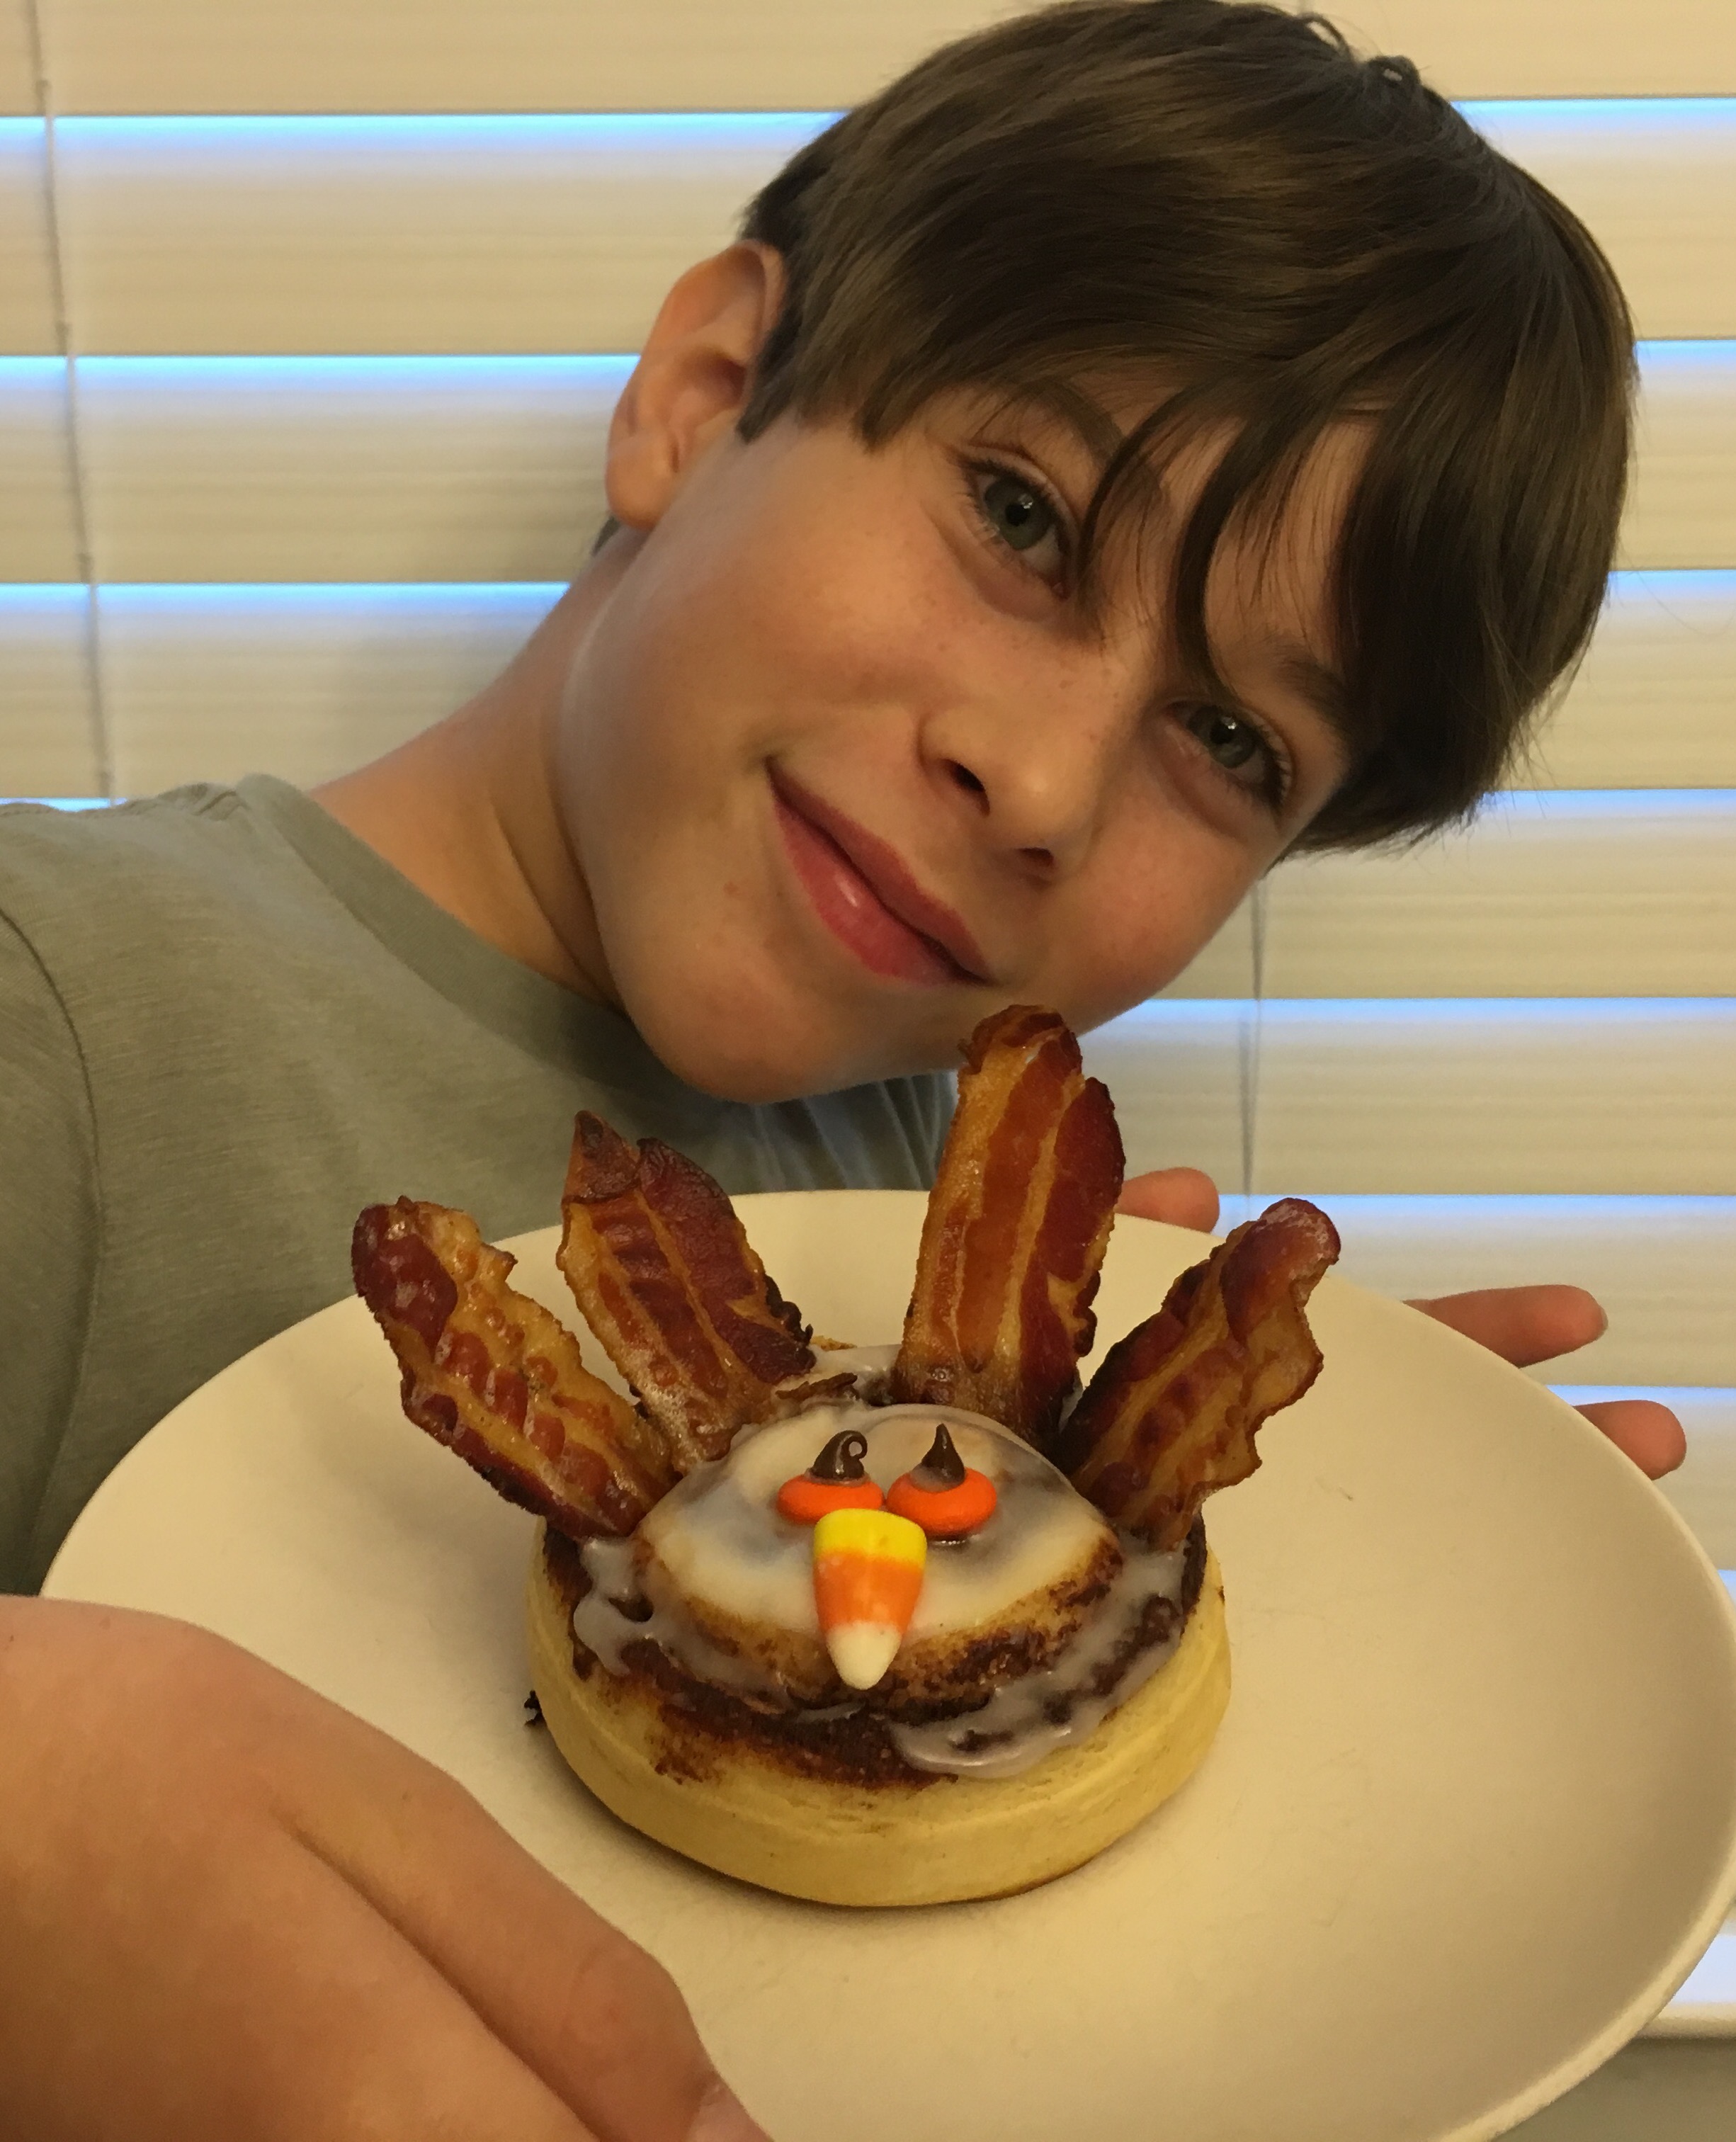
It’s the Monday morning of Thanksgiving break. We are all in our pajamas and enjoying a relaxing day off. In a couple of days we will pack up and head to Papa and Grandma’s house for Thanksgiving. But today we are home with virtually no agenda. I mentioned to my husband that we had cinnamon rolls and bacon in the refrigerator and then inspiration hit! I had seen a picture of these breakfast turkeys on Pinterest and had wanted to make them. Today was the perfect day! These sweet and yummy turkeys didn’t last long in our house…and I think we found a new Thanksgiving Break tradition.
FALL!!! It’s my favorite time of year! Leaves are changing color and the weather is perfect! If you are looking for a simple and elegant cupcake to celebrate Fall or to add to your Thanksgiving dessert menu, take a few minutes to watch my tutorial and learn how to make these delicious edible leaf cupcake toppers! You will need a package of chocolate Wilton’s candy melts, a squeeze bottle, gold cupcake holders, chocolate cake mix, and vanilla frosting. #CommissionsEarned
For more fun Fall ideas check out some of my other blogposts:
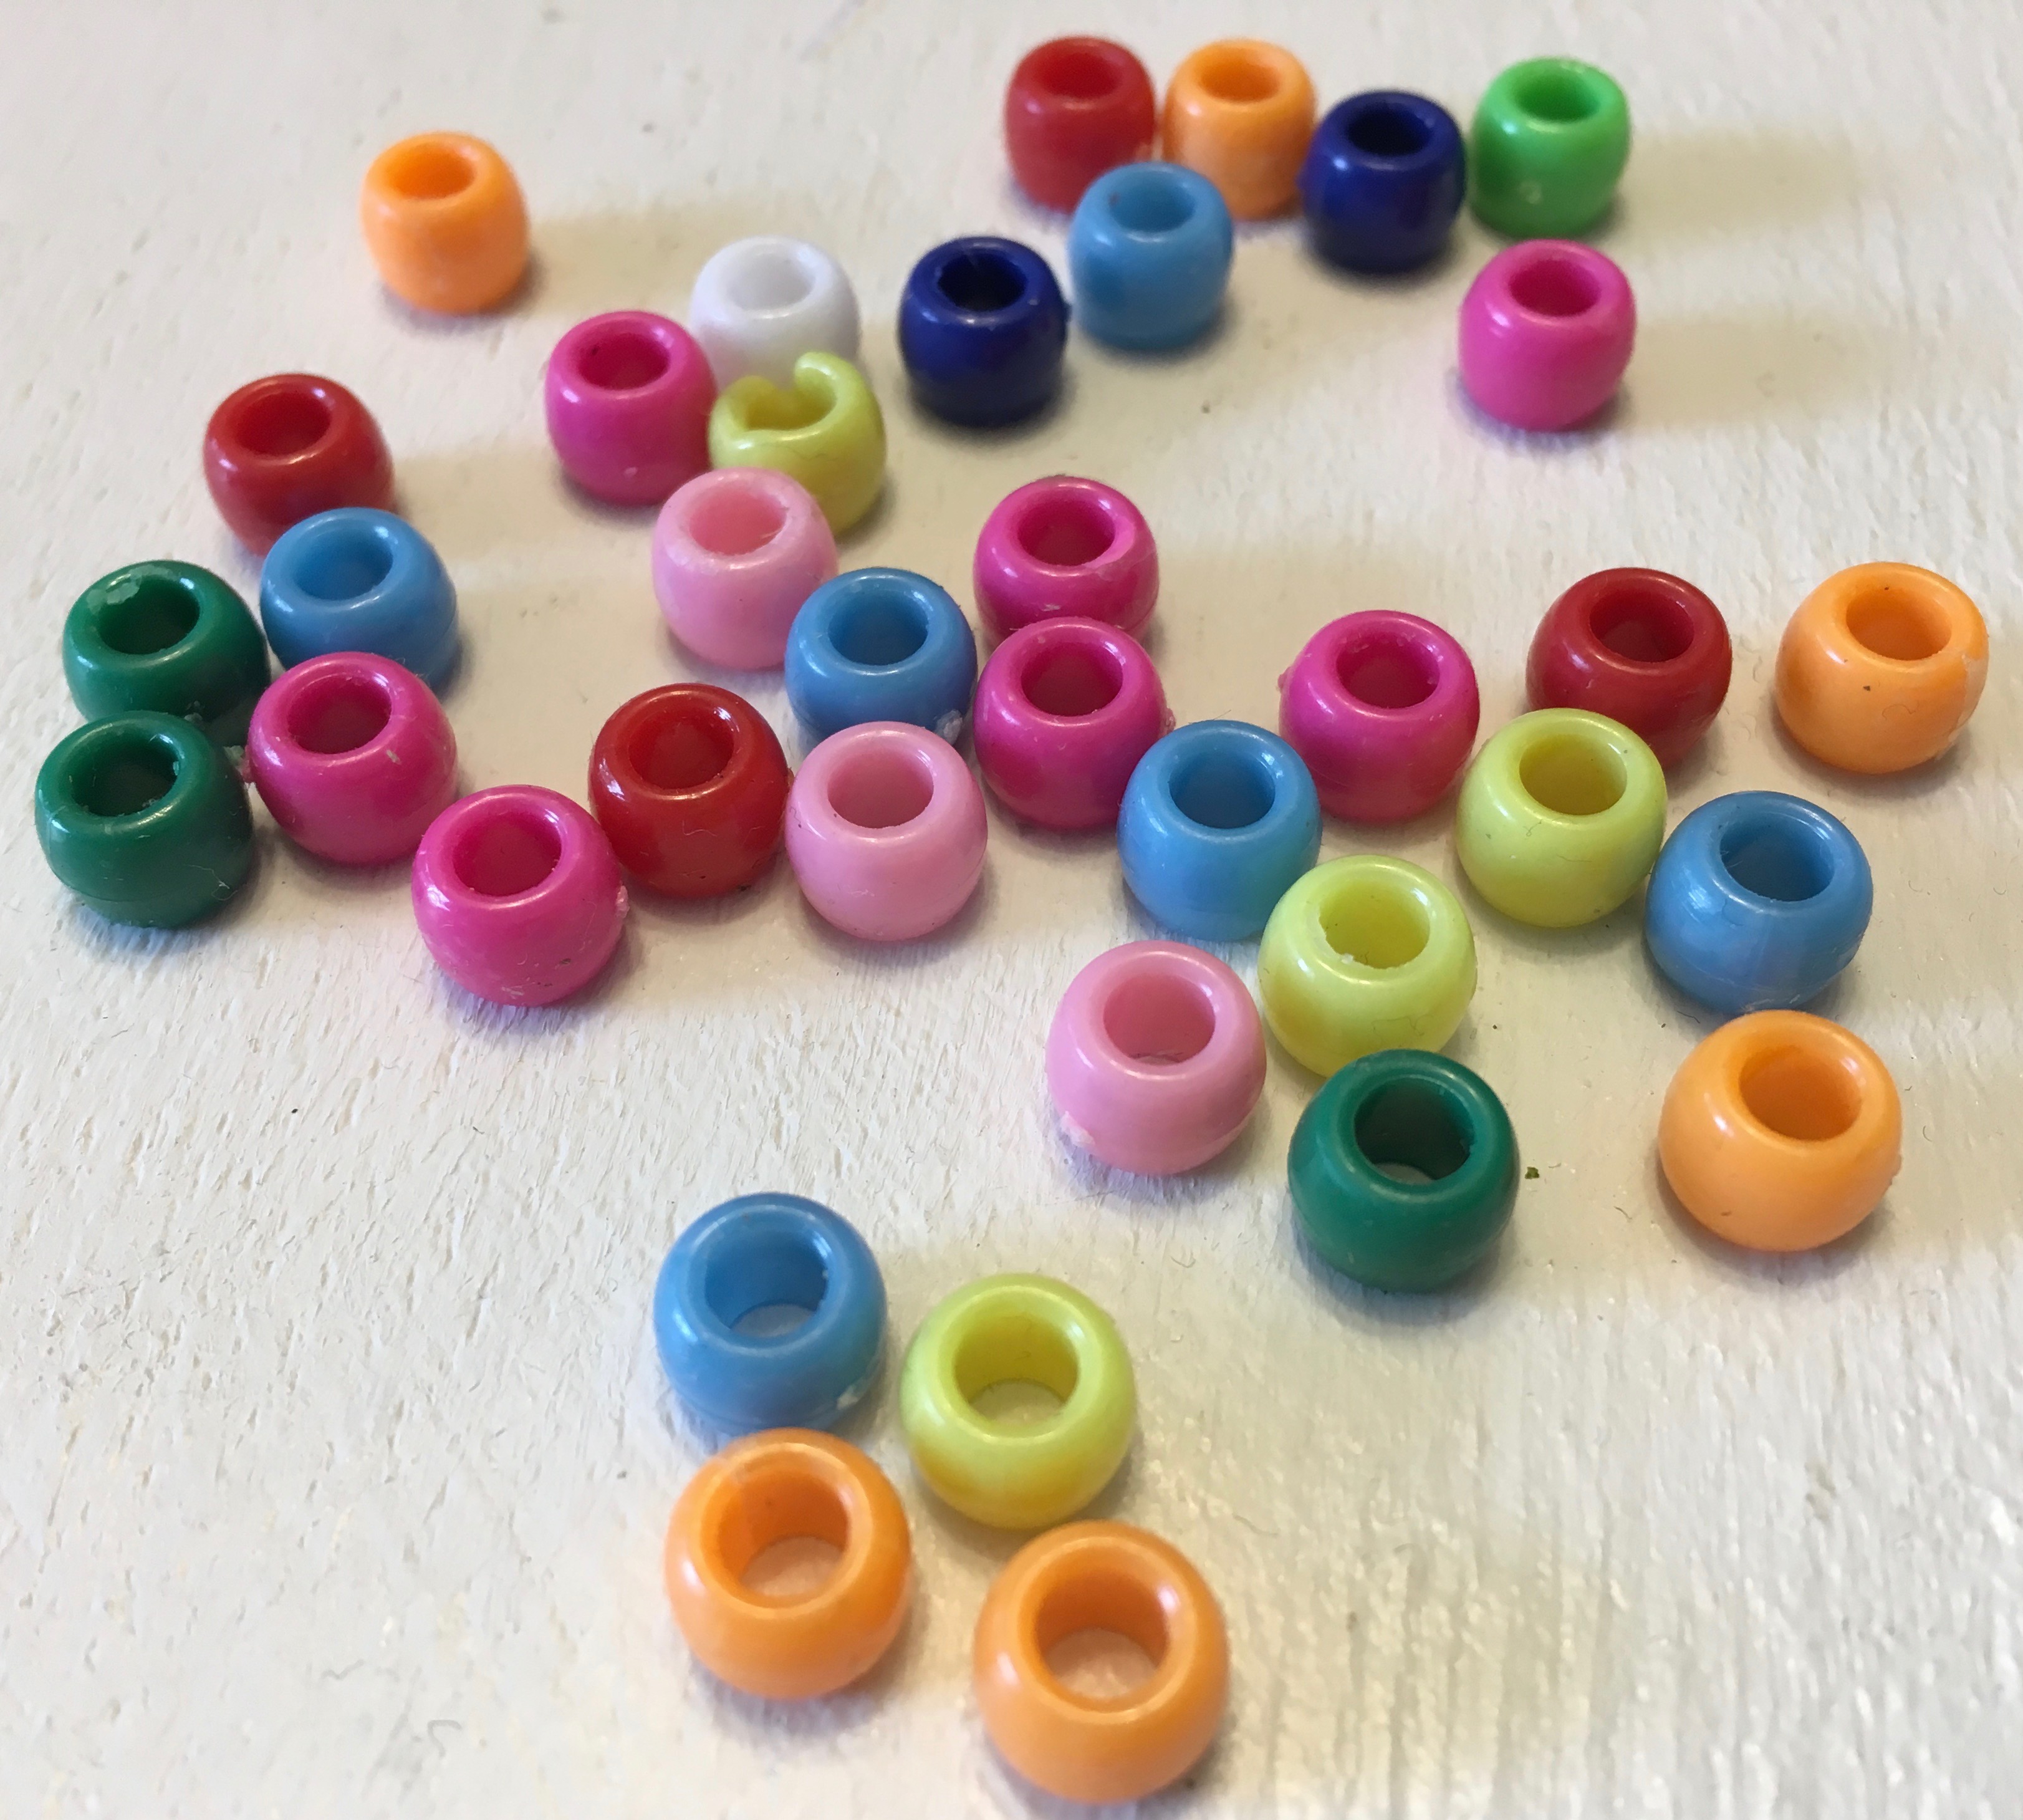
Are you looking for a quick and inexpensive Halloween costume? Or maybe you are attending an 80’s themed party. Well, look no further! Recently, my daughter had “time warp” day at school and we decided she would dress up in 80’s attire. This brought back many memories of my childhood…jelly bracelets, leg warmers, crimped hair, side ponytails, charm bracelets. I could almost hear Michael Jackson’s “Thriller” playing in the background as I made this shirt and reminisced. I was the same age as my daughter is now when that album was released, and it was the first record I ever owned!
Fortunately, I had all of what I needed on hand, so this time warp outfit did not cost a thing! I pulled an old “too small” t-shirt out of my son’s drawer and went to work. In less than an hour, my daughter was all ready for her fun dress up day at school.
Here’s what you will need: An old t-shirt, pony beads, and scissors #CommissionsEarned
Enjoy my tutorial on how to create the neckline and fringes on this totally 80’s shirt.
For more easy costume ideas check out the following blogposts:

 Pennant Banners are one of the most simple sewing projects and can add pops of color to any room or front porch. They can be used as a party decoration, on a mantle or mirror during the holidays, or in a child’s room. They can be made out of paper, material, or burlap. The possibilities are endless! I have made various kinds of pennant banners for many occasions. For this post, I’m featuring the most recent one I made for a friend of mine, but I’m also including one of my most popular youtube video tutorials on how to make a pennant banner.


 I kept things inexpensive by hitting up our local Dollar Tree for supplies, and then I went to work. I already had paper bags, card stock, and glue sticks, so our “On the Hour Bags” didn’t cost a dime! My plan was to start our evening festivities at 6:00, so I made a bag for each hour from 6:00 pm – Midnight. I googled “free printable clock templates” and then added the clock hands to each one before printing them out onto white card stock. I traced around a bowl to get perfect circles on the shiny blue and sparkly card stock behind the clocks. A few finishing touches later, and the bags were done.
 7:00 pm: Glow Sticks & Balloons This was SO….MUCH….FUN! We put glow sticks in balloons and then had an epic living room battle. Boys vs. Girls with Dad as the DJ. We turned off all the lights and made a line of glow sticks dividing the floor in half, girls on one side, boys on the other, with 6 glowing balloons on each side. When Dad played the music, we would try to get all the balloons onto the opposing side. When the music stopped the team with the least balloon on their side was the winner. The girls started off strong, but after 5 rounds, the boys were the ultimate winners! I’m telling you…I haven’t laughed that hard in a long time!
  8:00 pm: Popcorn & A Red Box Movie Popcorn and movie nights are a family favorite for us, and my kids really wanted to see the movie Storks! Perfect for one of our New Year’s Eve activities!
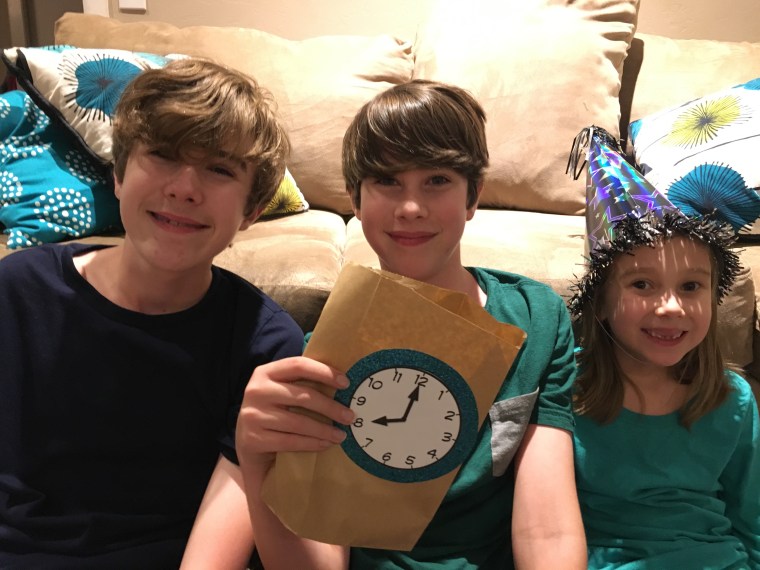 9:00 pm: Gummy Worms with a “Dessert Break” note attached We took an intermission from the movie to get dessert. This year, I made a delicious ice cream pie with a clock face. I used gluten free Joe Joe’s cookies from Trader Joes to make an “oreo” crust, filled it in with vanilla bean ice cream, and poured homemade chocolate fudge frosting over the top. While it was setting in the freezer, I made a clock on wax paper out of melted white chocolate and placed it on top of the frozen pie. We also included gummy worms for the “non ice cream eater” in our family.
 10:00 pm: M&M’s, Marshmallows, and Straws Game Time: I found this idea under “minute to win it” games on Pinterest. I set the table with two paper plates for each player. One plate contained M&M’s and marshmallows. The other was empty. Each player was given a straw (cut to about 3/4 size). At my “GO” the players had to suck up the candies and mallows to make them stick to their straw and transfer them from one plate to the next. The first player to get all of theirs transferred had to call out “Happy New Year!” Micah for the win!
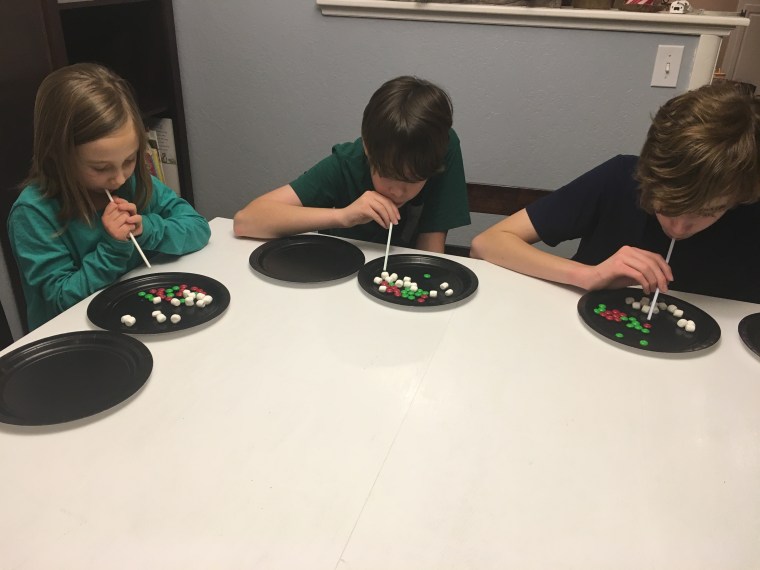 11:00 pm: A Big Bag of Skittles Make a rainbow science experiment! I had seen a couple of videos on youtube of this simple and fascinating science experiment, so I thought it would be a fun way to keep my tired children awake that last hour before the ball dropped. Check out our “make a rainbow” video!


 Every year, in the month of December, we spent time focusing on preparing our hearts to celebrate the birth of our Savior, Jesus Christ. One tangible way we do this as a family is by doing Advent Activities. Each day, December 1-25, our kids open the Advent Bag that corresponds with that day. Each bag contains a card with a Bible verse and a family activity printed on it.